
It was one of those evenings where everything felt a bit chaotic—the invitations hadn’t gone out, the decorations were half-finished, and honestly, I was running on pure caffeine and desperation. My best friend’s graduation party was just a couple of days away, and I had promised to bring a cake that would “wow” the crowd. Now, I’m not really what you’d call a baker—more of a hopeful experimenter in the kitchen—but that night, I stumbled upon a marble cake recipe that seemed simple enough. As I mixed the batter, the swirls of vanilla and chocolate reminded me of the uncertainty and excitement of graduation itself. By the time I stacked the three tiers and added a light, elegant frosting, the cake looked like something straight out of a bakery window. The best part? It tasted even better than it looked.
That three-tier marble cake became the centerpiece of the celebration, sparking conversations and photo ops, and honestly, it transformed my approach to baking. It wasn’t just a cake; it was a symbol of accomplishment, a sweet pause amid the whirlwind, and a surprisingly easy way to bring elegance to a hectic day. I keep coming back to this recipe whenever there’s a special celebration that calls for something both impressive and comforting. It’s the kind of cake that feels personal, sophisticated, and downright delicious all at once.
So if you’re looking to create a memorable graduation party centerpiece that’s as beautiful as it is tasty, this perfect three-tier marble graduation cake might just be the answer you didn’t know you needed. It’s got that classic marble charm with a polished touch, and trust me, it’s a crowd-pleaser that’ll have everyone asking for your secret.
Why You’ll Love This Recipe
- Quick & Easy: You can whip this cake up in under three hours from start to finish—ideal for last-minute party prep or when you want a fuss-free centerpiece.
- Simple Ingredients: No need for fancy or hard-to-find items. Most ingredients are pantry staples like flour, eggs, cocoa powder, and butter.
- Perfect for Elegant Celebrations: The three-tier design gives it a sophisticated look that fits graduations, anniversaries, or any classy gathering.
- Crowd-Pleaser: The marble pattern combines vanilla and chocolate flavors, pleasing both traditionalists and chocolate lovers alike.
- Unbelievably Delicious: The texture is moist and tender, with a smooth crumb that melts in your mouth—plus the swirls add a visual appeal that’s hard to resist.
- What Sets It Apart: Unlike typical marble cakes, this recipe uses a special folding technique to create defined swirls without over-mixing, giving it that perfect marble effect. The buttercream frosting is light and fluffy, with just the right hint of vanilla to complement the cake’s flavor.
- Emotional Connection: This cake isn’t just dessert—it’s a celebration in each slice, capturing the bittersweet mix of pride and nostalgia that graduation brings. It’s elegant yet approachable, the kind of treat that makes you pause and savor the moment.
What Ingredients You Will Need
This recipe uses simple, wholesome ingredients to deliver bold flavor and satisfying texture without the fuss. Most are pantry staples, making this cake both accessible and adaptable for any home baker.
- For the Cake Batter:
- 2 ½ cups (320g) all-purpose flour (I prefer King Arthur for consistent results)
- 2 ½ tsp baking powder
- ½ tsp baking soda
- ½ tsp salt
- 1 cup (225g) unsalted butter, softened (Boston Brand is a reliable choice)
- 1 ¾ cups (350g) granulated sugar
- 4 large eggs, room temperature
- 1 tbsp pure vanilla extract
- 1 cup (240ml) whole milk, warmed (substitute with almond milk for dairy-free)
- ½ cup (45g) unsweetened cocoa powder (use Dutch-process for richer chocolate flavor)
- For the Buttercream Frosting:
- 1 ½ cups (340g) unsalted butter, softened
- 5 cups (600g) powdered sugar, sifted
- 2 tsp vanilla extract
- 2-4 tbsp (30-60ml) heavy cream or milk (adjust for preferred consistency)
- Pinch of salt (balances sweetness)
- Additional Decoration:
- Edible gold leaf or fresh flowers for a touch of elegance (optional)
- Graduation-themed toppers or fresh berries (optional)
Look for firm, high-quality butter and fresh eggs to get the best rise and flavor. If you’re baking in warmer weather, chilling the butter slightly before mixing can help maintain a good texture. For cocoa powder, Dutch-process works wonders to deepen the chocolate notes without bitterness.
Equipment Needed
- Three round cake pans (6-inch, 8-inch, and 10-inch) for the tiered effect
- Electric mixer (stand or hand mixer) for smooth batter and frosting
- Mixing bowls in various sizes
- Spatulas and wooden spoons for folding and mixing
- Cooling racks to let cakes rest evenly
- Offset spatula and bench scraper for frosting and smoothing tiers
- Turntable (optional, but makes frosting easier and neater)
- Parchment paper to line pans and prevent sticking
- Measuring cups and spoons (preferably digital scale for accuracy)
Don’t worry if you don’t have all three pan sizes—using the same size pans and stacking with sturdy cardboard cake rounds works fine too. If you’re on a budget, silicone spatulas and wooden spoons are inexpensive and durable options. A turntable is a nice-to-have but not mandatory; a steady hand and patience can achieve great results as well. Keeping your tools clean and dry helps avoid lumps in your frosting and ensures smooth layers.
Preparation Method
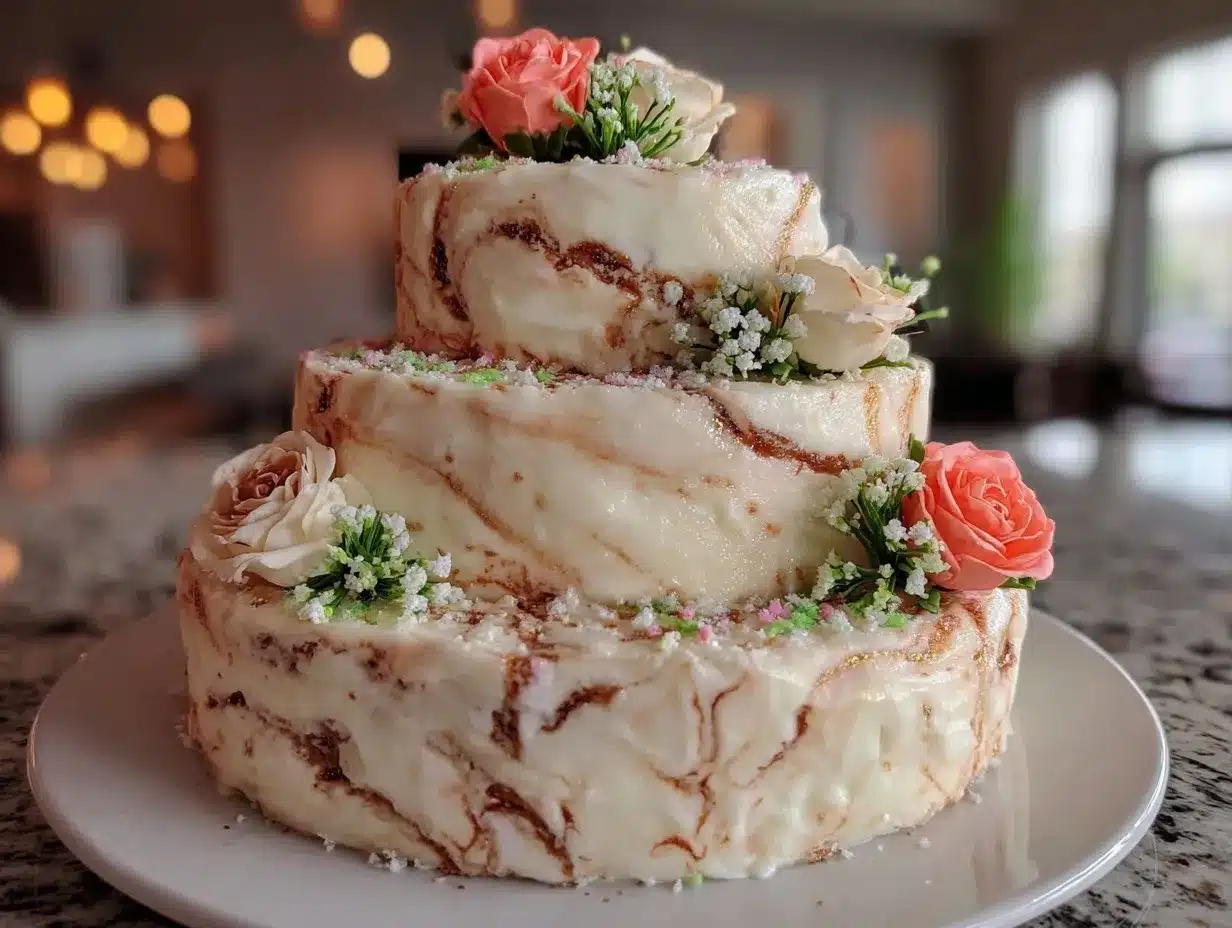
- Preheat and Prep: Set your oven to 350°F (175°C). Grease and line each cake pan with parchment paper. This ensures easy removal and clean edges.
- Mix Dry Ingredients: In a bowl, whisk together 2 ½ cups (320g) flour, 2 ½ tsp baking powder, ½ tsp baking soda, and ½ tsp salt. Set aside.
- Cream Butter and Sugar: In a large bowl, beat 1 cup (225g) softened butter with 1 ¾ cups (350g) sugar until light and fluffy—about 4-5 minutes on medium speed. The mixture should look pale and airy, which traps air for a tender crumb.
- Add Eggs and Vanilla: Beat in 4 room temperature eggs, one at a time, ensuring each is fully incorporated before adding the next. Stir in 1 tbsp vanilla extract.
- Alternate Dry Ingredients and Milk: Reduce mixer speed to low. Add the dry ingredients in three parts, alternating with 1 cup (240ml) warmed milk, beginning and ending with the dry mix. Mix gently until just combined—overmixing can toughen the cake.
- Divide Batter: Scoop out about 1/3 of the batter into a separate bowl. Stir in ½ cup (45g) unsweetened cocoa powder to this portion until smooth.
- Create Marble Effect: Pour half of the vanilla batter evenly into each prepared pan, then add half of the chocolate batter on top. Using a butter knife or skewer, gently swirl the batters together to create a marbled look. Repeat with remaining batter for each pan.
- Bake: Place pans in the oven and bake for 25-30 minutes (smaller pans may need less time). Check doneness by inserting a toothpick—if it comes out clean, it’s ready.
- Cool: Let cakes cool in pans for 10 minutes before transferring to wire racks. Cooling completely is crucial for stable frosting.
- Prepare Buttercream: Beat 1 ½ cups (340g) softened butter until creamy. Gradually add 5 cups (600g) sifted powdered sugar, mixing on low speed. Add 2 tsp vanilla extract, pinch of salt, and 2-4 tbsp cream until smooth and spreadable.
- Assemble Tiers: Level cakes with a serrated knife if needed. Place the largest cake on your serving plate or cake board, spread a thin layer of buttercream on top. Add the medium cake, repeat frosting layer, then top with the smallest cake.
- Crumb Coat: Apply a thin coat of frosting over the entire cake to seal crumbs. Chill for 20-30 minutes.
- Final Frosting: Apply a smooth, even layer of buttercream. Use an offset spatula and bench scraper to get sharp edges and smooth sides.
- Decorate: Add edible gold leaf, fresh flowers, or graduation toppers for a personalized touch.
Remember, the swirling step is key to that perfect marble look—swirl just enough to create contrast, but don’t overdo it or the colors will blend too much. Cooling the cakes completely before frosting prevents melting and sliding tiers—patience here pays off!
Cooking Tips & Techniques
- Butter Temperature: Softened butter should yield slightly when pressed but not be greasy or melting. This texture is essential for creaming properly with sugar.
- Folding Swirls: Use a gentle hand with your swirling tool—quick, shallow strokes create defined marbling without mixing the batters fully.
- Layer Stability: For a stable three-tier cake, insert dowels or sturdy straws into the bottom tiers to support the weight above. This prevents collapsing or sliding during transport.
- Frosting Consistency: If your buttercream feels too thick, add a teaspoon of milk at a time until spreadable. If too soft, chill for a few minutes—temperature affects texture.
- Timing: Bake all layers simultaneously if possible to keep flavors consistent. If oven space is limited, keep finished layers wrapped in parchment at room temperature (not fridge) until assembly.
- Common Mistakes: Overmixing batter can lead to tough cake. Underbaking results in soggy centers. Test early, and trust the toothpick test.
- Personal Lessons: I once skipped the crumb coat and ended up with frosting flecks everywhere—lesson learned! Don’t skip chilling your cake between frosting layers for a clean finish.
Variations & Adaptations
- Dietary Tweaks: Swap all-purpose flour for a gluten-free blend to accommodate sensitivities. Use coconut or soy-based milk and dairy-free margarine for a vegan-friendly version.
- Flavor Twists: Add a teaspoon of espresso powder to the chocolate batter to deepen the cocoa flavor. Or stir in orange zest to the vanilla batter for a fresh citrus note.
- Seasonal Swaps: Incorporate fresh berries or chopped nuts between layers for added texture and color, especially in spring and summer.
- Cooking Method: If you don’t have multiple cake pans, bake layers sequentially, wrapping cooled cakes in plastic wrap until assembly.
- Personal Variation: I once replaced the buttercream with a cream cheese frosting for a tangy contrast, which was a hit at a family party. Just reduce sugar slightly to balance the tang.
Serving & Storage Suggestions
Serve the cake at room temperature for the best flavor and texture. The buttercream is smoothest and the crumb is tenderest when not chilled too long before serving.
This cake pairs beautifully with fresh coffee, a light fruit punch, or sparkling wine for celebrations. Present it on a sturdy cake stand to showcase the tiers and marble design.
Store leftover cake wrapped tightly in plastic wrap or an airtight container at room temperature for up to two days. For longer storage, refrigerate up to five days or freeze individual slices wrapped well for up to two months.
To reheat frozen slices, let thaw at room temperature for an hour. Avoid microwaving directly, as this can dry out the cake; instead, warm briefly in a low oven wrapped in foil.
Flavors tend to meld and deepen after a day, so if you have the patience, making the cake a day ahead can improve taste and ease party-day stress.
Nutritional Information & Benefits
This three-tier marble cake is a treat best enjoyed in moderation, but it does provide some nutritional perks. Eggs contribute protein and essential vitamins, while whole milk and butter add calcium and fat-soluble nutrients.
The cocoa powder is rich in antioxidants and can boost mood with its natural compounds, making this dessert a little mood-lifter at graduation celebrations.
For those watching carbs or gluten, the recipe is adaptable to gluten-free flours and lower-sugar frostings, though the classic version is naturally gluten-containing and moderately high in sugar.
From a wellness perspective, this cake balances indulgence with familiar, quality ingredients, making it a satisfying way to celebrate milestones without feeling overly processed or artificial.
Conclusion
The perfect three-tier marble graduation cake is a testament to how elegance and comfort can come together with just a few simple ingredients and a little patience. It’s the kind of recipe that welcomes customization and rewards you with a stunning, delicious centerpiece that everyone remembers.
Whether you’re throwing a formal party or a laid-back gathering, this cake stands out in both looks and flavor. I still find myself making it when I want that special mix of sophistication and nostalgia, and honestly, it never fails to impress.
Give it a shot, tweak it your way, and let it be part of your celebration stories. I’d love to hear how you personalize this recipe or any tips you pick up along the way—feel free to share your experiences!
Here’s to sweet celebrations and unforgettable moments, one slice at a time.
FAQs
How do I prevent the tiers from collapsing?
Use cake dowels or sturdy straws to support the upper tiers. Also, chill the crumb-coated layers before stacking to improve stability.
Can I make this cake a day ahead?
Yes! Baking and assembling a day before helps flavors meld and reduces stress on the day of your event. Just keep it refrigerated and bring to room temperature before serving.
What if I don’t have different sized pans?
You can bake all layers in the same size pan and stack them accordingly; just use sturdy cake boards between tiers to keep them stable.
Can I substitute the buttercream frosting?
Absolutely. Cream cheese frosting or whipped ganache work well as alternatives, though they’ll alter the flavor and texture slightly.
How do I get a distinct marble pattern?
Pour vanilla and chocolate batters in alternating layers and use a skewer or knife to gently swirl them. Avoid overmixing to keep the contrast clear.
Pin This Recipe!
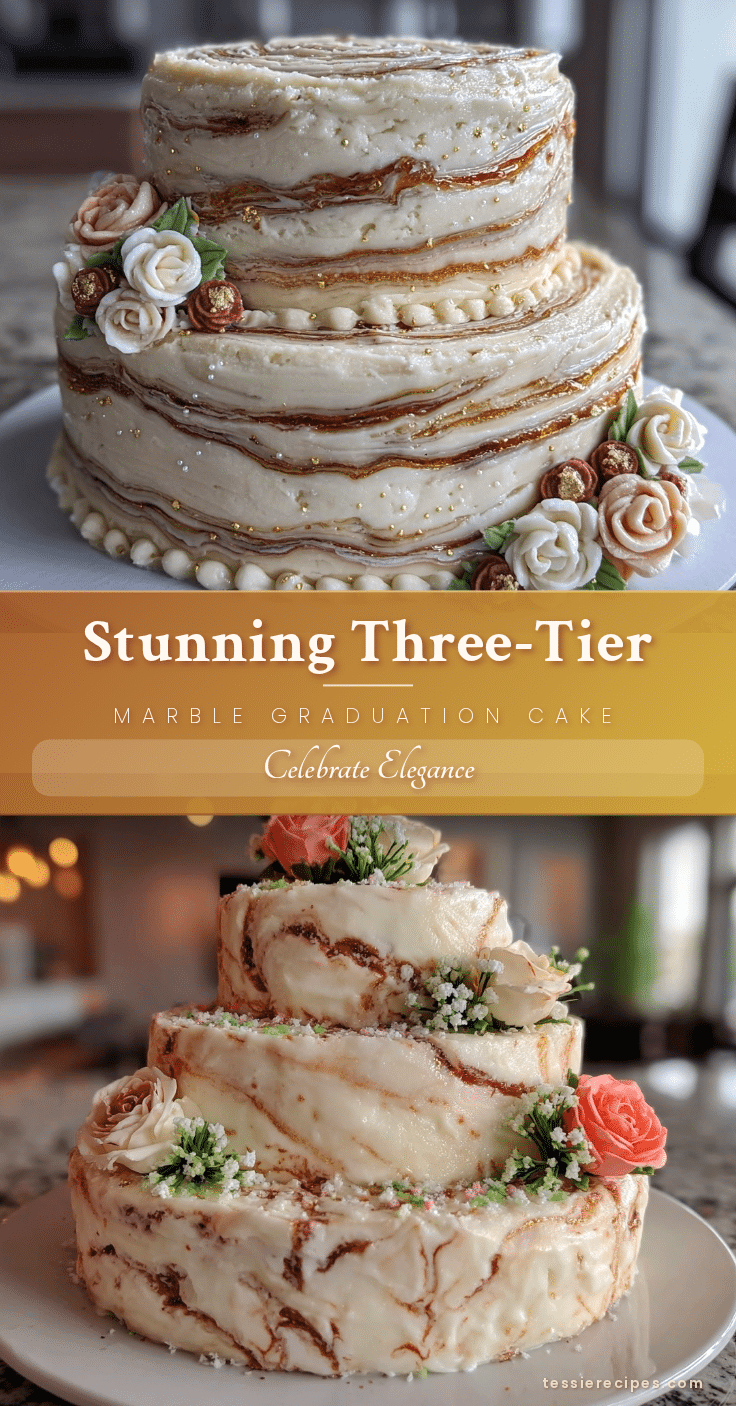
Perfect Three-Tier Marble Graduation Cake Recipe for Elegant Parties

A sophisticated and crowd-pleasing three-tier marble cake combining vanilla and chocolate flavors with a light buttercream frosting, perfect for graduation celebrations and elegant parties.
- Prep Time: 45 minutes
- Cook Time: 30 minutes
- Total Time: 3 hours
- Yield: 12-16 servings 1x
- Category: Dessert
- Cuisine: American
Ingredients
- 2 ½ cups (320g) all-purpose flour
- 2 ½ tsp baking powder
- ½ tsp baking soda
- ½ tsp salt
- 1 cup (225g) unsalted butter, softened
- 1 ¾ cups (350g) granulated sugar
- 4 large eggs, room temperature
- 1 tbsp pure vanilla extract
- 1 cup (240ml) whole milk, warmed (substitute with almond milk for dairy-free)
- ½ cup (45g) unsweetened cocoa powder (Dutch-process recommended)
- 1 ½ cups (340g) unsalted butter, softened (for frosting)
- 5 cups (600g) powdered sugar, sifted
- 2 tsp vanilla extract (for frosting)
- 2–4 tbsp (30-60ml) heavy cream or milk (for frosting)
- Pinch of salt (for frosting)
- Edible gold leaf or fresh flowers for decoration (optional)
- Graduation-themed toppers or fresh berries (optional)
Instructions
- Preheat oven to 350°F (175°C). Grease and line three cake pans (6-inch, 8-inch, and 10-inch) with parchment paper.
- In a bowl, whisk together flour, baking powder, baking soda, and salt. Set aside.
- In a large bowl, beat softened butter with sugar until light and fluffy, about 4-5 minutes on medium speed.
- Beat in eggs one at a time, then stir in vanilla extract.
- Reduce mixer speed to low. Add dry ingredients in three parts, alternating with warmed milk, beginning and ending with dry ingredients. Mix gently until just combined.
- Scoop about one-third of the batter into a separate bowl and stir in cocoa powder until smooth.
- Pour half of the vanilla batter evenly into each prepared pan, then add half of the chocolate batter on top. Use a butter knife or skewer to gently swirl the batters to create a marble effect. Repeat with remaining batter for each pan.
- Bake for 25-30 minutes or until a toothpick inserted comes out clean. Smaller pans may require less time.
- Cool cakes in pans for 10 minutes, then transfer to wire racks to cool completely.
- For the buttercream frosting, beat softened butter until creamy. Gradually add powdered sugar on low speed.
- Add vanilla extract, pinch of salt, and heavy cream or milk until smooth and spreadable.
- Level cakes if needed. Place the largest cake on serving plate, spread a thin layer of frosting, then add medium cake and repeat. Top with smallest cake.
- Apply a thin crumb coat over entire cake and chill for 20-30 minutes.
- Apply a final smooth layer of frosting using an offset spatula and bench scraper for sharp edges.
- Decorate with edible gold leaf, fresh flowers, or graduation toppers as desired.
Notes
[‘Use softened butter that yields slightly when pressed but is not greasy or melting.’, ‘Swirl batters gently with quick, shallow strokes to create defined marbling without overmixing.’, ‘Insert dowels or sturdy straws into bottom tiers for stability during stacking and transport.’, ‘Adjust buttercream consistency by adding milk or chilling as needed.’, ‘Bake all layers simultaneously if possible for consistent flavor.’, ‘Cool cakes completely before frosting to prevent melting and sliding.’, ‘Chill crumb-coated layers before final frosting for a clean finish.’, ‘For gluten-free or vegan adaptations, substitute flour and dairy ingredients accordingly.’, ‘Make cake a day ahead to allow flavors to meld and reduce party-day stress.’]
Nutrition
- Serving Size: 1 slice (approximate
- Calories: 450
- Sugar: 40
- Sodium: 300
- Fat: 25
- Saturated Fat: 15
- Carbohydrates: 55
- Fiber: 2
- Protein: 5
Keywords: marble cake, three-tier cake, graduation cake, elegant cake, buttercream frosting, chocolate vanilla swirl, party cake



