
“Wait, you’re telling me this royal icing didn’t have any corn syrup?” my niece asked, wide-eyed as she admired the glossy, perfectly smooth frosting on her sugar cookie. Honestly, I had my doubts myself the first few times I tried skipping corn syrup in royal icing. I mean, corn syrup always seemed like the secret weapon for that ultra-smooth, shiny finish—right? But after a couple of experiments (and a tiny kitchen mess or two), I stumbled on this easy, smooth homemade royal icing sugar cookie frosting without corn syrup that’s just as glossy and pipe-friendly, without the sticky corn syrup ingredient lurking behind the scenes.
One lazy Sunday afternoon, I was halfway through decorating a batch of sugar cookies for a friend’s birthday party when I realized I was out of corn syrup. Panic? Sure. But then I thought, what if I just wing it with what I had on hand? The results totally surprised me. This frosting dried hard, held its shape, and had that classic royal icing snap—except it was made without that corn syrup stickiness I usually try to avoid. Since then, I’ve been making it again and again, tweaking it each time to get the perfect balance between smooth and sturdy.
What really hooked me was how naturally it clung to my sugar cookies, making decorating so much less frustrating (you know that moment when the icing just won’t spread right? Yeah, avoided that here). Plus, I didn’t have to hunt down specialty ingredients, which is a win if you’re like me and usually racing the clock on a weekday evening. This recipe stuck because it’s honest and practical, but trust me—it doesn’t skimp on that sweet, velvety texture that makes sugar cookies feel like a mini celebration.
Why You’ll Love This Recipe
After testing this smooth homemade royal icing sugar cookie frosting without corn syrup several times, I can say it ticks a lot of boxes, especially if you’re tired of fussing with complicated frostings or dodging weird ingredients. Here’s why you’ll find it hard to go back to other frostings:
- Quick & Easy: This frosting comes together in under 10 minutes, perfect for those last-minute cookie decorating sessions or when you want to impress without the stress.
- Simple Ingredients: No need for corn syrup or fancy syrups—just basics you probably already keep in your pantry like powdered sugar, egg whites, and a splash of vanilla.
- Perfect for Holidays & Parties: Whether it’s a batch of Christmas tree shortbread cookies or colorful sugar cookies for birthdays, this frosting holds up beautifully for detailed piping or smooth flooding.
- Crowd-Pleaser: Kids love the sweet taste and adults appreciate the clean, crisp finish without that heavy corn syrup aftertaste.
- Unbelievably Delicious: The balance between sweet and silky is spot on—no graininess, no weird texture, just that classic royal icing snap when it dries.
What sets this recipe apart? It’s the careful use of meringue powder and a touch of cream of tartar that replaces the sticky corn syrup, giving you that smooth texture and shine while keeping the frosting stable. I’ve tried other versions, but this one consistently delivers that professional look without the fuss or weird ingredient hunts. Honestly, it’s the kind of frosting that makes you close your eyes after the first bite of a frosted sugar cookie—comfort food with a little elegance.
What Ingredients You Will Need
This recipe uses simple, wholesome ingredients to deliver bold flavor and satisfying texture without the fuss. All are pantry staples or easy to find, and I’ve shared some helpful tips for substitutions and best brands.
- Powdered Sugar (Confectioners’ Sugar) – about 4 cups (480g), sifted for a smooth, lump-free base. I like using Domino or C&H for consistent texture.
- Meringue Powder – 3 tablespoons. This is the magic dry egg white substitute that makes the frosting firm and glossy. Wilton brand works great and is easy to find online or at craft stores.
- Warm Water – 5 to 6 tablespoons (75-90 ml), added gradually to reach the perfect consistency.
- Vanilla Extract – 1 teaspoon for flavor. You can swap with almond or lemon extract if you want a different twist.
- Cream of Tartar – 1/4 teaspoon. This little addition helps stabilize the frosting without corn syrup.
- Optional: Gel Food Coloring – for vibrant colors that won’t thin out the icing. I always keep AmeriColor gels on hand.
If you’re gluten-free or dairy-free, this frosting is naturally safe as it contains no flour or dairy. For a vegan version, you’d need to find a vegan meringue powder or experiment with aquafaba but be warned, the texture might shift a bit.
Equipment Needed
- Mixing Bowl: A medium to large bowl, preferably glass or metal, to avoid static clinging of powdered sugar.
- Electric Mixer: Stand or hand mixer with a whisk attachment to whip the icing to the right consistency. You can do it by hand, but it takes a lot longer and arm strength.
- Sifter: To sift powdered sugar — this step is key for smooth icing without lumps.
- Spatula: For scraping the sides and folding ingredients together.
- Piping Bags and Tips: If you want to create intricate designs. I often use disposable piping bags and Wilton #2 or #3 tips for details.
- Containers with Lids: For storing leftover icing or colored batches so they don’t dry out.
Don’t have a stand mixer? No worries. A good quality hand mixer works just fine—just prepare for a little more arm work. Also, keeping your equipment clean and dry before you start is crucial to prevent the royal icing from seizing or clumping.
Preparation Method

- Sift your powdered sugar into your mixing bowl to avoid lumps. This usually takes about 2-3 minutes but pays off in silky smooth icing.
- Add the meringue powder and cream of tartar to the sugar and stir gently to combine. These two are your secret stabilizers replacing corn syrup.
- Pour in 5 tablespoons of warm water and vanilla extract. Begin mixing on low speed to prevent a sugar cloud. It takes about 2 minutes to get everything wet and starting to come together.
- Whip on medium-high speed for 5-7 minutes until the mixture holds stiff peaks. This is your cue that the icing is thick, shiny, and ready to pipe or spread.
- Test the consistency. For outlining cookies, the icing should hold its shape and not spread immediately when piped. For flooding (filling in the cookie), add an extra tablespoon of water and mix gently to thin it out.
- If using colors: Divide the icing into small bowls and add gel food coloring a little at a time until you reach your desired shade.
- Cover the icing bowls with plastic wrap pressed directly onto the surface to prevent drying. Use within 24 hours for best results.
A quick tip: If your icing looks grainy or too thick, a splash of warm water and a gentle mix can rescue it. If it’s too runny, add a bit more powdered sugar, but do this cautiously—too much sugar can make it crack when dry.
Cooking Tips & Techniques
Getting royal icing right without corn syrup isn’t rocket science, but it does take some finesse. Here are a few tips I picked up the hard way (and you’re welcome!):
- Don’t skip sifting the powdered sugar. Lumps can ruin the smooth finish and clog your piping tips.
- Use meringue powder, not just egg whites. Raw egg whites can be risky, and meringue powder gives you consistent results every time.
- Whip long enough for stiff peaks. Under-whipping results in runny icing that won’t hold shapes; over-whipping can dry it out.
- Adjust water gradually. It’s tempting to thin the icing quickly, but slow adjustments prevent overshooting the perfect consistency.
- Practice piping on parchment paper before decorating cookies. This helped me avoid some early decorating disasters.
- Keep leftover icing airtight. It dries out fast when exposed to air, so cover tightly or store in ziplock bags.
Once, I tried rushing the drying process by cranking up the oven heat—don’t do it. The icing cracked and lost its shine. Patience wins here, and letting the cookies dry at room temperature overnight is the way to go.
Variations & Adaptations
This royal icing recipe is pretty versatile, and I’ve enjoyed tweaking it depending on the occasion or dietary needs:
- Flavor Variations: Swap vanilla for almond or lemon extract to add a subtle twist without messing with consistency.
- Vegan Adaptation: Try aquafaba (chickpea water) instead of meringue powder. It takes a bit longer to whip but can work in a pinch.
- Gluten-Free: Naturally gluten-free since it contains no flour, making it perfect for people with gluten sensitivities.
- Thicker Consistency: For 3D cookie designs, reduce water slightly and pipe in layers, allowing each to dry before adding more.
- Color Mixing: Create pastel shades by adding just a drop of gel coloring—perfect for spring or baby shower cookies.
One personal favorite is using lemon extract and a tiny bit of lemon zest mixed in after whipping—it gives a fresh zing that pairs beautifully with classic sugar cookies. If you want to see a fun and festive cookie to go with this frosting, try decorating the Christmas tree shortbread cookies for a holiday treat.
Serving & Storage Suggestions
This royal icing dries hard within a few hours, so serve your sugar cookies once the icing is fully set to avoid smudges. Ideally, let them rest overnight at room temperature on a wire rack.
The cookies are best served at room temperature alongside a cup of tea or milk—simple comforts that let the sweet icing and tender cookie shine. For parties, arrange cookies on a decorative platter with a mix of piped designs for visual appeal.
Store leftover frosted cookies in an airtight container at room temperature for up to 5 days. If you need to keep them longer, refrigerate but bring to room temperature before serving to avoid a stale texture. Avoid freezing frosted cookies, as the icing can crack upon thawing.
For leftover frosting, cover tightly with plastic wrap pressed onto the surface and refrigerate for up to 3 days. When ready to use, allow it to come to room temperature and stir gently to restore consistency.
Nutritional Information & Benefits
This frosting is mostly powdered sugar and meringue powder, so it’s high in sugar but low in fat and protein. Each serving (about 2 tablespoons) contains roughly 100 calories, mostly from sugars.
Because it uses meringue powder instead of raw egg whites, it’s safer and more consistent. The absence of corn syrup also means a cleaner ingredient list, which is a win if you’re avoiding processed syrups or glucose additives.
While not a health food, this frosting offers a classic sweet finish without artificial preservatives, making it a reasonable treat when enjoyed in moderation. And hey, it’s gluten-free and dairy-free, so more friends can enjoy it without worry.
Conclusion
This smooth homemade royal icing sugar cookie frosting without corn syrup is my go-to for every cookie decorating occasion now. It’s simple, straightforward, and honestly, a bit of a game changer if you’ve struggled with sticky or grainy frostings before. I love how it lets me focus on creativity without worrying about tricky ingredients or weird textures.
Feel free to make it your own by adding your favorite flavors or colors, and don’t hesitate to experiment with thicker or thinner consistencies based on what you’re decorating. It’s one of those recipes that’s forgiving but rewarding—perfect for beginners and more experienced bakers alike.
Happy baking and frosting! I’d love to hear if you try this out or add your own twist—drop a comment below and share your cookie decorating stories. For even more sweet recipes to pair with this frosting, you might enjoy my soft frosted sugar cookies or the rich and indulgent triple chocolate mousse bars.
FAQs
Can I use egg whites instead of meringue powder?
Technically yes, but raw egg whites carry a risk of salmonella and can be tricky to whip consistently. Meringue powder is safer and gives more reliable results, especially for beginners.
How long does royal icing take to dry?
It usually takes 4 to 6 hours to dry hard at room temperature, but for best results, let your decorated cookies rest overnight.
Can I store leftover royal icing?
Yes, cover it tightly with plastic wrap pressed onto the surface and refrigerate for up to 3 days. Stir gently before using again.
Is this frosting suitable for piping intricate designs?
Absolutely! Once whipped to stiff peaks and the right consistency is achieved, it holds shapes well for detailed piping and outlines.
What can I do if my royal icing is too thick or too thin?
If too thick, add a teaspoon of warm water at a time and mix gently until it thins. If too thin, add a little sifted powdered sugar slowly until it firms up.
Pin This Recipe!
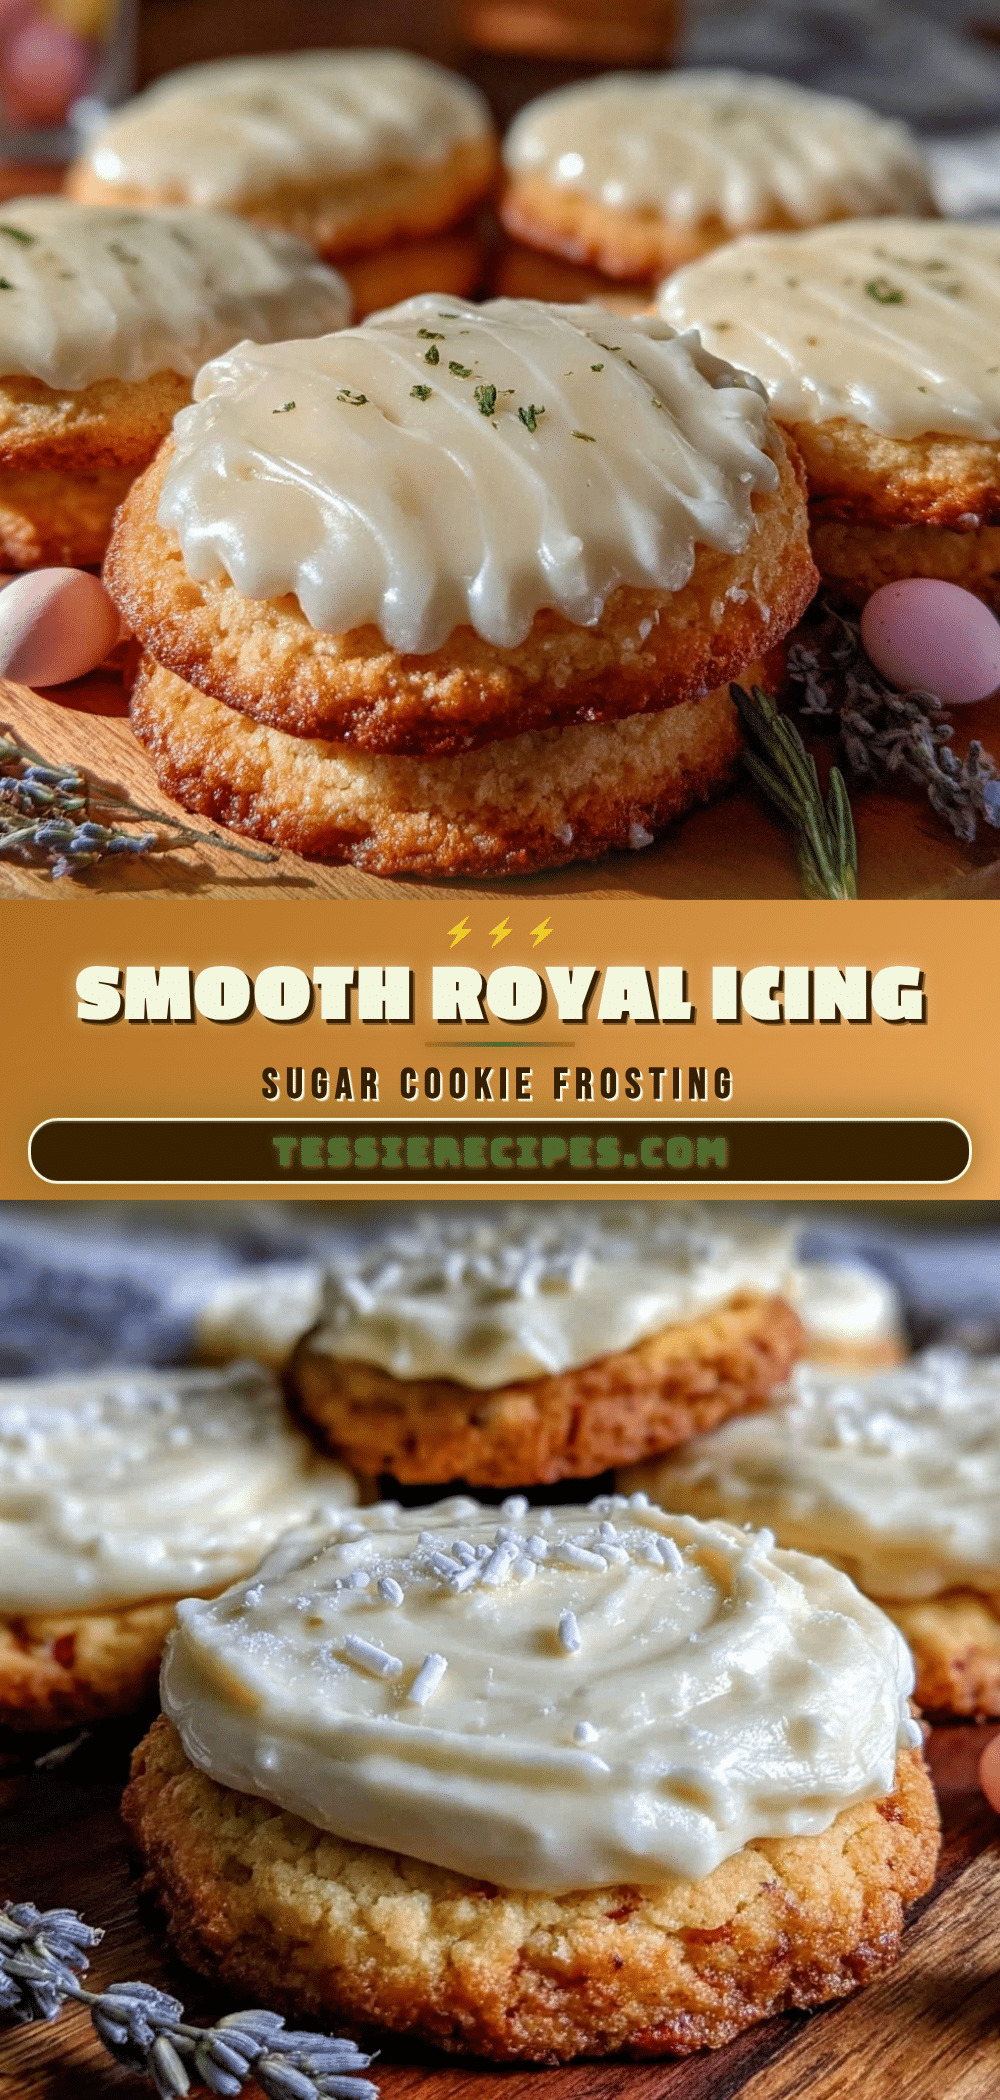
Smooth Homemade Royal Icing Sugar Cookie Frosting Easy Recipe Without Corn Syrup

An easy, smooth royal icing recipe for sugar cookies that requires no corn syrup, using simple pantry ingredients and delivering a glossy, pipe-friendly finish.
- Prep Time: 5 minutes
- Cook Time: 7 minutes
- Total Time: 12 minutes
- Yield: About 2 cups of royal icing (approximately 24 servings of 2 tablespoons each) 1x
- Category: Dessert
- Cuisine: American
Ingredients
- 4 cups (480g) powdered sugar (confectioners’ sugar), sifted
- 3 tablespoons meringue powder
- 5 to 6 tablespoons (75–90 ml) warm water
- 1 teaspoon vanilla extract
- 1/4 teaspoon cream of tartar
- Optional: gel food coloring
Instructions
- Sift your powdered sugar into your mixing bowl to avoid lumps.
- Add the meringue powder and cream of tartar to the sugar and stir gently to combine.
- Pour in 5 tablespoons of warm water and vanilla extract. Begin mixing on low speed to prevent a sugar cloud.
- Whip on medium-high speed for 5-7 minutes until the mixture holds stiff peaks.
- Test the consistency: for outlining cookies, the icing should hold its shape and not spread immediately when piped; for flooding, add an extra tablespoon of water and mix gently to thin it out.
- If using colors, divide the icing into small bowls and add gel food coloring a little at a time until you reach your desired shade.
- Cover the icing bowls with plastic wrap pressed directly onto the surface to prevent drying. Use within 24 hours for best results.
Notes
Do not skip sifting powdered sugar to avoid lumps. Use meringue powder instead of raw egg whites for safety and consistency. Whip until stiff peaks form. Adjust water gradually to achieve desired consistency. Store leftover icing covered tightly and refrigerate up to 3 days. Let decorated cookies dry at room temperature overnight for best results.
Nutrition
- Serving Size: 2 tablespoons
- Calories: 100
- Sugar: 25
- Sodium: 5
- Carbohydrates: 26
Keywords: royal icing, sugar cookie frosting, no corn syrup, smooth frosting, easy royal icing, meringue powder frosting, cookie decorating



