
“You’re really making cake pops at midnight?” my roommate asked, half amused, half skeptical. Honestly, I wasn’t planning to. I’d just baked a red velvet cake for a friend’s birthday party, and as fate would have it, I left it too long on the counter. The edges started to dry out, and that usually means tossing it—or so I thought. Instead, I crumbled the cake into tiny pieces, mixed it with cream cheese frosting, and started rolling balls in the quiet, dim glow of the kitchen light.
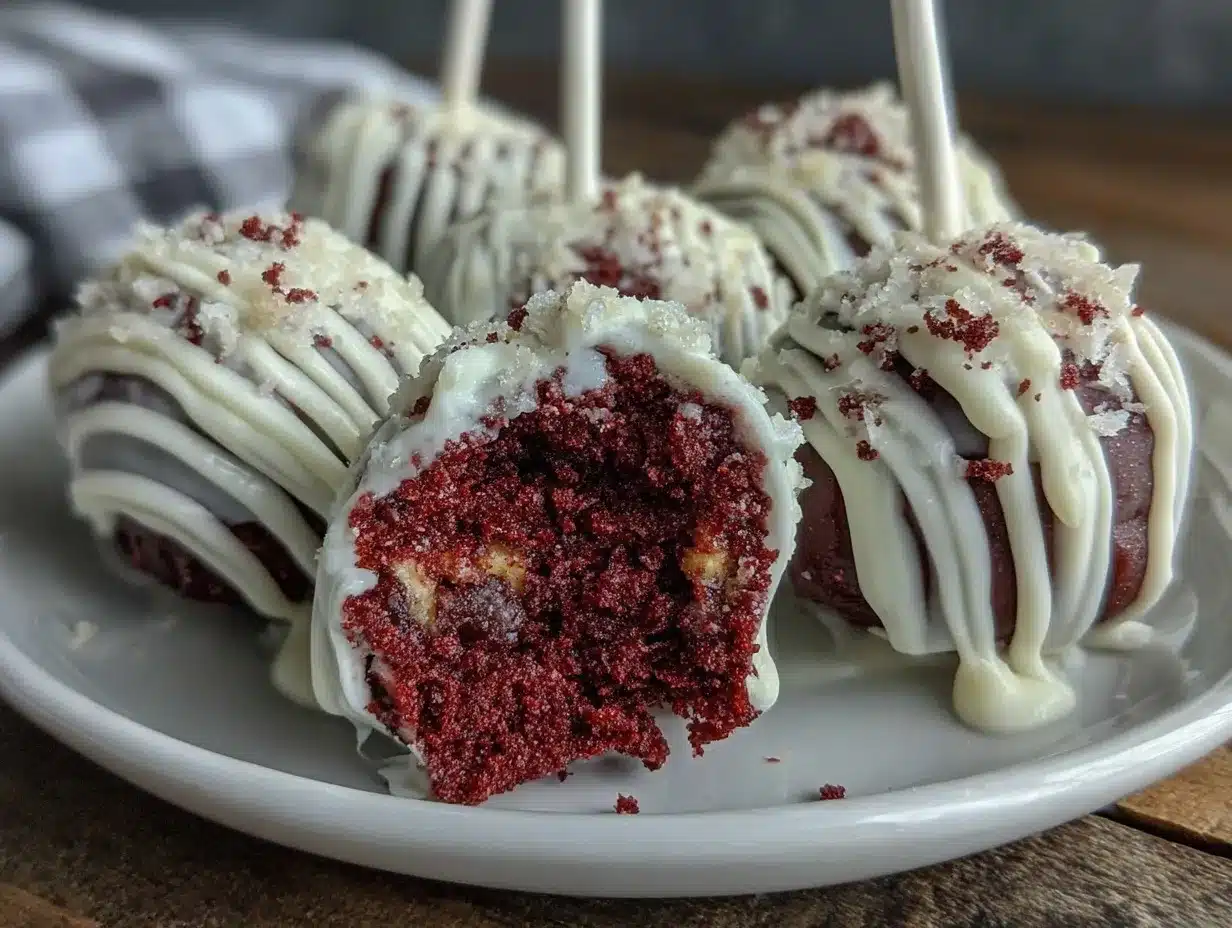
That’s how these decadent red velvet cake pops with white chocolate drizzle came to be—a happy accident born from a baking mishap and a stubborn craving for something sweet but not too complicated. The white chocolate drizzle? Pure improvisation. I melted some white chocolate chips left over from holiday baking and drizzled them on top for a fancy touch. It looked fancy, tasted even better, and suddenly I had a whole batch to share at work the next day.
What stuck with me is how this recipe turned a potential waste into a show-stopping dessert. It’s simple, forgiving, and honestly, kind of addictive. Whether you’re dealing with leftover cake or just want a fun twist on classic red velvet, this recipe delivers rich flavor and a moist, melt-in-your-mouth texture every single time. No fancy tools, no complicated steps—just sweet, nostalgic goodness wrapped in a bite-sized treat.
Now, anytime I hear the words “red velvet,” I can’t help but think about that quiet kitchen moment and how a little mistake turned into one of my favorite desserts to bring to gatherings or indulge in solo. It’s the kind of recipe that invites you to slow down, savor the process, and maybe even share a few with friends (or keep them all to yourself, no judgment).
Why You’ll Love This Decadent Red Velvet Cake Pops Recipe
After making these cake pops repeatedly (okay, maybe a few times a week), I’ve come to appreciate exactly why they stand out from the crowd. It’s not just the vibrant red color or the creamy white chocolate drizzle—there’s a little magic in the way the flavors and textures come together so effortlessly.
- Quick & Easy: From leftover cake to finished pops in under an hour, they’re perfect for busy days or last-minute parties.
- Simple Ingredients: You probably have everything in your pantry or fridge—cream cheese, cake, white chocolate—and that’s it.
- Perfect for Celebrations: Whether it’s Valentine’s Day, a birthday, or just a cozy night in, these pops add a festive, indulgent touch.
- Crowd-Pleaser: Kids, adults, picky eaters—everyone seems to love these little bites of red velvet heaven.
- Unbelievably Delicious: The moist cake mixed with rich cream cheese frosting, all wrapped in a crisp white chocolate coating, is pure comfort food.
What makes this recipe truly different? It’s the balance of flavors and the ease of execution. I blend the cream cheese frosting just right to get a smooth, creamy texture that holds the cake crumbs together without being too dense or soggy. Plus, the white chocolate drizzle adds a delicate sweetness that complements the slight cocoa notes in the red velvet without overpowering it.
This isn’t just another cake pop recipe—it’s my go-to when I want a treat that feels indulgent but isn’t a million steps or ingredients away. And honestly, it’s helped me rescue more than one cake disaster, turning it into something everyone asks for again and again.
What Ingredients You Will Need for Decadent Red Velvet Cake Pops
This recipe uses simple, wholesome ingredients to deliver bold flavor and satisfying texture without the fuss. Most of these are pantry staples or things you can easily swap based on what you have on hand.
- Red Velvet Cake: About 4 cups of crumbled cake (homemade or store-bought works great)—if homemade, use a classic red velvet recipe with cocoa powder and buttermilk for authentic flavor.
- Cream Cheese Frosting: 1 cup (240g) cream cheese, softened (I swear by Philadelphia brand for its smooth texture), ½ cup (115g) unsalted butter, softened, 2 cups (240g) powdered sugar, sifted, 1 tsp vanilla extract.
- White Chocolate Chips or Melting Wafers: 12 oz (340g) for coating and drizzle—Ghirardelli or another high-quality brand gives a smooth finish.
- Red Food Coloring: Optional, for extra vibrancy if your cake isn’t as red as you want.
- Sprinkles or Decorations: Optional, for a festive touch (think heart shapes for Valentine’s or edible glitter for parties).
- Wax or Parchment Paper: For setting the cake pops after dipping.
Substitution tip: Use dairy-free cream cheese and coconut oil-based white chocolate for a vegan-friendly option. For gluten-free cake, almond flour-based red velvet cakes work beautifully.
Equipment Needed
- Mixing Bowls: A medium bowl for frosting and a large bowl for crumbled cake mixing.
- Electric Mixer or Hand Mixer: Makes whipping the cream cheese frosting smoother and quicker.
- Baking Sheet: For placing cake pops as they chill and dry.
- Parchment or Wax Paper: Prevents sticking and keeps your pops neat.
- Microwave-Safe Bowl or Double Boiler: For melting white chocolate without burning.
- Wooden Skewers or Lollipop Sticks: If you want traditional cake pops on sticks; otherwise, they work just as well without.
- Cookie Scoop or Small Spoon: For evenly sized cake balls.
Personally, I found that using a small cookie scoop helps keep the cake pops uniform, which makes dipping and decorating way easier. If you don’t have one, just roll with your hands—it’s a bit messier but perfectly fine. For melting white chocolate, a double boiler prevents scorching, but a microwave in short bursts works well, too. Just watch it closely!
Preparation Method for Decadent Red Velvet Cake Pops
- Crumble the Cake: Take about 4 cups (approx. 480g) of red velvet cake and crumble it finely into a large bowl. The texture should be loose but not powdery.
- Make the Cream Cheese Frosting: In a medium bowl, beat 1 cup (240g) softened cream cheese with ½ cup (115g) softened unsalted butter until creamy and smooth, about 2-3 minutes. Gradually add 2 cups (240g) powdered sugar and 1 tsp vanilla extract. Beat until fluffy and light, scraping the sides occasionally.
- Combine Cake and Frosting: Gently fold the frosting into the crumbled cake. You want a mixture that holds together when pressed but isn’t overly wet or sticky. If it feels too loose, add a little more frosting; too wet, add more cake crumbs.
- Form Cake Balls: Using a cookie scoop or your hands, form the mixture into 1-inch (2.5 cm) balls. Place them on a baking sheet lined with parchment paper. Chill in the refrigerator for at least 30 minutes to firm up.
- Melt the White Chocolate: In a microwave-safe bowl or double boiler, gently melt 12 oz (340g) white chocolate chips. Stir often to avoid burning; the chocolate should be smooth and glossy.
- Dip the Cake Pops: (Optional) Insert a wooden skewer or lollipop stick into each cake ball. Dip each ball into the melted white chocolate, allowing excess to drip off. Place back onto parchment paper.
- Drizzle White Chocolate: Use a spoon or piping bag to drizzle extra melted white chocolate over the dipped cake pops for that elegant, decadent finish.
- Decorate: Before the drizzle sets, add sprinkles or edible glitter if desired.
- Chill and Set: Refrigerate the cake pops for about 15-20 minutes until the chocolate hardens completely.
Pro tip: If the cake balls feel too soft to dip, pop them back in the fridge for 10-15 minutes. Also, when melting chocolate, adding a tiny splash of coconut oil can help achieve a smoother coating.
Cooking Tips & Techniques for Perfect Cake Pops
One of the trickiest parts is getting the right balance between cake and frosting. Too much frosting, and your pops become mushy; too little, and they fall apart. I learned this the hard way after several failed attempts that ended with crumbly messes. Start with about a half cup of frosting and add more only if needed.
Rolling the cake balls evenly sized not only makes them look professional but also ensures they cook or set uniformly. Using a small cookie scoop is a game changer here.
When dipping in white chocolate, don’t rush. Let the excess drip off slowly, then gently tap the stick on the bowl’s edge to avoid clumps. I once dipped too quickly and ended up with giant blobs that took forever to dry—lesson learned!
Chilling the cake balls before dipping is crucial. If they’re too warm, the chocolate melts and slides off. I usually pop mine in the fridge for at least 30 minutes and then dip them straight from cold to get that crisp shell.
Lastly, multitasking helps. While the cake balls chill, melt your white chocolate and prep your decorating station. This way, everything flows smoothly without last-minute scrambling.
Variations & Adaptations for Your Cake Pops
Want to mix things up? Here are some tasty ideas to tailor this recipe to your mood or dietary needs:
- Chocolate Lovers: Swap red velvet cake for rich chocolate cake and drizzle with dark or milk chocolate instead of white.
- Seasonal Twist: Add a pinch of cinnamon and nutmeg to the cream cheese frosting for a cozy fall flavor. You can even use cranberry sprinkles for a festive touch.
- Nut-Free Option: Use sunflower seed butter in the frosting instead of cream cheese if you’re avoiding dairy or nuts.
- Alcohol Infusion: Mix a tablespoon of bourbon or coffee liqueur into the frosting for grown-up cake pops with a kick.
- Gluten-Free: Use a gluten-free red velvet cake recipe or store-bought gluten-free cake mix for a safe swap.
Personally, I love adding a sprinkle of flaky sea salt on top of the white chocolate drizzle—it’s a little unexpected but balances the sweetness beautifully.
Serving & Storage Suggestions
These cake pops are best served chilled or at room temperature. They make perfect bite-sized treats for parties, afternoon snacks, or even a sweet surprise in lunchboxes.
Pair them with a hot cup of coffee or a rich glass of milk to complement the creamy, chocolaty flavors. For a party spread, they sit nicely alongside other finger foods like bacon-wrapped jalapeño poppers or festive shortbread cookies.
Store leftover cake pops in an airtight container in the refrigerator for up to 5 days. For longer storage, freeze them on a tray first, then transfer to a freezer-safe bag or container for up to 2 months. When ready to eat, thaw in the fridge for a few hours.
Reheat gently at room temperature—avoid microwaving, which can melt the chocolate coating unevenly. Over time, the flavors mellow and meld, making them even tastier the next day.
Nutritional Information & Benefits
Each decadent red velvet cake pop is roughly 150-170 calories, depending on size and decoration. Key ingredients like cream cheese provide a bit of protein and calcium, while the white chocolate adds sweetness and a dose of fat.
This recipe isn’t low-calorie by any means, but it’s a treat that uses real ingredients without artificial fillers or preservatives. For those mindful of dietary needs, swapping in gluten-free cake or dairy-free frosting can make these accessible to more people.
Red velvet’s cocoa powder contains antioxidants, and while this dessert is all about indulgence, it’s a satisfying way to enjoy a sweet moment without going overboard.
Conclusion
These decadent red velvet cake pops with white chocolate drizzle have become a little obsession of mine—not just for their eye-catching looks, but because they’re forgiving, fun, and genuinely delicious. They remind me that sometimes the best recipes come from happy accidents in the kitchen.
Feel free to customize the frosting ratio, add your favorite toppings, or even experiment with different cake bases. Whether it’s a special occasion or just a craving fix, these pops deliver comfort and sweetness in every bite.
If you try these out, I’d love to hear how you make them your own—drop a comment or share your favorite twist. Here’s to sweet moments and simple pleasures!
Frequently Asked Questions (FAQs)
Can I use store-bought red velvet cake for these cake pops?
Absolutely! Using store-bought cake is a great shortcut, especially if it’s moist and flavorful. Just crumble and mix with the cream cheese frosting as directed.
How do I prevent the cake pops from falling apart?
Make sure your cake and frosting mixture holds together when squeezed gently. Chill the formed balls before dipping, and don’t overdo the frosting to avoid sogginess.
Can I make these cake pops without sticks?
Yes! You can shape and serve them as bite-sized truffles. Just skip the dipping on sticks and place them on parchment paper to set.
What’s the best way to melt white chocolate without burning it?
Use a double boiler or microwave in short bursts (15 seconds), stirring in between. Adding a teaspoon of coconut oil can help achieve a smooth consistency.
How long can I store these cake pops?
Refrigerated in an airtight container, they last up to 5 days. For longer storage, freeze for up to 2 months and thaw in the fridge before serving.
Pin This Recipe!

Decadent Red Velvet Cake Pops with White Chocolate Drizzle

These decadent red velvet cake pops are made from crumbled cake mixed with cream cheese frosting, dipped in white chocolate, and drizzled for an elegant finish. Perfect for celebrations or a sweet treat, they are easy to make and irresistibly delicious.
- Prep Time: 15 minutes
- Cook Time: 45 minutes
- Total Time: 1 hour
- Yield: 24 cake pops 1x
- Category: Dessert
- Cuisine: American
Ingredients
- 4 cups crumbled red velvet cake (homemade or store-bought)
- 1 cup (8 oz) cream cheese, softened
- 1/2 cup (4 oz) unsalted butter, softened
- 2 cups powdered sugar, sifted
- 1 teaspoon vanilla extract
- 12 oz white chocolate chips or melting wafers
- Red food coloring (optional)
- Sprinkles or decorations (optional)
- Wax or parchment paper
Instructions
- Crumble about 4 cups (approx. 480g) of red velvet cake finely into a large bowl.
- In a medium bowl, beat 1 cup (240g) softened cream cheese with 1/2 cup (115g) softened unsalted butter until creamy and smooth, about 2-3 minutes.
- Gradually add 2 cups (240g) powdered sugar and 1 teaspoon vanilla extract. Beat until fluffy and light, scraping the sides occasionally.
- Gently fold the frosting into the crumbled cake until the mixture holds together when pressed but is not overly wet or sticky. Adjust by adding more frosting or cake crumbs if needed.
- Form the mixture into 1-inch (2.5 cm) balls using a cookie scoop or hands. Place on a baking sheet lined with parchment paper and chill in the refrigerator for at least 30 minutes.
- Melt 12 oz (340g) white chocolate chips in a microwave-safe bowl or double boiler, stirring often to avoid burning until smooth and glossy.
- Optional: Insert wooden skewers or lollipop sticks into each cake ball.
- Dip each cake ball into the melted white chocolate, allowing excess to drip off. Place back onto parchment paper.
- Drizzle extra melted white chocolate over the dipped cake pops using a spoon or piping bag.
- Before the drizzle sets, add sprinkles or edible glitter if desired.
- Refrigerate the cake pops for 15-20 minutes until the chocolate hardens completely.
Notes
If the cake balls feel too soft to dip, chill them for an additional 10-15 minutes. Adding a teaspoon of coconut oil to the melted white chocolate helps achieve a smoother coating. Use dairy-free cream cheese and coconut oil-based white chocolate for vegan options. Gluten-free red velvet cake can be used for gluten-free adaptations.
Nutrition
- Serving Size: 1 cake pop
- Calories: 160
- Sugar: 18
- Sodium: 110
- Fat: 9
- Saturated Fat: 5
- Carbohydrates: 20
- Fiber: 1
- Protein: 2
Keywords: red velvet cake pops, cake pops recipe, white chocolate drizzle, easy dessert, homemade cake pops, cream cheese frosting, party treats



