
“Try the pink salt cured salmon crudo,” my friend insisted one evening over text. Honestly, I was skeptical—curing fish at home? That sounded like a whole culinary production I wasn’t ready to tackle after a long day. But curiosity got the better of me, and before I knew it, I was in my kitchen, surrounded by a simple mix of pink salt and a fresh salmon fillet, experimenting with something that felt both fancy and surprisingly doable.
The result? A dish that’s bright, fresh, and so effortless it’s become my go-to appetizer whenever guests drop by unexpectedly or when I just want to treat myself without fuss. The pink salt lends a delicate cure that enhances the salmon’s natural flavor without overpowering it—honestly, it feels like a little magic happening right in the fridge overnight.
What’s wild is how this easy pink salt cured salmon crudo recipe transformed my view on homemade appetizers. It’s not just about ticking off a fancy dish on a party menu; it’s about the quiet moment of slicing through that tender, silky fish, the slight crunch of sea salt crystals, and the zing of fresh citrus. That first bite made me realize this recipe wasn’t just a passing fling—it’s something that stuck around because it’s genuinely satisfying, approachable, and a little bit special, perfect for those times when you want to keep things simple but impressive.
Why You’ll Love This Recipe
This easy pink salt cured salmon crudo recipe has earned a permanent spot in my kitchen lineup, and here’s why you’ll find it just as irresistible:
- Quick & Easy: It takes just 10 minutes of active prep, then a few hours of hands-off curing. Perfect for busy weeknights or last-minute appetizer needs.
- Simple Ingredients: No exotic items here—just quality salmon, pink salt, a touch of sugar, and fresh citrus. You probably have everything already.
- Perfect for Entertaining: Whether it’s a casual get-together or a more formal dinner, this crudo feels elegant without any stress.
- Crowd-Pleaser: The silky texture and balanced flavors get rave reviews from both seafood lovers and the curious alike.
- Unbelievably Delicious: The pink salt cure gently firms the salmon while bringing out its natural sweetness, making every bite melt in your mouth.
What makes this recipe stand apart is the use of pink salt instead of regular sea salt. The trace minerals in the pink salt add a subtle depth, and it’s gentle enough to cure the salmon without drying it out. Plus, I’ve played around with the seasoning balance for just the right hint of sweetness and acidity, so it’s never flat or one-dimensional. It’s not just another cured salmon recipe—it’s the one I trust when I want easy, fresh, and thoroughly delicious.
Trust me, this is the kind of appetizer that feels like a treat but doesn’t require hours in the kitchen or complicated steps. It’s a little indulgence that’s as approachable as it is impressive.
What Ingredients You Will Need
This recipe uses simple, wholesome ingredients to deliver bold flavor and a satisfying texture without fuss. Most are pantry staples or easy to find at your local market.
- Fresh Salmon Fillet (skin-on or skinless, about 1 pound / 450 grams) – Look for sushi-grade if possible for the best safety and taste.
- Pink Himalayan Salt (1/4 cup / 55 grams) – The star for curing, adding subtle mineral notes and gentle curing power.
- Granulated Sugar (2 tablespoons / 25 grams) – Balances the saltiness and helps with the curing process.
- Fresh Dill (a few sprigs, chopped) – Adds a bright, herbaceous note that pairs beautifully with salmon.
- Zest of 1 Lemon – For a fresh citrus aroma that cuts through the richness.
- Fresh Black Pepper (about 1 teaspoon, cracked) – Adds a mild spice without overpowering.
- Extra Virgin Olive Oil (for serving) – A drizzle adds silkiness and rounds out the flavor just before serving.
- Optional Garnishes: Capers, thinly sliced red onion, microgreens or fresh herbs.
For the best results, I recommend sourcing the salmon from a trusted fishmonger or a reputable brand like Vital Choice, especially if you’re new to curing fish at home. The pink Himalayan salt you find in stores like Trader Joe’s or Whole Foods works perfectly here. If you want to experiment, swapping the sugar for coconut sugar gives a slightly deeper flavor, but regular granulated sugar keeps it classic and clean.
In summer, I sometimes swap lemon zest with a splash of fresh lime juice or add a pinch of crushed pink peppercorns for a little twist. These small changes keep the recipe fresh and exciting without complicating things.
Equipment Needed
- Sharp Knife: Essential for slicing the salmon thinly and cleanly—trust me, a dull knife ruins the experience.
- Mixing Bowl: For combining the pink salt, sugar, and zest.
- Plastic Wrap or Parchment Paper: Needed to tightly wrap the salmon during curing to keep it fresh.
- Baking Dish or Tray: To hold the salmon while it cures in the fridge.
- Cutting Board: A clean, sturdy surface for prepping the fish.
- Optional: A mandoline slicer if you want paper-thin slices of garnishes like onion or cucumber.
Personally, I find that a Japanese-style sushi knife makes slicing the salmon a breeze, but a good quality chef’s knife works just fine. For wrapping, I prefer using parchment paper over plastic wrap to reduce waste and keep things tidy. If you don’t have a dedicated curing tray, any shallow dish lined with parchment will do.
Preparation Method
- Prepare the Cure Mix (5 minutes): In a mixing bowl, combine 1/4 cup (55 g) pink Himalayan salt, 2 tablespoons (25 g) granulated sugar, lemon zest, cracked black pepper, and chopped fresh dill. Stir well to blend the flavors evenly.
- Coat the Salmon (5 minutes): Place the salmon fillet skin-side down on a large piece of parchment paper or in a shallow dish. Rub the cure mix evenly over the entire surface of the salmon, making sure every bit is covered, especially the thicker parts.
- Wrap and Chill (12 to 24 hours): Wrap the salmon tightly in parchment or plastic wrap to prevent air exposure. Place it on a baking tray and refrigerate for at least 12 hours, ideally 24 for a firmer texture and deeper flavor. The curing time depends on thickness and personal texture preference.
- Rinse and Dry (10 minutes): After curing, remove the salmon from the fridge. Unwrap and gently rinse off the cure mixture under cold water to remove excess salt and sugar. Pat dry thoroughly with paper towels. The salmon should feel firm but not dry.
- Slice Thinly (5 to 10 minutes): Using a sharp knife, slice the salmon thinly against the grain. Thin slices showcase the silky texture and make the flavors pop.
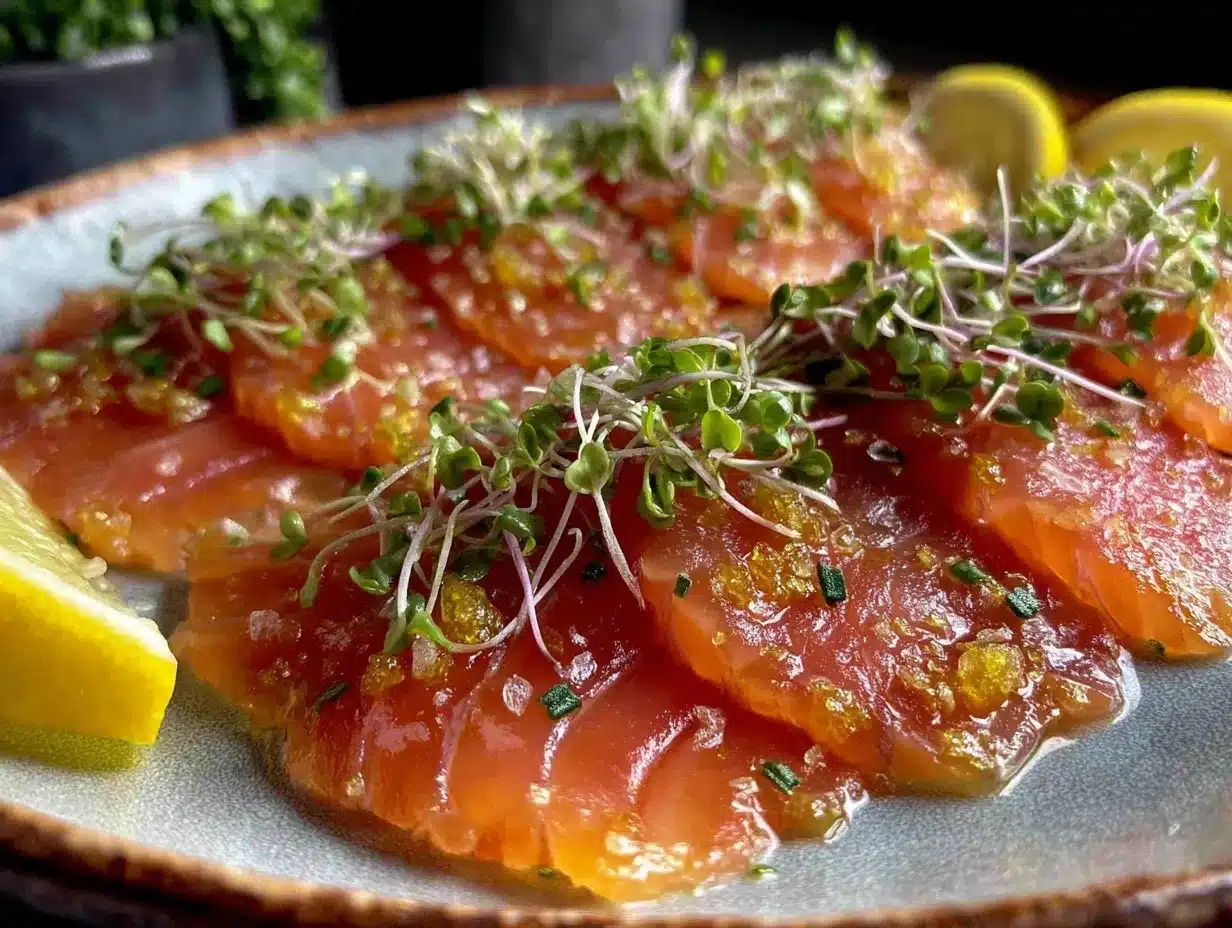
- Plate and Garnish (5 minutes): Arrange the slices on a chilled platter. Drizzle with extra virgin olive oil and scatter optional garnishes like capers, thin red onion slices, or microgreens for freshness and crunch.
Tip: If your salmon feels too salty after curing, a quick soak in cold water for 10 minutes before slicing can help balance it out. Also, keeping the salmon cold while slicing prevents it from becoming mushy.
One time, I left the salmon curing a little longer than planned (about 30 hours), and it turned out firmer with a more intense flavor—great for those who prefer a stronger cured taste.
Cooking Tips & Techniques
Though this recipe doesn’t involve cooking, there are key techniques that make all the difference:
- Choosing the Right Salmon: Always opt for sushi-grade or sashimi-grade salmon to keep things safe and delicious. Freshness is non-negotiable here.
- Even Cure Application: Make sure the salt and sugar mix covers every inch of the salmon. Uneven curing can lead to inconsistent texture.
- Timing the Cure: Less than 12 hours and the salmon might be too soft; more than 24 hours and it can become overly firm or too salty. Plan accordingly.
- Slicing with Care: Use a very sharp, long-bladed knife and slice in one smooth motion to avoid tearing the delicate flesh.
- Keep It Cold: Chill the salmon before slicing to maintain its structure and prevent it from becoming mushy under the knife.
Early on, I learned the hard way that poor knife skills can ruin the texture of cured salmon. Watching a quick tutorial on slicing sashimi helped me immensely. Also, multitasking is key: while the salmon cures, you can prep simple sides or even whip up a batch of spicy avocado chicken wraps to go alongside for a fuller meal.
Variations & Adaptations
This pink salt cured salmon crudo recipe is versatile and easy to tailor to your tastes or dietary needs.
- Herb Variations: Try swapping dill for fresh tarragon, chives, or basil to change the flavor profile.
- Spicy Kick: Add a pinch of chili flakes or a drizzle of chili oil before serving for a subtle heat.
- Low-Sodium Option: Reduce the amount of pink salt and increase curing time slightly to compensate, or rinse thoroughly before slicing.
- Gluten-Free: This recipe is naturally gluten-free, making it perfect for gluten-sensitive guests.
- Serving Style: Instead of slices, cube the cured salmon and toss with avocado, cucumber, and a light vinaigrette for a refreshing salad.
One personal favorite twist is incorporating thinly sliced Asian pear for a sweet crunch that contrasts beautifully with the silky salmon. It’s unexpected and adds a fresh note that guests always ask about.
Serving & Storage Suggestions
Serve the pink salt cured salmon crudo chilled for the best texture and flavor. Arrange it on a simple platter with a drizzle of olive oil and fresh herbs. It pairs wonderfully with crisp white wine or a light sparkling rosé.
For a complete appetizer spread, complement it with crusty bread, creamy dips, or even some cream cheese stuffed mushrooms with bacon for a savory balance.
Store leftover cured salmon wrapped tightly in parchment or plastic wrap in the refrigerator for up to 3 days. Avoid freezing, as the texture changes unfavorably.
Reheat is not recommended because this dish shines best raw and chilled, but letting it sit at room temperature for 10 minutes before serving can deepen the flavors.
Flavors tend to mellow and meld after a few hours, so making this a day in advance can actually improve the taste—a small win when hosting.
Nutritional Information & Benefits
Per serving, this recipe is low in calories but rich in protein and healthy fats thanks to the salmon.
| Nutrient | Amount |
|---|---|
| Calories | 180 |
| Protein | 22g |
| Fat | 10g (mostly omega-3 fatty acids) |
| Carbohydrates | 1g |
Salmon is a powerhouse of omega-3 fatty acids, which support heart and brain health. The pink Himalayan salt provides trace minerals not found in regular salt, albeit in small amounts.
This recipe is naturally gluten-free and low in carbs, making it suitable for many dietary preferences.
From a wellness perspective, it’s a satisfying way to enjoy raw fish with minimal additives, perfect for those who want fresh, clean eating without sacrificing flavor.
Conclusion
Making this easy pink salt cured salmon crudo recipe has been one of those simple kitchen wins that quietly changed my approach to homemade appetizers. It’s easy enough to whip up on a whim, yet refined enough to impress without trying too hard.
Feel free to tweak the herbs, citrus, or garnishes to suit your mood or season—this recipe welcomes customization. Personally, I love how it brings a little bit of luxury into the everyday, without any fuss.
If you give it a go, I’d love to hear how you adapted it or what your favorite garnishes are—sharing those little tweaks makes all the difference. Here’s to effortless elegance on your plate!
FAQs
Is it safe to cure salmon at home?
Yes, as long as you start with sushi-grade or sashimi-grade salmon and keep everything clean and cold, curing at home is safe and delicious.
How long should I cure the salmon?
Between 12 to 24 hours is ideal. Less than 12 hours, it may be too soft; more than 24 hours, it can get too firm or salty.
Can I use regular sea salt instead of pink Himalayan salt?
You can, but pink Himalayan salt adds subtle minerals and tends to be gentler on the fish, producing a better texture and flavor.
How do I store leftover cured salmon?
Wrap tightly in parchment or plastic wrap and refrigerate for up to 3 days. Avoid freezing as it affects texture.
What can I serve with pink salt cured salmon crudo?
Try crusty bread, light salads, or even pair it with creamy appetizers like stuffed mushrooms with bacon for a balanced spread.
Pin This Recipe!

Easy Pink Salt Cured Salmon Crudo Recipe Perfect for Fresh Homemade Appetizers

A bright, fresh, and effortless pink salt cured salmon crudo recipe that makes a perfect appetizer for guests or a simple treat. The pink salt gently cures the salmon, enhancing its natural flavor with a delicate balance of sweetness and acidity.
- Prep Time: 10 minutes
- Cook Time: 0 minutes
- Total Time: 12 to 24 hours (mostly curing time)
- Yield: 4 servings 1x
- Category: Appetizer
- Cuisine: Contemporary
Ingredients
- 1 pound (450 grams) fresh salmon fillet (skin-on or skinless, sushi-grade recommended)
- 1/4 cup (55 grams) pink Himalayan salt
- 2 tablespoons (25 grams) granulated sugar
- A few sprigs fresh dill, chopped
- Zest of 1 lemon
- 1 teaspoon fresh black pepper, cracked
- Extra virgin olive oil (for serving)
- Optional garnishes: capers, thinly sliced red onion, microgreens or fresh herbs
Instructions
- Prepare the Cure Mix (5 minutes): In a mixing bowl, combine 1/4 cup (55 g) pink Himalayan salt, 2 tablespoons (25 g) granulated sugar, lemon zest, cracked black pepper, and chopped fresh dill. Stir well to blend the flavors evenly.
- Coat the Salmon (5 minutes): Place the salmon fillet skin-side down on a large piece of parchment paper or in a shallow dish. Rub the cure mix evenly over the entire surface of the salmon, making sure every bit is covered, especially the thicker parts.
- Wrap and Chill (12 to 24 hours): Wrap the salmon tightly in parchment or plastic wrap to prevent air exposure. Place it on a baking tray and refrigerate for at least 12 hours, ideally 24 for a firmer texture and deeper flavor.
- Rinse and Dry (10 minutes): After curing, remove the salmon from the fridge. Unwrap and gently rinse off the cure mixture under cold water to remove excess salt and sugar. Pat dry thoroughly with paper towels.
- Slice Thinly (5 to 10 minutes): Using a sharp knife, slice the salmon thinly against the grain.
- Plate and Garnish (5 minutes): Arrange the slices on a chilled platter. Drizzle with extra virgin olive oil and scatter optional garnishes like capers, thin red onion slices, or microgreens.
Notes
If the salmon feels too salty after curing, soak it in cold water for 10 minutes before slicing. Keep the salmon cold while slicing to prevent mushiness. Curing time can be adjusted between 12 to 24 hours depending on desired texture and flavor intensity. Use sushi-grade salmon for safety. Avoid freezing leftovers as it affects texture.
Nutrition
- Serving Size: Approximately 4 ounc
- Calories: 180
- Fat: 10
- Carbohydrates: 1
- Protein: 22
Keywords: pink salt cured salmon, salmon crudo, easy appetizer, homemade cured salmon, fresh salmon recipe, pink Himalayan salt, no-cook seafood, gluten-free appetizer



