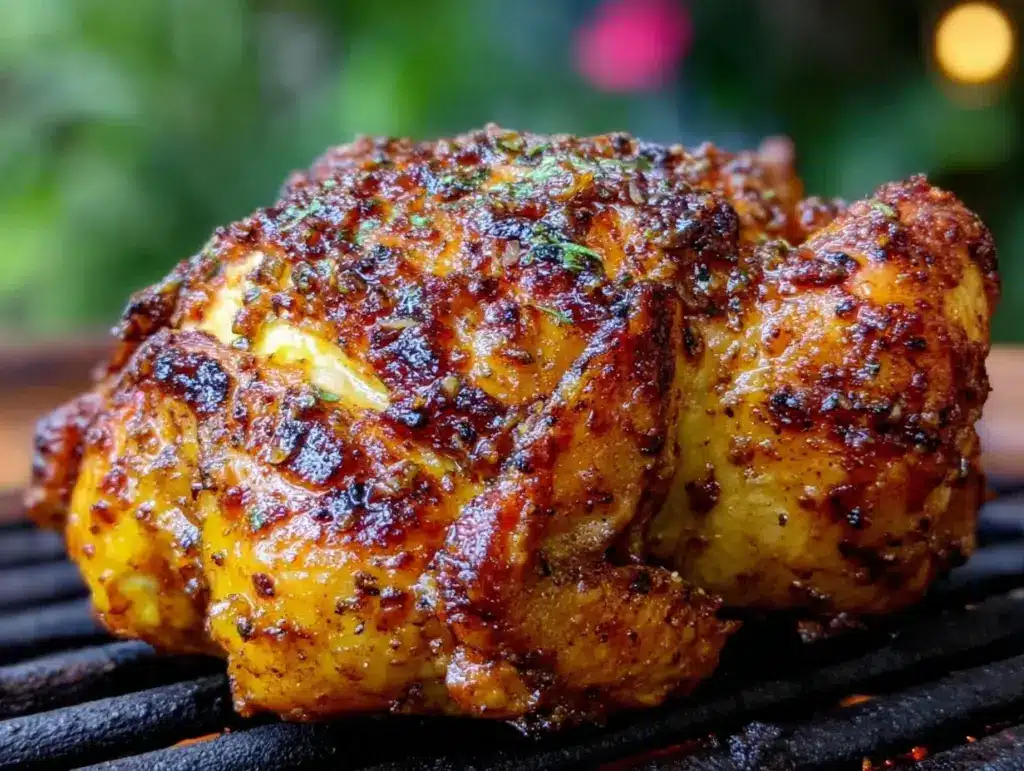
“Hey, you ever tried cooking a chicken with a beer can stuck in it?” my buddy called out over the crackle of the grill. I raised an eyebrow, skeptical but curious. I mean, who comes up with these ideas? Honestly, I thought it was a bit of a backyard gimmick at first. But that summer evening, with the sun dipping low and the scent of smoky wood hanging in the air, I let him talk me into it. What happened next? The juiciest, crispiest chicken I’d ever tasted, with a flavor so good it made me rethink my whole grilling game. That beer can wasn’t just some prop — it was the secret to locking in moisture and infusing subtle hoppy notes.
It wasn’t a fancy setup or a special marinade, just simple ingredients and a bit of patience on the grill. The skin crackled like the perfect fried chicken, but the inside stayed tender and juicy, almost like it was steamed gently from within. I remember thinking, “Why haven’t I been doing this all along?” Since then, the crispy beer can chicken has become my go-to whenever I want a no-fuss, crowd-pleasing grilled dinner that feels like a treat but doesn’t require hours of prep.
What stuck with me—beyond the taste—was how the method turned a humble whole chicken into something special without stress. It’s the kind of recipe that makes you look forward to firing up the grill on a weekend, or even a casual weeknight when you want to impress without sweating it. Plus, it’s a neat conversation starter—people always ask how you get the skin so crisp and the meat so juicy. That little beer can trick is the answer, and honestly, it’s saved me from overcooked, dry chicken disasters more than once.
So if you’re like me, someone who loves the idea of grilled chicken but sometimes finds it tricky to get just right, this crispy beer can chicken recipe might just be the solution you didn’t know you needed. It’s a quiet little secret that turns out to be a winner every time.
Why You’ll Love This Recipe
After trying plenty of grilled chicken recipes, this crispy beer can chicken really stands out for several reasons. I’ve tested it multiple times (sometimes more than twice a week, no joke), and each time it nails that perfect balance of crispy skin and juicy meat. Here’s why it’s become a staple in my grilling rotation:
- Quick & Easy: Once your chicken is prepped, it grills in about 1 to 1.5 hours, giving you plenty of time to relax or prep sides.
- Simple Ingredients: You probably have everything on hand—whole chicken, basic spices, and a can of beer. No fancy marinades or hard-to-find items.
- Perfect for Gatherings: Whether it’s a weekend cookout, a backyard party, or a casual family dinner, this chicken impresses without the fuss.
- Crowd-Pleaser: Kids and adults alike love the crispy skin and juicy texture. It’s a recipe that rarely leaves leftovers!
- Unbelievably Delicious: The beer steams the chicken from the inside, keeping it tender, while the outside crisps up beautifully for that amazing contrast.
What sets this recipe apart is the way it embraces a simple technique to achieve something that many think requires hours of marinating or complex steps. Instead, the beer can method creates a sort of natural roasting chamber that locks in moisture and flavor. I’ve even played around with different beer types, and a lighter lager works best for a subtle note without overpowering the seasoning. Plus, the spice rub I use hits all the right spots—smoky, a little spicy, and just enough salt to make your mouth water.
Honestly, this isn’t just grilled chicken; it’s the kind of dish that makes you close your eyes after the first bite and savor the moment. If you want a recipe that’s both comforting and exciting, this crispy beer can chicken on the grill delivers every time.
What Ingredients You Will Need
This crispy beer can chicken recipe keeps things straightforward and flavorful. The ingredients work together to create that perfect crispy skin and juicy interior, with a balanced seasoning mix that complements the beer’s subtle steam.
- Whole chicken: About 4 to 5 pounds (1.8 to 2.3 kg), preferably fresh or fully thawed. I like a plump bird with good skin for crisping.
- Beer: One 12 oz (355 ml) can of light lager or pilsner. Avoid heavily flavored beers to keep the taste balanced.
- Olive oil: 2 tablespoons, for coating the chicken skin and helping the rub stick.
- Salt: 1 tablespoon kosher salt (or sea salt), essential for seasoning and drawing out moisture to crisp the skin.
- Black pepper: 1 teaspoon freshly ground for a bit of bite.
- Paprika: 1 tablespoon smoked paprika adds a subtle smoky flavor and rich color.
- Garlic powder: 1 teaspoon, because garlic is a classic chicken partner.
- Onion powder: 1 teaspoon, for a mild savory depth.
- Dried thyme: 1 teaspoon, for a hint of herbaceous earthiness.
- Cayenne pepper: 1/4 teaspoon, optional, if you want a slight kick.
Some tips on ingredients:
- I prefer kosher salt for even seasoning and less harshness than table salt.
- For the beer, I recommend brands like Bud Light or Pabst Blue Ribbon—nothing too bitter or heavy.
- If you want to swap beer out, try a non-alcoholic beer or even sparkling water for a milder steam effect.
- For a gluten-free option, make sure your beer choice is gluten-free or use apple cider as a substitute.
Equipment Needed
- Grill: A charcoal or gas grill will work, but charcoal gives a better smoky flavor.
- Beer can chicken holder (optional): These nifty stands keep the chicken upright and stable for even cooking. If you don’t have one, you can improvise with a sturdy can and a baking sheet.
- Meat thermometer: Absolutely crucial to check doneness and avoid dry chicken. I swear by a digital instant-read thermometer for accuracy.
- Tongs and heat-resistant gloves: For safely handling the hot chicken and grill.
- Basting brush: Useful if you want to apply extra oil or glaze during cooking.
Alternatives to specialized tools:
- If you don’t have a beer can chicken stand, just place the opened beer can on a sturdy pan and carefully set the chicken on top, so it stands upright.
- A simple oven thermometer can help monitor grill temperature if your grill doesn’t have a built-in gauge.
- For budget-friendly options, a food-grade aluminum foil ring can help stabilize the chicken when placed on the grill.
Maintaining your grill and thermometer properly will make this recipe repeatable and foolproof. I learned the hard way that a faulty thermometer leads to dry chicken, which nobody wants!
Preparation Method
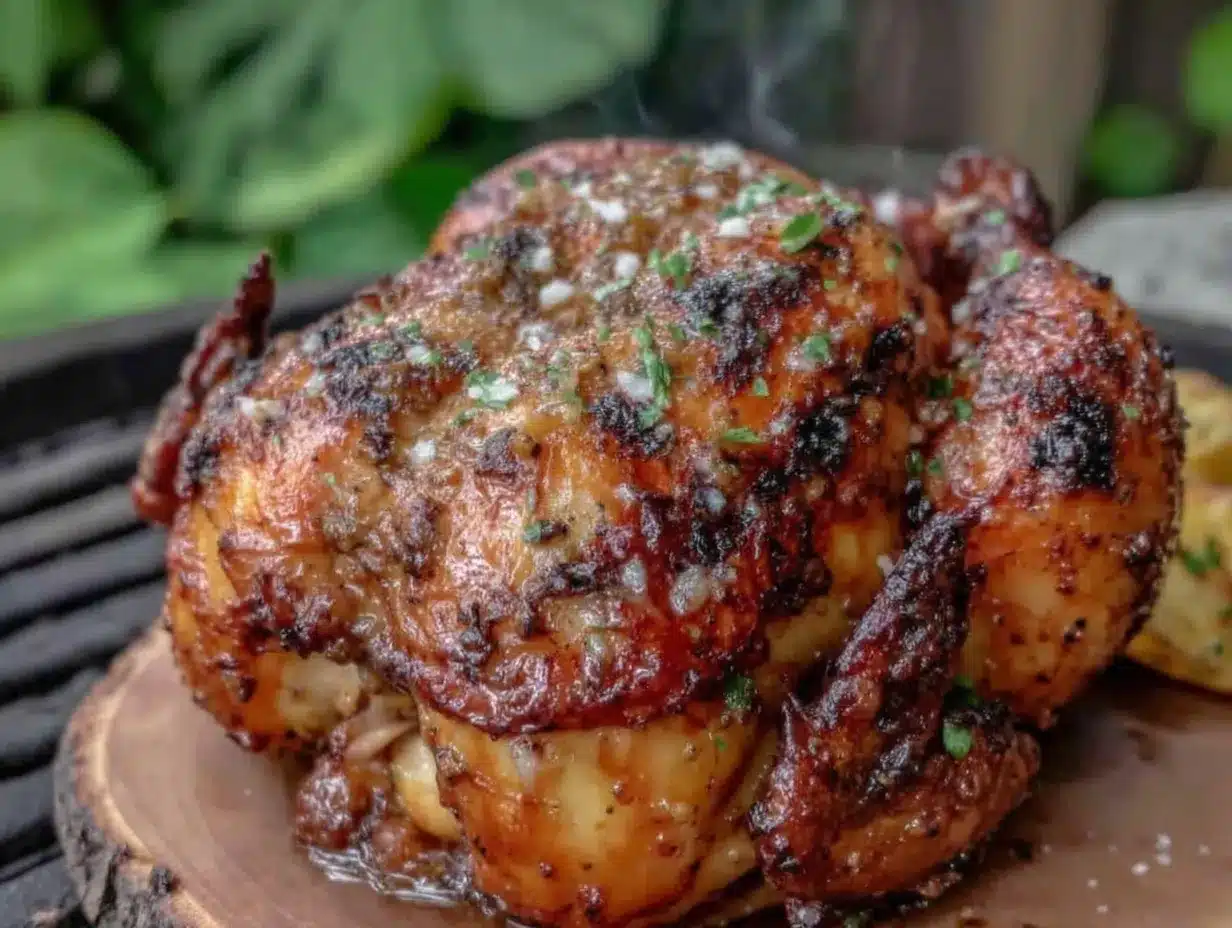
- Preheat your grill: Set up your grill for indirect cooking at medium heat, about 375°F (190°C). If using charcoal, bank the coals to one side; for gas, turn off one burner to create an indirect zone. This usually takes about 15 minutes.
- Prepare the chicken: Remove any giblets or excess fat from the cavity. Pat the chicken dry with paper towels—dry skin crisps better.
- Make the spice rub: In a small bowl, mix 1 tablespoon kosher salt, 1 teaspoon black pepper, 1 tablespoon smoked paprika, 1 teaspoon garlic powder, 1 teaspoon onion powder, 1 teaspoon dried thyme, and 1/4 teaspoon cayenne pepper (if using).
- Apply olive oil: Rub 2 tablespoons olive oil all over the chicken, including under the skin if you can. This helps the rub stick and promotes browning.
- Season the chicken: Generously sprinkle the spice rub all over the chicken, including inside the cavity. Don’t be shy—this seasoning is key for flavor and crispness.
- Prepare the beer can: Open the beer and pour out (or drink) about half of it. Using a can opener, carefully make a few holes in the top for extra steam release.
- Mount the chicken: Place the chicken cavity over the beer can so it sits upright. If using a beer can chicken holder, secure it now.
- Place on the grill: Position the chicken upright over the indirect heat zone. Close the lid and cook for about 1 to 1.5 hours. Maintain grill temperature around 375°F (190°C).
- Check temperature: After about an hour, start checking the internal temperature at the thickest part of the thigh (without touching bone). The chicken is done at 165°F (74°C).
- Rest the chicken: Carefully remove the chicken from the grill and let it rest upright for 10-15 minutes. This lets juices redistribute, keeping the meat moist.
- Carve and serve: Remove the beer can (carefully—it’s hot!) and carve the chicken as usual. Get ready for that crispy, juicy bite!
Pro tip: If the skin isn’t crisping enough, move the chicken briefly over direct heat for a few minutes—just watch carefully so it doesn’t burn. Also, keeping the lid closed as much as possible helps maintain even cooking.
Cooking Tips & Techniques
Getting crispy beer can chicken just right takes a little know-how but nothing too complicated. Here are some tips I’ve picked up over time:
- Pat the chicken dry: Moisture on the skin steams it instead of crisping it. Paper towels are your best friend here.
- Maintain consistent grill temperature: Fluctuating heat leads to uneven cooking. Use vents and burners to keep it steady around 375°F (190°C).
- Don’t forget to open beer can holes: Making extra holes helps steam escape and prevents the can from exploding (yes, it can happen if you’re not careful!).
- Use a meat thermometer: Overcooking is the enemy here. The thermometer saves you from guesswork and dry results.
- Let it rest: That 10-15 minute rest after grilling is crucial for juicy chicken.
- Experiment with rubs: I’ve had great luck adding a bit of brown sugar or chili powder for a sweeter or spicier kick.
One time, I tried rushing the process by cooking over direct heat the whole time—big mistake. The outside burned before the inside cooked through. Since then, I stick to indirect heat and keep a close eye on temps. Also, multitasking by prepping sides or drinks while the chicken cooks helps keep the flow smooth without rushing.
Variations & Adaptations
The beauty of this crispy beer can chicken is how easy it is to tweak based on what you like or have on hand. Here are some variations I’ve enjoyed:
- Herb & Lemon: Add fresh lemon slices and rosemary inside the cavity for a bright, aromatic twist.
- Spicy BBQ: Swap the dry rub for a smoky barbecue seasoning blend and brush with your favorite BBQ sauce during the last 15 minutes of cooking.
- Gluten-Free: Use gluten-free beer or apple cider as your steaming liquid and stick to gluten-free spices.
- Low-Alcohol Option: Non-alcoholic beer or sparkling water still produce great steam and moisture.
- Stuffed Cavity: Add aromatics like garlic cloves, onion wedges, or herbs inside for extra flavor infusion.
Personally, I tried a maple bourbon glaze on the chicken once, similar to my maple bourbon pork chops, and it added a delicious caramelized sweetness that worked wonders. The recipe adapts well for different tastes, so feel free to get creative!
Serving & Storage Suggestions
This crispy beer can chicken is best served warm, right off the grill, with the skin still crackling under your fork. I love pairing it with simple sides like grilled corn, a crisp green salad, or buttery mashed potatoes. It also goes surprisingly well with spicy avocado chicken wraps for a lighter, fresh complement—check out that recipe for inspiration.
If you have leftovers (which might be rare!), store the chicken in an airtight container in the refrigerator for up to 3 days. Reheat gently in a 350°F (175°C) oven or on the grill, covered loosely with foil to keep the meat moist. Avoid microwaving if you want to keep the skin crispy.
Flavors tend to deepen after resting overnight, making leftover chicken perfect for sandwiches, salads, or those loaded cream cheese stuffed mushrooms with bacon that I love to serve at gatherings.
Nutritional Information & Benefits
A typical serving of crispy beer can chicken (about 6 ounces or 170 grams) provides approximately 300 calories, 25 grams of protein, 20 grams of fat (mostly from the skin), and minimal carbohydrates. The high protein content makes it satisfying and ideal for balanced meals.
The chicken skin, when crisped properly, adds texture but also fat—so enjoy in moderation if you’re watching intake. Using olive oil and natural spices keeps the recipe free from artificial additives. Plus, the beer steaming method means no heavy sauces or extra fats are necessary.
For those mindful of allergens, this recipe is naturally gluten-free if you choose gluten-free beer or cider, and dairy-free as well. It’s a wholesome option that fits many dietary preferences.
Conclusion
This crispy beer can chicken on the grill has become one of those recipes that feels like second nature now—reliable, satisfying, and honestly, a little bit fun to cook. It’s not fancy, but it delivers on flavor and texture every time, turning a simple whole chicken into a juicy, crispy masterpiece.
Feel free to make it your own by tweaking the spice rub, trying different beers, or adding your favorite herbs. I keep coming back to this recipe because it’s straightforward, forgiving, and always impresses my guests. Plus, it pairs beautifully with other dishes I love making, like slow cooker creamy chicken taco soup or crunchy, flavorful spicy avocado chicken wraps.
I’d love to hear how your grill session goes—did you try a new twist? Any tips you discovered along the way? Share your thoughts and recipes so we can all keep the smoky, crispy chicken love going strong.
FAQs about Crispy Beer Can Chicken on the Grill
How do I know when the beer can chicken is fully cooked?
Use a meat thermometer to check the thickest part of the thigh (avoiding bone). It should read 165°F (74°C) for safe consumption.
Can I use canned soda instead of beer?
Yes, you can use soda or sparkling water to create steam inside the chicken. Just be aware the flavor will be different and potentially sweeter.
Is it safe to put a beer can inside the chicken?
Yes, as long as the can is opened and cleaned. Some people prefer to pour out half the beer to prevent overflow. Avoid cans with plastic coatings inside.
What if I don’t have a grill? Can I cook this in the oven?
You can roast the chicken upright on a beer can in the oven at 375°F (190°C) for about 1.5 hours. The skin may not get quite as crispy as on the grill, but it still works well.
How do I get the skin extra crispy?
Make sure to pat the skin dry, apply oil liberally, maintain indirect heat around 375°F (190°C), and finish briefly over direct heat if needed (watching carefully to avoid burning).
Pin This Recipe!

Crispy Beer Can Chicken Recipe Perfect for Juicy Grilled Dinners

This crispy beer can chicken recipe delivers juicy, tender meat with perfectly crispy skin using a simple beer can steaming method on the grill. It’s quick, easy, and perfect for gatherings or casual dinners.
- Prep Time: 15 minutes
- Cook Time: 1 to 1.5 hours
- Total Time: 1 hour 15 minutes to 1 hour 45 minutes
- Yield: 4 to 6 servings 1x
- Category: Main Course
- Cuisine: American
Ingredients
- 1 whole chicken (4 to 5 pounds)
- 1 (12 oz) can light lager or pilsner beer
- 2 tablespoons olive oil
- 1 tablespoon kosher salt
- 1 teaspoon freshly ground black pepper
- 1 tablespoon smoked paprika
- 1 teaspoon garlic powder
- 1 teaspoon onion powder
- 1 teaspoon dried thyme
- 1/4 teaspoon cayenne pepper (optional)
Instructions
- Preheat your grill for indirect cooking at medium heat, about 375°F (190°C). If using charcoal, bank the coals to one side; for gas, turn off one burner to create an indirect zone. This usually takes about 15 minutes.
- Remove any giblets or excess fat from the chicken cavity. Pat the chicken dry with paper towels.
- In a small bowl, mix kosher salt, black pepper, smoked paprika, garlic powder, onion powder, dried thyme, and cayenne pepper (if using) to make the spice rub.
- Rub 2 tablespoons olive oil all over the chicken, including under the skin if possible.
- Generously sprinkle the spice rub all over the chicken, including inside the cavity.
- Open the beer can and pour out or drink about half of it. Carefully make a few holes in the top of the can for steam release.
- Place the chicken cavity over the beer can so it sits upright. Secure with a beer can chicken holder if available.
- Position the chicken upright over the indirect heat zone on the grill. Close the lid and cook for about 1 to 1.5 hours, maintaining grill temperature around 375°F (190°C).
- After about an hour, check the internal temperature at the thickest part of the thigh (without touching bone). The chicken is done at 165°F (74°C).
- Carefully remove the chicken from the grill and let it rest upright for 10-15 minutes to allow juices to redistribute.
- Remove the beer can carefully and carve the chicken. Serve immediately.
Notes
Pat the chicken dry before applying oil and rub to ensure crispy skin. Maintain consistent grill temperature around 375°F (190°C) using indirect heat. Open holes in the beer can to prevent pressure buildup. Use a meat thermometer to avoid overcooking. Rest the chicken 10-15 minutes after grilling for juicy meat. If skin isn’t crispy enough, briefly move chicken over direct heat while watching carefully.
Nutrition
- Serving Size: 6 ounces (170 grams)
- Calories: 300
- Fat: 20
- Protein: 25
Keywords: beer can chicken, grilled chicken, crispy chicken, juicy chicken, beer can recipe, backyard grilling, easy chicken recipe



