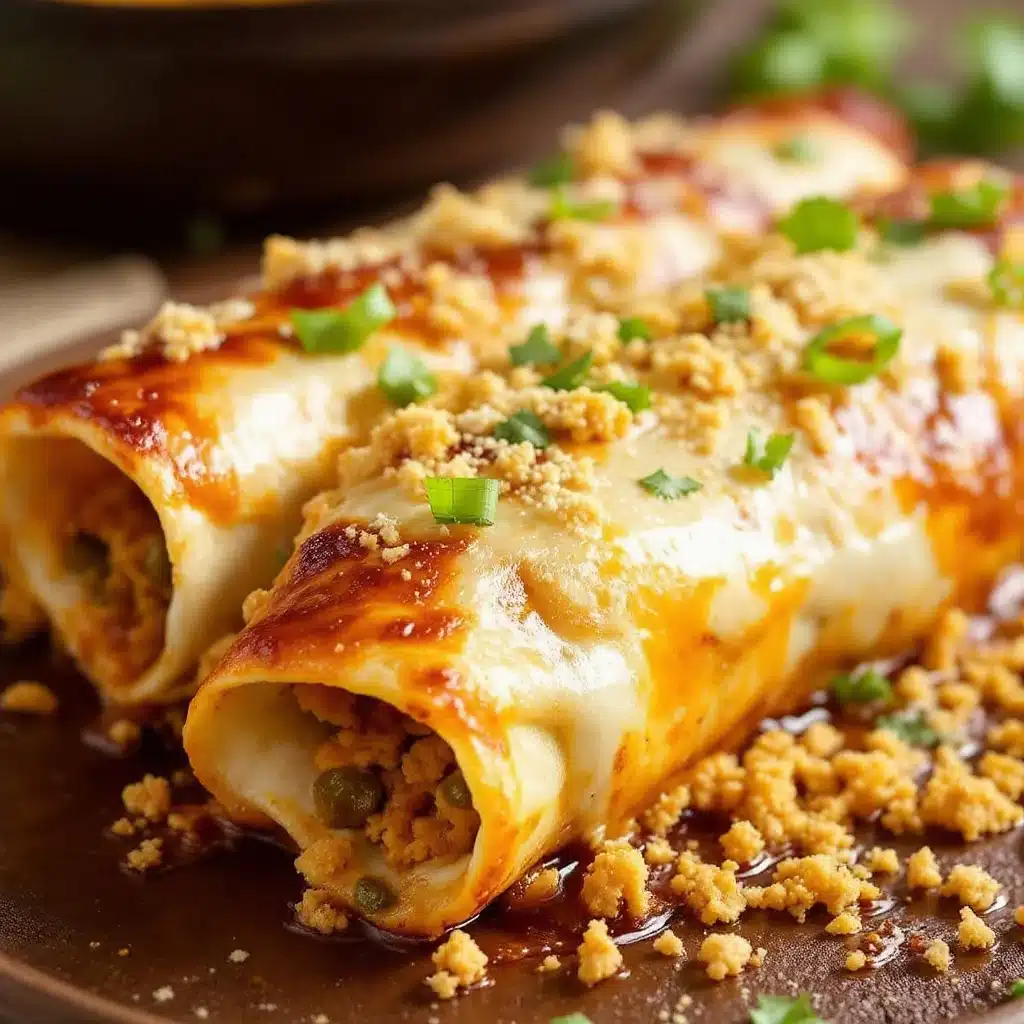
I need something creamy, spicy, and completely satisfying tonight—and I have everything except the willpower to make anything complicated. That’s usually how these Hatch green chili chicken enchiladas happen around here. They come together when I’m tired, hungry, and craving that specific New Mexico heat that only roasted Hatch chiles can deliver. Honestly, I’ve made this recipe so many times that I can almost do it with my eyes closed now. But that first time? I was nervous about the whole thing.
I had just scored a case of fresh Hatch chiles from a roadside stand—you know the ones, where the seller looks at you like you’re either a local or a lost tourist—and I needed something that would do them justice. Not just another green chili stew (though I love that too). I wanted something creamy, cheesy, and wrapped in tortillas. Something that would make my kitchen smell like a tiny New Mexican restaurant. And these creamy Hatch green chili chicken enchiladas delivered exactly that. The first bite actually made me stop and stare at the pan. That’s rare for me. I’m usually too busy thinking about the next forkful.
This recipe is my go-to when I want to impress without the stress. It’s rich without being heavy, spicy without being punishing, and creamy without relying on a can of soup. The Hatch chiles do the heavy lifting here—they bring this fruity, smoky heat that you just can’t fake with anything else. So if you’ve got a bag of frozen Hatch chiles in your freezer or you’re lucky enough to find fresh ones, this is the recipe to make. Trust me on this one.
Why You’ll Love This Recipe
Let me tell you why these enchiladas have earned a permanent spot in my dinner rotation. I’ve tested this recipe at least a dozen times, tweaking the creaminess, the spice level, and the baking time until it was just right. Here’s what makes it special:
- Quick & Easy: From start to table in about 45 minutes. That’s faster than ordering takeout in my neighborhood.
- Simple Ingredients: Nothing fancy here. Cream cheese, sour cream, shredded chicken, tortillas, and those glorious Hatch chiles. You probably have most of this already.
- Perfect for Weeknights or Entertaining: These enchiladas feel special enough for company but are easy enough for a Tuesday. I’ve served them at casual dinners and holiday potlucks—they disappear fast every time.
- Crowd-Pleaser: My picky-eating niece asked for seconds. My spice-loving brother asked for the recipe. That’s the ultimate test right there.
- Unbelievably Delicious: The creaminess from the cream cheese and sour cream balances the smoky heat of the Hatch chiles perfectly. Every bite is rich, tangy, and just a little bit addictive.
What makes this recipe different from all the other enchilada recipes out there? It’s the sauce. Most enchilada sauces are tomato-based or rely on heavy cream. This one uses a creamy Hatch green chili sauce that’s silky smooth and deeply flavorful. It’s not just another version—it’s the version I keep coming back to. The kind that makes you close your eyes after the first bite. Seriously. It’s comfort food reimagined—faster, creamier, and with that soul-soothing satisfaction that only Hatch chiles can deliver.
What Ingredients You Will Need
This recipe uses simple, wholesome ingredients to deliver bold flavor and satisfying texture without the fuss. Most of these are pantry staples, but the Hatch chiles are the star here—don’t skip them.
- For the Filling:
- 3 cups cooked chicken, shredded (rotisserie chicken works great here—saves time and adds flavor)
- 8 oz cream cheese, softened (full-fat gives the creamiest texture, but reduced-fat works in a pinch)
- 1/2 cup sour cream (adds tanginess and helps bind the filling)
- 1 cup roasted Hatch green chiles, chopped (mild or hot, depending on your heat preference—I use medium)
- 1/2 cup shredded Monterey Jack cheese (melts beautifully and adds mild flavor)
- 1/2 cup shredded cheddar cheese (sharp cheddar adds a nice bite)
- 1/2 teaspoon garlic powder
- 1/2 teaspoon onion powder
- 1/4 teaspoon cumin (adds warmth and depth)
- Salt and black pepper to taste
- For the Creamy Hatch Green Chili Sauce:
- 2 tablespoons unsalted butter
- 2 tablespoons all-purpose flour
- 2 cups chicken broth (low-sodium preferred—you can control the salt better)
- 1 cup roasted Hatch green chiles, chopped (use the same heat level as the filling)
- 1/2 cup heavy cream (or half-and-half for a lighter version)
- 1/2 teaspoon garlic powder
- 1/4 teaspoon cumin
- Salt and black pepper to taste
- For Assembly:
- 8-10 flour tortillas (fajita size—about 8 inches. Corn tortillas work too, just warm them first so they don’t crack)
- 1 1/2 cups shredded Monterey Jack cheese (for topping)
- 1/2 cup shredded cheddar cheese (for topping)
- Fresh cilantro, chopped (for garnish)
- Green onions, sliced (for garnish)
Ingredient Tips: I recommend using Hatch chiles from 505 Southwestern or Bueno Foods if you’re buying jarred or frozen. They have the best flavor and consistent heat. If you’re using fresh Hatch chiles, roast them yourself—it’s worth the extra step. Just blister the skins under the broiler, steam them in a bowl, and peel off the skins. The smoky flavor is unbeatable. For the chicken, I often use the meat from a slow cooker creamy chicken taco soup I made earlier in the week—it’s already perfectly seasoned and shredded.
Equipment Needed
You don’t need any fancy equipment for these enchiladas, which is part of why I love this recipe. Here’s what you’ll need:
- 9×13 inch baking dish (glass or ceramic works best—even heat distribution)
- Large skillet or saucepan (for making the creamy Hatch green chili sauce)
- Medium mixing bowl (for the filling)
- Cutting board and sharp knife
- Measuring cups and spoons
- Whisk (for a smooth sauce—no lumps allowed)
- Spatula or wooden spoon
- Aluminum foil (for covering while baking)
Tool Tips: If you don’t have a 9×13 dish, you can use two smaller dishes—just adjust the baking time slightly. I’ve also made these in a cast iron skillet when I wanted a more rustic presentation. It works great, just watch the edges so they don’t burn. For the whisk, a flat whisk works best for sauces, but any whisk will do. And honestly, if you don’t have a whisk, a fork works in a pinch—just be prepared to whisk a little longer.
Preparation Method
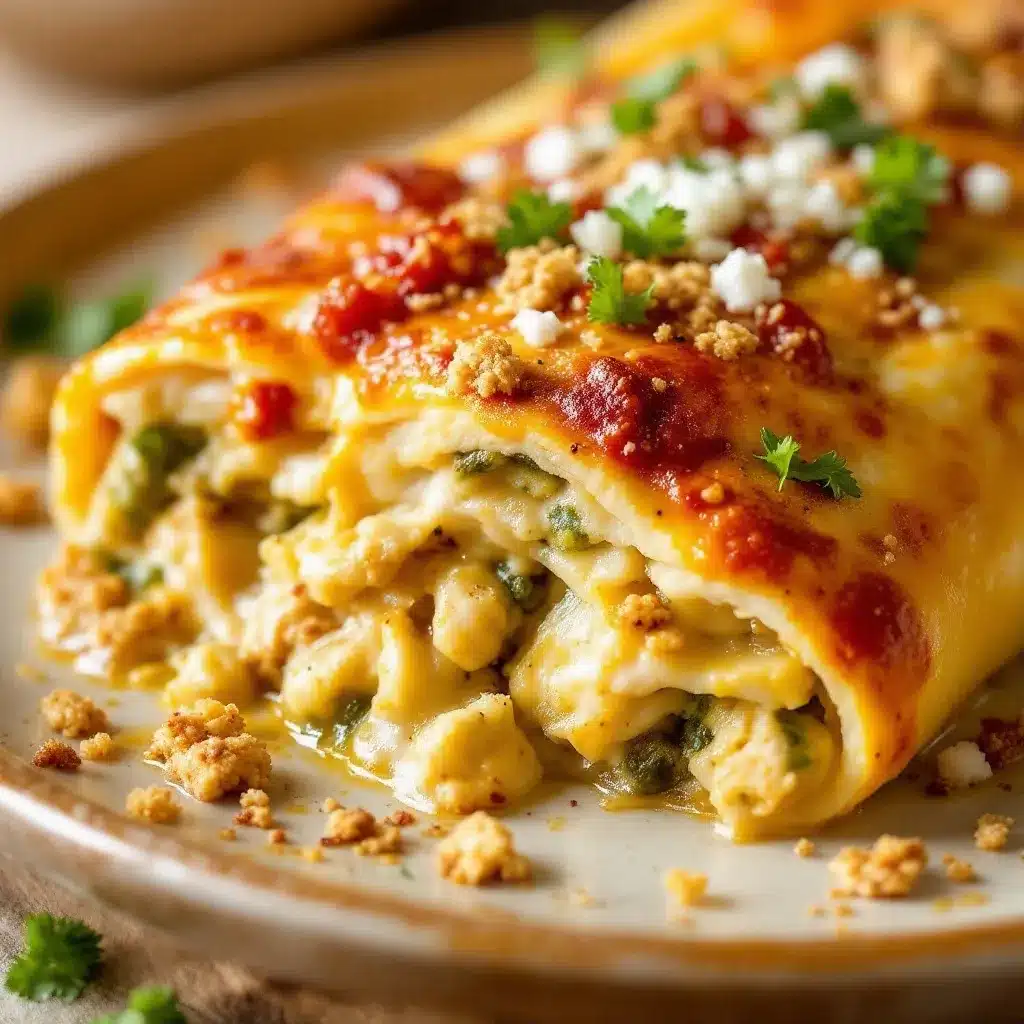
Let’s get cooking. I’ll walk you through every step so you get perfect enchiladas every time.
Step 1: Preheat and Prep
Preheat your oven to 375°F (190°C). Lightly grease your 9×13 baking dish with butter or non-stick spray. This prevents sticking and makes cleanup easier. Trust me on this one.
Step 2: Make the Creamy Hatch Green Chili Sauce
In a large skillet or saucepan over medium heat, melt the butter. Once it’s bubbling (but not browning), whisk in the flour. Cook for about 1 minute, stirring constantly—this is your roux, and it’s what thickens the sauce. You’ll know it’s ready when it smells nutty and looks like wet sand.
Slowly pour in the chicken broth while whisking continuously. Keep whisking until the mixture is smooth and starts to thicken, about 3-4 minutes. Add the chopped Hatch chiles, heavy cream, garlic powder, cumin, salt, and pepper. Stir everything together and let it simmer for 2-3 minutes. The sauce should be silky and slightly thickened—think heavy cream consistency. Remove from heat and set aside.
Step 3: Prepare the Filling
In a medium mixing bowl, combine the softened cream cheese and sour cream. Mix until smooth—an electric mixer works great here, but a sturdy spoon works too (just make sure the cream cheese is really soft). Add the shredded chicken, chopped Hatch chiles, Monterey Jack cheese, cheddar cheese, garlic powder, onion powder, cumin, salt, and pepper. Stir until everything is well combined. Take a taste—yes, it’s safe to eat at this point. Adjust seasoning if needed. The filling should be creamy, cheesy, and just a little spicy.
Step 4: Assemble the Enchiladas
Now for the fun part. Spread about 1/2 cup of the creamy Hatch green chili sauce on the bottom of your greased baking dish. This keeps the tortillas from sticking and adds flavor to the bottom layer.
Take a tortilla and place about 1/3 cup of the filling down the center. Roll it up tightly and place it seam-side down in the baking dish. Repeat with the remaining tortillas and filling. Don’t worry if they’re snug—they should be touching each other. That’s what gives you those perfect, gooey edges.
Step 5: Top and Bake
Pour the remaining creamy Hatch green chili sauce evenly over the rolled enchiladas. Use a spatula to spread it around so every inch gets covered. Sprinkle the shredded Monterey Jack and cheddar cheese on top. Don’t skimp here—the cheese is what gives you that golden, bubbly crust.
Cover the dish with aluminum foil and bake for 20 minutes. Then remove the foil and bake for another 10-15 minutes, until the cheese is melted and bubbly and the edges are just starting to brown. Let the enchiladas rest for 5 minutes before serving. This is important—it lets the sauce set so you don’t end up with a soupy mess on your plate.
Step 6: Garnish and Serve
Sprinkle fresh cilantro and sliced green onions over the top. Serve hot, with extra sour cream or a squeeze of lime if you like. I also love serving these with a side of creamy jalapeño popper chicken chili for a double dose of creamy, spicy comfort food.
Cooking Tips & Techniques
I’ve made these enchiladas enough times to know exactly where things can go wrong—and how to fix them. Here are my best tips:
- Don’t overfill the tortillas. I know it’s tempting to pack them full, but too much filling makes them hard to roll and they’ll burst open while baking. Stick to about 1/3 cup per tortilla.
- Warm your tortillas before rolling. If you’re using corn tortillas, this is non-negotiable. Cold corn tortillas crack and break. Wrap them in a damp paper towel and microwave for 30 seconds, or warm them in a dry skillet for a few seconds per side. Flour tortillas are more forgiving, but warming them still helps.
- Let the sauce simmer long enough. The roux needs to cook for at least a minute to lose that raw flour taste. And the sauce needs to simmer to thicken properly. Don’t rush this step.
- Use room temperature cream cheese. Cold cream cheese doesn’t mix well and leaves lumps in your filling. Let it sit on the counter for 20-30 minutes before you start.
- Cover with foil for the first bake. This traps steam and helps the tortillas soften and absorb the sauce. If you skip the foil, the edges will dry out before the center is hot.
- Let them rest before serving. I know you’re hungry, but those 5 minutes make a huge difference. The sauce thickens, the flavors meld, and everything stays together when you scoop it out.
One time I forgot to cover the enchiladas with foil. The edges turned into crunchy, burnt tortilla chips while the center was still cold. Lesson learned. Don’t be like me—use the foil.
Variations & Adaptations
This recipe is endlessly adaptable. Here are some of my favorite variations:
- Make it Spicier: Use hot Hatch chiles instead of mild, or add a diced jalapeño to the filling. You can also add a pinch of cayenne pepper to the sauce for extra heat.
- Make it Milder: Use mild Hatch chiles and reduce the amount by half. You can also substitute canned green chiles if you’re really sensitive to heat.
- Vegetarian Version: Swap the chicken for black beans, corn, and sautéed mushrooms. The creamy sauce is so flavorful that you won’t miss the meat. I’ve made this for my vegetarian friends and they raved about it.
- Gluten-Free: Use corn tortillas (make sure they’re certified gluten-free) and substitute the all-purpose flour with a gluten-free flour blend or cornstarch. For the cornstarch, use 1 tablespoon mixed with 2 tablespoons cold water, then add to the sauce at the end.
- Dairy-Free: Use dairy-free cream cheese, sour cream, and cheese alternatives. The texture will be slightly different, but it still works. I’ve tried this with cashew-based cream cheese and it was surprisingly good.
- Add Vegetables: Sautéed onions, bell peppers, or zucchini make great additions to the filling. Just make sure to cook them first so they don’t release too much water while baking.
My personal favorite variation? I add a layer of bacon-wrapped jalapeño poppers on the side—the smoky, spicy, creamy combo is absolutely next level.
Serving & Storage Suggestions
These enchiladas are best served hot, straight from the oven. The cheese should be bubbly and the sauce should be thick and creamy. Here’s how to serve and store them:
- Serving Temperature: Serve immediately after the 5-minute rest. The sauce will be perfectly set and the cheese will be stretchy and delicious.
- Presentation: Garnish with fresh cilantro, sliced green onions, and a dollop of sour cream. A squeeze of lime juice brightens everything up. Serve with Mexican rice, refried beans, or a simple side salad.
- Complementary Dishes: These enchiladas pair beautifully with a crisp green salad dressed with lime vinaigrette, or with loaded bacon cheeseburger soup for a cozy, indulgent meal.
- Storage: Store leftovers in an airtight container in the refrigerator for up to 4 days. The flavors actually get better as they meld together—I love eating these the next day for lunch.
- Freezing: These enchiladas freeze beautifully. Assemble the dish completely but don’t bake it. Cover tightly with foil and freeze for up to 3 months. To bake, thaw overnight in the refrigerator, then bake as directed. You may need to add 5-10 minutes to the baking time.
- Reheating: Reheat individual portions in the microwave for 1-2 minutes, or reheat the entire dish in a 350°F oven for 15-20 minutes. If the sauce seems dry, add a splash of chicken broth or water before reheating.
Nutritional Information & Benefits
Here’s an estimated nutritional breakdown per serving (based on 8 servings):
| Nutrient | Amount per Serving |
|---|---|
| Calories | 485 |
| Total Fat | 32g |
| Saturated Fat | 18g |
| Cholesterol | 125mg |
| Sodium | 780mg |
| Total Carbohydrates | 22g |
| Dietary Fiber | 2g |
| Sugars | 3g |
| Protein | 32g |
Health Benefits: Hatch green chiles are packed with vitamin C and capsaicin, which can boost metabolism and reduce inflammation. Chicken provides lean protein, and the calcium from the cheese supports bone health. This recipe is also naturally low in sugar and can be made gluten-free or dairy-free with simple substitutions. Just keep in mind that it’s rich and indulgent—perfect for an occasional treat that still feels nourishing.
Conclusion
These creamy Hatch green chili chicken enchiladas are everything I want in a comfort meal—rich, spicy, cheesy, and deeply satisfying. They come together quickly with simple ingredients, and the flavor is so much more than the sum of its parts. Whether you’re a longtime Hatch chile lover or trying them for the first time, this recipe is a winner.
I love how forgiving this recipe is. You can adjust the spice level, swap in different cheeses, or add extra vegetables—it always turns out delicious. That’s the kind of recipe I keep coming back to, and I hope it becomes a staple in your kitchen too.
Have you made these enchiladas? I’d love to hear how they turned out! Leave a comment below and let me know what variations you tried. And if you share a photo on Pinterest, tag me—I love seeing your creations. Happy cooking, friends!
Frequently Asked Questions
Can I use canned green chiles instead of Hatch chiles?
You can, but the flavor won’t be the same. Hatch chiles have a distinct smoky, fruity heat that canned green chiles just can’t replicate. If you can’t find Hatch chiles, look for fire-roasted green chiles in the can—they’re the closest substitute.
Can I make these enchiladas ahead of time?
Absolutely! Assemble the dish completely but don’t bake it. Cover and refrigerate for up to 24 hours. When you’re ready to bake, add 5-10 minutes to the baking time since you’re starting from cold.
How do I prevent my enchiladas from getting soggy?
The key is not to over-sauce them. Use just enough sauce to coat the bottom of the dish and cover the rolled enchiladas. Too much sauce will make them soggy. Also, letting them rest after baking helps the sauce set.
Can I use chicken thighs instead of chicken breast?
Yes! Chicken thighs are actually more flavorful and stay juicier than breast meat. Just cook them until they’re tender, then shred them. I often use leftover honey mustard grilled chicken thighs in this recipe—the slight sweetness pairs surprisingly well with the Hatch chiles.
What’s the best way to freeze these enchiladas?
Assemble the dish completely but don’t bake it. Wrap tightly with plastic wrap, then foil. Freeze for up to 3 months. To bake, thaw overnight in the refrigerator, remove the plastic wrap, cover with foil, and bake as directed. You may need to add 10-15 minutes to the baking time.
Pin This Recipe!
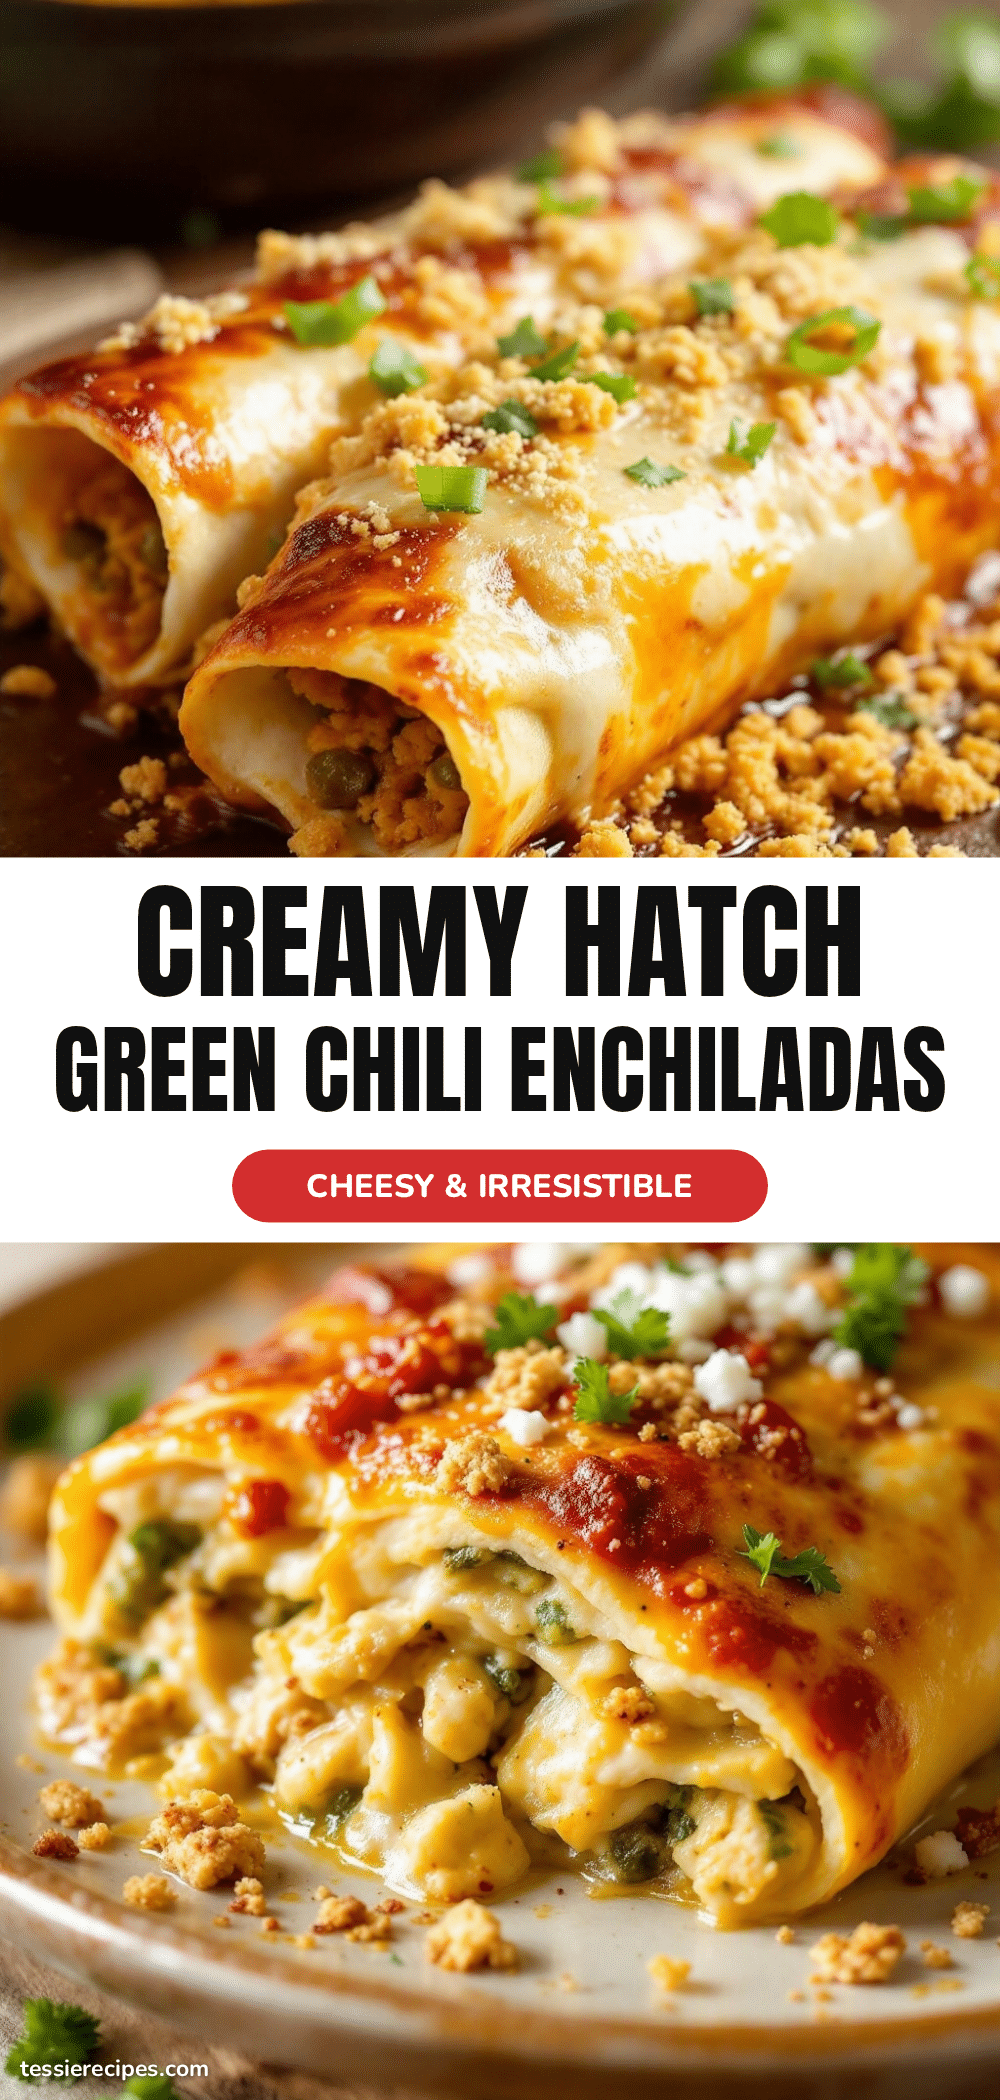
Creamy Hatch Green Chili Chicken Enchiladas (Easy Recipe)

These creamy Hatch green chili chicken enchiladas are rich, spicy, and completely satisfying. They come together quickly with simple ingredients, featuring a silky Hatch green chili sauce that’s deeply flavorful.
- Prep Time: 15 minutes
- Cook Time: 30 minutes
- Total Time: 45 minutes
- Yield: 8 servings 1x
- Category: Main Course
- Cuisine: Mexican
Ingredients
- 3 cups cooked chicken, shredded
- 8 oz cream cheese, softened
- 1/2 cup sour cream
- 1 cup roasted Hatch green chiles, chopped
- 1/2 cup shredded Monterey Jack cheese
- 1/2 cup shredded cheddar cheese
- 1/2 teaspoon garlic powder
- 1/2 teaspoon onion powder
- 1/4 teaspoon cumin
- Salt and black pepper to taste
- 2 tablespoons unsalted butter
- 2 tablespoons all-purpose flour
- 2 cups chicken broth, low-sodium
- 1 cup roasted Hatch green chiles, chopped
- 1/2 cup heavy cream
- 1/2 teaspoon garlic powder
- 1/4 teaspoon cumin
- Salt and black pepper to taste
- 8–10 flour tortillas (fajita size, about 8 inches)
- 1 1/2 cups shredded Monterey Jack cheese
- 1/2 cup shredded cheddar cheese
- Fresh cilantro, chopped (for garnish)
- Green onions, sliced (for garnish)
Instructions
- Preheat your oven to 375°F (190°C). Lightly grease a 9×13 baking dish with butter or non-stick spray.
- Make the creamy Hatch green chili sauce: In a large skillet or saucepan over medium heat, melt the butter. Whisk in the flour and cook for about 1 minute, stirring constantly, until the roux smells nutty and looks like wet sand.
- Slowly pour in the chicken broth while whisking continuously. Keep whisking until the mixture is smooth and starts to thicken, about 3-4 minutes.
- Add the chopped Hatch chiles, heavy cream, garlic powder, cumin, salt, and pepper. Stir and let simmer for 2-3 minutes until the sauce is silky and slightly thickened. Remove from heat and set aside.
- Prepare the filling: In a medium mixing bowl, combine the softened cream cheese and sour cream. Mix until smooth.
- Add the shredded chicken, chopped Hatch chiles, Monterey Jack cheese, cheddar cheese, garlic powder, onion powder, cumin, salt, and pepper. Stir until well combined. Adjust seasoning to taste.
- Assemble the enchiladas: Spread about 1/2 cup of the creamy Hatch green chili sauce on the bottom of the greased baking dish.
- Place about 1/3 cup of the filling down the center of a tortilla. Roll it up tightly and place seam-side down in the baking dish. Repeat with remaining tortillas and filling.
- Pour the remaining sauce evenly over the rolled enchiladas. Sprinkle the shredded Monterey Jack and cheddar cheese on top.
- Cover the dish with aluminum foil and bake for 20 minutes. Remove the foil and bake for another 10-15 minutes, until the cheese is melted and bubbly and the edges are just starting to brown.
- Let the enchiladas rest for 5 minutes before serving.
- Garnish with fresh cilantro and sliced green onions. Serve hot.
Notes
For best results, use room temperature cream cheese. Warm tortillas before rolling to prevent cracking. Let enchiladas rest after baking to allow the sauce to set. For a vegetarian version, swap chicken for black beans, corn, and sautéed mushrooms. For gluten-free, use corn tortillas and substitute flour with a gluten-free blend or cornstarch.
Nutrition
- Serving Size: 1 enchilada
- Calories: 485
- Sugar: 3
- Sodium: 780
- Fat: 32
- Saturated Fat: 18
- Carbohydrates: 22
- Fiber: 2
- Protein: 32
Keywords: Hatch green chili, chicken enchiladas, creamy enchiladas, New Mexican recipe, easy dinner