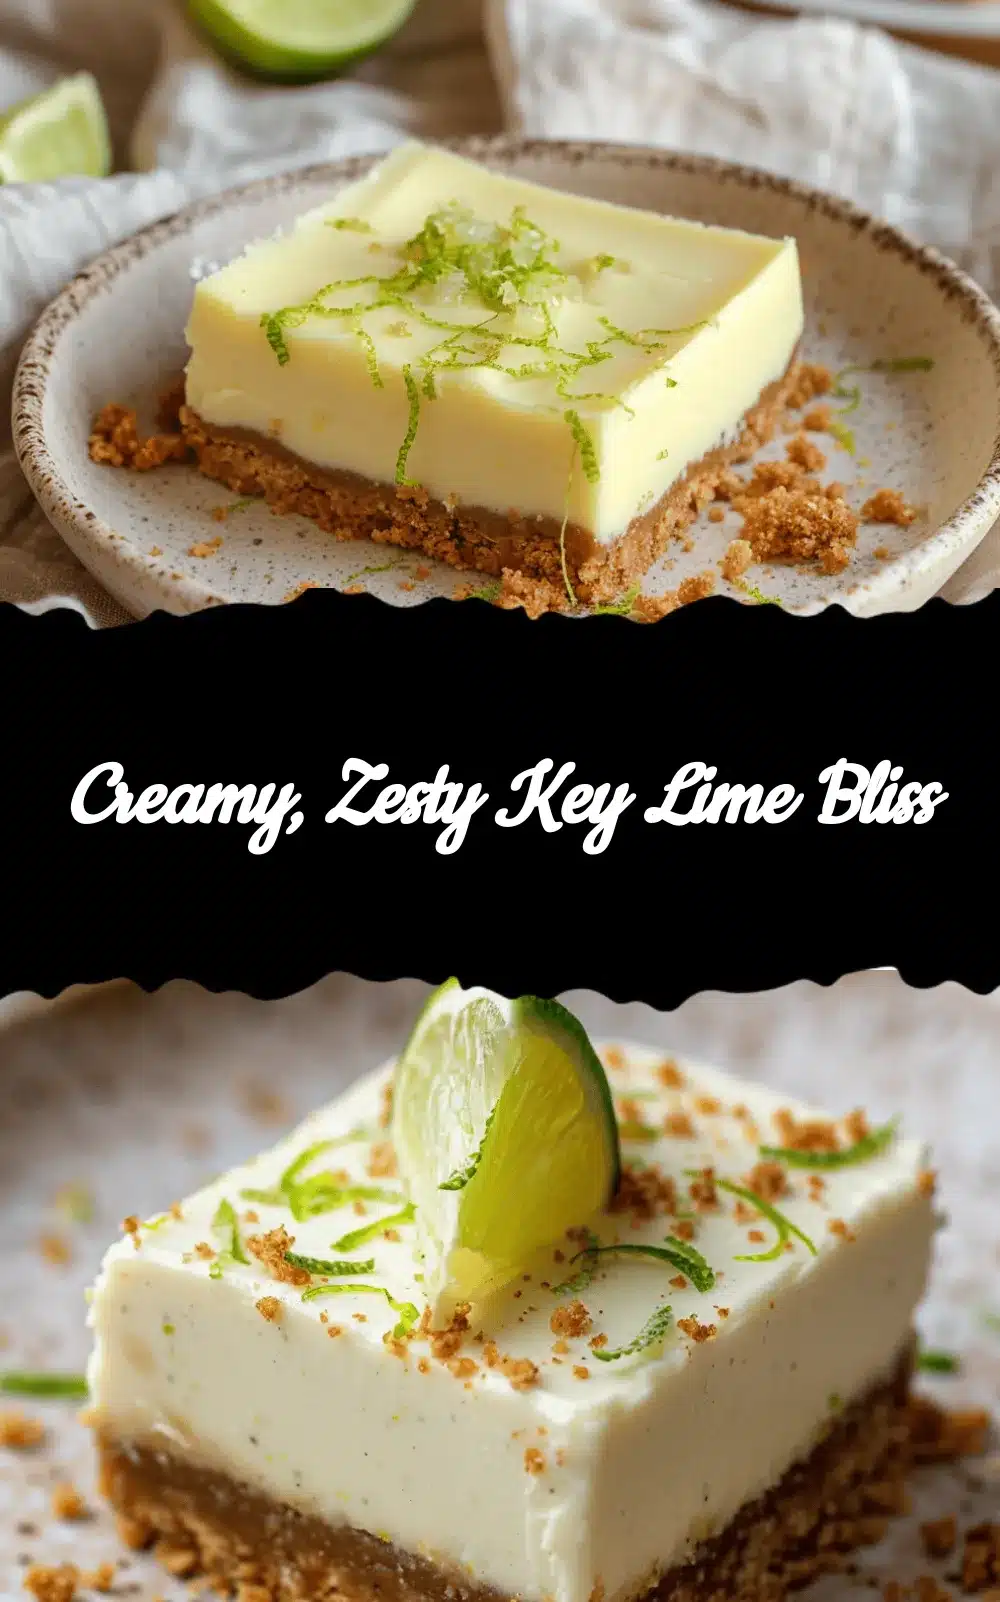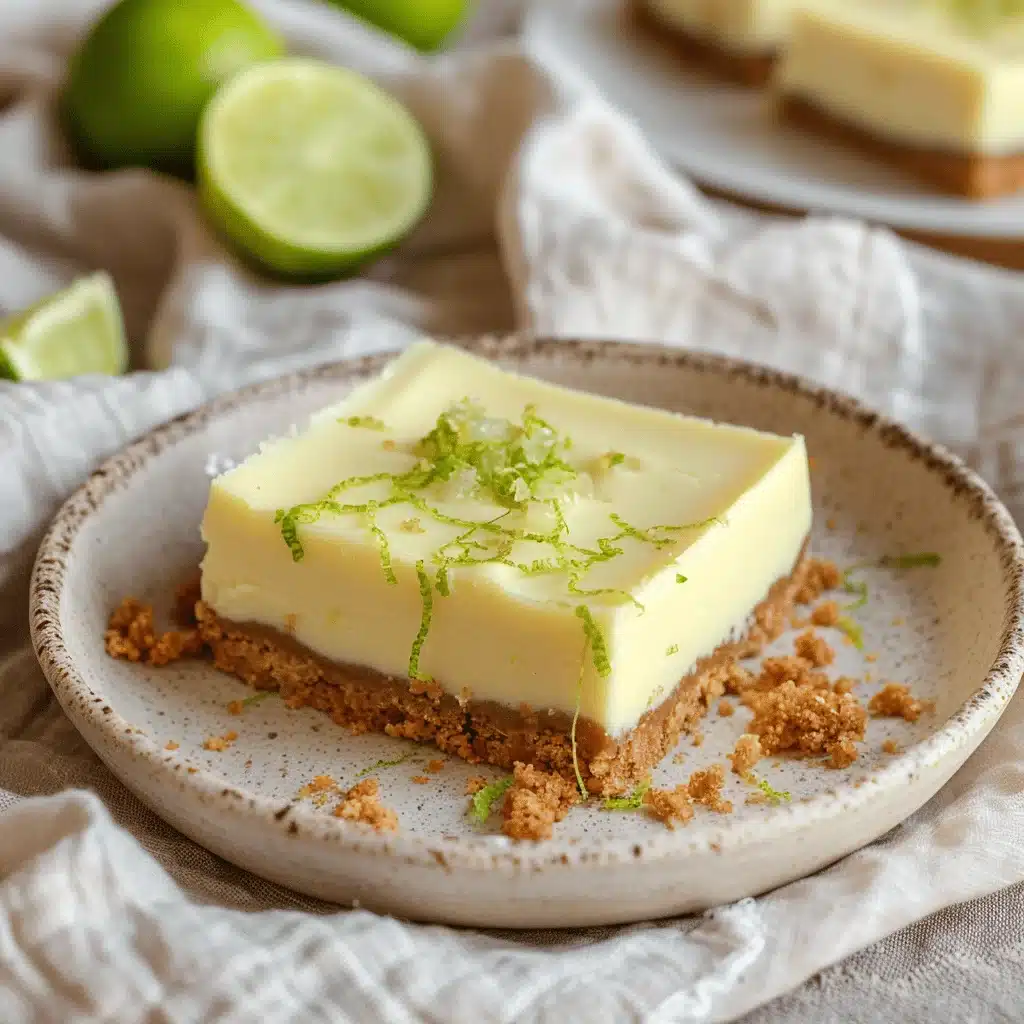
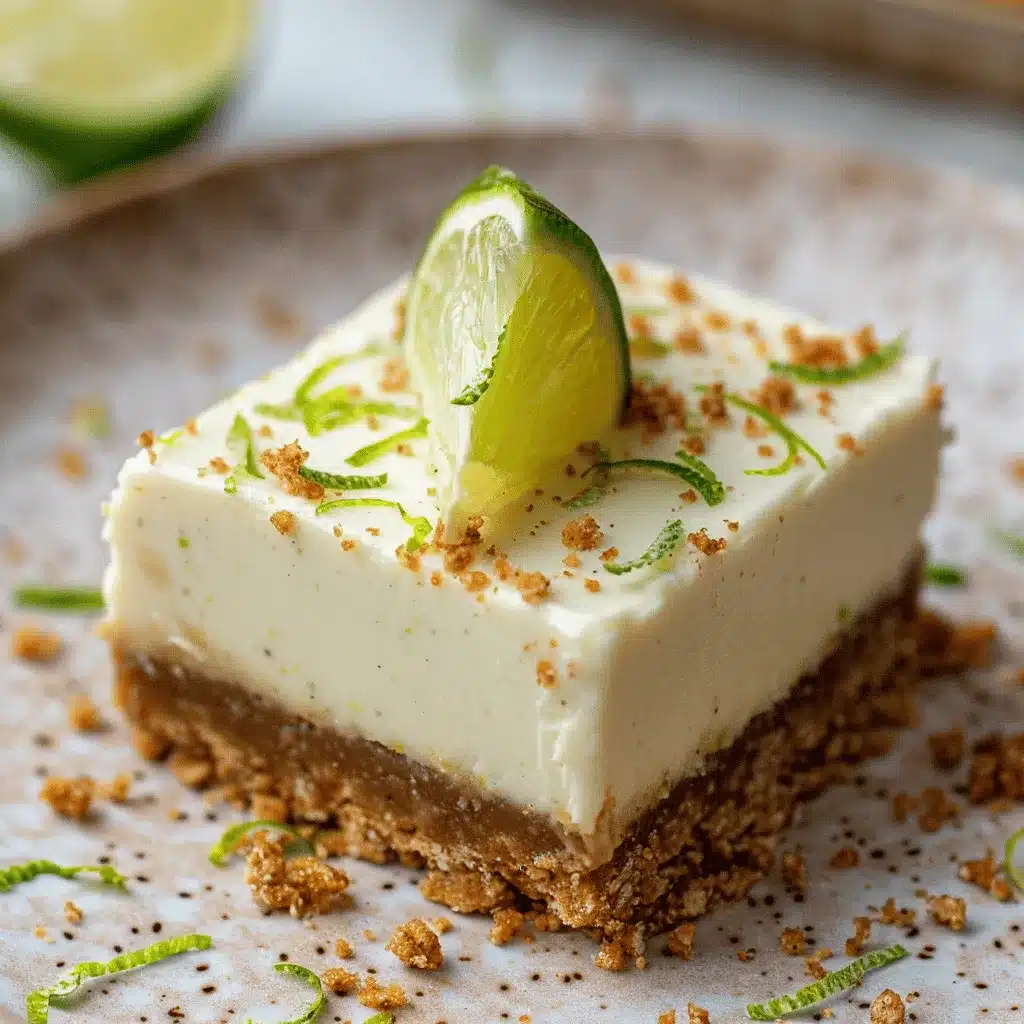
The zingy, citrusy aroma of key lime pie bars baking in the oven is summer in a nutshell. These bars are the ultimate warm-weather treat—bright, creamy, and just the right amount of tangy. I first made these during a backyard barbecue when I wanted something easy to serve but impressive enough to steal the dessert table spotlight. Spoiler alert: they were a hit! Every bite is a balance of buttery crust and smooth lime filling, making it impossible to stop at just one piece.
If you’re a fan of classic key lime pie but want something a little less fussy to prepare (and easier to grab at parties), this recipe will be your go-to. It’s perfect for family gatherings, summer picnics, or just because you want a slice of sunshine on your plate. Plus, they’re ridiculously easy to make—I promise, no fancy techniques here. Let me show you how to whip up these refreshing key lime pie bars!
Why You’ll Love This Recipe
- Quick and Easy: These bars come together in about 30 minutes of prep time, making them perfect for last-minute summer gatherings.
- Minimal Ingredients: You likely have most of the ingredients in your pantry already. No need for a complicated grocery list!
- Perfect for Any Occasion: Whether it’s a picnic, BBQ, or a sweet ending to a cozy dinner, these bars always hit the spot.
- Texture Heaven: The buttery graham cracker crust paired with the silky lime filling is an irresistible combo.
- Customizable: You can tweak the sweetness or add a twist (like coconut flakes!) to suit your taste.
What makes these key lime pie bars stand out is the perfect balance of tart and sweet. Unlike some overly sugary desserts, the fresh lime juice and zest bring a zingy brightness that keeps you coming back for more. Trust me, these bars are the epitome of summer vibes!
What Ingredients You Will Need
This recipe uses simple ingredients that pack a punch of flavor. Here’s what you’ll need:
- For the crust:
- 1 ½ cups (150g) graham cracker crumbs
- ⅓ cup (75g) granulated sugar
- ½ cup (115g) unsalted butter, melted
- For the filling:
- 4 large egg yolks
- 1 can (14 oz or 395g) sweetened condensed milk
- ½ cup (120ml) fresh key lime juice (about 12-15 key limes)
- 1 tablespoon key lime zest (optional but recommended for extra flavor)
- For the topping (optional):
- Whipped cream
- Extra lime zest for garnish
Pro Tip: If you can’t find key limes, regular limes work just fine. The flavor will still be amazing!
Equipment Needed
- Mixing bowls: One for the crust and one for the filling.
- 9×9-inch baking pan: For the perfect thickness of bars.
- Parchment paper: Makes removing the bars so much easier.
- Whisk: To blend the filling until silky smooth.
- Microplane or zester: Essential for getting that fragrant lime zest.
- Juicer: A handheld citrus juicer works great for squeezing key limes.
No fancy gadgets are required for this recipe, though a stand mixer can make whipping up the filling even faster. And if you’re using a glass baking dish, don’t forget to grease it lightly to avoid sticking!
Preparation Method
- Preheat your oven: Set it to 350°F (175°C) and line a 9×9-inch baking pan with parchment paper for easy removal.
- Make the crust: In a mixing bowl, combine the graham cracker crumbs, sugar, and melted butter. Stir until the mixture resembles wet sand. Press it firmly and evenly into the prepared pan. Bake for 10 minutes, then let it cool slightly.
- Prepare the filling: In a separate bowl, whisk the egg yolks until slightly thickened. Add the sweetened condensed milk, lime juice, and lime zest. Whisk until smooth and creamy.
- Assemble: Pour the lime filling over the cooled crust, spreading it evenly with a spatula.
- Bake: Return the pan to the oven and bake for 15-17 minutes. The filling should be set but still slightly wobbly in the center—it will firm up as it cools.
- Cool and chill: Let the bars cool to room temperature, then refrigerate for at least 2 hours (or overnight) to fully set.
- Slice and serve: Use the parchment paper to lift the bars out of the pan. Slice into squares, top with whipped cream and lime zest if desired, and enjoy!
Cooking Tips & Techniques
- Don’t skip chilling: The bars need time to set in the fridge so they slice cleanly and hold their shape.
- Press the crust firmly: Use the bottom of a glass or measuring cup to press the crust evenly into the pan for a sturdy base.
- Fresh lime juice is key: Bottled juice won’t give you the same vibrant flavor, so grab those fresh limes!
- Taste test the filling: If you like it a little sweeter, add a touch more condensed milk before baking.
- Room temperature ingredients: Let your egg yolks come to room temperature for a smoother filling.
Variations & Adaptations
- Gluten-Free: Use gluten-free graham crackers for the crust.
- Dairy-Free: Substitute coconut condensed milk and vegan butter for a tropical twist.
- Extra Creamy: Add a dollop of cream cheese to the filling for a richer texture.
- Tropical Flavor: Mix in shredded coconut to the crust or sprinkle it on top.
- Mini Bars: Use a muffin tin lined with cupcake liners for individual servings.
One time, I added a layer of melted white chocolate on the crust before pouring in the filling—absolute game changer! Experiment with flavors to make this recipe your own.
Serving & Storage Suggestions
Serve these key lime pie bars chilled, topped with a dollop of whipped cream and a sprinkle of lime zest. They pair beautifully with iced tea or sparkling lemonade on a hot day. For a fancier presentation, garnish each slice with a thin lime wheel.
To store, cover the bars tightly and keep them in the refrigerator for up to 5 days. They also freeze well! Wrap individual pieces in plastic wrap, then store them in an airtight container for up to 2 months. Let them thaw in the fridge before serving.
Nutritional Information & Benefits
Each bar (based on 12 servings) contains approximately:
- Calories: 250
- Fat: 12g
- Carbohydrates: 33g
- Protein: 4g
- Vitamin C: 10% DV
Key limes are rich in vitamin C, which supports your immune system and promotes healthy skin. Plus, the bars are portion-controlled, so you can enjoy a sweet treat without overindulging!
Conclusion
If you’re looking for a dessert that screams “summer,” these refreshing key lime pie bars are it. With their bright, tangy flavor and creamy texture, they’re guaranteed to become a favorite. I love how versatile this recipe is—you can tweak it for dietary needs or add your own flair.
Give these bars a try and let me know how they turn out! Leave a comment below with your thoughts or any fun variations you’ve tried. Don’t forget to share the recipe with your friends—it’s too good to keep to yourself. Here’s to a summer full of sweet and zesty moments!
FAQs
Can I use regular limes instead of key limes?
Yes, regular limes work perfectly if you can’t find key limes. The flavor is slightly less tart but still delicious!
Do I need to bake the crust before adding the filling?
Yes, pre-baking the crust helps it set and prevents it from becoming soggy once the filling is added.
Can I make these bars ahead of time?
Absolutely! They actually taste even better the next day after chilling overnight in the fridge.
How do I prevent the filling from cracking?
Don’t overbake the bars; the center should still have a slight jiggle when you take them out of the oven.
Can I freeze key lime pie bars?
Yes, wrap them tightly and freeze for up to 2 months. Thaw in the fridge before enjoying.
Pin This Recipe!