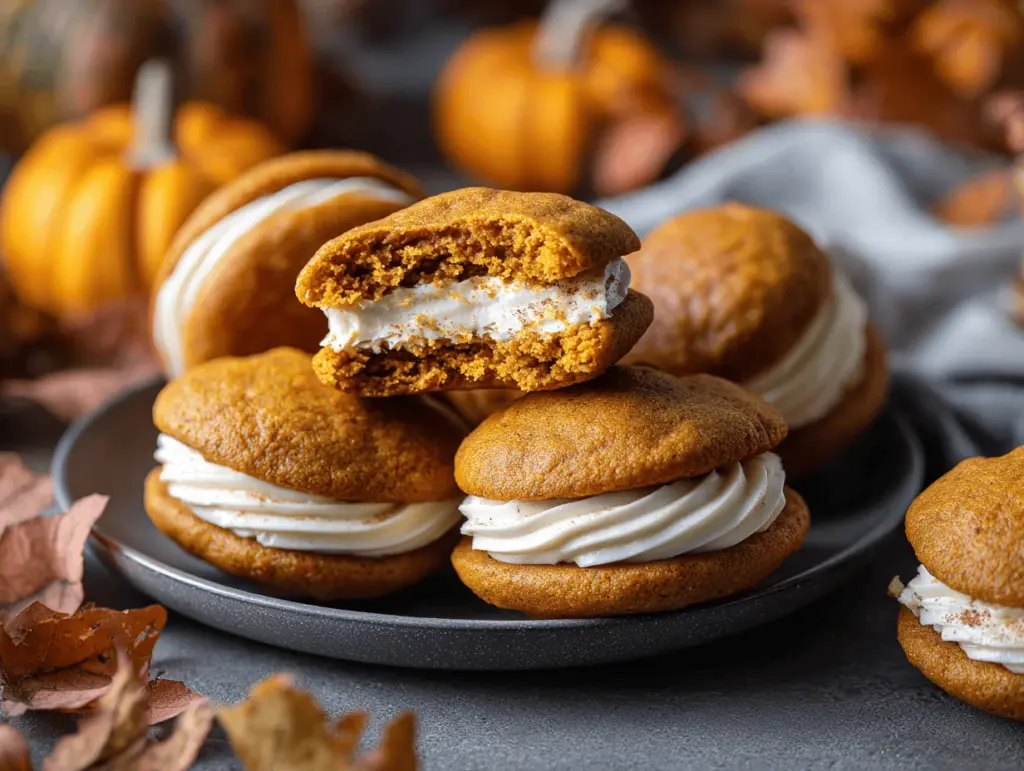
The first time I baked a batch of pumpkin cream cheese whoopie pies, the aroma wrapped my whole kitchen in a fragrant, spiced hug. Warm pumpkin, cinnamon, and nutmeg—honestly, it smelled like the coziest sweater weather day you can imagine. I remember biting into that pillowy-soft cake with its tangy cream cheese center and thinking, “This is autumn, sandwiched between two soft cookies.”
Maybe you’ve seen whoopie pies at a bakery or on Pinterest, but let me tell you, homemade is a whole different level. My love for these pumpkin cream cheese whoopie pies actually started years ago at a family fall festival. Someone brought a tray, and they disappeared faster than you can say “pumpkin spice.” Ever since, I’ve tweaked and perfected the recipe—sometimes adding extra spice, sometimes swapping the filling, but always circling back to this dreamy combo.
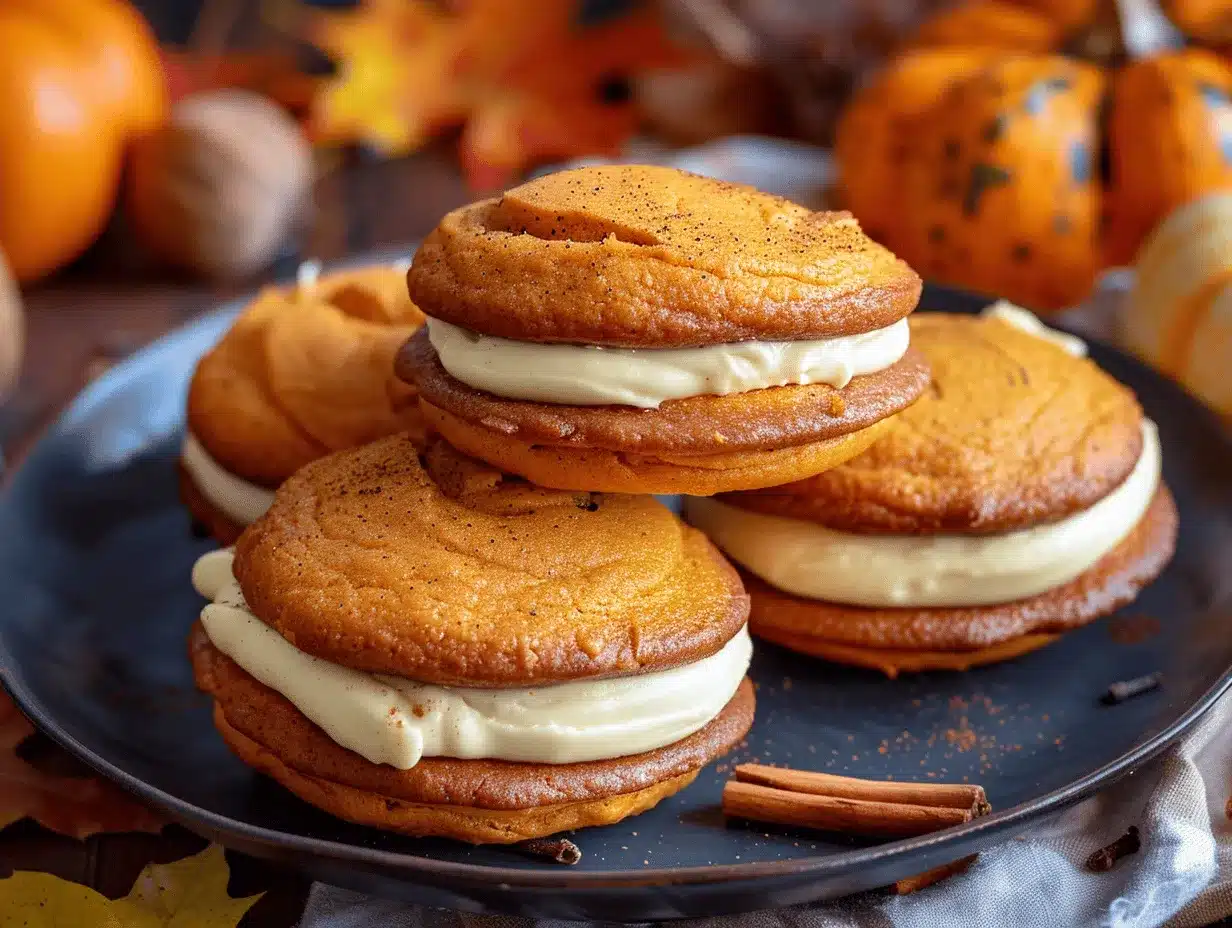
These pumpkin cream cheese whoopie pies are the dessert I crave when the leaves start to turn. They’re soft, cakey, and just sweet enough, with that irresistible swirl of tangy cream cheese filling. Whether you’re planning a cozy night in or need a show-stopping treat for a fall gathering, you’re in the right place. Oh, and if you love baking with pumpkin, these are a must-try. As someone who’s tested this recipe more times than I can count, I promise—these whoopie pies are pure autumn magic!
Even if you’re not a pro baker, don’t sweat it. This recipe is straightforward, with plenty of tips for perfect results. So grab your canned pumpkin and let’s make the best pumpkin cream cheese whoopie pies you’ve ever tasted.
Why You’ll Love This Pumpkin Cream Cheese Whoopie Pies Recipe
I’ve baked a lot of whoopie pies, but this pumpkin cream cheese whoopie pies recipe is the one that gets requests year after year. Here’s why it stands out:
- Quick & Easy: Ready in under an hour, including cooling time. There’s no need to chill the batter or wait around for complicated steps.
- Simple Ingredients: No fancy stuff here. You probably have most of what you need already—pumpkin puree, warm spices, and basic baking staples.
- Perfect for Fall Gatherings: These are always a hit at potlucks, bake sales, or holiday dessert tables. I’ve seen people reach for seconds (and thirds!) before the tray even cools.
- Crowd-Pleaser: The soft, moist pumpkin cakes and tangy, creamy filling are a flavor combo everyone loves. Even my picky nephew gives these a thumbs-up.
- Unbelievably Delicious: Each bite is fluffy, spiced, and rich—basically the best parts of pumpkin pie and carrot cake rolled into one.
What makes my version special? I blend the pumpkin with brown sugar for extra moisture and depth, and I use a blend of cinnamon, nutmeg, and ginger to create that classic pumpkin spice warmth. The cream cheese filling is thick, not runny, thanks to a little powdered sugar and a splash of vanilla—no more squishing out the sides when you take a bite!
Honestly, these pumpkin cream cheese whoopie pies have all the cozy vibes you want from fall baking. They’re the kind of treat that makes you close your eyes and just enjoy the moment. They’re also forgiving—even if you’re new to baking, you’ll get bakery-worthy results. Want to impress friends or family? Bring a plate of these whoopie pies to your next get-together and watch them disappear.
Whether you’re an avid baker or just someone who loves all things pumpkin, this recipe is the one you’ll come back to every autumn. It’s easy, festive, and guaranteed to bring a little extra joy to your fall.
What Ingredients You Will Need
This recipe uses simple, wholesome ingredients to deliver bold flavor and that signature soft, cake-like texture. Most are pantry staples, so you won’t need to hunt down anything fancy. Here’s what you’ll need for your pumpkin cream cheese whoopie pies:
- For the Pumpkin Whoopie Pie Cakes:
- All-purpose flour (2 2/3 cups / 335g) – For structure and softness.
- Baking powder (1 tsp / 5g) – Helps the cakes rise and stay fluffy.
- Baking soda (1 tsp / 5g) – Works with the acid in pumpkin for perfect lift.
- Salt (1/2 tsp / 3g) – Balances the sweetness and brings out the spices.
- Ground cinnamon (2 tsp / 5g) – Classic pumpkin spice warmth.
- Ground ginger (1 tsp / 2g) – Adds a gentle zing.
- Ground nutmeg (1/2 tsp / 1g) – For extra cozy, earthy flavor.
- Vegetable oil (1 cup / 240ml) – Keeps the cakes tender and moist. I usually use canola or sunflower oil.
- Brown sugar (1 1/4 cups / 250g, packed) – Adds depth and moisture. I like light brown sugar best.
- Granulated sugar (1 cup / 200g) – For sweetness and structure.
- Pumpkin puree (1 1/2 cups / 360g, not pumpkin pie filling) – The star! Libby’s is my go-to brand.
- Large eggs (2, room temperature) – For richness and binding.
- Pure vanilla extract (2 tsp / 10ml) – Rounds out all the flavors.
- For the Cream Cheese Filling:
- Cream cheese (8 oz / 225g, softened) – Use full-fat for the best texture. I swear by Philadelphia brand.
- Unsalted butter (1/4 cup / 60g, softened) – Adds silkiness and richness.
- Powdered sugar (2 cups / 240g, sifted) – Sweetens and thickens the filling.
- Pure vanilla extract (1 tsp / 5ml) – For extra flavor.
- Pinch of salt – Just a little to balance the sweetness.
Substitution tips: You can use gluten-free all-purpose flour for a celiac-friendly version (I’ve had good luck with King Arthur’s blend). Dairy-free cream cheese and butter work too—just watch the consistency. No brown sugar? Use all granulated, but the flavor will be a bit less rich. And if you want to sneak in extra spice, a pinch of cloves or allspice is lovely.
These are the basics for classic pumpkin cream cheese whoopie pies, but you can always play around (see the Variations section below for ideas!).
Equipment Needed
- Large mixing bowls: For both the cake batter and the filling. Glass or stainless steel work best for easy cleanup.
- Hand mixer or stand mixer: Essential for whipping up a smooth cream cheese filling. I’ve used both—a hand mixer does the job just fine if you don’t have a stand mixer.
- Baking sheets: You’ll need two, lined with parchment paper or silicone baking mats. If you only have one, just bake in batches.
- Cookie scoop or two spoons: A medium (about 2-tbsp) cookie scoop gives you uniform whoopie pies, but two spoons work in a pinch.
- Wire cooling rack: For cooling the cakes before filling. Don’t skip this or the filling will melt!
- Rubber spatula: To scrape every last bit of batter and filling from your bowls.
- Offset spatula or butter knife: Makes spreading the cream cheese filling a breeze.
If you don’t have a cookie scoop, just use two spoons to drop the batter onto your baking sheet. Parchment paper keeps things from sticking, but a silicone mat is even easier to clean (and reusable!). For budget-friendly options, I’ve found most tools at big-box stores or online—no need to splurge!
Pro tip: If you use your mixer a lot, keep the blades clean by rinsing right after use. And if you’re using a hand mixer, scrape down the bowl often for even mixing. Trust me, a little care with your tools makes baking way less stressful.
Preparation Method
-
Prep your space and ingredients (5 minutes):
Preheat your oven to 350°F (175°C). Line two large baking sheets with parchment paper or silicone baking mats. Set out your eggs, butter, and cream cheese to bring them to room temperature. (Room temp ingredients blend so much smoother—trust me, I learned that the hard way!) -
Mix the dry ingredients (3 minutes):
In a large bowl, whisk together 2 2/3 cups (335g) all-purpose flour, 1 tsp (5g) baking powder, 1 tsp (5g) baking soda, 1/2 tsp (3g) salt, 2 tsp (5g) cinnamon, 1 tsp (2g) ginger, and 1/2 tsp (1g) nutmeg. Set aside. The spices should be fragrant—if not, they might be past their prime. -
Make the wet mixture (5 minutes):
In another large bowl, whisk together 1 cup (240ml) vegetable oil, 1 1/4 cups (250g) packed brown sugar, 1 cup (200g) granulated sugar, 1 1/2 cups (360g) pumpkin puree, 2 large eggs, and 2 tsp (10ml) vanilla extract. Mix until smooth and well combined. -
Combine wet and dry (2 minutes):
Gradually add the dry ingredients to the wet mixture, stirring gently with a spatula or wooden spoon. Mix just until no streaks of flour remain—don’t overwork it or the cakes can turn out tough. -
Shape the whoopie pies (5 minutes):
Using a medium cookie scoop or two spoons, drop 2-tbsp mounds of batter onto the baking sheets, spacing them about 2 inches (5cm) apart. They’ll spread a bit as they bake. For perfectly round cakes, smooth the tops slightly with the back of a damp spoon. -
Bake (12-15 minutes):
Bake in the preheated oven for 12-15 minutes, until the cakes are set and spring back when touched lightly. If they’re browning too fast, check your oven temp. I usually rotate the pans halfway through for even baking. -
Cool completely (15-20 minutes):
Let the cakes rest on the pan for 5 minutes, then transfer to a wire rack to cool. Make sure they’re completely cool before filling, or you’ll have a messy situation! -
Make the cream cheese filling (5 minutes):
In a medium bowl, beat together 8 oz (225g) softened cream cheese, 1/4 cup (60g) softened unsalted butter, 2 cups (240g) sifted powdered sugar, 1 tsp (5ml) vanilla extract, and a pinch of salt. Beat until fluffy and smooth—about 2-3 minutes. If the filling is too soft, chill it for 10 minutes to firm up. -
Assemble the whoopie pies (5 minutes):
Pair up the cakes by size. Spread or pipe about 2 tablespoons of cream cheese filling onto the flat side of one cake, then top with another cake to make a sandwich. Gently press together—you don’t want the filling to squish out the sides. -
Chill and serve (optional but recommended):
For best texture, let the assembled whoopie pies chill in the fridge for 30 minutes before serving. This helps the flavors meld and makes them easier to handle (plus, that cold cream cheese center is divine!).
Troubleshooting: If your cakes spread too much, your batter may be too warm—try chilling it for 10 minutes before scooping. If the filling is runny, add more powdered sugar 1 tablespoon at a time. And if you accidentally overbake the cakes, don’t worry—just add a little extra filling for moisture!
Personal tip: Work assembly-line style. Pair up all your cakes first, then add filling and sandwich. It’s faster, and you’ll get more even pies.
Cooking Tips & Techniques
- Don’t Overmix the Batter: Stir until just combined. Overmixing makes the cakes dense—something I’ve learned the hard way after a few too many “pancake” whoopie pies.
- Use Room Temperature Ingredients: Especially for the cream cheese filling! Cold cream cheese gets lumpy. If you forget to set it out, a quick 10-second zap in the microwave (still in the wrapper) usually helps.
- Even Scoops for Even Baking: A cookie scoop really helps here. If you don’t have one, try to eyeball the batter so your cakes are roughly the same size. It makes pairing them up easier later.
- Chill the Filling if Needed: If your kitchen is warm (or you’re baking on a sunny fall day), pop the filling in the fridge for a few minutes to firm it up. Soft filling is tricky to work with!
- Rotate Pans Halfway Through Baking: Most ovens have hot spots. Rotating the pans ensures all your cakes bake evenly—no burnt bottoms or underdone middles.
One mistake I made early on was assembling the whoopie pies before the cakes were fully cool. Big mess! Let them cool completely or risk melted filling everywhere. If you’re short on time, pop them in the fridge for 10 minutes to speed things up.
For multitasking, prep the filling while the cakes are baking—you’ll save time and everything comes together more smoothly. And don’t worry if the cakes look a little rustic; the filling covers a multitude of imperfections!
Consistency is key. Try to keep your batter, cakes, and filling at a similar temp for the easiest assembly. And if you want that bakery-perfect finish, pipe the filling with a pastry bag (or just snip the corner off a zip-top bag—works like a charm!).
Variations & Adaptations
There are so many fun ways to make these pumpkin cream cheese whoopie pies your own—whether you’re working around allergies or just in the mood for something new. Here are some of my favorites:
- Gluten-Free: Swap the all-purpose flour for a gluten-free flour blend (like King Arthur or Cup4Cup). I’ve made this swap for my gluten-free friends and you honestly can’t tell the difference!
- Dairy-Free: Use dairy-free cream cheese (like Kite Hill or Tofutti) and plant-based butter. The cakes themselves also work with a neutral oil and plant-based milk if you want to go all-in.
- Maple Spice Filling: Add 2 tablespoons of pure maple syrup and a pinch of cinnamon to the cream cheese filling for a fall-flavored twist. It’s rich, sweet, and extra autumn-y.
- Chocolate Chip Pumpkin Whoopie Pies: Fold 1/2 cup mini chocolate chips into the batter before baking. Kids love this version!
- Nutty Crunch: Add 1/2 cup finely chopped toasted pecans or walnuts to the filling for a little texture and nutty flavor.
- Mini Whoopie Pies: Scoop smaller mounds of batter (about 1 tablespoon each) for bite-sized treats—perfect for parties or lunchboxes.
Personally, I love adding a drizzle of salted caramel over the finished pies for special occasions. For those with allergies, skip the nuts and always double-check your cream cheese and butter labels for potential cross-contamination. And if you want to switch up the flavor, try swapping some of the spices for pumpkin pie spice or adding a little orange zest to the filling for a fresh twist.
Serving & Storage Suggestions
These pumpkin cream cheese whoopie pies are best served chilled or at cool room temperature. I love arranging them on a rustic wooden platter for a festive look—so Pinterest-worthy! If you want to get fancy, dust the tops with a little extra powdered sugar or a pinch of cinnamon right before serving.
They pair beautifully with a hot cup of coffee, chai latte, or even a spiced apple cider. For a full autumn spread, serve alongside mulled wine, caramel apples, or roasted nuts.
For storage, keep the assembled whoopie pies in an airtight container in the fridge. They’ll stay fresh for up to 4 days, and the flavors only get better as they sit—the cakes get softer, and the filling melds with the pumpkin spice. If you want to freeze them, wrap individually in plastic wrap and store in a freezer bag for up to 2 months. Thaw overnight in the fridge before serving.
To reheat, just let them sit at room temperature for 15-20 minutes. I don’t recommend microwaving—they’ll get too soft. Honestly, these are at their best slightly chilled, with the cream cheese filling firm and luscious.
Nutritional Information & Benefits
Each pumpkin cream cheese whoopie pie (based on 18 pies) contains roughly:
- Calories: 320
- Fat: 14g
- Saturated Fat: 6g
- Carbohydrates: 46g
- Fiber: 1g
- Sugar: 30g
- Protein: 3g
Pumpkin is a superstar ingredient here. It’s packed with vitamin A, fiber, and antioxidants, plus it adds moisture without a ton of extra fat. The cream cheese filling—okay, it’s not exactly health food, but it does provide a bit of calcium and protein. If you’re watching sugar, you can cut back a bit on the powdered sugar in the filling, though it may affect the texture.
This recipe can be made gluten-free or dairy-free with a few swaps, and it’s nut-free as written. Always check labels if you have food allergies. Personally, I love that you get the flavor of pumpkin pie with a little more balance—perfect for those fall cravings without going overboard.
Conclusion
If you’re looking for the ultimate fall dessert, these pumpkin cream cheese whoopie pies are it. They’re soft, sweet, and filled with cozy spice—basically autumn in every bite. Whether you’re a seasoned baker or just want to try something new for the season, this recipe is easy to follow and so rewarding.
Feel free to tweak the spices, play with the filling, or make mini-sized pies. I always say—recipes are a starting point, not a rulebook! Honestly, these whoopie pies are my go-to when I want to share a little fall happiness (and I’ve never taken home leftovers from a party!).
Let me know in the comments if you try this pumpkin cream cheese whoopie pies recipe! Share your own twists and don’t forget to pin this for your next baking day. Happy fall baking—may your kitchen smell like pumpkin spice and joy!
FAQs
How do I keep my pumpkin cream cheese whoopie pies from being too soft?
Let the cakes cool completely before adding the filling. If they’re still too soft, chill them in the fridge for 20-30 minutes before assembling. The filling will also help firm up the pies once refrigerated.
Can I make these pumpkin cream cheese whoopie pies gluten-free?
Absolutely! Just substitute your favorite gluten-free all-purpose flour blend in place of regular flour. I’ve had great results with King Arthur’s blend.
Do I need to refrigerate whoopie pies with cream cheese filling?
Yes, because of the cream cheese filling, keep them in the fridge. They’ll stay fresh for up to 4 days and taste even better the next day.
Can I freeze pumpkin cream cheese whoopie pies?
Yes! Wrap each whoopie pie individually in plastic wrap and place in a freezer bag. Freeze for up to 2 months. Thaw in the fridge overnight before serving.
Can I make the batter or filling ahead of time?
You can! Both the cake batter and the cream cheese filling can be made a day ahead. Store the batter covered in the fridge, and let it come to room temp before baking. The filling should be stored in an airtight container and may need a quick re-whip before using.
Pin This Recipe!

Pumpkin Cream Cheese Whoopie Pies

These pumpkin cream cheese whoopie pies are soft, cakey, and filled with a tangy cream cheese center—perfect for fall gatherings or cozy nights in. With warm pumpkin spice flavors and a luscious filling, they’re the ultimate autumn treat.
- Prep Time: 20 minutes
- Cook Time: 15 minutes
- Total Time: 45 minutes
- Yield: 18 whoopie pies 1x
- Category: Dessert
- Cuisine: American
Ingredients
- 2 2/3 cups all-purpose flour
- 1 teaspoon baking powder
- 1 teaspoon baking soda
- 1/2 teaspoon salt
- 2 teaspoons ground cinnamon
- 1 teaspoon ground ginger
- 1/2 teaspoon ground nutmeg
- 1 cup vegetable oil (canola or sunflower oil recommended)
- 1 1/4 cups packed brown sugar (light brown sugar preferred)
- 1 cup granulated sugar
- 1 1/2 cups pumpkin puree (not pumpkin pie filling)
- 2 large eggs, room temperature
- 2 teaspoons pure vanilla extract
- 8 ounces cream cheese, softened (full-fat recommended)
- 1/4 cup unsalted butter, softened
- 2 cups powdered sugar, sifted
- 1 teaspoon pure vanilla extract (for filling)
- Pinch of salt (for filling)
Instructions
- Preheat oven to 350°F (175°C). Line two large baking sheets with parchment paper or silicone baking mats. Bring eggs, butter, and cream cheese to room temperature.
- In a large bowl, whisk together flour, baking powder, baking soda, salt, cinnamon, ginger, and nutmeg. Set aside.
- In another large bowl, whisk together vegetable oil, brown sugar, granulated sugar, pumpkin puree, eggs, and vanilla extract until smooth.
- Gradually add the dry ingredients to the wet mixture, stirring gently until just combined. Do not overmix.
- Using a medium cookie scoop or two spoons, drop 2-tablespoon mounds of batter onto prepared baking sheets, spacing about 2 inches apart. Smooth tops if desired.
- Bake for 12-15 minutes, until cakes are set and spring back when touched lightly. Rotate pans halfway through baking for even results.
- Let cakes cool on the pan for 5 minutes, then transfer to a wire rack to cool completely.
- For the filling: In a medium bowl, beat together cream cheese, butter, powdered sugar, vanilla extract, and a pinch of salt until fluffy and smooth (about 2-3 minutes). If too soft, chill for 10 minutes.
- Pair up cakes by size. Spread or pipe about 2 tablespoons of cream cheese filling onto the flat side of one cake, then top with another to make a sandwich. Gently press together.
- Optional: Chill assembled whoopie pies in the fridge for 30 minutes before serving for best texture.
Notes
For gluten-free or dairy-free adaptations, substitute with appropriate flour and dairy alternatives. Let cakes cool completely before filling to avoid melting. Chill the filling if it becomes too soft. Store assembled pies in the fridge for up to 4 days or freeze individually wrapped for up to 2 months. For best results, serve slightly chilled.
Nutrition
- Serving Size: 1 whoopie pie
- Calories: 320
- Sugar: 30
- Fat: 14
- Saturated Fat: 6
- Carbohydrates: 46
- Fiber: 1
- Protein: 3
Keywords: pumpkin whoopie pies, cream cheese filling, fall dessert, pumpkin spice, easy whoopie pies, autumn baking, pumpkin dessert, Thanksgiving dessert