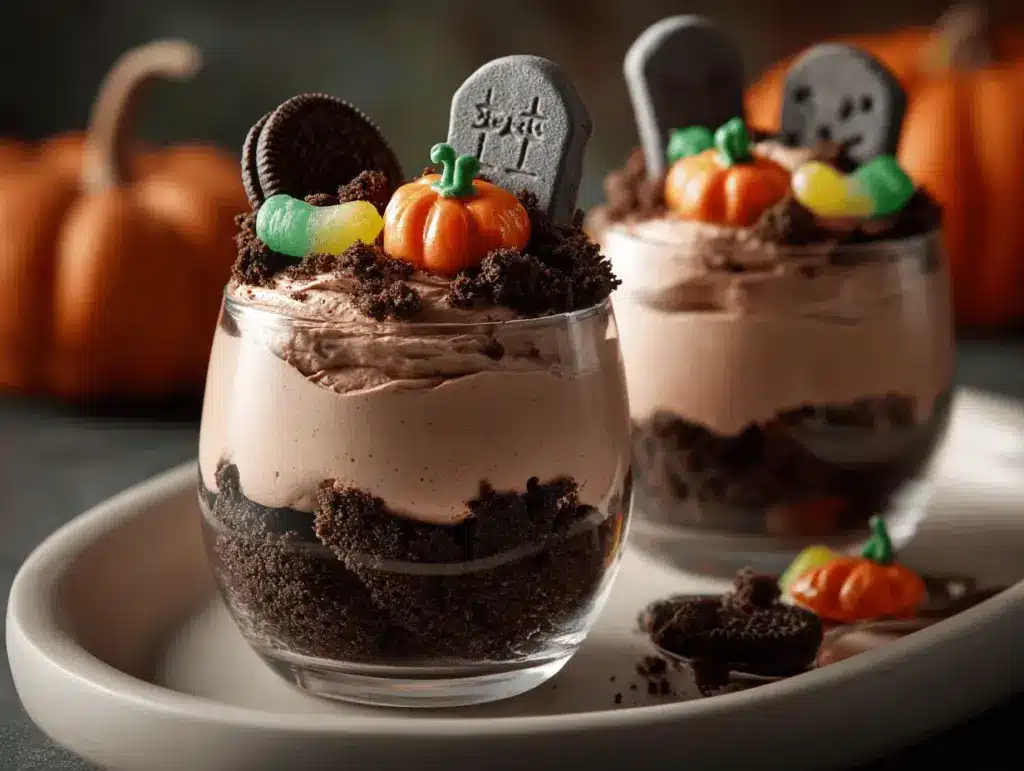
The first time I made a dirt cake graveyard parfait, my kitchen looked like a haunted house exploded—cookie crumbs everywhere, ghoulish candies scattered, and chocolate pudding on my elbow. But oh, the payoff was so worth it. There’s just something magical about smashing cookies, layering creamy pudding, and topping it all with a spooky graveyard scene. If you’re looking for a Halloween dessert that’ll wow your guests (and honestly, make you feel like a kid again), this dirt cake graveyard parfait is your ticket.
I stumbled onto this idea during a last-minute attempt to make something festive for my son’s classroom party. I wanted a treat that was fun, easy to assemble, and—let’s face it—wouldn’t have me sweating over the oven for hours. Dirt cake graveyard parfaits fit the bill perfectly. Plus, you can customize them to any level of spookiness you want! As someone who’s tested dozens of Halloween desserts, I can say this one is a guaranteed crowd-pleaser.
What makes this recipe a total win? It’s a no-bake, make-ahead dessert that brings together chocolate, creamy pudding, and playful toppings in every spoonful. Whether you’re hosting a monster bash, need a classroom snack, or just want to treat yourself, these parfaits are for you. Kids love helping decorate, adults get nostalgic, and the flavors are pure comfort. After making these dirt cake graveyard parfaits many times over the years—tweaking, taste-testing, and even letting the kids take over—I’m excited to share my best version with you!
Why You’ll Love This Dirt Cake Graveyard Parfait
Let’s cut to the chase: these dirt cake graveyard parfaits are ridiculously fun to make and even more fun to eat. Here’s why they’re worth a spot at your next Halloween shindig (or, honestly, any time you’re craving a playful treat).
- Quick & Easy: You can whip these up in about 20 minutes. No baking, no fuss—just a few simple steps and you’re ready for spooky magic!
- Simple Ingredients: Nothing fancy, nothing you can’t pronounce. Oreos, instant pudding, milk, whipped topping, and a few candies. You probably have most of it already.
- Perfect for Parties: These parfaits look amazing on a Halloween dessert table. The “graveyard” theme is a conversation starter, and everyone wants to pick their own tombstone or gummy worm.
- Crowd-Pleaser: I can’t tell you how many times I’ve watched kids’ eyes light up when they see these. Even adults sneak back for seconds (and thirds).
- Seriously Delicious: Crunchy cookie “dirt,” silky pudding, and fluffy whipped cream—each bite is rich, chocolatey, and just the right amount of sweet. It’s comfort food with a creepy-cool twist.
What makes my dirt cake graveyard parfait different? I blend the cookies super fine, so every layer is velvety and not gritty. The pudding is extra creamy thanks to a whipped topping trick I picked up after a few trial runs. And the decorations? You’re only limited by your imagination—use skeleton candies, candy corn, or even marshmallow ghosts. This dessert is about playfulness and flavor, not perfection.
If you’re like me, you want a Halloween treat that feels special but doesn’t turn your kitchen into a war zone. This parfait is your answer. It’s a memory-maker—one of those recipes that gets requested again and again, year after year. Whether you’re in it for the nostalgia, the ease, or the chocolate overload, you’ll love every layer, I promise!
What Ingredients You Will Need
This dirt cake graveyard parfait uses everyday ingredients, but the magic is in how they come together. Here’s what you’ll need for the ultimate spooky treat:
-
For the “Dirt” Layer:
- Chocolate sandwich cookies (Oreos work best, about 24 cookies/250g) – finely crushed
-
For the Pudding Layer:
- Instant chocolate pudding mix (1 box, 3.9 oz/110g) – you can use regular or sugar-free
- Cold whole milk (2 cups/480ml) – for mixing the pudding
- Whipped topping (Cool Whip or similar, 1 ½ cups/360ml) – thawed
- Cream cheese (4 oz/115g, softened) – gives a tangy, creamy texture (optional but so good!)
- Powdered sugar (2 tablespoons/16g) – sweetens the cream cheese if using
-
For Decorating the Graveyard:
- Milano cookies, graham crackers, or oval vanilla cookies – for “tombstones” (about 6-8, depending on parfait size)
- Black food gel or edible marker – to write “RIP” or spooky faces
- Gummy worms – the classic “creepy crawlers”
- Candy pumpkins, bones, skulls, or other Halloween candies – for fun
- Green sprinkles, shredded coconut tinted with green food coloring – for “grass” effect (optional but cute!)
Ingredient Tips:
For the best dirt cake graveyard parfait, use classic Oreos or a similar generic brand—they crumble well and have the right chocolate flavor. I’ve tried “double stuff” but found they’re a bit too creamy for this recipe. If you need a gluten-free option, swap in gluten-free sandwich cookies. For dairy-free, use almond milk and a coconut whipped topping (the pudding might be a bit softer, but it still works).
If you’re a stickler for homemade, you can make your own pudding, but honestly, instant pudding saves so much time and still tastes amazing in these parfaits. The decorations are where you can really get creative—just raid the Halloween aisle or use whatever candies you have on hand. If you’re making these with kids, let them pick their favorite toppings!
Equipment Needed
You don’t need any fancy gadgets for dirt cake graveyard parfaits—just a few basics:
- Mixing bowls (medium and large) – for pudding and cream cheese mixture
- Electric mixer or sturdy whisk – helps whip the cream cheese and blend pudding smoothly
- Plastic zip-top bag or food processor – for crushing cookies (I usually just smash them in a bag with a rolling pin!)
- Spoons or spatulas – for layering and spreading
- Clear parfait glasses, jars, or small cups – mason jars or even clear plastic cups work great for serving
- Small offset spatula or butter knife – useful for smoothing layers, but optional
- Toothpicks or edible marker – to write on cookie tombstones
If you’re making a big batch, you can use a trifle bowl instead of individual cups—just layer everything in one big showstopper. I’ve even used old jam jars for a rustic look. Cleanup is a breeze, especially since there’s no baking involved. My best tip? Use disposable cups if you’re taking these to a party or classroom. For the cookie crumbs, a food processor gets them super fine, but honestly, smashing them by hand is more fun (and stress-relieving!).
Budget tip: If you don’t have parfait glasses, clear plastic cups from the dollar store work perfectly. And don’t worry about everything being perfectly even—these are meant to look playfully messy!
Preparation Method
-
Crush the Cookies:
Place 24 chocolate sandwich cookies in a zip-top bag. Use a rolling pin or heavy glass to crush them into fine crumbs. You can also use a food processor for extra-fine dirt. Set aside. (Tip: Don’t leave big chunks—fine crumbs look most like “dirt” and layer better.) -
Prepare the Pudding:
In a medium bowl, whisk together 1 box (3.9 oz/110g) instant chocolate pudding mix and 2 cups (480ml) cold milk. Whisk for 2 minutes until thickened. Let it sit for 5 minutes to fully set. (If it looks runny, let it chill in the fridge for 10 more minutes.) -
Make the Cream Cheese Layer (Optional, but yummy):
In a separate bowl, beat 4 oz (115g) softened cream cheese with 2 tablespoons (16g) powdered sugar until smooth. Fold in 1 ½ cups (360ml) whipped topping until creamy and no lumps remain. (If skipping cream cheese, just use the whipped topping as is.) -
Combine Pudding and Cream:
Fold the whipped cream mixture into the chocolate pudding until fully combined. The result should be light, fluffy, and chocolatey. (If it’s too thick, add a splash of milk.) -
Layer the Parfaits:
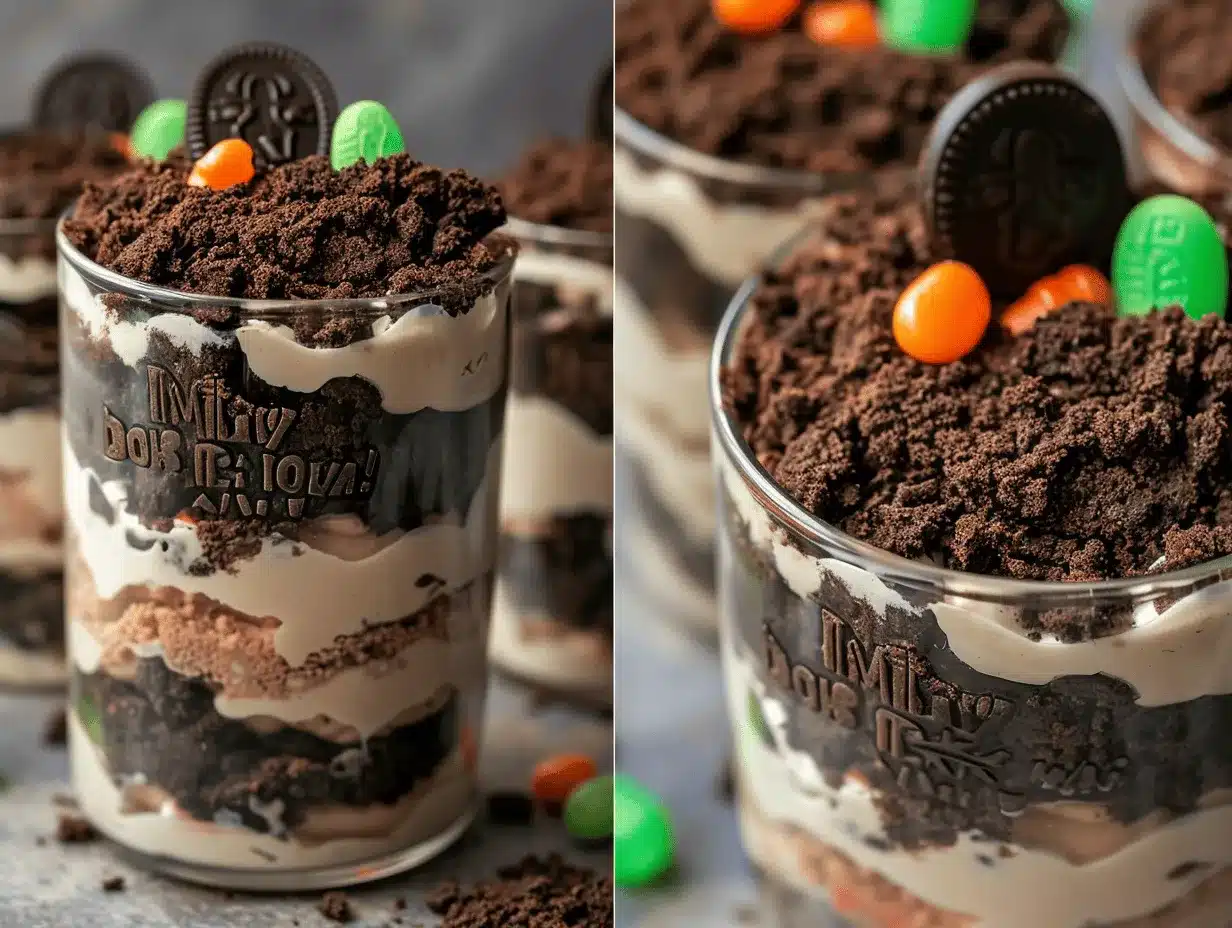
Spoon 1-2 tablespoons of cookie “dirt” into the bottom of each glass. Top with a generous layer of pudding mixture. Repeat the layers—cookie crumbs, pudding, cookie crumbs—ending with a thick layer of “dirt” on top. (For standard 8oz/240ml cups, you’ll get 6-8 parfaits.) -
Decorate the Graveyard:
Use an edible marker or food gel to write “RIP” on each Milano or graham cracker cookie. Gently press a tombstone into each parfait. Add gummy worms crawling out, candy pumpkins, bones, or skulls. Sprinkle on green coconut or sprinkles for “grass.” Let the kids run wild! -
Chill Before Serving:
Refrigerate at least 1 hour (or up to 24 hours) before serving. This lets the flavors meld and the layers set. (If you need to stack them in the fridge, cover with plastic wrap so the toppings don’t dry out.)
Prep and Troubleshooting Tips:
If your pudding seems too thin, don’t panic—chilling helps it firm up. If you forget to soften the cream cheese, microwave it in short bursts (10 seconds at a time) until just soft. When writing on cookie tombstones, do it gently so they don’t break. If your parfaits look a little messy, that’s part of the charm—remember, it’s a spooky graveyard!
My kids love helping with the layering and decorations. It’s a little chaotic, but so much fun. And if you’re making these for a crowd, set up a “decorate your own graveyard” station—always a hit!
Cooking Tips & Techniques
Getting that perfect dirt cake graveyard parfait look and taste is easier than you think, but a few pro tips make all the difference.
- Crush Cookies Finely: Don’t leave big chunks in your cookie “dirt.” Super-fine crumbs help the layers blend together and look more realistic. If you’re like me and sometimes get lazy, just toss them in a food processor for a few pulses.
- Layering is Key: Alternate layers evenly—cookie crumbs, pudding, more crumbs. It makes every spoonful perfect. If you want picture-perfect sides for Pinterest, use a piping bag to add the pudding (I usually just use a spoon, but for parties, I go all out).
- Don’t Over-mix: When combining pudding and whipped topping, gently fold, not stir. Over-mixing can make the mixture runny.
- Decorate Just Before Serving: Some candies (like gummy worms) can get a little slimy if left too long on top, so add final decorations right before serving if possible.
- Chill, Chill, Chill: Letting the parfaits set in the fridge gives the flavors time to meld and the pudding to firm up. If you’re in a rush, you can pop them in the freezer for 20 minutes, but don’t forget about them!
- Personal Lesson Learned: One Halloween, I used regular markers on the tombstone cookies—bad idea! Use only edible markers or food gel, or you’ll have unhappy (and possibly inky) guests.
- Multitasking: While the pudding sets, crush your cookies and prep decorations. That way, you’re not just waiting around.
Honestly, the best tip is to embrace the mess. These parfaits are supposed to look playful and a little wild—a crooked tombstone or a worm peeking out just adds to the fun!
Variations & Adaptations
The beauty of a dirt cake graveyard parfait is how customizable it is. Here are some of my favorite spins:
- Gluten-Free: Use gluten-free chocolate sandwich cookies (like Glutino or Kinnikinnick). The rest of the recipe is naturally gluten-free if you check your pudding and candy labels.
- Dairy-Free or Vegan: Swap regular pudding mix for a dairy-free version (some brands use almond or coconut milk), and use coconut or almond whipped topping. Plenty of vegan candies work for decoration—just skip the cream cheese or use a dairy-free alternative.
- Flavor Twists: Try vanilla pudding with golden Oreos for a “ghostly” look, or use chocolate mint cookies for a fresh twist. I’ve even made a peanut butter version by mixing 2 tablespoons of peanut butter into the cream cheese layer.
- Seasonal Switches: In the spring, swap the graveyard theme for flower candies and pastel sprinkles—call it a “garden parfait.” At Christmas, decorate with crushed candy canes and holiday sprinkles.
- Cooking Method: Want a big showstopper? Layer everything in a clear trifle bowl for a dramatic centerpiece. Or, for picnics, assemble parfaits in individual mason jars with lids for easy transport.
- Personal Favorite: Once, I added a layer of chopped peanut butter cups between the pudding and cookie “dirt.” It was insanely good (and totally over the top).
If you have nut allergies or other dietary needs, be sure to check your candy decorations. There’s really no wrong way to make these parfaits your own—let your imagination (and pantry) be your guide!
Serving & Storage Suggestions
Dirt cake graveyard parfaits are best served chilled, straight from the fridge. The cold pudding and whipped cream give the perfect contrast to the crunchy cookie topping.
- Serving: Serve in clear glasses, jars, or even plastic cups so everyone can admire the spooky layers. I love to top each parfait with a tombstone cookie standing up and a few worms “crawling” out. For a Halloween party, arrange them on a black tray with fake cobwebs for maximum effect.
- Pairings: Serve alongside a mug of hot cocoa, apple cider, or even a pumpkin spice latte. For a full dessert spread, pair with caramel apples or popcorn balls.
- Storage: Cover parfaits with plastic wrap and store in the fridge for up to 3 days. The cookie “dirt” will soften over time, but the flavors meld beautifully. If you want to keep the crumbs crunchy, add the top layer of cookie and candies just before serving.
- Freezing: You can freeze assembled parfaits (without decorations) for up to 2 weeks. Thaw overnight in the fridge, then decorate before serving.
- Reheating: No need! These are meant to be enjoyed cold—but if you somehow end up with leftovers, just eat them straight from the fridge. The flavors get even richer by day two.
Honestly, these parfaits disappear fast, but if you do have leftovers, they make a great midnight snack. The layers get even more delicious as they sit!
Nutritional Information & Benefits
Each dirt cake graveyard parfait (based on 8 servings) contains roughly:
- Calories: 310
- Fat: 13g
- Carbohydrates: 44g
- Protein: 3g
- Sugar: 28g
While this dessert is definitely a treat, you get a little calcium and some protein from the milk and cream cheese. If you opt for low-sugar pudding or a lighter whipped topping, you can cut down on calories and sugar. Gluten-free and dairy-free adaptations are easy to make, so everyone can enjoy these parfaits.
Allergen notes: Contains wheat, milk, and possibly soy (check your pudding and cookies). For peanut-free versions, check all candy labels. I see dessert as a joyful, occasional splurge—and these parfaits are just the thing for sharing a sweet moment with family and friends.
Conclusion
If you’re searching for a Halloween dessert that’s easy, crowd-pleasing, and just plain fun, this dirt cake graveyard parfait is it. There’s something so satisfying about layering cookies and pudding, then letting your creativity run wild with decorations. Every batch is a little different, and that’s what makes it special.
I hope you’ll make this recipe your own—try new toppings, change up the flavors, or let the kids take charge of the decorating. Whether you’re hosting a party or just want a playful treat for movie night, you’ll love how simple and satisfying these parfaits are. Honestly, they’re one of my favorite Halloween traditions!
If you make these dirt cake graveyard parfaits, let me know how they turn out! Share your spooky creations in the comments, send me your best flavor twists, or tag me on social media. Happy haunting and happy eating!
Frequently Asked Questions
How far in advance can I make dirt cake graveyard parfaits?
You can assemble these parfaits up to 24 hours ahead. Just add the final decorations (like gummy worms and tombstone cookies) right before serving to keep them looking fresh and festive.
Can I use homemade pudding instead of instant?
Absolutely! Homemade pudding works great and adds a rich, custardy touch. Just make sure it’s fully cooled and thick before layering.
What’s the best way to crush cookies for the “dirt”?
A food processor gives you super-fine crumbs, but a zip-top bag and rolling pin work just as well (plus, it’s oddly satisfying to smash them by hand).
Are there nut-free or allergy-friendly options?
Yes! Use nut-free cookies and check all candy labels. There are plenty of gluten-free and dairy-free options available, so you can adapt to almost any allergy.
Can I make these parfaits in a large dish instead of individual cups?
Definitely. Layer everything in a trifle bowl or 9×13-inch (23x33cm) dish for a big crowd—just scoop and serve!
Pin This Recipe!
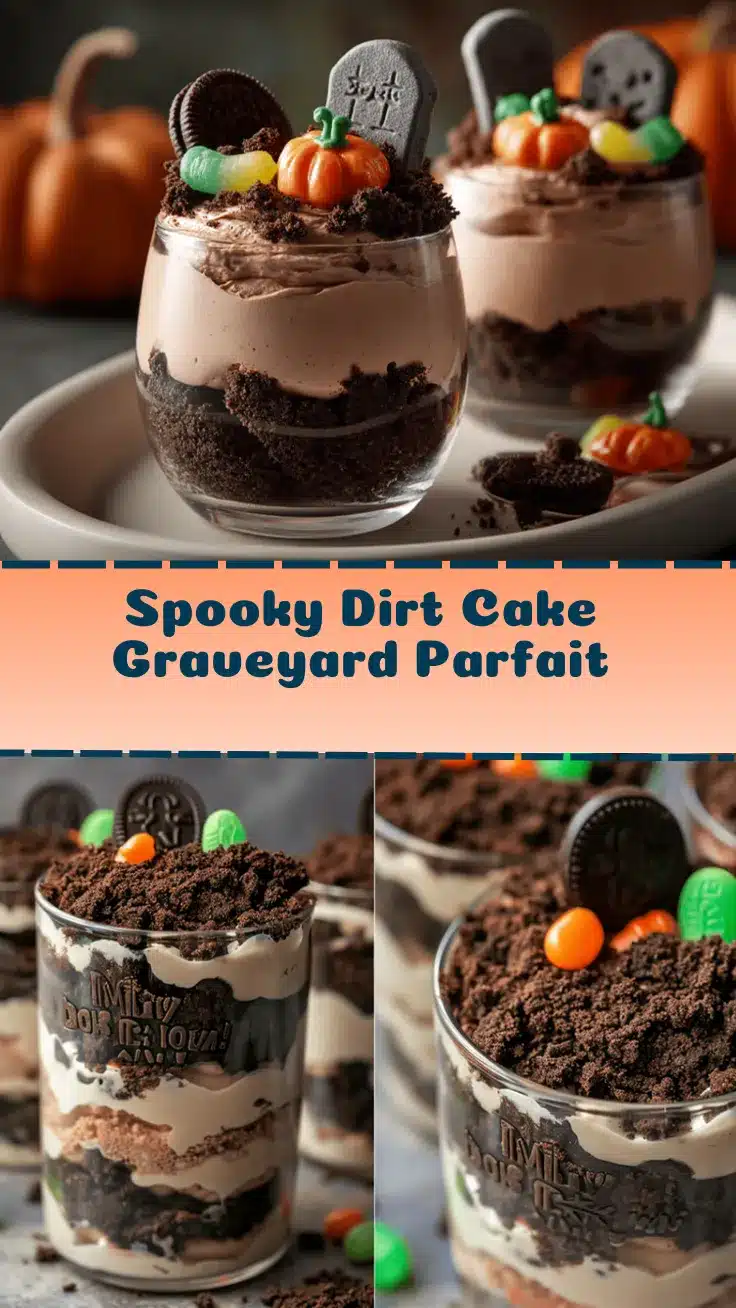
Dirt Cake Graveyard Parfait: Easy Halloween Layered Treat

This no-bake dirt cake graveyard parfait is a fun and spooky Halloween dessert featuring layers of crushed chocolate cookies, creamy chocolate pudding, and playful candy decorations. Perfect for parties, classroom treats, or a festive family dessert, it’s easy to assemble and endlessly customizable.
- Prep Time: 15 minutes
- Cook Time: 0 minutes
- Total Time: 1 hour 15 minutes (includes chilling)
- Yield: 6-8 servings 1x
- Category: Dessert
- Cuisine: American
Ingredients
- 24 chocolate sandwich cookies (Oreos work best, about 250g), finely crushed
- 1 box (3.9 oz) instant chocolate pudding mix (regular or sugar-free)
- 2 cups cold whole milk
- 1 1/2 cups whipped topping (Cool Whip or similar), thawed
- 4 oz cream cheese, softened (optional)
- 2 tablespoons powdered sugar (if using cream cheese)
- 6–8 Milano cookies, graham crackers, or oval vanilla cookies (for tombstones)
- Black food gel or edible marker (to write on tombstones)
- Gummy worms
- Candy pumpkins, bones, skulls, or other Halloween candies
- Green sprinkles or shredded coconut tinted with green food coloring (optional, for grass effect)
Instructions
- Place chocolate sandwich cookies in a zip-top bag and crush into fine crumbs using a rolling pin or use a food processor. Set aside.
- In a medium bowl, whisk together instant chocolate pudding mix and cold milk for 2 minutes until thickened. Let sit for 5 minutes to fully set.
- In a separate bowl, beat softened cream cheese with powdered sugar until smooth. Fold in whipped topping until creamy and no lumps remain. (If skipping cream cheese, use whipped topping as is.)
- Fold the whipped cream mixture into the chocolate pudding until fully combined and fluffy. Add a splash of milk if too thick.
- Spoon 1-2 tablespoons of cookie crumbs into the bottom of each glass. Add a layer of pudding mixture. Repeat layers, ending with a thick layer of cookie crumbs on top. (Makes 6-8 parfaits in 8oz cups.)
- Write ‘RIP’ or spooky faces on cookie tombstones using edible marker or food gel. Press a tombstone into each parfait. Add gummy worms, candy pumpkins, bones, skulls, and green sprinkles or coconut for decoration.
- Refrigerate parfaits for at least 1 hour (or up to 24 hours) before serving. Cover with plastic wrap if storing longer.
Notes
For gluten-free, use gluten-free sandwich cookies. For dairy-free, use almond milk and coconut whipped topping. Decorate just before serving for best appearance. Let kids help with decorating for extra fun. Parfaits can be made up to 24 hours ahead; add final decorations right before serving. If making a large batch, layer in a trifle bowl.
Nutrition
- Serving Size: 1 parfait (about 8 oz cup)
- Calories: 310
- Sugar: 28
- Sodium: 320
- Fat: 13
- Saturated Fat: 6
- Carbohydrates: 44
- Fiber: 2
- Protein: 3
Keywords: dirt cake, graveyard parfait, Halloween dessert, no-bake, chocolate pudding, kids party, spooky treats, easy Halloween recipe, layered dessert, parfait, Oreo dessert



