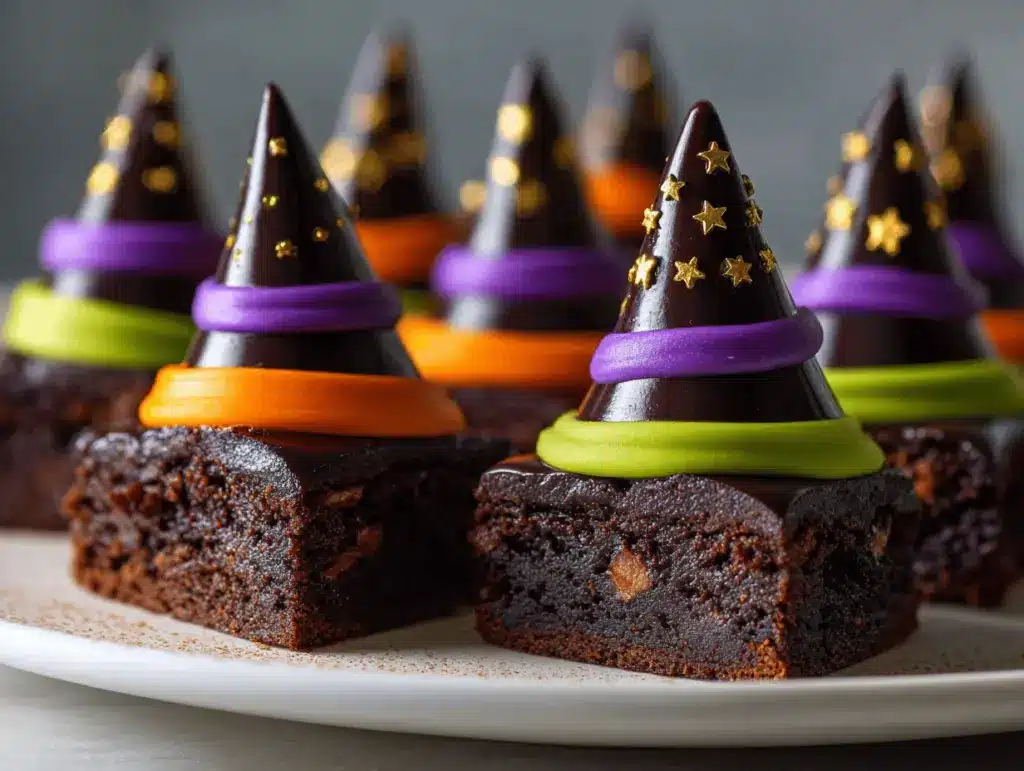
Sweet chocolatey aroma swirling through the kitchen, orange and purple sprinkles scattered across the counter—Halloween baking is honestly my favorite kind of chaos. The first time I whipped up these Witch Hat Brownies, I was trying to impress my niece, who’s obsessed with “spooky-cute” treats. Let’s just say, she didn’t stop talking about them for weeks! There’s something about transforming fudgy brownies into adorable witch hats that makes me feel like I’m conjuring up a little bit of edible magic.
This Witch Hat Brownies recipe is my go-to for Halloween parties, classroom bake sales, and cozy nights in when I just want to binge scary movies (with snacks, of course). You know, you don’t need to be a pro baker to make these—just a pinch of creativity and a love for chocolate. Every batch I make brings back memories of sticky fingers, laughter, and arguments over who gets the biggest one. If you’ve ever wanted to make a Halloween treat that’s easy, festive, and guaranteed to spark joy, this is the one.
As someone who’s tested these Witch Hat Brownies at least a dozen times (yes, I’m that person who tries every combo of toppings), I can tell you they’re reliable crowd-pleasers. Whether you’re baking for a party or just for fun, they’re perfect for busy families, little hands, and anyone who loves a touch of whimsy. The best part? You get rich, chewy brownies topped with a cute chocolate cone and a burst of color—no fancy equipment or hard-to-find ingredients. So, grab your mixing bowl and let’s make Halloween a little sweeter!
Why You’ll Love This Recipe
- Quick & Easy: Comes together in under 45 minutes. Perfect for last-minute party prep or spontaneous baking urges.
- Simple Ingredients: Everything you need is likely already in your pantry. No wild goose chases for specialty items!
- Perfect for Halloween Parties: These Witch Hat Brownies steal the show at any festive gathering—kids and grownups can’t resist picking their favorite hat.
- Crowd-Pleaser: I’ve brought these to school events, potlucks, and even office parties. They always disappear in a flash (plus, they make for amazing Instagram and Pinterest photos!).
- Unbelievably Delicious: Fudgy brownies meet creamy chocolate cones, with a pop of candy crunch. Honestly, it’s the ultimate comfort food—just in a spooky disguise!
What sets these Witch Hat Brownies apart from the rest? It’s all about the details. I blend the brownie batter just enough to get that chewy texture, and the “hats” are made with chocolate sugar cones dipped in candy melts—so you get flavor, crunch, and a playful look. The sprinkles and edible glitter add a fun twist (sometimes I swap in mini candies or colored icing for extra flair).
Truthfully, after trying several Halloween brownie recipes, this one wins for both taste and visual impact. The hats aren’t just stuck on top—they’re decorated with love, making each brownie a little masterpiece. Whether you’re impressing trick-or-treaters or just celebrating at home, these brownies have that “wow” factor and are easy enough for anyone to make. They’re the kind of treat that makes you smile—and isn’t that what Halloween’s all about?
What Ingredients You Will Need
This Witch Hat Brownies recipe uses straightforward ingredients that pack a punch of flavor and fun. You’ll find most of these in your kitchen already, and there’s plenty of room for creativity if you want to mix things up. I’ll break them down by function to keep things clear:
- For the Brownie Base:
- 1 cup (2 sticks) unsalted butter, melted (adds richness and chewy texture)
- 2 cups (400g) granulated sugar
- 4 large eggs, room temperature
- 1 cup (120g) all-purpose flour (can swap for gluten-free blend if needed)
- 1 cup (90g) unsweetened cocoa powder (I love using Ghirardelli for deep flavor)
- 1/2 tsp salt
- 1 tsp pure vanilla extract (Madagascar vanilla if you’re feeling fancy)
- For the Witch Hat Topping:
- 12 chocolate sugar cones (these are the “hats”—use gluten-free cones if required)
- 1 1/2 cups (270g) semi-sweet chocolate chips (for dipping)
- 1 cup (175g) orange or purple candy melts (for extra color—Wilton or Sweet Tooth Fairy are reliable brands)
- Sprinkles, edible glitter, colored icing (optional, but so much fun!)
- Mini chocolate candies (for the hat bands—think M&Ms or Sixlets)
- For Assembly:
- 1/2 cup (100g) chocolate frosting or piping gel (to “glue” the hats to the brownies)
- Substitutions & Tips:
- Swap butter for coconut oil for a dairy-free version
- Use almond flour in place of all-purpose for low-carb brownies (texture will change slightly)
- If candy melts aren’t available, just use white chocolate and tint with gel food coloring
- No chocolate cones? Use plain sugar cones and dip in melted chocolate
Honestly, there’s no wrong way to dress up these Witch Hat Brownies. If you don’t have all the toppings, just improvise—Halloween is about creativity! I’ve even tried them with crushed Oreos and gummy worms for a “witches in the garden” vibe (my niece still talks about those).
Equipment Needed
- 9×13 inch (23x33cm) baking pan: For perfect brownie thickness. If you only have an 8×8 pan, just adjust the baking time (add 5-10 minutes).
- Mixing bowls (medium and large): For batter and melted chocolate. I use glass because it’s easier for melting and cleaning.
- Hand mixer or whisk: Either works! I’ve made these with both—sometimes a good old-fashioned whisk is more fun.
- Spatula: Silicone is best for scraping every last bit of batter.
- Baking parchment or nonstick spray: For lining the pan (prevents stuck brownies and makes cleanup a breeze).
- Microwave-safe bowl: For melting chocolate and candy melts. If you don’t have one, a double boiler on the stove does the trick.
- Wire rack: For cooling brownies. If you don’t have one, just let the pan rest on a towel.
- Small offset spatula or butter knife: For spreading frosting and attaching hats.
- Piping bag or zip-top bag: For decorative icing (optional).
I’ve used everything from silicone pans to old metal ones—just watch baking times if your pan is dark-coated. For candy melts, I recommend cleaning your bowls quickly afterward (they can get stubborn if left to cool!). Don’t stress if you’re missing a piping bag; a zip-top bag with the tip snipped off does the job. Budget tip: Most equipment can be found at discount stores or borrowed from a neighbor for a day!
Preparation Method
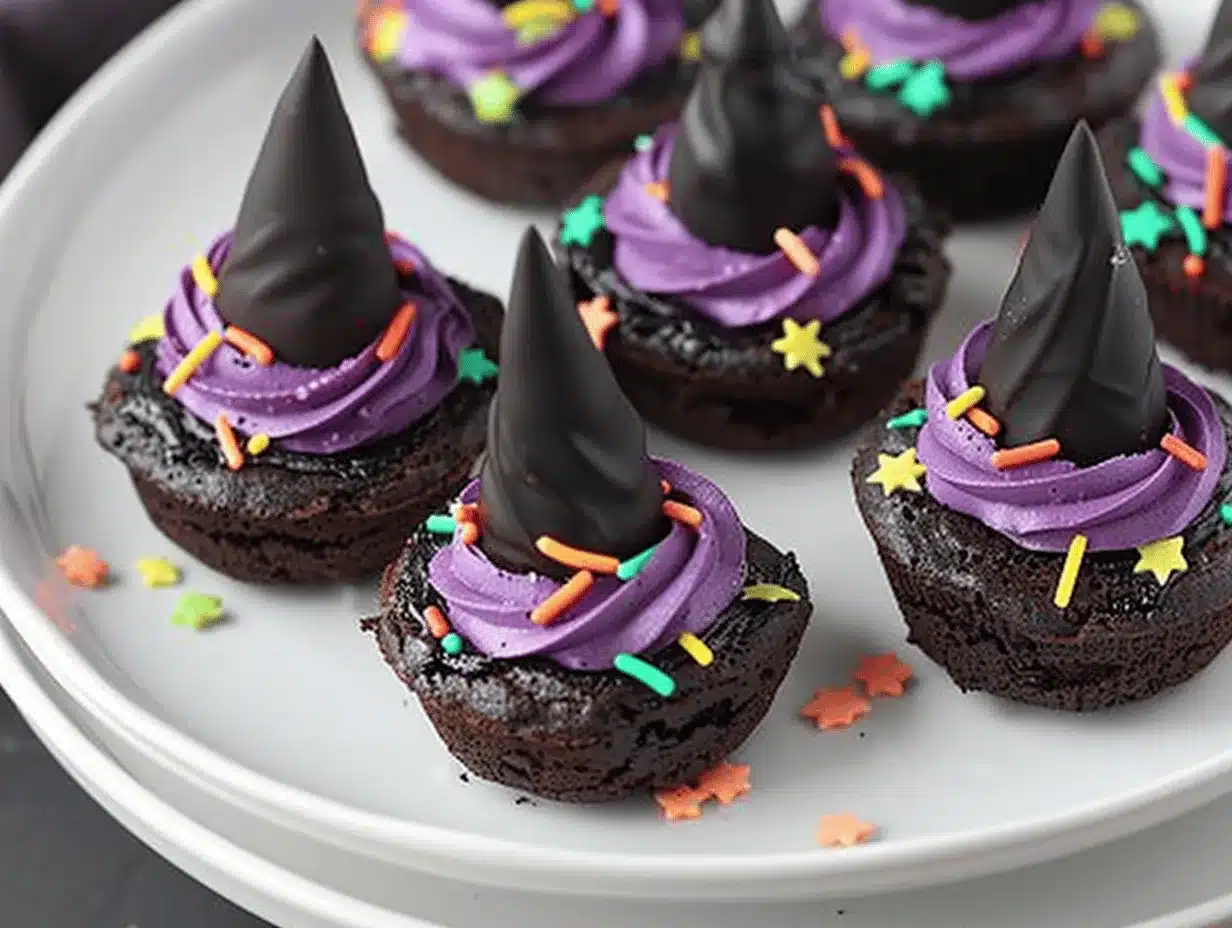
- Preheat & Prep: Preheat your oven to 350°F (175°C). Line your 9×13-inch pan with parchment paper or spray with nonstick spray. (This saves you from scrubbing later!)
- Mix the Brownie Batter: In a large mixing bowl, whisk together melted butter and sugar until smooth and slightly glossy (about 2 minutes). Add eggs one at a time, whisking well after each addition. Stir in vanilla extract.
- Combine Dry Ingredients: In a separate bowl, sift together flour, cocoa powder, and salt. (Sifting helps avoid lumps—trust me, I learned the hard way.)
- Blend Wet & Dry: Gradually add the dry ingredients to the wet mixture. Stir gently with a spatula until just combined. Don’t overmix or the brownies get tough! The batter should be thick, dark, and shiny.
- Bake: Pour batter into prepared pan and smooth the top. Bake for 25-30 minutes, or until a toothpick inserted in the center comes out with a few moist crumbs. (If you see wet batter, give it another 3-5 minutes.)
- Cool Completely: Place pan on a wire rack and let brownies cool for at least 45 minutes. This step is crucial—otherwise, the hats will slide right off.
- Cut Brownies: Once cool, lift brownies out using parchment and cut into 12 equal squares. Wipe your knife between cuts for clean edges.
- Prepare Witch Hats: Melt chocolate chips and candy melts separately in microwave-safe bowls, stirring every 20 seconds until smooth. (Don’t overheat—the chocolate will seize up!) Dip the tips of each chocolate cone in candy melts, then in sprinkles or edible glitter. Let set on wax paper for 10 minutes.
- Assemble: Spread a small dab of chocolate frosting or piping gel on the center of each brownie square. Place a decorated cone “hat” upright on top, pressing gently so it sticks.
- Add Hat Bands & Extra Decor: Pipe colored icing or attach mini candies around the base of each cone for a hat band. Add extra sprinkles, glitter, or candy eyes if you’re feeling creative.
Troubleshooting tips: If brownies seem underbaked, pop them back in the oven for a few minutes. If chocolate on hats doesn’t set, chill in the fridge for 10 minutes. If hats won’t stick, use a bit more frosting—the stickier, the better!
My personal tip: Assemble hats just before serving for best crunch. If you make them ahead, store the cones separately and add the day of your party.
Cooking Tips & Techniques
- Don’t Overmix: Overmixing brownie batter makes them cakey instead of chewy. I learned this after a few rubbery batches—mix just until combined.
- Check for Doneness Early: Ovens vary! Start testing at 25 minutes; a toothpick with a few moist crumbs is perfect. If it’s clean, you’ve probably gone too long.
- Use Room Temperature Eggs: This helps the batter come together smoothly (cold eggs can make it grainy).
- Melting Chocolate: Microwave in short bursts and stir well. If it gets lumpy, add a teaspoon of coconut oil to smooth it out.
- Decorating Hats: Dip cones one at a time and work quickly. Candy melts set fast! If you’re decorating with kids, set up a sprinkle “station” so everyone can choose their favorite colors.
- Assembly Sequence: Attach hats just before serving so the cones stay crisp. If making ahead, keep cones and brownies separate.
- Personal Fails: Once, I used hot brownies and the hats slid off in a chocolatey landslide (it was hilarious but messy). Always let brownies cool fully!
- Multitasking: While brownies are baking, prep your toppings and melt chocolate. This saves time and keeps the process smooth.
The secret to Witch Hat Brownies is simplicity and a little bit of fun chaos. Don’t worry about making every hat perfect—quirky ones are often the most charming!
Variations & Adaptations
One of my favorite things about Witch Hat Brownies is how flexible they are. You can easily adapt them for different tastes, dietary needs, or even seasons. Here are a few fun ways to make them your own:
- Gluten-Free: Use your favorite gluten-free flour blend for the brownies and gluten-free cones for the hats. The texture will be slightly different but still delicious.
- Vegan Version: Swap butter for vegan margarine, use egg replacer (like flax eggs: 1 tbsp ground flaxseed + 3 tbsp water per egg), and choose dairy-free chocolate cones. Vegan chocolate and candy melts are easy to find online these days.
- Spooky Flavors: Add a teaspoon of instant espresso to the batter for “witchy” depth, or mix in orange zest for a citrusy twist. I’ve even tried peppermint extract for a “winter witch” theme—so good!
- Allergen-Friendly: For nut allergies, skip nut-based toppings and check candy labels. For dairy allergies, use coconut oil and dairy-free chocolate (Enjoy Life is a great brand).
- Seasonal Adaptations: Swap orange and purple for red and green sprinkles for Christmas “elf hats,” or pastel colors for spring “wizard brownies.”
- Personal Twist: I once topped these brownies with crushed pretzels mixed into the batter—adds a salty crunch that’s unexpectedly addictive!
Don’t be afraid to experiment. Sometimes the best Witch Hat Brownies are the ones with a little extra personality!
Serving & Storage Suggestions
- Serving: Serve Witch Hat Brownies at room temperature for best texture. Arrange on a platter with extra sprinkles for a festive “witchy” look. They’re perfect paired with hot cocoa, spiced apple cider, or even a cold glass of milk.
- Presentation: I like to place the brownies on a cake stand lined with black parchment and scatter candy eyeballs and gummy worms for extra Halloween flair. You can also wrap them individually in cellophane bags for party favors or bake sales.
- Storage: Store brownies in an airtight container at room temperature for up to 3 days. If you’ve already attached the hats, keep a layer of parchment between each to prevent sticking. For longer storage, freeze brownie squares (without hats) in a zip-top bag for up to 2 months.
- Reheating: Gently warm brownies in the microwave for 10 seconds if you like them extra gooey. If you’re reheating with hats, go slow—chocolate cones can soften quickly.
- Flavor Development: The flavors actually deepen after a day, so these are even better if made ahead. I sometimes add a sprinkle of sea salt on top before serving for a grown-up twist.
Tip: Always assemble hats just before serving if possible, to keep them crisp and fresh!
Nutritional Information & Benefits
| Per Serving (1 brownie with hat) | Estimated Value |
|---|---|
| Calories | ~320 kcal |
| Fat | 16g |
| Sugar | 28g |
| Protein | 4g |
Health Benefits: Cocoa powder brings antioxidants, and you can up the fiber by using whole wheat flour or adding a handful of chopped nuts (if allergies aren’t an issue). Choose dark chocolate chips for less sugar and more minerals.
Dietary Considerations: Easily adaptable for gluten-free or vegan diets. Watch for dairy, gluten, and nut allergens in cones and toppings. If you’re aiming for lower sugar, use a sugar substitute like coconut sugar or stevia.
From a wellness perspective, these Witch Hat Brownies are all about fun and balance—treat yourself, share with friends, and enjoy a little Halloween magic!
Conclusion
Witch Hat Brownies aren’t just a treat—they’re an experience. Rich, fudgy brownies crowned with playful hats turn any Halloween gathering into a little celebration. You can customize them endlessly, make them ahead, and watch them disappear in minutes. This recipe is a staple in my kitchen every October (and sometimes for other holidays, with a twist!).
Whether you love decorating, baking with kids, or simply want a dessert that makes people smile, these brownies deliver every time. I hope you try them—make them your own, swap out toppings, and let your creativity run wild. If you do, drop a comment below, share your photos, or let me know how you adapted the recipe. There’s nothing better than seeing your witchy creations!
Happy Halloween and happy baking! Let’s make this spooky season unforgettable, one bite at a time.
Frequently Asked Questions
Can I make Witch Hat Brownies ahead of time?
Absolutely! Bake the brownies a day or two ahead. Store them in an airtight container, then assemble the hats just before serving to keep them fresh and crisp.
How do I prevent the cones from getting soggy?
Let brownies cool completely before attaching the hats, and store assembled brownies uncovered for short periods. For longer storage, keep cones and brownies separate until serving.
What if I can’t find chocolate cones?
No problem! Use plain sugar cones and dip them in melted chocolate. You can also use waffle cones—just trim them down to hat size.
Can I freeze Witch Hat Brownies?
Yes, you can freeze just the brownie base for up to 2 months. Thaw at room temperature, then decorate with hats and toppings when ready to serve.
Are Witch Hat Brownies allergy-friendly?
This recipe can be made gluten-free, dairy-free, or nut-free with simple swaps. Always check ingredient labels for hidden allergens. Let me know if you need specific substitution ideas!
Pin This Recipe!
Witch Hat Brownies

These Witch Hat Brownies are rich, fudgy brownies topped with whimsical chocolate-dipped cones and festive sprinkles, making them the perfect easy Halloween party treat. They’re simple to make, endlessly customizable, and guaranteed to delight kids and adults alike.
- Prep Time: 15 minutes
- Cook Time: 30 minutes
- Total Time: 45 minutes
- Yield: 12 servings 1x
- Category: Dessert
- Cuisine: American
Ingredients
- 1 cup (2 sticks) unsalted butter, melted
- 2 cups (400g) granulated sugar
- 4 large eggs, room temperature
- 1 cup (120g) all-purpose flour (or gluten-free blend)
- 1 cup (90g) unsweetened cocoa powder
- 1/2 tsp salt
- 1 tsp pure vanilla extract
- 12 chocolate sugar cones (or gluten-free cones)
- 1 1/2 cups (270g) semi-sweet chocolate chips
- 1 cup (175g) orange or purple candy melts
- Sprinkles, edible glitter, colored icing (optional)
- Mini chocolate candies (e.g., M&Ms or Sixlets)
- 1/2 cup (100g) chocolate frosting or piping gel
Instructions
- Preheat your oven to 350°F (175°C). Line a 9×13-inch pan with parchment paper or spray with nonstick spray.
- In a large mixing bowl, whisk together melted butter and sugar until smooth and slightly glossy (about 2 minutes). Add eggs one at a time, whisking well after each addition. Stir in vanilla extract.
- In a separate bowl, sift together flour, cocoa powder, and salt.
- Gradually add the dry ingredients to the wet mixture. Stir gently with a spatula until just combined. Do not overmix.
- Pour batter into prepared pan and smooth the top. Bake for 25-30 minutes, or until a toothpick inserted in the center comes out with a few moist crumbs.
- Place pan on a wire rack and let brownies cool for at least 45 minutes.
- Once cool, lift brownies out using parchment and cut into 12 equal squares. Wipe your knife between cuts for clean edges.
- Melt chocolate chips and candy melts separately in microwave-safe bowls, stirring every 20 seconds until smooth. Dip the tips of each chocolate cone in candy melts, then in sprinkles or edible glitter. Let set on wax paper for 10 minutes.
- Spread a small dab of chocolate frosting or piping gel on the center of each brownie square. Place a decorated cone ‘hat’ upright on top, pressing gently so it sticks.
- Pipe colored icing or attach mini candies around the base of each cone for a hat band. Add extra sprinkles, glitter, or candy eyes if desired.
Notes
Let brownies cool completely before assembling to prevent hats from sliding off. Assemble hats just before serving for best crunch. Easily adaptable for gluten-free or vegan diets with simple swaps. If you can’t find chocolate cones, dip plain sugar cones in melted chocolate. Store brownies and hats separately if making ahead.
Nutrition
- Serving Size: 1 brownie with hat
- Calories: 320
- Sugar: 28
- Sodium: 120
- Fat: 16
- Saturated Fat: 9
- Carbohydrates: 44
- Fiber: 3
- Protein: 4
Keywords: witch hat brownies, Halloween brownies, Halloween treats, party brownies, easy Halloween dessert, spooky brownies, chocolate brownies, Halloween party food, kid-friendly Halloween, Halloween baking



