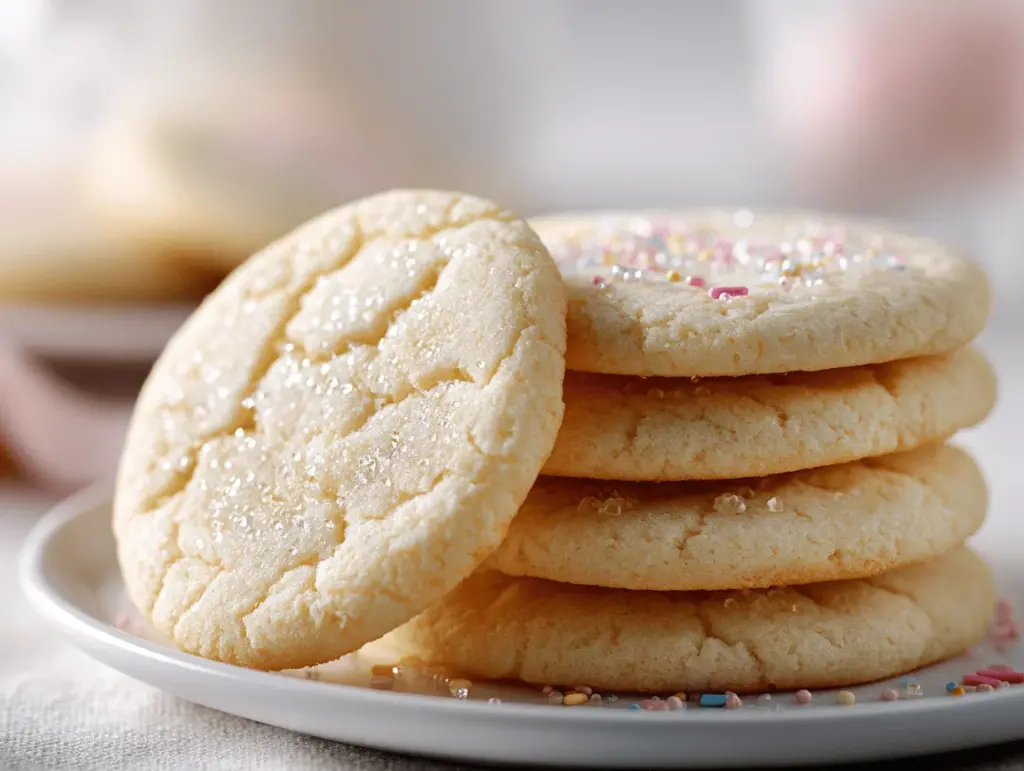
The moment you open the oven and that sweet, buttery aroma hits—honestly, it’s pure nostalgia. Classic sugar cookies are the kind of treat that feels like a warm hug (especially when you’re dusting them with sprinkles or swirling on icing with your kids). I’ve been making sugar cookies since I was barely tall enough to reach the counter, and every batch still reminds me of holidays spent rolling dough and laughing over silly cookie shapes. Whether you’re prepping for a big holiday cookie swap or just want a simple baking project, this sugar cookies recipe is the go-to for tender, buttery cookies perfect for decorating—or, let’s be real, eating straight off the tray.
One thing I absolutely love about this recipe is its flexibility. The dough is sturdy enough to hold its shape for cut-outs but remains soft and melt-in-your-mouth after baking. I’ve tested it dozens of times, tweaking the ratios and chilling times so you get cookies that don’t spread too much and always taste amazing. Plus, sugar cookies are the ultimate blank canvas for creativity. If you’re someone who likes to get fancy with royal icing or just wants a simple sprinkle topping, you’ll find these cookies are up for anything. Seriously, this classic sugar cookies recipe is my secret weapon for birthday parties, school bake sales, and cozy snow days.
As someone who’s had her share of cookie disasters (flat, crumbly, burnt—been there), I promise you this recipe is foolproof. You’ll get consistent results every time, and the ingredient list is basic enough that you probably have everything in your pantry right now. So grab your favorite cookie cutters and let’s make some memories with the best sugar cookies recipe around!
Why You’ll Love This Sugar Cookies Recipe
- Quick & Easy: The dough comes together in under 15 minutes, and you don’t need any fancy equipment—just a bowl, mixer, and a rolling pin. Perfect for last-minute baking cravings or when the kids are suddenly “starving for cookies.”
- Simple Ingredients: You’re looking at classic pantry staples here—flour, sugar, butter, eggs, and a splash of vanilla. No hunting for obscure ingredients!
- Perfect for Decorating: The cookies hold their shape beautifully, so you can go wild with cookie cutters and icing. Whether it’s for Christmas, Valentine’s Day, or just a rainy afternoon, these cookies are ready for some fun.
- Crowd-Pleaser: I’ve made these for everything from birthday parties to office potlucks, and they always disappear fast. Kids and adults both love the tender, buttery flavor.
- Unbelievably Delicious: The texture is just right—not too soft, not too hard, with that signature snap when you bite in and a rich, buttery finish that lingers.
What sets this sugar cookies recipe apart? I use a little extra vanilla and a pinch of salt for balance, plus a technique I learned from my grandma—chilling the dough long enough so the cookies don’t spread and stay picture-perfect. The result is a cookie that’s not just sweet, but full of flavor and easy to work with. It’s the kind of recipe you’ll come back to over and over, whether you’re decorating for the holidays or just want something to dunk in your afternoon tea.
Honestly, the best part is how these cookies turn out every time—no dry edges, no weird floury aftertaste. They’re soft enough for little ones to bite into but sturdy enough for intricate icing designs. If you’ve ever had a sugar cookie that tasted bland or cardboard-like, you’ll be shocked at how buttery and tender these are. It’s comfort food in cookie form—sweet, simple, and always satisfying.
What Ingredients You Will Need
This classic sugar cookies recipe uses simple, wholesome ingredients that come together for the perfect texture and flavor. Most of these are pantry staples, and each one plays an important role in creating cookies that are tender, buttery, and just the right amount of sweet. Here’s what you’ll need:
- All-purpose flour (2 3/4 cups / 345g) – Provides structure and helps the cookies hold their shape. I recommend Gold Medal or King Arthur for consistent results.
- Baking powder (1 teaspoon / 5g) – Gives a little lift without making the cookies too cakey.
- Salt (1/2 teaspoon / 2g) – Balances sweetness and enhances flavor. Don’t skip it!
- Unsalted butter (1 cup / 226g, softened) – The star of the show for flavor and texture. I usually stick to European-style butter for extra richness, but any good-quality unsalted butter works.
- Granulated sugar (1 cup / 200g) – Sweetens and helps create that classic crisp edge.
- Large egg (1, room temperature) – Binds everything together and adds tenderness.
- Pure vanilla extract (1 1/2 teaspoons / 7ml) – Adds depth and warmth. Nielsen-Massey is my go-to, but any real vanilla is fine.
- Optional: Almond extract (1/2 teaspoon / 2ml) – For an extra flavor twist. I add this when I want a more bakery-style cookie.
- For decorating:
- Royal icing or simple glaze (powdered sugar + milk + vanilla)
- Sprinkles (any color or style you like)
- Food coloring (gel colors work best for vibrant designs)
If you need substitutions, swap gluten-free flour blends for a GF version (I’ve had success with Cup4Cup), or use vegan butter and flax egg for dairy-free/egg-free needs. You can even use coconut sugar for a deeper flavor, though the color will be slightly darker. I’ve tried all these tweaks over the years, and the cookies still come out delicious!
Pro tip: Make sure your butter is truly softened but not melted. This helps the dough come together smoothly and prevents greasy cookies. If you’re low on vanilla, add a tiny bit of lemon zest for a surprisingly fresh flavor!
Equipment Needed
- Mixing bowls – At least two, one for wet and one for dry ingredients. Any sturdy bowl works.
- Electric mixer – Stand mixer or hand mixer. I’ve made these by hand, but a mixer saves time and your arms!
- Rolling pin – For rolling out the dough evenly. If you don’t have one, a clean wine bottle works in a pinch.
- Cookie cutters – Any shape you like. Even a drinking glass makes perfect rounds.
- Baking sheets – Heavy-duty sheets help prevent over-browning. Line with parchment for easy cleanup.
- Parchment paper or silicone baking mat – Prevents sticking and makes transferring cookies easy.
- Wire cooling rack – Speeds up cooling and keeps cookies crisp.
If you’re on a budget, skip specialty tools—use a butter knife for shapes, and wax paper instead of parchment. I’ve baked sugar cookies on both old metal trays and fancy insulated ones; just watch your baking times, as thinner pans brown things faster. For maintenance, wash cookie cutters right away (dried dough is stubborn!). A light oiling of your rolling pin prevents sticking, too.
Preparation Method
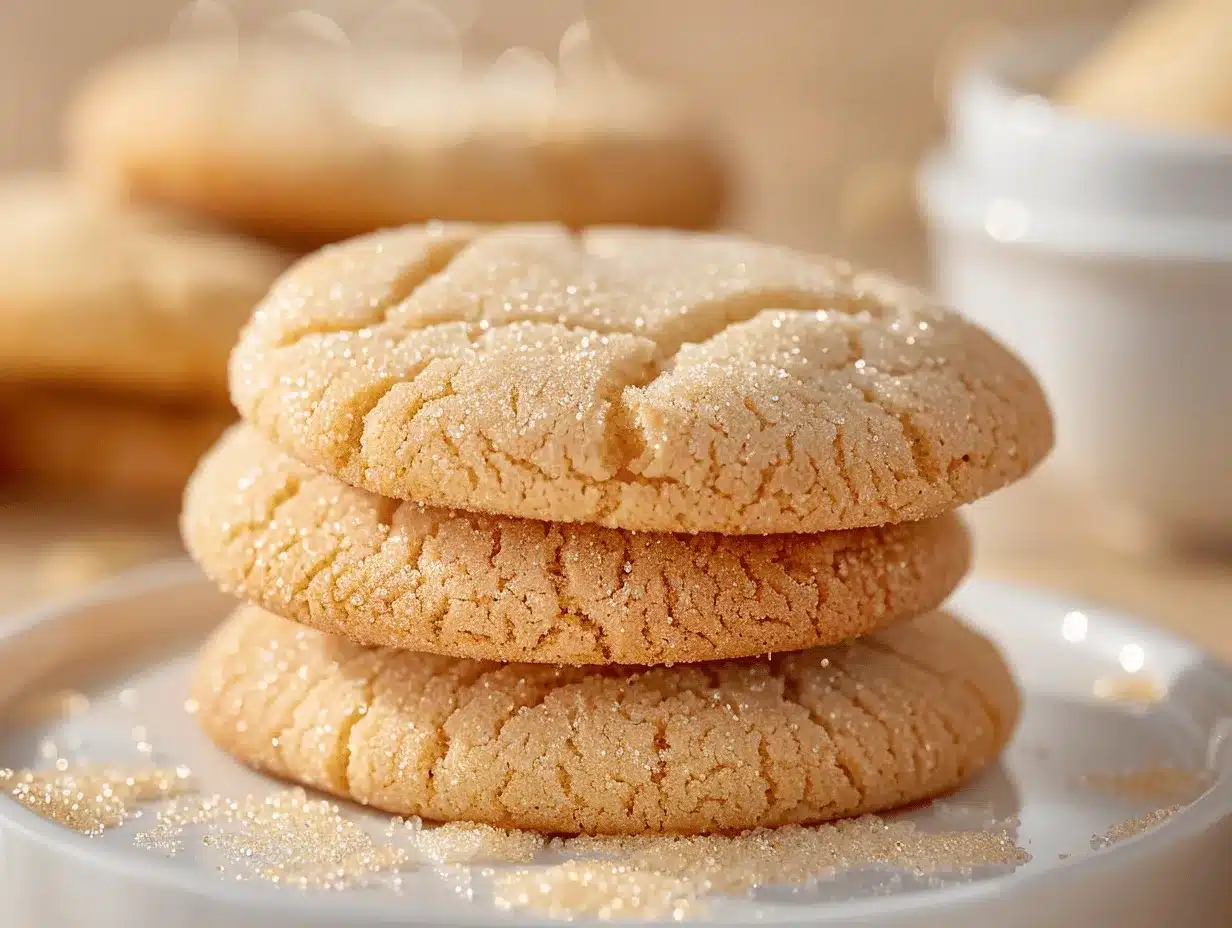
- Combine dry ingredients: In a medium bowl, whisk together 2 3/4 cups (345g) all-purpose flour, 1 teaspoon (5g) baking powder, and 1/2 teaspoon (2g) salt. Set aside. This keeps lumps out and ensures even mixing.
- Cream butter and sugar: In a large bowl, beat 1 cup (226g) unsalted butter with 1 cup (200g) granulated sugar until light and fluffy—about 2-3 minutes with a stand mixer on medium speed. The mixture should look pale and feel airy.
- Add egg and vanilla: Beat in 1 large egg (room temperature) and 1 1/2 teaspoons (7ml) pure vanilla extract. If using, add 1/2 teaspoon (2ml) almond extract for extra flavor. Mix until fully incorporated, scraping down the sides as needed.
- Mix in dry ingredients: Gradually add the flour mixture to the wet ingredients. Beat on low speed until just combined—don’t overmix, or your cookies may turn out tough. The dough will be soft but not sticky.
- Chill the dough: Divide the dough into two flat discs, wrap in plastic wrap, and chill for at least 1 hour (or up to overnight). Chilling prevents spreading and makes rolling easier. If you’re short on time, 30 minutes in the freezer works in a pinch.
- Preheat oven: Preheat your oven to 350°F (175°C). Line baking sheets with parchment paper or silicone mats.
- Roll out dough: On a lightly floured surface, roll one disc of dough to about 1/4 inch (6mm) thickness. If the dough cracks, let it warm up for a few minutes. Dust the rolling pin and dough with flour as needed to prevent sticking.
- Cut cookies: Use cookie cutters to cut shapes, transferring them to prepared baking sheets about 1 inch (2.5cm) apart. Gather scraps, reroll, and cut until all dough is used.
- Bake: Bake for 8-10 minutes, depending on size. Cookies should look set and just barely golden at the edges. Thinner cookies will bake faster, so keep an eye out—overbaking leads to dryness.
- Cool: Let cookies cool on the baking sheet for 2 minutes before transferring to a wire rack. They’ll firm up as they cool.
- Decorate: Once completely cool, decorate with icing, glaze, or sprinkles. If using royal icing, allow time for it to set before stacking or storing.
If you notice the dough getting too soft as you work, pop it back in the freezer for a few minutes. If cookies spread too much, make sure you’re chilling long enough and using cool baking sheets. My personal trick: bake one test cookie first to check shape and timing!
Cooking Tips & Techniques
After years of baking sugar cookies, I’ve learned a few tricks (the hard way, sometimes!). Here are my top tips for getting perfect cookies every time:
- Chill that dough: Skipping the chill leads to cookies that spread and lose their shape. If you’re in a rush, 30 minutes in the freezer works, but an hour in the fridge gives the best results.
- Don’t overmix: Once you add the flour, mix just until combined. Overmixing makes cookies tough instead of tender.
- Even rolling: Use guide sticks or rolling pin rings to maintain an even thickness. Uneven cookies bake unevenly—trust me, I’ve had plenty of burnt edges and raw centers.
- Test your oven: Ovens can run hot or cold. Bake a test cookie to see how long it takes. My old oven ran 15°F hotter, so cookies baked way too fast until I got an oven thermometer.
- Multitask smart: While one batch chills, roll and cut the second batch. That way, you’re always prepping something and never waiting around.
- Keeps edges clean: Dip cookie cutters in flour between cuts, especially with sticky dough. This keeps your shapes sharp and easy to release.
My biggest fail? Rushing the chill time and ending up with a giant cookie blob instead of snowflakes. Now I always chill, and the results are consistent—crisp edges, soft centers, perfect for decorating. If your cookies are browning too quickly, switch to a lighter baking sheet or double up for insulation.
Variations & Adaptations
Sugar cookies are super adaptable, so don’t be afraid to make them your own! Here are some favorite twists:
- Gluten-Free: Swap in a 1:1 gluten-free flour blend (Cup4Cup or Bob’s Red Mill work great). The texture is slightly different but still tender.
- Vegan: Use plant-based butter and a flax egg (1 tablespoon ground flax + 2.5 tablespoons water). The flavor is buttery, and the dough holds together well.
- Lemon zest: Add 1-2 teaspoons finely grated lemon zest to the dough for a fresh, citrusy flavor. This is my go-to for springtime cookies.
- Chocolate sugar cookies: Replace 1/3 cup (30g) flour with cocoa powder for a chocolaty twist. My kids love this version!
- Spiced: Mix in 1/2 teaspoon ground cinnamon or nutmeg for a cozy holiday vibe.
For different baking methods, you can bake as drop cookies (skip rolling, just scoop), or press the dough into a pan for cookie bars. If you’re decorating for allergies, use allergy-friendly sprinkles and check icing ingredients. My personal favorite? Adding almond extract and lemon zest for a “bakery-style” flavor that makes people ask for the recipe every time!
Serving & Storage Suggestions
Serve these classic sugar cookies at room temperature for the best texture—soft, buttery, and just a little crisp at the edge. They look gorgeous stacked on a platter or arranged in a festive tin. Pair with hot cocoa, milk, or tea for a comforting treat.
For special occasions, arrange cookies on a cake stand with colorful icing and sprinkles for a Pinterest-worthy display. They make perfect favors or gifts—just pop a few in a cellophane bag and tie with ribbon.
To store, keep cookies in an airtight container at room temperature for up to 5 days. If you’ve decorated with royal icing, wait until it’s fully set before stacking. For longer storage, freeze undecorated cookies between layers of parchment paper for up to 2 months. To thaw, leave at room temperature, then decorate as usual.
Reheat gently in a low oven (300°F/150°C for 3-5 minutes) if you like them warm, but honestly, they’re best fresh. Flavors deepen after a day, so if you can resist, let them rest overnight before serving.
Nutritional Information & Benefits
Each classic sugar cookie (about 2 1/2 inches/6.5cm diameter) contains approximately:
- Calories: 90
- Fat: 4g
- Carbohydrates: 13g
- Sugar: 6g
- Protein: 1g
These cookies are a sweet treat, so enjoy in moderation. The main health benefit comes from using real butter, which provides satisfying flavor and a touch of vitamin A. If you use gluten-free or vegan substitutions, you can tailor the recipe for dietary needs. Note: Contains wheat, eggs, and dairy; use allergy-friendly swaps if needed.
From a wellness perspective, sugar cookies aren’t exactly “health food,” but they do offer comfort and joy—sometimes that’s just as important! Baking together is a great way to bond with family, and sharing cookies brings smiles all around.
Conclusion
If you’re searching for the perfect sugar cookies recipe—for decorating, sharing, or simply snacking—this is the one you’ll keep coming back to. The classic buttery flavor, tender crumb, and endless decorating potential make these cookies a staple in my kitchen. I love how they bring people together, whether it’s a holiday or just a random Tuesday.
Feel free to customize with your favorite extracts, colors, and shapes. Make them gluten-free, vegan, or spice them up—this recipe is all about making it your own. I hope you enjoy baking (and eating) these as much as I do. If you try them, let me know in the comments or share your cookie creations online—I always love seeing how others decorate!
Bake a batch, spread the joy, and don’t forget: the best sugar cookies are the ones made with a little extra love (and maybe some sprinkles!).
Frequently Asked Questions
Can I make the sugar cookies dough ahead of time?
Yes! You can prepare the dough up to 2 days in advance. Wrap tightly and refrigerate until ready to roll and bake.
Do I need to chill the dough?
Absolutely. Chilling helps the cookies hold their shape and prevents spreading. An hour is best, but 30 minutes in the freezer works if you’re short on time.
Can I freeze sugar cookies?
Definitely. Freeze undecorated cookies between layers of parchment for up to 2 months. Thaw at room temperature before decorating or eating.
What’s the best icing for decorating sugar cookies?
Royal icing creates a smooth, sturdy finish. If you prefer something simpler, mix powdered sugar with a bit of milk and vanilla for a quick glaze.
How do I keep sugar cookies soft?
Store cookies in an airtight container. If they start to harden, add a slice of bread to the container—the cookies will absorb moisture and soften up again.
Pin This Recipe!

Sugar Cookies Recipe: Easy Classic Homemade Cookies for Decorating

This classic sugar cookies recipe yields tender, buttery cookies that hold their shape perfectly for decorating. With simple pantry ingredients and foolproof instructions, these cookies are ideal for holidays, parties, or everyday baking fun.
- Prep Time: 15 minutes
- Cook Time: 8-10 minutes per batch
- Total Time: 1 hour 30 minutes (includes chilling time)
- Yield: 36 cookies 1x
- Category: Dessert
- Cuisine: American
Ingredients
- 2 3/4 cups all-purpose flour (345g)
- 1 teaspoon baking powder (5g)
- 1/2 teaspoon salt (2g)
- 1 cup unsalted butter, softened (226g)
- 1 cup granulated sugar (200g)
- 1 large egg, room temperature
- 1 1/2 teaspoons pure vanilla extract (7ml)
- Optional: 1/2 teaspoon almond extract (2ml)
- For decorating: royal icing or simple glaze (powdered sugar + milk + vanilla)
- Sprinkles (any color or style you like)
- Food coloring (gel colors recommended)
Instructions
- In a medium bowl, whisk together flour, baking powder, and salt. Set aside.
- In a large bowl, beat unsalted butter with granulated sugar until light and fluffy, about 2-3 minutes.
- Beat in the egg and vanilla extract (and almond extract, if using) until fully incorporated.
- Gradually add the flour mixture to the wet ingredients, mixing on low speed until just combined. Do not overmix.
- Divide the dough into two flat discs, wrap in plastic wrap, and chill for at least 1 hour (or up to overnight). For a quick chill, 30 minutes in the freezer works.
- Preheat oven to 350°F (175°C). Line baking sheets with parchment paper or silicone mats.
- On a lightly floured surface, roll one disc of dough to about 1/4 inch thickness. Dust rolling pin and dough with flour as needed.
- Use cookie cutters to cut shapes and transfer to prepared baking sheets about 1 inch apart. Gather scraps, reroll, and cut until all dough is used.
- Bake for 8-10 minutes, until cookies look set and just barely golden at the edges.
- Let cookies cool on the baking sheet for 2 minutes, then transfer to a wire rack to cool completely.
- Once cool, decorate with icing, glaze, or sprinkles. Allow royal icing to set before stacking or storing.
Notes
Chill the dough for at least 1 hour to prevent spreading. For best results, bake one test cookie to check oven temperature and timing. Dip cookie cutters in flour for clean edges. Store cookies in an airtight container for up to 5 days, or freeze undecorated cookies for up to 2 months. For gluten-free or vegan adaptations, use a 1:1 gluten-free flour blend and plant-based butter with a flax egg.
Nutrition
- Serving Size: 1 cookie (about 2 1/2 inches diameter)
- Calories: 90
- Sugar: 6
- Sodium: 35
- Fat: 4
- Saturated Fat: 2.5
- Carbohydrates: 13
- Protein: 1
Keywords: sugar cookies, classic sugar cookies, easy sugar cookies, sugar cookies for decorating, holiday cookies, cut-out cookies, baking, dessert, Christmas cookies, kid-friendly



