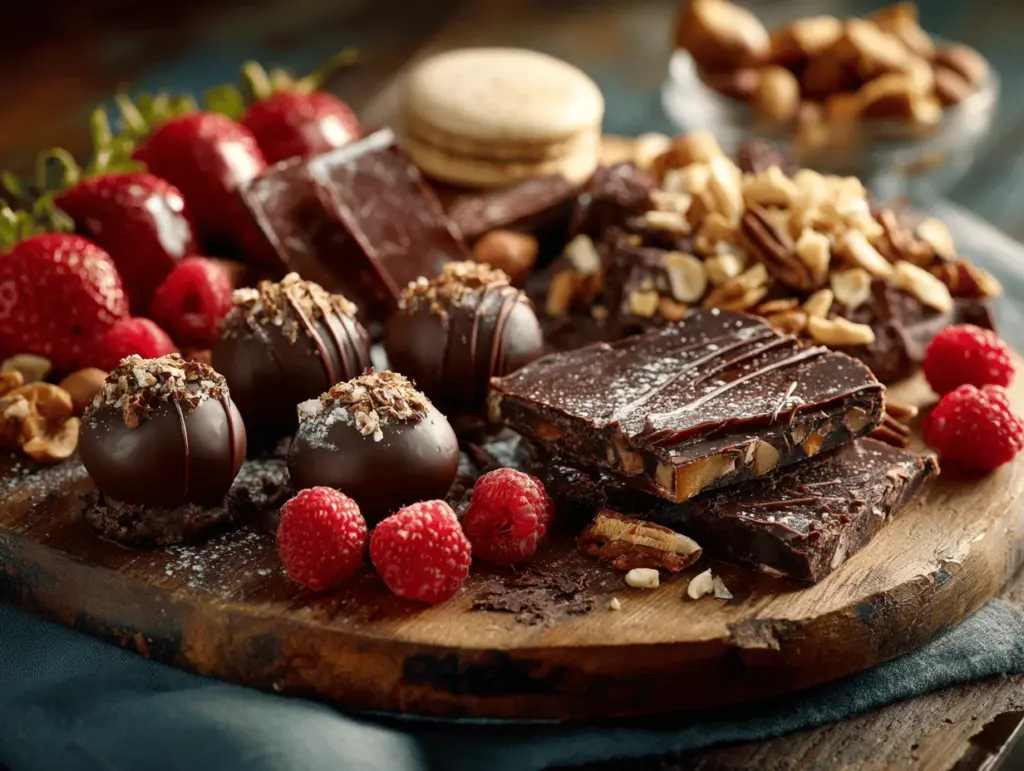
The moment you set a chocolate lover’s dessert board on the table, something magical happens. There’s this hush—then pure excitement. The glossy chocolate truffles, crumbly brownies, and playful chocolate-dipped fruits practically beg to be devoured. Honestly, I still remember the first time I whipped up a dessert board for friends: people hovered, snapped photos for Pinterest, and couldn’t resist sneaking bites before dinner was even over!
Chocolate is more than just a treat; it’s a mood-lifter, a conversation starter, and, let’s face it, the hero of any party spread. Crafting a chocolate lover’s dessert board became my go-to for birthdays, cozy holiday gatherings, and even those “just because” movie nights. It’s flexible, fun, and you get to channel your own creativity—no pastry chef skills required.
I’ve tested dozens of combinations, played with textures, and discovered that the best chocolate boards aren’t fancy—they’re packed with flavor, easy to assemble, and totally irresistible. Whether you’re hosting a crowd or just a handful of chocoholics, this recipe is for you. It’s perfect for busy folks, picky eaters, and anyone who believes dessert should be a celebration. Trust me, after making this chocolate lover’s dessert board more times than I can count, I’ve got all the tips and tricks for making it unforgettable (and stress-free!).
Why You’ll Love This Chocolate Lover’s Dessert Board
- Quick & Easy: You can assemble this show-stopping board in under 30 minutes. It’s perfect for last-minute entertaining or spontaneous get-togethers.
- Simple Ingredients: No complicated pastry recipes here. Most items can be found at your local grocery store—or maybe even in your pantry.
- Perfect for Any Occasion: Whether it’s a winter holiday, birthday, date night, or a girls’ night in, this dessert board fits every mood and celebration.
- Crowd-Pleaser: I’ve watched guests (adults and kids alike) light up when they see this board. There’s something for every chocolate craving—fudgy, creamy, crunchy, fruity.
- Unbelievably Delicious: The mix of premium chocolate, homemade bites, and fresh fruit creates a flavor experience you just can’t get from a single dessert.
Here’s what truly sets my chocolate lover’s dessert board apart: I like to blend textures and temperatures. Think silky chocolate mousse nestled beside crunchy biscotti, warm brownies next to cool chocolate-covered strawberries. Sometimes I’ll swirl in a chocolate fondue as a centerpiece (pro tip: it’s a total conversation starter). You don’t have to spend hours baking—just combine carefully chosen favorites for a wow factor. And if you’re health-conscious, gluten-free, or vegan, you can easily adapt it. My secret? Mixing store-bought with homemade and always adding a personal touch.
I believe dessert should feel special, no matter how busy you are. This board turns any night into a celebration and makes guests feel extra welcome. The first bite always gets a smile—and that’s why I keep coming back to this recipe for every occasion.
What Ingredients You Will Need
This chocolate lover’s dessert board uses a combination of decadent, easy-to-find ingredients. Honestly, you can mix and match based on what you love or have on hand. Here’s how I build mine:
- Chocolate Truffles: Store-bought or homemade. I love Lindt and Godiva for their creamy centers.
- Brownie Bites: Fudgy, cut into small squares (homemade or bakery bought works).
- Chocolate-Dipped Pretzels: Sweet and salty—these are always a hit.
- Chocolate Bars: Break up a few varieties—dark, milk, and white. I recommend Ghirardelli or Theo for quality and flavor.
- Chocolate-Covered Nuts: Almonds, hazelnuts, or peanuts (check labels if allergies are a concern).
- Chocolate Mousse or Pudding Cups: Spoon into small ramekins for dipping and spreading.
- Chocolate-Covered Fruit: Strawberries, bananas, or dried apricots (dip them yourself or buy premade).
- Mini Chocolate Chip Cookies: Soft or crunchy, they add playful texture.
- Biscotti or Wafer Rolls: Adds crunch and elegance—perfect for dipping.
- Marshmallows: Regular, mini, or gourmet—sometimes I even toast them quickly with a kitchen torch.
- Fresh Fruit for Balance: Sliced apples, pears, raspberries, or blueberries. They help cut the richness and look gorgeous.
- Chocolate Fondue (optional): Melted chocolate for dipping, placed in a bowl at the center.
- Caramel or Peanut Butter Sauce (optional): For drizzling or dipping.
If you’re building a board for dietary needs, you can swap in gluten-free cookies, vegan chocolate bars (like Hu Kitchen), or dairy-free mousse. For nut allergies, skip the chocolate-covered nuts and add more fruit or pretzels. During summer, I love adding fresh cherries and strawberries—while in winter, dried figs and oranges are a treat. The real beauty of this board is its flexibility: just pick your favorites, and don’t be afraid to experiment!
Equipment Needed
- Large Wooden or Slate Board: I usually use a big cutting board, but a serving platter or even a sheet pan works. Just make sure it’s food safe.
- Small Bowls or Ramekins: For mousse, sauces, and smaller items. Ceramic or glass bowls add a nice touch.
- Spreading Knives and Small Tongs: Makes serving easy and keeps things tidy.
- Toothpicks or Skewers: If you’re featuring fondue or want guests to dip fruit.
- Serving Spoons: Handy for scooping mousse or pudding.
- Kitchen Torch (optional): For toasting marshmallows right on the board—trust me, it’s a fun party trick!
If you’re on a budget, use any large plate or tray you have. Small mason jars work for sauces or mousse. I’ve even used cupcake liners for portioning when I didn’t have enough bowls. Just make sure everything is clean, sturdy, and can handle a bit of chocolate mess.
After use, I always give wooden boards a gentle scrub and oil them occasionally to keep them looking fresh. If you use slate, wipe it with a damp cloth. Honestly, dessert boards are forgiving—just avoid anything with deep grooves that’s tricky to clean.
Preparation Method
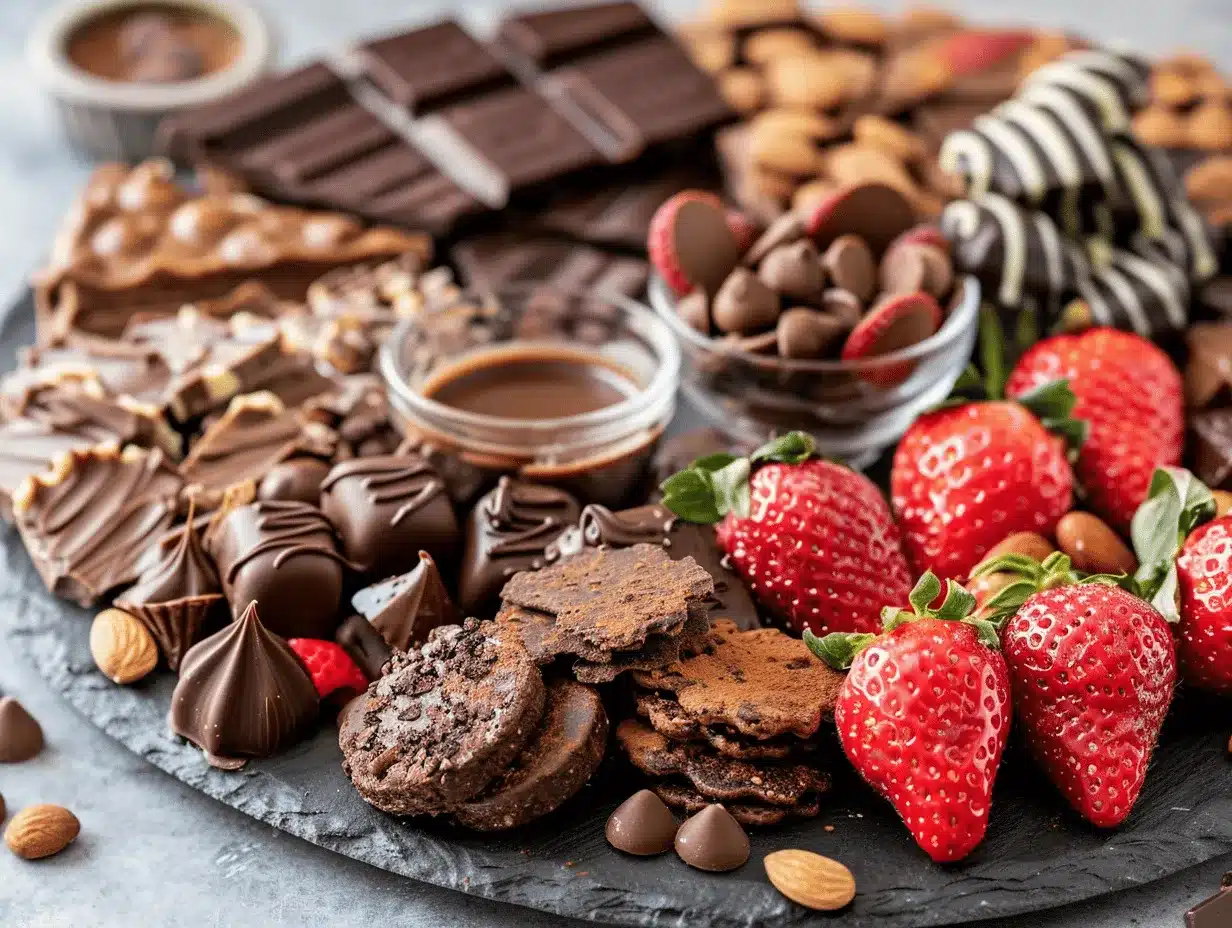
- Choose Your Board and Bowls: Start with a large board (about 18 x 12 inches/45 x 30 cm works well for 8-10 people). Place small bowls for mousse, sauces, or fondue first, spacing them out.
- Prepare the Chocolate Items: If making homemade brownies or cookies, bake them first and let cool completely (about 30-40 minutes for brownies, 15 minutes for cookies). Cut into bite-sized pieces—aim for 1-inch/2.5 cm squares.
- Arrange the Anchor Items: Place brownies, truffles, and chocolate bars around the bowls. Stack or fan out the pieces for visual interest.
- Add Dippable Items: Arrange pretzels, biscotti, wafer rolls, and marshmallows near dipping sauces or mousse. Keep crunchy items away from anything that might make them soggy.
- Incorporate Fresh Fruit: Wash and dry fruit thoroughly. Slice apples and pears. Arrange berries and chocolate-dipped fruits in clusters for pops of color.
- Include Chocolate-Covered Nuts: Scatter in small piles or use mini bowls. If allergies are a concern, keep nuts far from other items and clearly label.
- Fill in Gaps: Use mini cookies, extra truffles, or dried fruit to fill empty spaces. The board should look abundant but not overcrowded.
- Optional Fondue: Melt 8 oz (225 g) of chocolate with 1/2 cup (120 ml) cream in a double boiler. Transfer to a bowl and keep warm. Place in the center for dipping.
- Finishing Touches: Drizzle caramel or peanut butter sauce over a few items. Sprinkle with flaked sea salt or edible gold dust if you want extra flair.
- Serve and Enjoy: Set out tongs, toothpicks, and napkins. Encourage guests to mix and match bites. Watch as the board disappears!
Troubleshooting Tips: If your board looks sparse, add more fruit or cookies. If chocolate items start to melt, chill the board for 10 minutes before serving. If you’re worried about cross-contamination with nuts, use cupcake liners for separation.
Sensory Cues: You want glossy chocolate, crisp cookies, and vibrant fruit. If anything feels too soft or sticky, chill briefly before arranging. The board should smell rich and inviting—like a chocolate shop!
Efficiency Tip: Prep brownies and cookies ahead of time and freeze. Arrange items just before guests arrive for the freshest look and texture.
Cooking Tips & Techniques
Let’s talk real-life dessert board building. I’ve made a few mistakes over the years (like putting juicy fruits next to cookies… hello, soggy disaster!). Here are my go-to tips for getting it right:
- Balance Flavors and Textures: Mix creamy, crunchy, chewy, and juicy. The best boards have variety—it keeps every bite interesting.
- Temperature Matters: Serve cold items (like mousse or pudding) in chilled bowls, and keep fruits fresh by prepping just before guests arrive.
- Don’t Overcrowd: Leave some breathing room so nothing gets crushed. You want each treat to stand out visually.
- Pre-portion for Easy Grabbing: Cut brownies and bars small, and break chocolate into bite-sized pieces.
- Label Allergens: If you include nuts or gluten, add a little sign or use separate bowls. It helps guests feel safe and welcome.
- Practice Makes Perfect: My first board looked a bit chaotic, but now I lay out everything on the counter first and arrange by color and shape before setting on the board. Don’t worry about perfection!
Common mistakes? Overloading with just one kind of chocolate. Or skipping the fruit—trust me, you need something fresh. Timing is key: have everything ready, but assemble last minute so nothing wilts or melts. If you want to multitask, prep dips or sauces ahead, and keep cookies and brownies in airtight containers until serving.
Consistency tip: Use a pattern or symmetry for arranging. It makes the board look “Pinterest-perfect” and totally welcoming. And if you’re short on time, get the kids to help—mine love placing marshmallows!
Variations & Adaptations
Here’s where you can flex your creative muscles and make the chocolate lover’s dessert board your own:
- Dietary-Friendly: Use gluten-free cookies, vegan chocolate bars, and plant-based mousse. Brands like Enjoy Life and Hu Kitchen are lifesavers for allergies.
- Seasonal: In summer, load up on fresh berries, cherries, and peaches. In winter, add candied orange slices, spiced nuts, or gingerbread cookies.
- Flavor Twists: Add chili-dusted chocolate, salted caramel truffles, or espresso beans for a grown-up edge.
- Cooking Methods: Toast marshmallows with a kitchen torch, or use a mini slow cooker to keep fondue warm. If you want to bake everything from scratch, go for it—just plan ahead for cooling time.
- Taste Preferences: For kids, stick to milk chocolate and fun shapes. For adults, mix in dark chocolate, nuts, and strong flavors like coffee or orange zest.
- Personal Favorite: Once I swapped in chocolate-dipped dried pineapple and coconut macaroons for a tropical twist—total hit!
Don’t be afraid to experiment. If someone in your group can’t have dairy, there are plenty of coconut milk-based mousse recipes. Allergic to nuts? Use seeds or extra fruit. The board is totally customizable.
Serving & Storage Suggestions
Serve the chocolate lover’s dessert board at room temperature for the best flavor and texture. If you’re including mousse or fondue, keep those cool or warm as needed in small bowls.
Presentation matters: arrange in color blocks, use edible flowers or fresh mint sprigs for pops of green, and always have napkins handy (chocolate gets messy!). Pair with coffee, red wine, or even a sparkling mocktail.
Leftovers? Store brownies, cookies, and chocolate bars in airtight containers at room temperature for up to 3 days. Fruit should be refrigerated and eaten within a day. Mousse or fondue can be covered and chilled—just reheat gently in a microwave or double boiler before serving again.
Pro tip: As the board sits, flavors mingle and deepen. Some say it’s even better the next day! Just keep everything covered so it doesn’t dry out.
Nutritional Information & Benefits
Here’s a general guide for a chocolate lover’s dessert board (per serving, about 6-8 treats):
- Calories: 250-350
- Protein: 3-5 g
- Fat: 15-20 g
- Sugar: 20-30 g
Dark chocolate offers antioxidants and can even boost your mood (seriously, there’s research!). Fresh fruit provides vitamins and fiber, balancing out the richness. For gluten-free or dairy-free guests, just swap in appropriate treats and check labels for allergens.
I like to think dessert is about joy, but it’s good to be mindful if you have dietary needs. Personally, I keep my boards balanced—lots of fruit, quality chocolate, and portion-sized bites. That way, everyone can indulge without overdoing it.
Conclusion
If you’re looking for a dessert that’s as fun to make as it is to eat, this chocolate lover’s dessert board is the answer. It’s flexible, visually stunning, and totally crowd-pleasing. You can customize every element, making it perfect for any group or occasion.
I always love seeing the reactions when guests spot the board—instant excitement, lots of laughter, and plenty of “oohs” and “aahs.” It’s a treat that brings people together, sparks conversation, and makes any gathering feel special.
Give this recipe a try, and don’t be afraid to put your own spin on it! Share your favorite chocolate combos or creative twists in the comments. If you snap a photo for Pinterest, tag me—I’d love to see your masterpiece. Have fun, and happy chocolate entertaining!
Frequently Asked Questions
How far in advance can I assemble a chocolate lover’s dessert board?
It’s best to assemble just before serving to keep fruit fresh and cookies crisp. You can prep baked items and dips a day ahead and store them separately.
What are the best chocolates to use for the board?
I recommend a mix of dark, milk, and white chocolate. Choose brands you enjoy—Lindt, Ghirardelli, and Godiva are always crowd-pleasers.
Can I make this board nut-free?
Absolutely! Skip chocolate-covered nuts and add extra fruit, pretzels, or seed-based treats. Always check labels for hidden allergens.
What drinks pair well with a chocolate dessert board?
Coffee, red wine, and milk are classic choices. Sparkling water or mocktails work well for kids or non-drinkers.
How do I keep chocolate from melting on the board?
If your house is warm, chill the board for 10 minutes before serving and keep it out of direct sunlight. Serve mousse and fondue in chilled bowls if needed.
Pin This Recipe!
Chocolate Lover’s Dessert Board

A visually stunning and customizable dessert board packed with chocolate treats, fresh fruit, and playful dippables. Perfect for entertaining, birthdays, holidays, or cozy nights in, this board is easy to assemble and guaranteed to delight any crowd.
- Prep Time: 20 minutes
- Cook Time: 10 minutes (if making fondue or baking brownies/cookies)
- Total Time: 30 minutes
- Yield: 8-10 servings
- Category: Dessert
- Cuisine: American
Ingredients
- Chocolate truffles (store-bought or homemade)
- Brownie bites (homemade or bakery bought, cut into 1-inch squares)
- Chocolate-dipped pretzels
- Chocolate bars (dark, milk, and white varieties)
- Chocolate-covered nuts (almonds, hazelnuts, or peanuts)
- Chocolate mousse or pudding cups
- Chocolate-covered fruit (strawberries, bananas, or dried apricots)
- Mini chocolate chip cookies
- Biscotti or wafer rolls
- Marshmallows (regular, mini, or gourmet)
- Fresh fruit (sliced apples, pears, raspberries, blueberries)
- Chocolate fondue (optional: 8 oz chocolate + 1/2 cup cream)
- Caramel or peanut butter sauce (optional)
Instructions
- Choose a large board (about 18 x 12 inches) and place small bowls for mousse, sauces, or fondue first, spacing them out.
- Prepare chocolate items: bake brownies and cookies if homemade, let cool, and cut into bite-sized pieces.
- Arrange anchor items (brownies, truffles, chocolate bars) around the bowls, stacking or fanning out for visual interest.
- Add dippable items (pretzels, biscotti, wafer rolls, marshmallows) near dipping sauces or mousse, keeping crunchy items away from moisture.
- Wash and dry fresh fruit thoroughly. Slice apples and pears, and arrange berries and chocolate-dipped fruits in clusters.
- Include chocolate-covered nuts in small piles or mini bowls, keeping them separate if allergies are a concern.
- Fill in gaps with mini cookies, extra truffles, or dried fruit for an abundant look.
- Optional: Prepare chocolate fondue by melting 8 oz chocolate with 1/2 cup cream in a double boiler. Transfer to a bowl and keep warm in the center.
- Drizzle caramel or peanut butter sauce over select items. Sprinkle with flaked sea salt or edible gold dust for extra flair.
- Serve with tongs, toothpicks, and napkins. Encourage guests to mix and match bites and enjoy!
Notes
Mix and match ingredients based on dietary needs and preferences. Assemble just before serving for best texture and freshness. Use cupcake liners or separate bowls for allergens. Chill the board briefly if chocolate items start to melt. Add edible flowers or mint for extra color. Store leftovers in airtight containers.
Nutrition
- Serving Size: About 6-8 treats per person
- Calories: 300
- Sugar: 25
- Sodium: 120
- Fat: 18
- Saturated Fat: 10
- Carbohydrates: 35
- Fiber: 3
- Protein: 4
Keywords: chocolate dessert board, entertaining, party dessert, chocolate platter, easy dessert, holiday dessert, birthday dessert, chocolate treats, dessert charcuterie, crowd-pleaser



