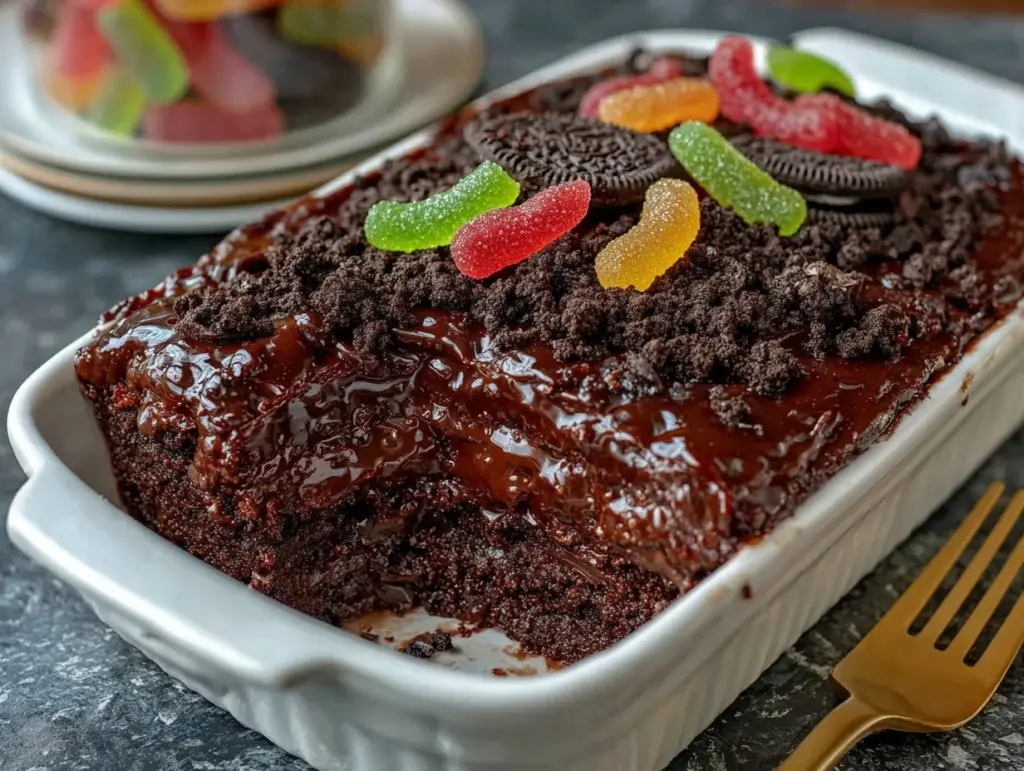
There’s something so nostalgic and fun about dirt cake, isn’t there? The creamy chocolate pudding layers, crunchy cookie “dirt,” and playful gummy worms all make for the perfect combo of flavor and whimsy. Every Halloween, I whip up this irresistible chocolate pudding dirt cake, and let me tell you—it’s always a hit with kids and adults alike. The best part? It’s easy to make, utterly delicious, and you don’t need any fancy ingredients. It’s the ultimate spooky treat for your Halloween party!
I first stumbled upon dirt cakes during a potluck years ago, and I was instantly hooked. But over the years, I’ve tweaked the recipe to make it my own. From adding fun Halloween-themed toppings to layering the pudding just right, this dessert has become a tradition at my house. Whether you’re hosting a Halloween bash or looking for a fun dessert to make with your family, this chocolate pudding dirt cake is guaranteed to bring smiles (and maybe a few spooky giggles).
Why You’ll Love This Recipe
- Perfect for Halloween: With its creepy, “dirt-like” appearance and gummy worm garnish, it’s ideal for spooky celebrations.
- Fun for All Ages: Kids love the playful presentation, and adults appreciate the rich chocolatey flavor.
- Quick and Easy: You can whip this up in about 30 minutes with minimal effort, making it a great last-minute dessert.
- Simple Ingredients: Most of the ingredients are pantry staples, so you won’t have to run to the store.
- Customizable: Add Halloween-themed candies, swap out gummy worms for spiders, or even use orange frosting for a festive twist.
- No Baking Required: This is a no-bake dessert, which means less hassle and perfect results every time.
What sets this dirt cake apart is the smooth, luscious pudding layers paired with the crunchy cookie crumbles. It’s not just delicious; it’s a dessert that makes people smile from the first bite. Plus, it’s great for impressing your guests without spending hours in the kitchen!
Ingredients You’ll Need
This recipe uses simple, easy-to-find ingredients that come together for a spooky, delicious treat.
- Chocolate pudding mix: You’ll need two 3.9-ounce boxes for thick, creamy layers.
- Milk: 4 cups of cold milk to whisk up the pudding (use whole milk for extra richness).
- Whipped topping: One 8-ounce tub, thawed (or substitute with homemade whipped cream).
- Chocolate sandwich cookies: About 20 cookies, crushed into fine crumbs (Oreos work perfectly!).
- Gummy worms: For that classic dirt cake look. You can also use gummy spiders for an extra spooky effect.
- Halloween candies: Optional, but fun! Mini pumpkins, candy eyeballs, or spooky sprinkles add festive flair.
If you’re feeling adventurous, you can add a layer of cream cheese frosting or even sprinkle in chopped nuts for texture. Don’t forget, the crushed cookies are key—they’re what gives this dessert its “dirt” look!
Equipment Needed
- Mixing bowls: You’ll need at least two—one for the pudding and one for the whipped topping.
- Whisk: Essential for mixing the pudding and ensuring a silky finish.
- Food processor or rolling pin: To crush the cookies into fine crumbs (a food processor makes it faster, but a rolling pin works just as well).
- 9×13-inch pan or serving cups: Use a pan for a family-style presentation or clear cups for individual servings.
- Spatula: For spreading the pudding and whipped topping layers evenly.
If you don’t have a food processor, simply place the cookies in a zip-top bag, seal it, and crush them with a rolling pin. Easy and mess-free!
Preparation Method
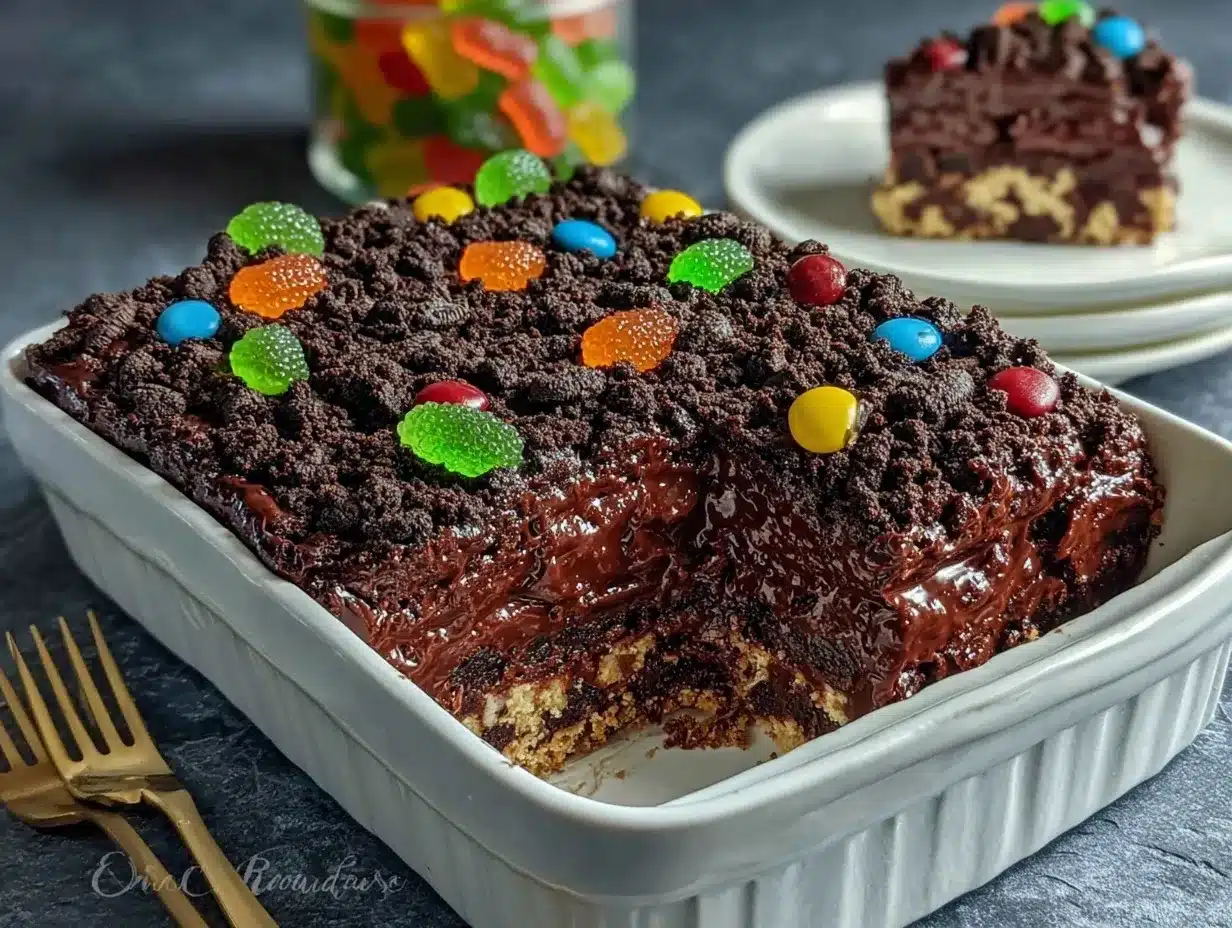
- Make the pudding: In a large mixing bowl, whisk together the chocolate pudding mix and cold milk until thick and smooth. Let it sit for 5 minutes to fully set.
- Prepare the cookie crumbs: Crush the chocolate sandwich cookies into fine crumbs using a food processor or rolling pin. Set aside.
- Layer the dessert: In a 9×13-inch pan, spread half of the pudding as the bottom layer. Sprinkle a generous layer of crushed cookies over the pudding.
- Add the whipped topping: Gently fold the whipped topping into the remaining pudding until combined. Spread this mixture over the cookie layer.
- Finish with cookie “dirt”: Top the dessert with the remaining crushed cookies to create the dirt-like appearance.
- Decorate: Arrange gummy worms crawling out of the “dirt” and add any Halloween candies for extra spookiness.
- Chill and serve: Cover the pan with plastic wrap and refrigerate for at least 1 hour before serving. This allows the layers to set beautifully.
For individual servings, layer the pudding and cookie crumbs in clear cups and decorate each one with gummy worms and candies. They’re perfect for grabbing and go!
Cooking Tips & Techniques
- Use whole milk for the pudding to achieve the creamiest texture.
- Crush the cookies finely for a realistic “dirt” appearance, but leave some larger chunks for added crunch.
- When folding the whipped topping into the pudding, be gentle to keep it light and airy.
- If you’re short on time, make the pudding and cookie crumbs the day before and assemble the cake on Halloween morning.
- For a spooky touch, add candy eyeballs peeking out of the “dirt” or drizzle red gel frosting for a creepy effect.
Don’t rush the chilling time—it helps the flavors meld and makes the dessert easier to slice or scoop!
Variations & Adaptations
- Gluten-free version: Use gluten-free chocolate sandwich cookies to make this dessert suitable for gluten-sensitive guests.
- Vegan adaptation: Swap the pudding mix for a dairy-free alternative, use almond milk, and opt for coconut whipped cream.
- Seasonal twist: Add orange food coloring to the whipped topping for a bright, Halloween-themed look.
- Flavor boost: Mix crushed peanut butter cups into the pudding layer for a chocolate-peanut butter combo.
- Other toppings: Switch out gummy worms for candy spiders or ghost-shaped marshmallows for a spooky upgrade.
Last year, I added a layer of crushed candy canes for a peppermint-chocolate twist—it was a hit!
Serving & Storage Suggestions
This chocolate pudding dirt cake is best served chilled, straight from the fridge. Here’s how to make the most of it:
- Presentation: Serve it in the pan for a family-style dessert or in individual clear cups for a party-friendly option.
- Pairings: Enjoy it with a glass of milk, hot cocoa, or even a scoop of vanilla ice cream.
- Storage: Cover the pan tightly with plastic wrap and store in the refrigerator for up to 3 days.
- Freezing: Freeze leftovers in an airtight container for up to 1 month. Thaw in the fridge overnight before serving.
- Reheating: No need to reheat—just serve it cold for the best taste!
As the cake sits, the cookie crumbs soften slightly, blending beautifully with the pudding layers.
Nutritional Information & Benefits
While this dessert is all about indulgence, here’s a general idea of its nutritional profile:
- Calories: Approximately 250 per serving.
- Protein: 3 grams (thanks to the milk and pudding).
- Carbohydrates: 35 grams.
- Fats: 10 grams.
Using whole milk adds calcium, and swapping whipped topping for Greek yogurt can increase protein while reducing sugar. For a lighter version, consider using sugar-free pudding mix and low-fat cookies.
Conclusion
This irresistible chocolate pudding dirt cake is more than just a dessert—it’s a fun, festive experience perfect for Halloween. With its playful gummy worms and spooky “dirt” appearance, it’s sure to delight guests of all ages. Plus, it’s easy to customize and make your own. Whether you’re hosting a party or just indulging with family, this recipe is always a crowd-pleaser.
I love how this cake brings people together, sparking laughter and conversations over its quirky presentation. So grab your mixing bowls and get creative—your Halloween dessert table is about to get a whole lot spookier!
If you try this recipe, let me know how it turns out in the comments below. Don’t forget to share your version on social media and tag me—I’d love to see your spooky creations!
FAQs
Can I use homemade pudding instead of instant mix?
Absolutely! Homemade pudding works wonderfully, but it might take a little more time. Let it cool completely before layering.
Can I make this dessert ahead of time?
Yes, you can prepare the pudding and cookie crumbs a day ahead and assemble the cake on the day of your event.
What’s the best way to crush the cookies?
A food processor is the fastest option, but placing them in a zip-top bag and using a rolling pin works just as well.
Can I use a different candy instead of gummy worms?
Definitely! Gummy spiders, candy eyeballs, or ghost-shaped marshmallows are great alternatives.
How do I make this dessert healthier?
Use sugar-free pudding mix, low-fat milk, and reduced-fat whipped topping for a lighter version.
Pin This Recipe!

Irresistible Chocolate Pudding Dirt Cake Recipe for Halloween

This spooky and fun chocolate pudding dirt cake is perfect for Halloween, featuring creamy pudding layers, crunchy cookie crumbs, and playful gummy worms.
- Prep Time: 15 minutes
- Cook Time: 0 minutes
- Total Time: 1 hour 15 minutes
- Yield: 12 servings 1x
- Category: Dessert
- Cuisine: American
Ingredients
- 2 (3.9-ounce) boxes of chocolate pudding mix
- 4 cups cold milk
- 1 (8-ounce) tub whipped topping, thawed
- 20 chocolate sandwich cookies, crushed into fine crumbs
- Gummy worms
- Optional: Halloween candies like mini pumpkins, candy eyeballs, or spooky sprinkles
Instructions
- In a large mixing bowl, whisk together the chocolate pudding mix and cold milk until thick and smooth. Let it sit for 5 minutes to fully set.
- Crush the chocolate sandwich cookies into fine crumbs using a food processor or rolling pin. Set aside.
- In a 9×13-inch pan, spread half of the pudding as the bottom layer. Sprinkle a generous layer of crushed cookies over the pudding.
- Gently fold the whipped topping into the remaining pudding until combined. Spread this mixture over the cookie layer.
- Top the dessert with the remaining crushed cookies to create the dirt-like appearance.
- Arrange gummy worms crawling out of the ‘dirt’ and add any Halloween candies for extra spookiness.
- Cover the pan with plastic wrap and refrigerate for at least 1 hour before serving.
Notes
[‘Use whole milk for the pudding to achieve the creamiest texture.’, “Crush the cookies finely for a realistic ‘dirt’ appearance, but leave some larger chunks for added crunch.”, ‘Make the pudding and cookie crumbs the day before and assemble the cake on Halloween morning for convenience.’, ‘Add candy eyeballs or red gel frosting for a spooky touch.’]
Nutrition
- Serving Size: 1 slice or cup
- Calories: 250
- Fat: 10
- Carbohydrates: 35
- Protein: 3
Keywords: Halloween dessert, chocolate pudding dirt cake, no-bake dessert, spooky treat



