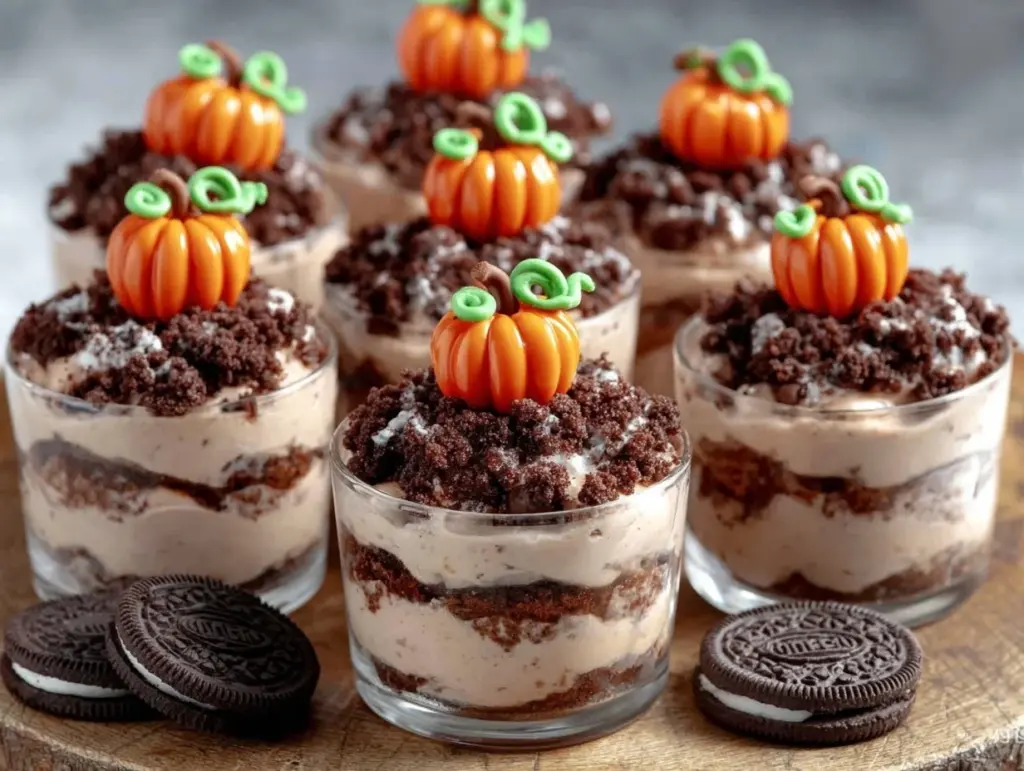
There’s something undeniably magical about Halloween that brings out the creative spirit in all of us. And when it comes to festive treats, these Pumpkin Patch Dirt Cups are an absolute showstopper! Picture rich, creamy layers of chocolate pudding, crunchy cookie crumbles that look just like soil, and adorable candy pumpkins perched atop—a miniature edible pumpkin patch that’s as fun to make as it is to eat. Whether you’re hosting a Halloween party or simply looking for a fun kitchen activity with the kids, this recipe is the perfect way to celebrate the spooky season.
I first made these dirt cups for a neighborhood Halloween gathering, and let me tell you—seeing the joy on everyone’s faces was worth every ounce of effort. Watching kids excitedly dig into their cups and adults marveling at the creative presentation made me realize that these treats are more than just food; they’re a little slice of Halloween magic. Ready to make your own Pumpkin Patch Dirt Cups? Let’s get started!
Why You’ll Love This Recipe
- Perfect for Halloween Celebrations: Whether it’s a party, a school event, or a cozy family night, these cups steal the show.
- Kid-Friendly: This recipe is a blast to make with little helpers. They’ll love creating their own edible pumpkin patches.
- No Baking Required: Quick, easy, and mess-free—perfect for busy days when you don’t want to turn on the oven.
- Customizable and Fun: You can add your own spooky twist—think gummy worms, candy ghosts, or even a sprinkle of edible glitter.
- Instagram-Worthy: Let’s face it—these cups are cute enough to be the centerpiece of your Halloween dessert table.
- Deliciously Decadent: The combination of creamy chocolate pudding and crunchy cookie crumbles hits all the right notes.
What sets these Pumpkin Patch Dirt Cups apart is the festive twist. Sure, regular dirt cups are fun, but the addition of candy pumpkins and themed decorations takes these to a whole new level. Plus, the recipe is so simple that you can whip them up in no time, but they look like they took hours. Trust me, you’ll want to make extra—these disappear fast!
What Ingredients You Will Need
This recipe uses simple, easy-to-find ingredients that come together beautifully to create these festive dirt cups. Here’s what you’ll need:
- Chocolate pudding mix: You can use instant pudding mix for a quick fix or make homemade pudding if you prefer.
- Milk: Whole milk works best for a creamy pudding, but you can use almond or oat milk for a dairy-free option.
- Chocolate sandwich cookies: Crushed into crumbs to mimic the texture of dirt (Oreo cookies are perfect for this).
- Candy pumpkins: These iconic orange candies are the stars of the show.
- Green icing or candy grass: For creating the look of a pumpkin patch.
- Whipped cream: Optional, but adds a luscious layer of texture and flavor.
- Optional decorations: Gummy worms, candy gravestones, or edible glitter for an extra spooky touch.
Feel free to adapt the ingredients to suit your dietary needs or preferences. For example, use gluten-free cookies if needed or swap out the candy pumpkins for chocolate-covered nuts for a slightly less sweet treat.
Equipment Needed
You don’t need fancy kitchen gadgets to create these adorable dirt cups! Here’s what you’ll need:
- Mixing bowls: For preparing the pudding.
- Whisk: To ensure your pudding is lump-free.
- Plastic sandwich bags: Perfect for crushing cookies without the mess.
- Clear cups or jars: To show off the layers (plastic cups are great for kids).
- Spoons: For layering and decorating.
Don’t worry if you don’t have clear cups on hand—use bowls, mason jars, or even wine glasses for a fancy twist. Crushing the cookies in a zip-top bag is my favorite hack; it keeps the crumbs contained and makes cleanup a breeze!
Preparation Method

Let’s get to the fun part! These steps are easy to follow, and you’ll have your Pumpkin Patch Dirt Cups ready in no time.
- Prepare the pudding: In a mixing bowl, whisk together the chocolate pudding mix and milk according to package instructions. Let it set for 5 minutes.
- Crush the cookies: Place the chocolate sandwich cookies in a zip-top bag and crush them into fine crumbs using a rolling pin or your hands.
- Layer the cups: Start by adding a layer of chocolate pudding to the bottom of each clear cup. Follow with a layer of cookie crumbs. Repeat until the cup is almost full, ending with a layer of cookie crumbs.
- Add whipped cream: If desired, add a dollop of whipped cream on top of the cookie crumbs for extra creaminess.
- Decorate the pumpkin patch: Use green icing or candy grass to create the patch. Place candy pumpkins on top, gently pressing them into the “soil.”
- Optional spooky touches: Add gummy worms, candy gravestones, or sprinkle edible glitter for extra Halloween flair.
That’s it! These festive dirt cups are ready to serve. Make sure to refrigerate them until you’re ready to enjoy—they’re best served chilled.
Cooking Tips & Techniques
- Get creative with the decorations: Don’t hold back—let your imagination run wild! Use gummy worms for a creepy-crawly effect or candy eyeballs for a spooky vibe.
- Chill the pudding properly: Ensure the pudding sets completely before layering for the best texture.
- Use fresh cookie crumbs: Crush the cookies right before assembling to keep the “soil” crunchy.
- Layer with precision: Use a spoon or piping bag for neat, even layers—this will make your dirt cups look professional.
- Prep ahead: You can make the pudding and crush the cookies a day ahead to save time.
Remember, there’s no right or wrong way to create these cups—they’re meant to be fun! Don’t stress about perfection; the charm is in their homemade touch.
Variations & Adaptations
Here are some fun ways to adapt this recipe to suit different tastes, occasions, or dietary needs:
- Dairy-Free Option: Use dairy-free milk like almond or oat milk and pair it with pudding mix that works with non-dairy milk.
- Gluten-Free Version: Substitute gluten-free chocolate cookies to make this recipe safe for gluten-sensitive guests.
- Seasonal Twist: Swap the candy pumpkins for edible snowflakes during winter or candy flowers for spring.
- Flavor Variations: Experiment with different pudding flavors like caramel, vanilla, or butterscotch for a unique twist.
- Extra Halloween Fun: Incorporate candy bats, spiders, or mini skeletons to make the dirt cups even spookier.
I once tried adding crushed peanut butter cups to the cookie layer for an extra indulgent treat, and let me tell you—it was a hit! Don’t be afraid to mix things up and put your own spin on this recipe.
Serving & Storage Suggestions
These Pumpkin Patch Dirt Cups are best served chilled. Here are some tips for serving and storing:
- Serving: Present them with a small spoon and let guests dig in—literally! Pair with hot apple cider or pumpkin spice lattes for the ultimate fall vibe.
- Storage: Store the cups covered in the fridge for up to 3 days. If making ahead, keep the cookie crumbs separate until ready to assemble to maintain crunchiness.
- Reheating: These aren’t meant to be reheated, but they taste just as good chilled straight from the fridge.
- Flavors Over Time: The cookie crumbs will soften slightly after a day, giving the cups a more cake-like texture.
Pro tip: Prepare extra decorations and let guests add their own spooky touches when serving. It’s a great way to get everyone involved.
Nutritional Information & Benefits
While these dirt cups are definitely a treat, here’s a quick look at some nutritional highlights:
- Calories: Approximately 280 per cup (depending on portion size).
- Key Ingredients: Chocolate pudding provides calcium, while the candy pumpkins add a fun dose of sweetness.
- Dietary Considerations: Can be easily adapted to be dairy-free or gluten-free.
Keep in mind, these are meant to be enjoyed as a festive indulgence. Balance them out with nutritious meals throughout the day for a guilt-free treat.
Conclusion
These Festive Pumpkin Patch Dirt Cups are more than just a Halloween dessert—they’re a creative way to bring people together and celebrate the spooky season. With their adorable presentation, easy preparation, and customizable options, they’re sure to be a hit with kids and adults alike.
What I love most about this recipe is how it combines fun and flavor. It’s not every day you get to create a miniature edible pumpkin patch, and the joy it brings is unmatched. So grab your ingredients, put on your favorite Halloween playlist, and get ready to make some magic in the kitchen!
If you try this recipe, I’d love to hear how it turned out! Share your creations in the comments below or tag me on social media. Let’s spread the Halloween spirit one dirt cup at a time. Happy haunting!
FAQs
Can I make these Pumpkin Patch Dirt Cups ahead of time?
Absolutely! You can prepare the pudding and cookie crumbs a day in advance. Assemble the cups on the day of serving for the freshest look and crunch.
What can I use instead of candy pumpkins?
If you can’t find candy pumpkins, try using orange chocolate truffles or orange gummy candies. You can even shape fondant or marzipan into mini pumpkins!
Can I make this recipe healthier?
Yes! Use sugar-free pudding mix, low-fat milk, and swap the candy for fresh fruit like strawberries or blueberries.
How many servings does this recipe make?
This recipe makes about 6–8 cups, depending on the size of your containers. You can easily scale up for larger gatherings.
Can I freeze the dirt cups?
While it’s not recommended to freeze assembled cups due to the texture changes, you can freeze the pudding separately and thaw it when ready to use.
Pin This Recipe!

Festive Pumpkin Patch Dirt Cups Recipe for Easy Halloween Fun

These Pumpkin Patch Dirt Cups are a fun and festive Halloween treat featuring layers of chocolate pudding, cookie crumbles, and candy pumpkins to create an adorable edible pumpkin patch.
- Prep Time: 10 minutes
- Cook Time: 5 minutes
- Total Time: 15 minutes
- Yield: 6–8 servings 1x
- Category: Dessert
- Cuisine: American
Ingredients
- 1 package chocolate pudding mix
- 2 cups milk (whole milk or dairy-free alternatives like almond or oat milk)
- 15 chocolate sandwich cookies (e.g., Oreo), crushed into crumbs
- Candy pumpkins
- Green icing or candy grass
- Whipped cream (optional)
- Optional decorations: gummy worms, candy gravestones, edible glitter
Instructions
- Prepare the pudding: In a mixing bowl, whisk together the chocolate pudding mix and milk according to package instructions. Let it set for 5 minutes.
- Crush the cookies: Place the chocolate sandwich cookies in a zip-top bag and crush them into fine crumbs using a rolling pin or your hands.
- Layer the cups: Start by adding a layer of chocolate pudding to the bottom of each clear cup. Follow with a layer of cookie crumbs. Repeat until the cup is almost full, ending with a layer of cookie crumbs.
- Add whipped cream: If desired, add a dollop of whipped cream on top of the cookie crumbs for extra creaminess.
- Decorate the pumpkin patch: Use green icing or candy grass to create the patch. Place candy pumpkins on top, gently pressing them into the ‘soil.’
- Optional spooky touches: Add gummy worms, candy gravestones, or sprinkle edible glitter for extra Halloween flair.
- Refrigerate until ready to serve. Serve chilled.
Notes
[‘Get creative with decorations like gummy worms or candy eyeballs for extra Halloween flair.’, ‘Ensure the pudding sets completely before layering for the best texture.’, “Crush cookies right before assembling to keep the ‘soil’ crunchy.”, ‘Prepare pudding and cookie crumbs a day ahead to save time.’]
Nutrition
- Serving Size: 1 cup
- Calories: 280
- Sugar: 25
- Sodium: 200
- Fat: 10
- Saturated Fat: 5
- Carbohydrates: 40
- Fiber: 2
- Protein: 4
Keywords: Halloween, Pumpkin Patch Dirt Cups, Chocolate Dessert, Kid-Friendly, No-Bake, Festive Treats



