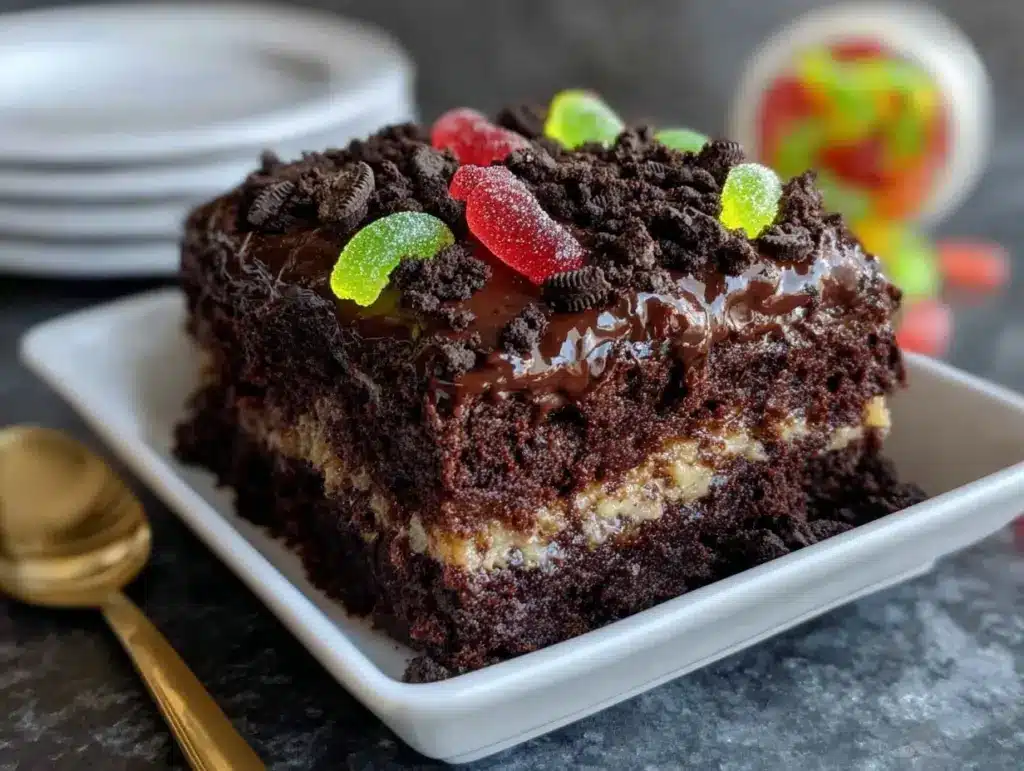
The crunch of chocolate cookie crumbs, the creamy richness of pudding, and the spooky fun of turning dessert into a Halloween masterpiece—this Ultimate Chocolate Pudding Dirt Cake is everything you need for your next Halloween party. I promise, once you make it, you’ll wonder why you haven’t made it every year. It’s easy, incredibly delicious, and perfect for serving to friends, family, or little trick-or-treaters.
This dirt cake is not your average dessert. With layers of chocolate, a touch of whimsy, and a whole lot of Halloween flair, it’s bound to be the centerpiece of your spooky spread. Whether you’re looking for a fun recipe to make with the kids or something to impress guests, this recipe ticks all the boxes. And trust me, it’s as much fun to make as it is to eat!
Why You’ll Love This Recipe
- Perfect for Halloween: The creepy, dirt-like appearance and gummy worms make it scream Halloween! It’s a dessert that’s entertaining and delicious.
- Kid-Friendly: Kids love helping with this recipe, especially when hiding the gummy worms and crushing cookies. It’s a fun way to get them involved in the kitchen.
- Easy to Make: No baking required! This dirt cake comes together quickly with simple layering and a handful of ingredients.
- Versatile: You can customize it to fit your theme. Add candy pumpkins, tombstones, or even edible spiders to amp up the Halloween vibe.
- Totally Delicious: The combination of creamy chocolate pudding, whipped topping, and crunchy cookie crumbs is an unbeatable flavor and texture combo.
This isn’t just another chocolate dessert—it’s the kind of recipe that gets people asking for seconds. And let’s be honest, it’s an iconic Halloween treat that’s equal parts spooky and scrumptious!
What Ingredients You Will Need
This recipe uses everyday ingredients you probably already have or can easily grab at the store. Here’s everything you’ll need to create the ultimate chocolate pudding dirt cake:
- Instant chocolate pudding: Two small packs (3.4 oz each) or one large pack (5.9 oz).
- Milk: Cold whole milk or 2% milk, as per pudding package instructions.
- Whipped topping: One container of frozen whipped topping, thawed (Cool Whip works great).
- Chocolate sandwich cookies: About 24 cookies (like Oreos), crushed into fine crumbs.
- Butter: Melted, for extra richness.
- Cream cheese: Softened, to add smoothness to the pudding layer.
- Powdered sugar: For lightly sweetening the cream cheese mixture.
- Gummy worms: A handful for decoration (you can add more for extra spooky appeal).
- Optional Halloween toppings: Candy pumpkins, candy eyeballs, or any edible Halloween decorations you love.
Feel free to swap the gummy worms for other spooky candy or use gluten-free cookies if you need to tweak the recipe for dietary needs.
Equipment Needed
You don’t need any fancy tools for this recipe—just a few basics. Here’s what you’ll need:
- Mixing bowls: A couple of medium to large bowls for preparing the pudding and cream cheese mixture.
- Hand mixer or stand mixer: For blending the cream cheese and powdered sugar until smooth.
- Food processor or rolling pin: To crush the chocolate cookies into crumbs.
- 9×13-inch dish: Perfect for layering and serving the dirt cake.
- Spatula: For spreading layers evenly.
If you don’t have a food processor, placing cookies in a zippered bag and crushing them with a rolling pin works just as well!
Preparation Method
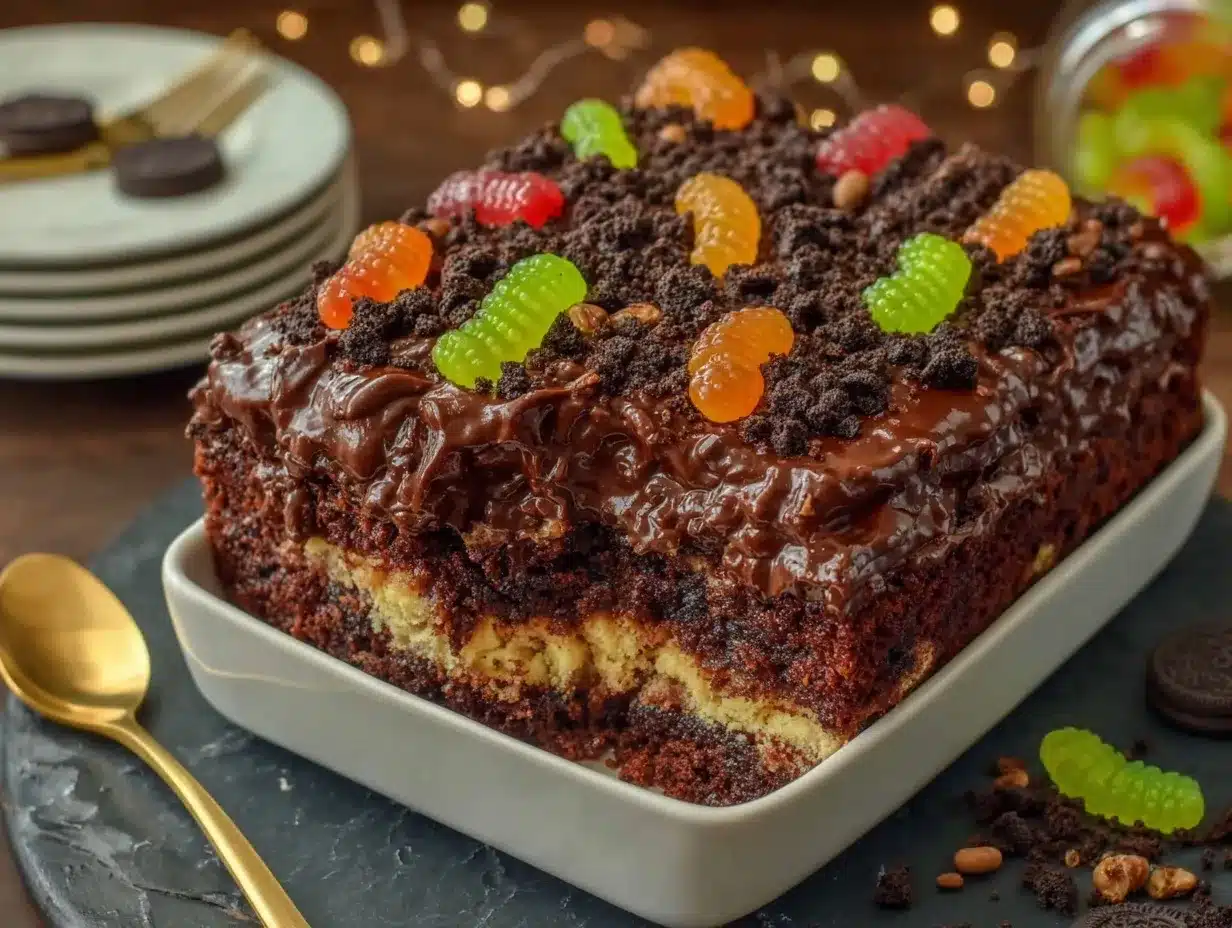
Follow these simple steps to make your Ultimate Chocolate Pudding Dirt Cake:
- Prepare the pudding: In a mixing bowl, whisk the instant pudding mix with cold milk according to package instructions. Set aside to thicken for about 5 minutes.
- Make the cream cheese layer: In another bowl, beat the softened cream cheese and powdered sugar until smooth and creamy. Fold in the thawed whipped topping until evenly combined.
- Crush the cookies: Use a food processor to crush the chocolate sandwich cookies into fine crumbs. If using a rolling pin, place the cookies in a zippered bag and crush until no large chunks remain.
- Layer the dirt cake: Start with a layer of cookie crumbs at the bottom of your dish. Spread half of the cream cheese mixture evenly over the crumbs. Add half of the chocolate pudding on top, followed by another layer of cookie crumbs.
- Repeat the layers: Add the remaining cream cheese mixture, followed by the rest of the pudding. Finish with a generous layer of cookie crumbs on top.
- Decorate: Arrange gummy worms on top so they peek out of the “dirt.” Add any other Halloween decorations you like.
- Chill and serve: Refrigerate the dirt cake for at least 2 hours to set. Serve cold and enjoy the spooky fun!
Cooking Tips & Techniques
- Use cold milk for the pudding to ensure it thickens properly—lukewarm milk won’t give you the right consistency.
- For the smoothest cream cheese layer, let your cream cheese soften at room temperature before beating it.
- Crush the cookies into very fine crumbs for the most realistic “dirt” appearance. A few small chunks are okay for texture.
- If you’re making this ahead of time, decorate just before serving to keep gummy worms and candy from getting soggy.
- Want extra richness? Add a layer of chocolate ganache or melted chocolate between the pudding and cookie crumbs.
Variations & Adaptations
- Gluten-Free Version: Use gluten-free chocolate sandwich cookies for the crumbs.
- Seasonal Twist: Swap gummy worms for candy canes and sprinkle crushed peppermint on top for a Christmas version.
- Flavor Boost: Add a tablespoon of instant espresso powder to the pudding for a mocha-flavored dirt cake.
- Healthier Adaptation: Use sugar-free pudding mix and light whipped topping to reduce the sugar content.
- Make it spooky: Decorate with candy tombstones, skeletons, or Halloween sprinkles for extra festive flair.
Serving & Storage Suggestions
This dirt cake is best served cold, straight from the fridge. Here are some tips for serving and storing:
- Serving: Use a serving spoon to scoop out portions. For a Halloween party, serve in small cups or jars for individual servings.
- Pairing Suggestions: Serve alongside hot cocoa or a glass of milk to complete the Halloween treat theme.
- Storage: Cover the dish tightly with plastic wrap and refrigerate leftovers for up to 3 days.
- Freezing: You can freeze the dirt cake for up to 2 weeks, though the texture of the whipped topping may change slightly.
- Reheating: There’s no need to reheat—just let it thaw in the fridge if frozen.
Nutritional Information & Benefits
This dessert is all about indulgence and fun, but here’s a quick look at the estimated nutritional breakdown:
- Calories: Approximately 250 per serving.
- Key Ingredients: Chocolate pudding provides a creamy base, while the cookies add crunch and flavor.
- Dietary Notes: Adaptable for gluten-free and sugar-free diets with ingredient swaps.
- Allergens: Contains dairy and gluten unless substitutions are made.
While it’s not a health food, the joy and creativity of making this cake are definitely good for the soul!
Conclusion
If you’re looking for a fun, festive dessert to wow your guests this Halloween, this Ultimate Chocolate Pudding Dirt Cake has it all—ease, flavor, and creativity. It’s perfect for customizing with your favorite spooky decorations, and it’s always a crowd-pleaser.
This recipe holds a special place in my heart because it brings together the joy of Halloween and the comfort of chocolate. So grab your ingredients, gather the kids, and have fun creating your own edible masterpiece. I’d love to hear how you make it your own! Share your ideas, comments, or photos below, and let’s spread the Halloween spirit. Happy baking!
FAQs
Can I make this recipe ahead of time?
Yes, you can prepare the dirt cake a day in advance and refrigerate it. Just add the decorations right before serving to keep them fresh.
What if I don’t have chocolate sandwich cookies?
You can use any chocolate cookies or even graham crackers mixed with cocoa powder as a substitute.
Can I make this dirt cake dairy-free?
Absolutely! Use dairy-free pudding mix, plant-based milk, and coconut whipped cream instead of regular dairy ingredients.
How can I crush the cookies without a food processor?
Place the cookies in a zippered bag and use a rolling pin or heavy object to crush them into fine crumbs.
What other decorations can I use for Halloween?
Try candy pumpkins, edible eyeballs, mini chocolate bats, or even black licorice to create a spooky scene!
Pin This Recipe!

Ultimate Chocolate Pudding Dirt Cake Recipe for Halloween Fun

A spooky and delicious Halloween dessert featuring layers of creamy chocolate pudding, whipped topping, and crunchy cookie crumbs, topped with gummy worms and festive decorations.
- Prep Time: 20 minutes
- Cook Time: 0 minutes
- Total Time: 2 hours 20 minutes
- Yield: 12 servings 1x
- Category: Dessert
- Cuisine: American
Ingredients
- 2 small packs (3.4 oz each) or 1 large pack (5.9 oz) instant chocolate pudding
- Cold whole milk or 2% milk (as per pudding package instructions)
- 1 container frozen whipped topping, thawed (e.g., Cool Whip)
- 24 chocolate sandwich cookies (e.g., Oreos), crushed into fine crumbs
- 2 tablespoons melted butter
- 8 oz cream cheese, softened
- 1 cup powdered sugar
- A handful of gummy worms for decoration
- Optional Halloween toppings: candy pumpkins, candy eyeballs, or other edible Halloween decorations
Instructions
- In a mixing bowl, whisk the instant pudding mix with cold milk according to package instructions. Set aside to thicken for about 5 minutes.
- In another bowl, beat the softened cream cheese and powdered sugar until smooth and creamy. Fold in the thawed whipped topping until evenly combined.
- Use a food processor to crush the chocolate sandwich cookies into fine crumbs. Alternatively, place the cookies in a zippered bag and crush them with a rolling pin until no large chunks remain.
- Start with a layer of cookie crumbs at the bottom of your 9×13-inch dish. Spread half of the cream cheese mixture evenly over the crumbs. Add half of the chocolate pudding on top, followed by another layer of cookie crumbs.
- Add the remaining cream cheese mixture, followed by the rest of the pudding. Finish with a generous layer of cookie crumbs on top.
- Arrange gummy worms on top so they peek out of the ‘dirt.’ Add any other Halloween decorations you like.
- Refrigerate the dirt cake for at least 2 hours to set. Serve cold and enjoy the spooky fun!
Notes
[‘Use cold milk for the pudding to ensure it thickens properly.’, ‘Let cream cheese soften at room temperature for a smoother mixture.’, “Crush cookies into very fine crumbs for a realistic ‘dirt’ appearance.”, ‘Decorate just before serving to keep gummy worms and candy fresh.’, ‘Add a layer of chocolate ganache or melted chocolate for extra richness.’]
Nutrition
- Serving Size: 1 portion
- Calories: 250
- Sugar: 22
- Sodium: 200
- Fat: 12
- Saturated Fat: 7
- Carbohydrates: 32
- Fiber: 1
- Protein: 3
Keywords: Halloween dessert, chocolate pudding dirt cake, spooky dessert, kid-friendly recipe, no-bake dessert