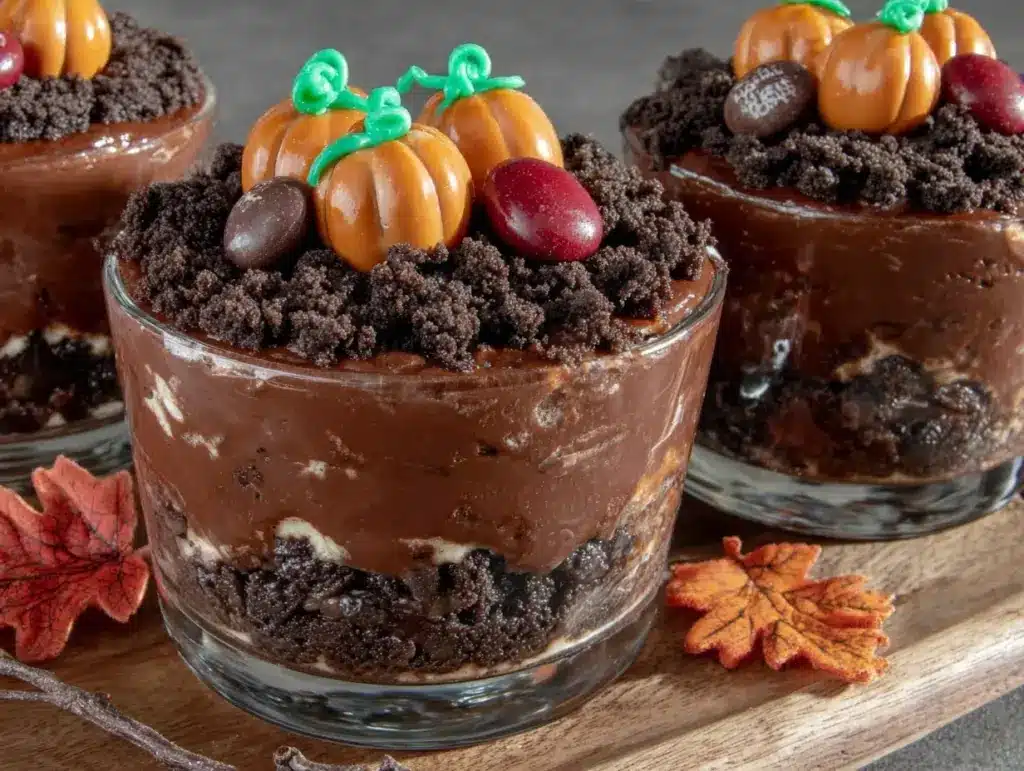
The crunch of chocolate cookies, the creamy richness of pudding, and a whimsical topping of candy critters and fall-inspired decorations—these irresistible chocolate dirt cups are the perfect treat for your next autumn gathering! Whether you’re hosting a harvest party, Halloween bash, or a cozy family dinner, these cups deliver a playful yet indulgent dessert experience that’s bound to be a crowd-pleaser. I’ve made this recipe countless times, tweaking it to perfection, and every single time, they disappear in minutes. Trust me, you’ll want to make a double batch!
I first fell in love with dirt cups as a kid, but it wasn’t until I started experimenting with seasonal flavors and decorations that the idea of an autumn version came to life. With a touch of pumpkin spice and adorable fall-themed gummies, these treats are not only delicious but also Instagram-worthy. The best part? They’re incredibly easy to whip up and require zero baking. So grab your mixing bowls, and let’s bring a little bit of fall magic to your dessert table!
Why You’ll Love This Recipe
- Simple and Quick: These chocolate dirt cups come together in under 30 minutes, making them perfect for last-minute party prep.
- No Baking Required: No need to turn on the oven—just layer, chill, and serve!
- Perfect for Fall Parties: The autumn-themed decorations make these treats ideal for Halloween, Thanksgiving, or any fall gathering.
- Kid-Friendly: Kids love the playful presentation, and they’re easy to customize with different toppings.
- Rich and Creamy: The combination of smooth chocolate pudding and crunchy cookie crumbs is absolutely irresistible.
What sets this recipe apart is its seasonal twist. Adding a hint of pumpkin spice to the pudding gives these dirt cups a warm, cozy flavor that is perfect for fall. Plus, the festive toppings—think candy pumpkins, gummy worms, and fall leaves—make them a visual delight that’s sure to impress your guests. Whether you’re looking for a fun activity to do with kids or a unique dessert to round out your autumn menu, these chocolate dirt cups check all the boxes!
What Ingredients You Will Need
This recipe uses straightforward ingredients that are easy to find at your local grocery store. You might even have most of them in your kitchen already! Here’s what you’ll need:
- Chocolate pudding mix: Instant pudding works best for a quick and creamy base.
- Milk: Whole milk gives the pudding a rich texture, but you can use 2% or non-dairy options like almond or oat milk.
- Chocolate sandwich cookies: Crushed into crumbs to create the “dirt” layer. I love using Oreos for their classic flavor.
- Whipped topping: Optional but adds a fluffy, creamy contrast to the pudding.
- Pumpkin spice: Just a pinch to infuse warm autumn flavors into the pudding.
- Candy decorations: Gummy worms, mini candy pumpkins, or fall-themed sprinkles to top it all off.
- Optional add-ins: Crushed nuts, chocolate chips, or shredded coconut for extra texture.
If you’re making these dirt cups for guests with dietary restrictions, you can easily adapt the ingredients. Swap the pudding mix for a dairy-free version, use gluten-free cookies, or choose vegan whipped topping. Trust me, they’ll still taste amazing!
Equipment Needed
These dirt cups don’t require any fancy equipment, which is part of their charm. Here’s what you’ll need:
- Mixing bowls: For whipping up the pudding and combining add-ins.
- Whisk: To ensure the pudding is smooth and lump-free.
- Plastic bag or food processor: For crushing the cookies into crumbs.
- Small serving cups: Clear cups work best to show off the layered effect.
- Spoon or spatula: For layering the pudding and cookie crumbs.
If you don’t have a food processor handy, simply place the cookies in a plastic bag and crush them with a rolling pin—it’s oddly satisfying! And if you’re looking to save costs, disposable plastic cups work perfectly for serving these treats.
Preparation Method
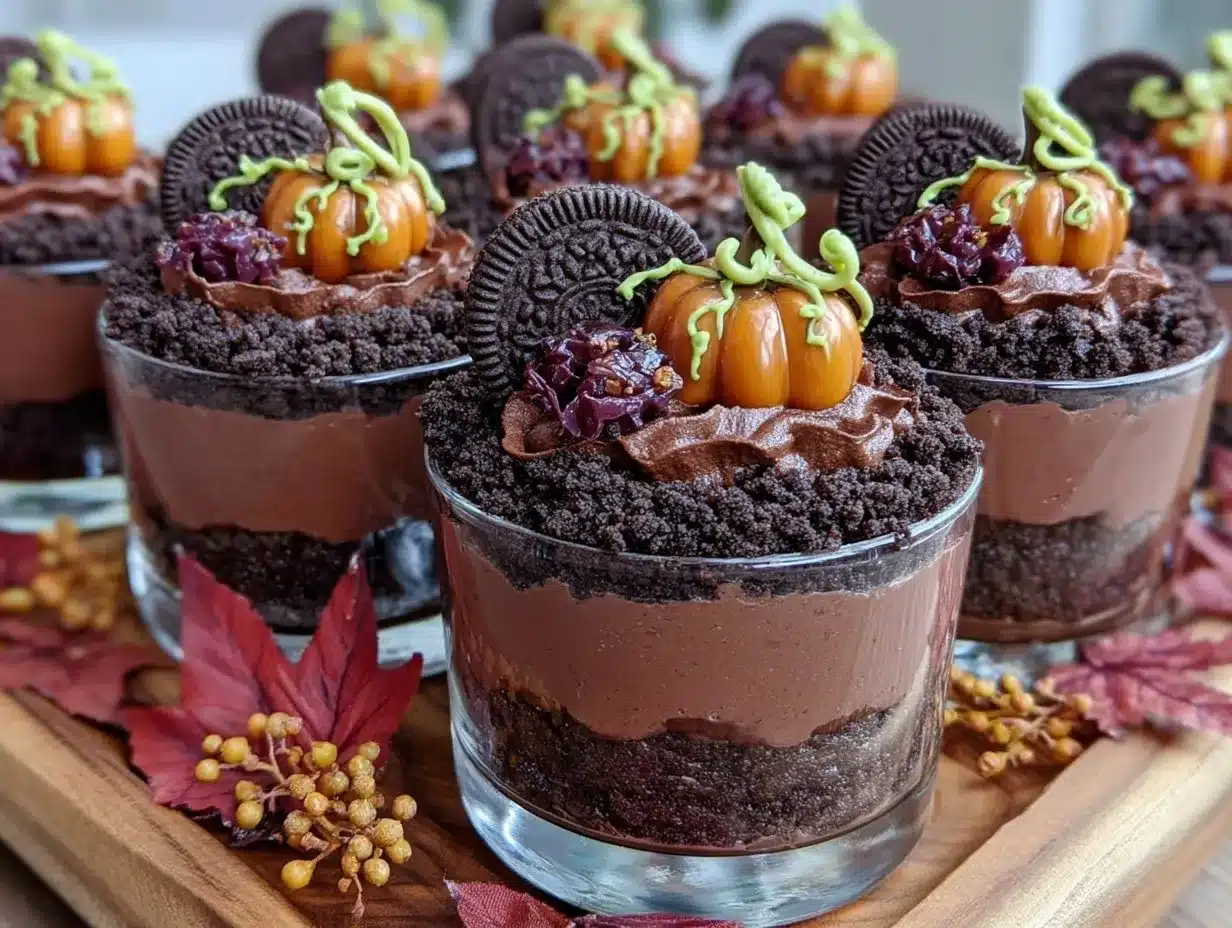
- Prepare the pudding: In a mixing bowl, whisk together the chocolate pudding mix and milk according to package instructions. Add a pinch of pumpkin spice and stir until well combined. Let the pudding sit for 5 minutes to thicken.
- Crush the cookies: Place the chocolate sandwich cookies in a food processor and pulse until they resemble fine crumbs. Alternatively, use a plastic bag and rolling pin to crush them manually.
- Layer the dirt cups: Spoon a layer of chocolate pudding into the bottom of each serving cup, followed by a layer of cookie crumbs. Repeat the process until the cups are almost full, finishing with a layer of “dirt” on top.
- Add decorations: Top each cup with gummy worms, candy pumpkins, or fall-themed sprinkles. Get creative—add chocolate shavings, crushed nuts, or any other fun toppings!
- Chill and serve: Place the cups in the refrigerator for at least 30 minutes to set. Serve chilled for the best texture and flavor.
These dirt cups are a breeze to make, but here’s a tip: mix the cookie crumbs with a tiny bit of melted butter if you want them to stick together for a firmer top layer.
Cooking Tips & Techniques
- Chill your pudding: Let the pudding set in the fridge for 5-10 minutes before layering. This ensures it’s thick enough to hold its shape.
- Don’t over-crush the cookies: A mix of fine crumbs and slightly larger pieces creates a more realistic “dirt” texture.
- Use clear cups: Transparent serving cups make the layers visually pop, adding to the wow factor!
- Get creative with toppings: Try different candy shapes or seasonal themes—mini fall leaves, edible glitter, or even candy eyes for Halloween.
- Scale up for parties: You can easily double or triple this recipe to serve a large crowd. Just keep the layering process simple and organized.
I’ve learned through trial and error that letting the dirt cups chill for at least half an hour enhances the flavor and makes the pudding and cookie crumbs meld beautifully!
Variations & Adaptations
- Gluten-Free Option: Use certified gluten-free chocolate cookies and check that your pudding mix is gluten-free.
- Vegan Version: Replace the milk with almond or oat milk, use vegan pudding mix, and opt for plant-based whipped topping.
- Seasonal Twist: Add a layer of pumpkin puree mixed with cinnamon and nutmeg for an extra festive flavor.
- Different Flavors: Swap chocolate pudding for butterscotch, vanilla, or even pumpkin spice pudding for a new twist.
- Healthy Adaptation: Use Greek yogurt instead of pudding and granola instead of cookie crumbs for a lighter, breakfast-friendly version.
My personal favorite? Adding a layer of salted caramel sauce between the pudding and cookie crumbs. The sweet and salty combo is absolutely divine!
Serving & Storage Suggestions
These chocolate dirt cups are best served chilled. Present them in individual clear cups with a fun garnish to make them visually appealing. Pair them with hot apple cider or a pumpkin spice latte for a cozy autumn vibe.
If you have leftovers (though that’s rare!), cover the cups with plastic wrap and store them in the refrigerator for up to 3 days. The flavors will continue to meld together, making them even more delicious. To reheat, simply let the cups sit at room temperature for 10-15 minutes to soften slightly.
Want to prepare them ahead of time? Assemble the cups without the candy decorations and store them in the fridge. Add the toppings just before serving to keep them fresh and colorful!
Nutritional Information & Benefits
Here’s a rough estimate of the nutritional values per serving:
- Calories: 250 per cup
- Carbohydrates: 35g
- Protein: 4g
- Fat: 8g
- Fiber: 2g
- Sugar: 20g
The chocolate pudding provides a good source of calcium, while the pumpkin spice adds antioxidants from its warming spices. If you use nuts or seeds as toppings, you’ll get additional healthy fats and protein. Just be mindful of portion sizes if you’re watching your sugar intake.
Conclusion
These irresistible autumn harvest chocolate dirt cups are more than just a dessert—they’re a celebration of fall flavors and fun! Whether you’re making them for a party, a family dinner, or just a treat for yourself, they’re guaranteed to bring smiles to everyone’s faces.
Feel free to customize the toppings and flavors to suit your taste or the occasion. I love making these dirt cups because they’re playful, easy, and absolutely delicious. Plus, who doesn’t love digging into a cup of chocolatey goodness?
Give this recipe a try and let me know how it turns out in the comments! Don’t forget to share your creations on social media—I’d love to see how you make this recipe your own. Happy fall, and happy cooking!
FAQs
Can I make chocolate dirt cups ahead of time?
Yes, you can prepare the pudding and cookie layers in advance and store them in the fridge. Add the toppings just before serving to keep them fresh.
Can I use homemade pudding instead of store-bought mix?
Absolutely! If you prefer to make your pudding from scratch, go for it—just make sure it’s thick and creamy before layering.
What’s the best way to crush the cookies?
You can use a food processor for fine crumbs, or place the cookies in a plastic bag and crush them with a rolling pin for a more rustic texture.
Can I freeze dirt cups?
Freezing is not recommended because it can affect the texture of the pudding and cookies. Refrigeration is best for storage.
Are these dirt cups healthy?
While they’re more of a treat, you can make them healthier by using Greek yogurt instead of pudding and adding fresh fruit instead of candy toppings.
Pin This Recipe!

Irresistible Chocolate Dirt Cups Recipe for Fall Parties

These irresistible chocolate dirt cups combine the crunch of chocolate cookies, creamy pudding, and whimsical fall-themed decorations for a playful yet indulgent dessert perfect for autumn gatherings.
- Prep Time: 10 minutes
- Cook Time: 0 minutes
- Total Time: 30 minutes
- Yield: 6 servings 1x
- Category: Dessert
- Cuisine: American
Ingredients
- 1 package chocolate pudding mix
- 2 cups milk (whole milk preferred, or 2% or non-dairy options like almond or oat milk)
- 1 package chocolate sandwich cookies (e.g., Oreos), crushed into crumbs
- 1 cup whipped topping (optional)
- 1/2 teaspoon pumpkin spice
- Candy decorations (e.g., gummy worms, mini candy pumpkins, fall-themed sprinkles)
- Optional add-ins: crushed nuts, chocolate chips, or shredded coconut
Instructions
- In a mixing bowl, whisk together the chocolate pudding mix and milk according to package instructions. Add a pinch of pumpkin spice and stir until well combined. Let the pudding sit for 5 minutes to thicken.
- Place the chocolate sandwich cookies in a food processor and pulse until they resemble fine crumbs. Alternatively, use a plastic bag and rolling pin to crush them manually.
- Spoon a layer of chocolate pudding into the bottom of each serving cup, followed by a layer of cookie crumbs. Repeat the process until the cups are almost full, finishing with a layer of ‘dirt’ on top.
- Top each cup with gummy worms, candy pumpkins, or fall-themed sprinkles. Add chocolate shavings, crushed nuts, or other fun toppings as desired.
- Place the cups in the refrigerator for at least 30 minutes to set. Serve chilled for the best texture and flavor.
Notes
[‘Let the pudding set in the fridge for 5-10 minutes before layering to ensure it holds its shape.’, ‘Mix cookie crumbs with a tiny bit of melted butter for a firmer top layer.’, ‘Use clear cups to showcase the layered effect for a visually appealing presentation.’, ‘Scale up the recipe for larger gatherings by doubling or tripling the ingredients.’]
Nutrition
- Serving Size: 1 cup
- Calories: 250
- Sugar: 20
- Fat: 8
- Carbohydrates: 35
- Fiber: 2
- Protein: 4
Keywords: chocolate dirt cups, fall dessert, Halloween treat, autumn recipe, no-bake dessert