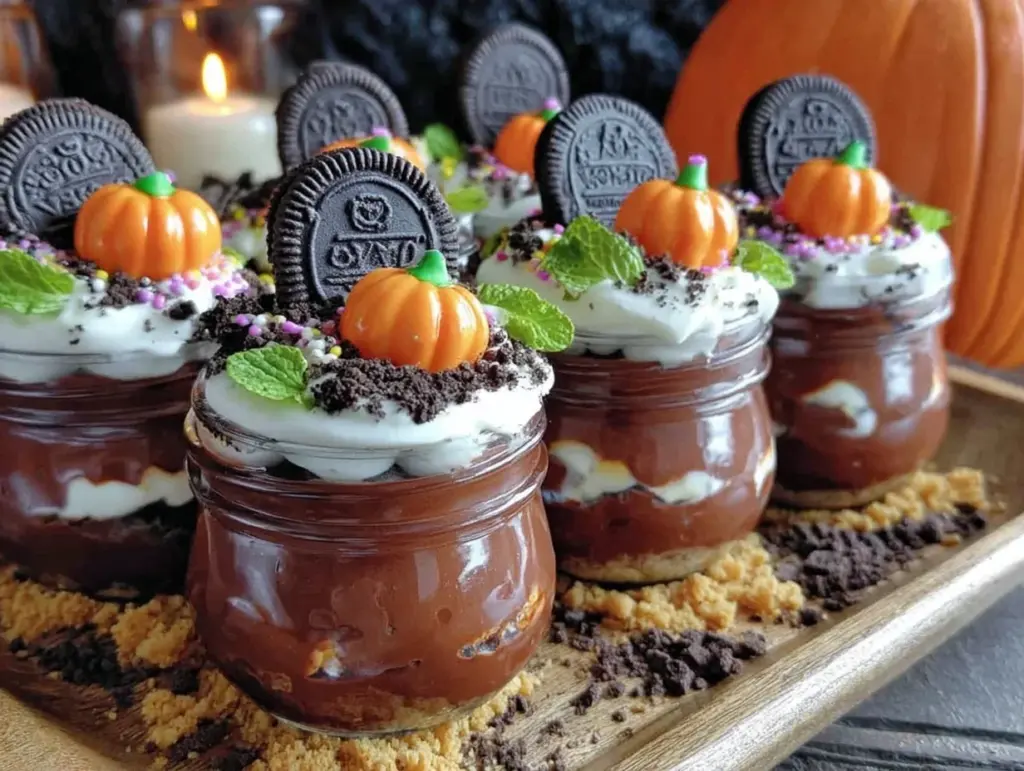
The crunch of crushed Oreo cookies, the creamy layers of chocolate pudding, and the eerie decorations – Spooky Halloween Dirt Cups with Oreo Tombstones are the perfect festive treat to wow your guests! I remember whipping these up for my family’s Halloween party last year, and they were the absolute showstopper. They’re easy to make, fun to decorate, and delightfully creepy – the kind of dessert that gets everyone talking and snapping photos. Whether you’re hosting kids or adults, these spooky dirt cups are guaranteed to be a hit. Let me walk you through how to make them!
Why You’ll Love This Recipe
- Perfect for Halloween Parties: These dirt cups are spooky and festive, making them ideal for Halloween gatherings, trick-or-treat celebrations, or even a cozy movie night with scary films.
- Fun for All Ages: Kids will love decorating the Oreo tombstones, while adults will appreciate the nostalgic flavors of chocolate pudding and crushed Oreos.
- No Baking Required: This recipe is quick and easy, with no oven needed. You can whip these up in under 30 minutes!
- Customizable: You can switch up the decorations, use different flavored puddings, or make them gluten-free with substitutions.
- Unforgettably Delicious: The combination of creamy pudding, crunchy cookie crumbs, and gummy worms is irresistible. Trust me, you’ll want to make extra because they disappear fast!
- Impressive Presentation: These spooky cups look like you spent hours crafting them, but they’re actually super simple. They’ll make your dessert table the center of attention!
What sets this recipe apart is the playful creativity. It’s not just a dessert – it’s an experience. From writing on the Oreo tombstones to placing gummy worms in the “dirt,” every step is an opportunity to get creative and have fun.
What Ingredients You Will Need
This recipe uses simple ingredients you can find at any grocery store. You might already have most of them in your pantry. Here’s what you’ll need:
- Chocolate pudding mix: Instant pudding works best for quick preparation (you’ll need milk to make it).
- Milk: Used to prepare the pudding. Whole milk gives a richer flavor, but any milk will work.
- Oreo cookies: Crushed to resemble dirt. You can use regular or double-stuffed Oreos.
- Gummy worms: For creepy crawly decorations.
- Whipped topping: Adds a cloud of fluffiness to the pudding layers.
- Vanilla wafer cookies: For writing tombstone designs. You can use any flat cookie as an alternative.
- Black or colored icing: For decorating the tombstones.
- Optional Halloween decorations: Candy pumpkins, sprinkles, or plastic spiders for extra spooky flair!
If you’re looking for substitutions, you can use gluten-free Oreos or dairy-free pudding and whipped topping to accommodate dietary restrictions. It’s all about customization!
Equipment Needed
You don’t need any fancy gadgets for this recipe. Here’s what you’ll need:
- Mixing bowls: You’ll need one for the pudding and one for crushing the Oreos.
- Whisk: To mix the pudding smoothly.
- Rolling pin or food processor: For crushing the Oreos into dirt-like crumbs.
- Clear cups or jars: Choose clear containers to show off the spooky layers.
- Small spatula or spoon: For layering the pudding and cookie crumbs.
- Piping bag or icing tube: To write on the tombstone cookies.
If you don’t have a food processor, no worries! A resealable bag and rolling pin work perfectly for crushing the Oreos into fine crumbs.
Preparation Method
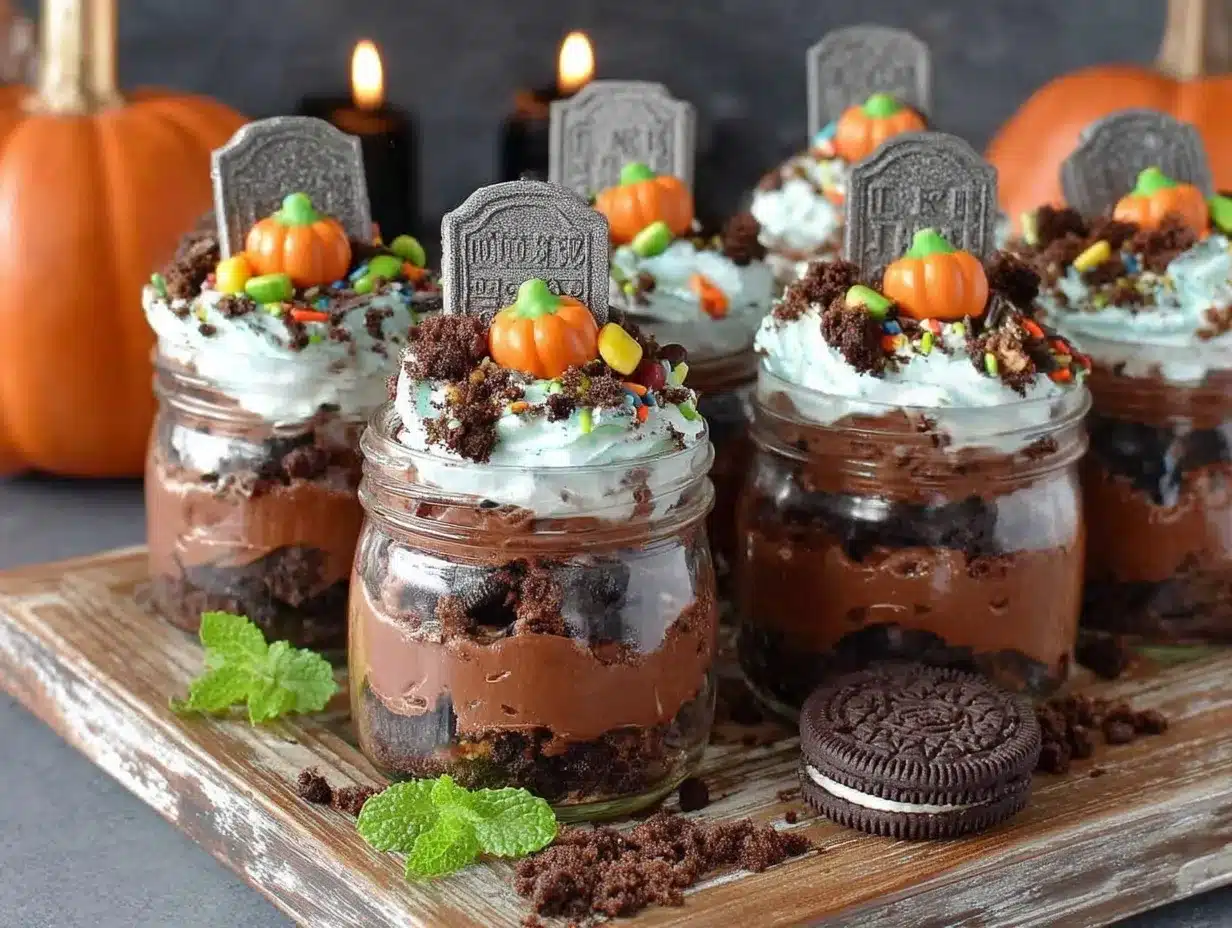
- Prepare the pudding: In a mixing bowl, whisk the chocolate pudding mix with cold milk according to the package instructions. Set aside to thicken for about 5 minutes.
- Crush the Oreos: Place the Oreos in a resealable plastic bag and crush them into fine crumbs using a rolling pin. Alternatively, pulse them in a food processor until they resemble dirt.
- Decorate the tombstones: Use black icing to write spooky phrases like “RIP” or “BOO” on the vanilla wafer cookies. Let the icing set for a few minutes.
- Layer the dirt cups: In clear cups or jars, start with a layer of chocolate pudding at the bottom. Add a layer of crushed Oreos on top. Repeat the layers until the cup is nearly full, ending with a final layer of Oreo crumbs.
- Add decorations: Stick the Oreo tombstones upright into the top layer of crumbs. Arrange gummy worms so they look like they’re crawling out of the “dirt.” Add candy pumpkins or sprinkles if desired.
- Chill and serve: Refrigerate the dirt cups for at least 30 minutes to let the flavors meld and decorations set. Serve cold and enjoy the spooky fun!
Cooking Tips & Techniques
Here are some tips to make your Spooky Halloween Dirt Cups extra special:
- Chill the pudding: Let the pudding set completely before layering to ensure a firm, creamy texture.
- Use a resealable bag: Crushing Oreos in a bag with a rolling pin is less messy than using a food processor.
- Get creative: Use different Halloween-themed decorations like candy eyeballs or colored sprinkles to personalize your dirt cups.
- Make ahead: Prepare the dirt cups the night before and refrigerate them. They taste even better when chilled overnight!
- Keep the layers clean: Use a small spoon or spatula to carefully layer the pudding and crumbs for a neat appearance.
It’s all about having fun and embracing the festive spirit. Don’t stress about perfection – the “spooky” look is supposed to be a little messy!
Variations & Adaptations
- Gluten-Free Version: Use gluten-free chocolate sandwich cookies and gluten-free pudding mix for a safe treat.
- Dairy-Free Option: Swap regular milk with almond or oat milk and use dairy-free whipped topping.
- Seasonal Decorations: For a Thanksgiving twist, replace the tombstones with candy turkeys or mini pumpkins.
- Flavor Twist: Try layering with vanilla pudding instead of chocolate or adding peanut butter cups for extra indulgence.
- Make it Boozy: For adults-only parties, add a splash of coffee liqueur to the pudding for a spooky cocktail-inspired dessert.
Last Halloween, I swapped gummy worms for candy snakes to amp up the creep factor – it was a huge hit!
Serving & Storage Suggestions
These dirt cups are best served chilled. Present them in clear cups or jars to showcase the layers, and scatter some Halloween decorations around them for added flair.
- Pairing Ideas: Serve with hot apple cider or pumpkin spice lattes for a cozy Halloween vibe.
- Storage: Cover the cups tightly with plastic wrap and store in the refrigerator for up to 3 days.
- Reheating Tips: No reheating needed – just serve them cold straight from the fridge!
- Flavor Development: The flavors meld and intensify when left to chill overnight, making them even tastier the next day.
Nutritional Information & Benefits
While these dirt cups are definitely a treat, they can be adjusted to fit various dietary needs. Here’s a quick snapshot:
- Calories: Approximately 300-350 calories per cup (depending on ingredients).
- Key Benefits: Contains calcium from the milk and pudding, and the gummy worms add a fun texture for kids.
- Dietary Options: Can be made gluten-free or dairy-free for those with dietary restrictions.
- Allergens: Contains dairy, gluten, and possible traces of nuts if using certain candies.
If you’re looking for a healthier option, swap half the pudding for Greek yogurt and use crushed graham crackers instead of Oreos.
Conclusion
Spooky Halloween Dirt Cups with Oreo Tombstones are the ultimate festive treat to make this Halloween unforgettable. They’re fun, delicious, and so easy to customize to your liking. My family loves how creative we can get with the decorations, and it’s always a joy to see everyone’s reactions!
Try these at your next Halloween party and let your spooky creativity shine. I’d love to hear how you personalized your cups – drop a comment below and share your ideas! If you enjoyed this recipe, share it with your friends and family and spread the Halloween spirit. Happy haunting!
FAQs
Can I make these dirt cups ahead of time?
Yes, you can! Prepare them the night before your event and store them covered in the fridge. The flavors will blend beautifully overnight.
What can I use instead of Oreo cookies?
If you’re looking for alternatives, try graham crackers, chocolate wafer cookies, or even gluten-free cookies for a dietary-friendly option.
How do I make the tombstone decorations stick to the cups?
Push the tombstone cookies gently into the Oreo “dirt” layer. If needed, you can secure them with a dab of frosting.
Can I use homemade pudding instead of instant pudding mix?
Absolutely! Homemade pudding will work perfectly. Just ensure it’s thick enough to hold the layers well.
Are these suitable for kids with allergies?
To make them allergy-friendly, use gluten-free cookies and dairy-free pudding. Always double-check candy ingredients for allergens like nuts or soy.
Pin This Recipe!

Spooky Halloween Dirt Cups Recipe with Oreo Tombstones

A festive and spooky treat featuring layers of chocolate pudding, crushed Oreos, and creepy decorations like gummy worms and Oreo tombstones. Perfect for Halloween parties and gatherings.
- Prep Time: 15 minutes
- Cook Time: 0 minutes
- Total Time: 30 minutes
- Yield: 8 servings 1x
- Category: Dessert
- Cuisine: American
Ingredients
- 1 package chocolate pudding mix
- 2 cups milk
- 20 Oreo cookies, crushed
- 1 cup whipped topping
- 8 vanilla wafer cookies
- Black or colored icing
- Gummy worms
- Optional Halloween decorations (candy pumpkins, sprinkles, plastic spiders)
Instructions
- Prepare the pudding: In a mixing bowl, whisk the chocolate pudding mix with cold milk according to the package instructions. Set aside to thicken for about 5 minutes.
- Crush the Oreos: Place the Oreos in a resealable plastic bag and crush them into fine crumbs using a rolling pin or pulse them in a food processor until they resemble dirt.
- Decorate the tombstones: Use black icing to write spooky phrases like ‘RIP’ or ‘BOO’ on the vanilla wafer cookies. Let the icing set for a few minutes.
- Layer the dirt cups: In clear cups or jars, start with a layer of chocolate pudding at the bottom. Add a layer of crushed Oreos on top. Repeat the layers until the cup is nearly full, ending with a final layer of Oreo crumbs.
- Add decorations: Stick the Oreo tombstones upright into the top layer of crumbs. Arrange gummy worms so they look like they’re crawling out of the ‘dirt.’ Add candy pumpkins or sprinkles if desired.
- Chill and serve: Refrigerate the dirt cups for at least 30 minutes to let the flavors meld and decorations set. Serve cold and enjoy the spooky fun!
Notes
[‘Chill the pudding completely before layering for a firm texture.’, ‘Use resealable bags for crushing Oreos to minimize mess.’, ‘Get creative with Halloween-themed decorations like candy eyeballs or colored sprinkles.’, ‘Prepare the dirt cups the night before for enhanced flavor.’, ‘Use a small spoon or spatula for clean layering.’]
Nutrition
- Serving Size: 1 cup
- Calories: 300350
- Sugar: 30
- Sodium: 300
- Fat: 12
- Saturated Fat: 6
- Carbohydrates: 45
- Fiber: 2
- Protein: 4
Keywords: Halloween, Dirt Cups, Oreo Tombstones, Spooky Dessert, No-Bake Recipe