
The sizzle of kielbasa hitting the hot pan, the tangy aroma of mustard mingling with smoky sausage—honestly, it’s a smell that instantly transports me to lively gatherings and cozy kitchen chats. I first whipped up these Crispy Mustard Hasselback Kielbasa Bites when I needed a quick snack that packed a punch but didn’t demand hours of prep. You know how it is—sometimes you want something impressive, yet no-fuss. This recipe hits that sweet spot perfectly.
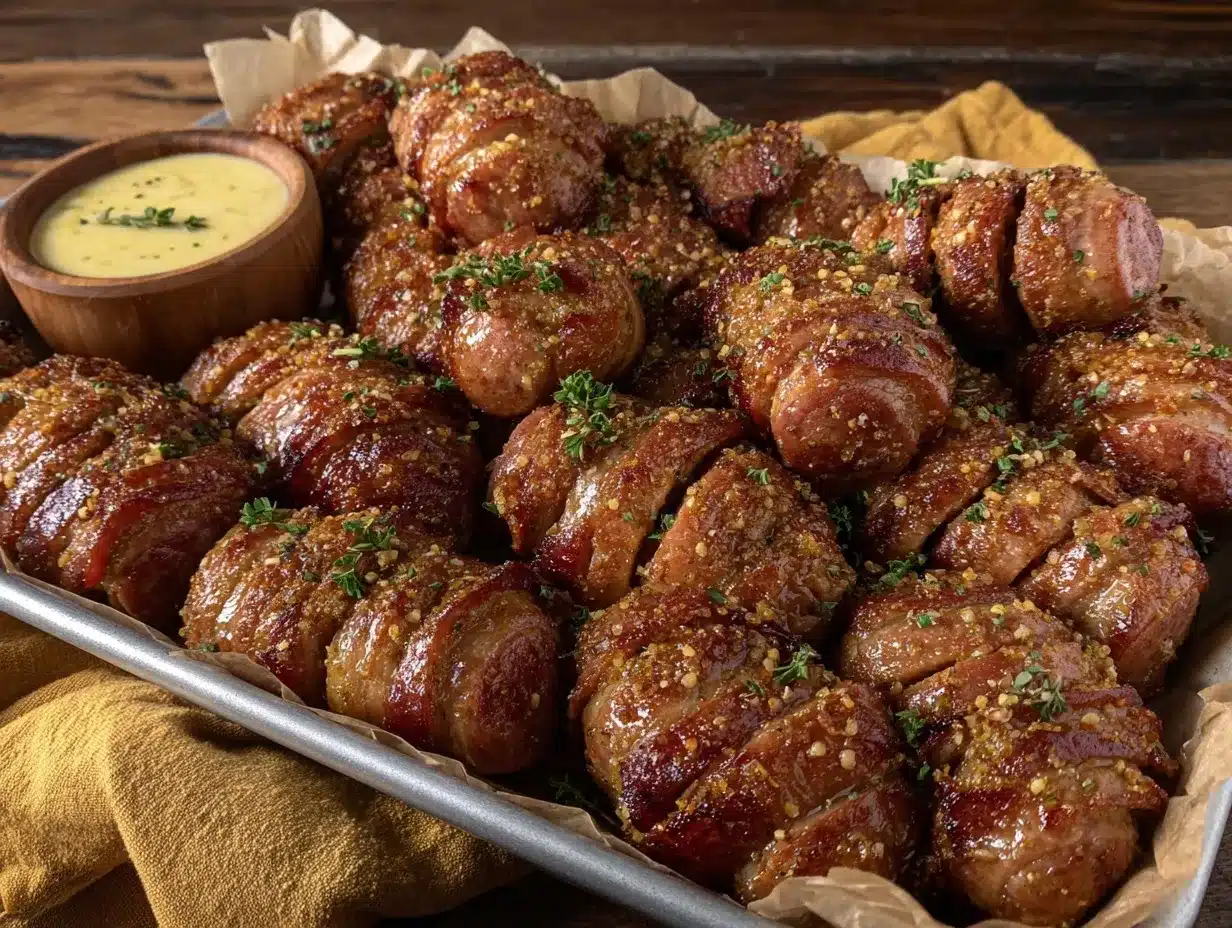
Over the years, I’ve tested this appetizer for everything from casual get-togethers to holiday parties, tweaking the mustard blend and cooking times until the bites turned golden and crisp just right. The “hasselback” technique—those thin slices that fan out on the sausage—doesn’t just look fancy; it lets the mustard seep deep and crisps up the edges to irresistible perfection. If you’ve ever wondered how to make kielbasa taste even better, this recipe will surprise you.
Whether you’re juggling a busy weeknight or prepping for a crowd, these Crispy Mustard Hasselback Kielbasa Bites bring flavor, crunch, and ease to your table. They’re a crowd-pleaser that works for snackers of all ages, and honestly, they make me want to throw a party just to have an excuse to make them again. Ready to impress without the stress? Let’s get started.
Why You’ll Love This Recipe
- Quick & Easy: Ready in about 25 minutes, making it perfect for last-minute party prep or an easy snack fix.
- Simple Ingredients: Uses everyday pantry staples—kielbasa, mustard, and a few herbs—that you probably already have on hand.
- Perfect for Parties: Bite-sized and finger-friendly, these appetizers are ideal for potlucks, game days, or casual gatherings.
- Crowd-Pleaser: Kids and adults alike rave about the crispy edges and tangy mustard flavor; they disappear fast!
- Unique Twist: The hasselback slicing technique lets the mustard caramelize into the sausage, creating flavor layers you don’t get with regular slices.
- Versatile: Works well as a snack, appetizer, or even a party platter centerpiece when paired with your favorite dips.
This recipe isn’t just another kielbasa appetizer. I’ve tested it multiple times, adjusting the mustard blend and cooking method to get the perfect balance of crispiness and flavor. The thin hasselback cuts allow the heat to penetrate evenly, crisping the sausage exterior while keeping the inside juicy. It’s simple, but wildly satisfying—a guaranteed hit every time you bring it out.
What Ingredients You Will Need
This recipe uses straightforward ingredients that come together to deliver big flavor without fuss. Most of the items are pantry staples, which means you can throw this appetizer together on a whim. Here’s what you’ll need:
- Kielbasa: One 14-ounce (400g) smoked kielbasa sausage, ideally pre-cooked and firm to the touch (I prefer brands like Hillshire Farm for consistent texture).
- Dijon Mustard: 2 tablespoons for that smooth, tangy base flavor (Grey Poupon is a classic choice).
- Whole Grain Mustard: 1 tablespoon adds texture and a rustic bite.
- Honey: 1 tablespoon to balance the mustard’s tang with a touch of sweetness.
- Olive Oil: 1 tablespoon to help the slices crisp up and prevent sticking.
- Smoked Paprika: 1 teaspoon for subtle smoky warmth and a lovely color.
- Garlic Powder: ½ teaspoon to add a mild savory depth.
- Fresh Thyme: 1 teaspoon, chopped (optional but highly recommended for an herbal kick).
- Black Pepper: Freshly cracked, to taste.
- Chives or Parsley: Finely chopped, for garnish (adds freshness and a pop of color).
If you want to swap things up, feel free to substitute honey with maple syrup or use a spicy mustard instead of Dijon for a bolder bite. I’ve even tried a touch of cayenne for some heat, which works beautifully if you like things spicy. For gluten-free options, just double-check your kielbasa brand, as some contain fillers.
Equipment Needed
- Sharp Chef’s Knife: Essential for making the thin hasselback slices—take your time here for even cuts.
- Cutting Board: A sturdy surface that won’t slip while you slice.
- Baking Sheet: Preferably rimmed to catch drips and allow air circulation.
- Parchment Paper or Silicone Baking Mat: For easy cleanup and preventing sticking.
- Small Mixing Bowl: To whisk together the mustard glaze.
- Pastry Brush: Handy for coating the sausage slices with the mustard mixture evenly.
- Tongs or Spatula: To carefully flip or transfer the kielbasa bites.
If you don’t have a pastry brush, a spoon can work to drizzle the glaze, but brushing gives you better control. For slicing, a serrated knife can help avoid squishing the sausage. I once tried a mandoline for the cuts—but honestly, it was overkill and less precise for this task. Simple tools work best here!
Detailed Preparation Method
- Preheat your oven to 400°F (200°C). Line your baking sheet with parchment paper or a silicone mat to prevent sticking and make cleanup easier.
- Prepare the kielbasa: Place the kielbasa on the cutting board. Using your sharp chef’s knife, make thin slices about ⅛ inch (3 mm) apart, cutting almost all the way through but leaving the bottom intact so the sausage holds together. The slices should fan slightly but stay connected.
- Mix the mustard glaze: In your small bowl, whisk together Dijon mustard, whole grain mustard, honey, olive oil, smoked paprika, garlic powder, fresh thyme, and a few twists of black pepper until well combined. The mixture should be smooth but textured with mustard seeds.
- Brush the glaze: Using your pastry brush, generously coat the top and inside the hasselback cuts with the mustard mixture. Be sure to get the glaze between the slices so the flavor really seeps in.
- Bake: Place the kielbasa on the prepared baking sheet and bake for 15-18 minutes. About halfway through, give the sausage a gentle brush with any leftover glaze and rotate the pan for even cooking.
- Check for crispiness: The edges should be golden and slightly caramelized, and the sausage should feel firm but juicy inside. If you want it extra crisp, pop it under the broiler for 1-2 minutes—but watch closely to avoid burning.
- Cool and slice: Let the kielbasa rest for 5 minutes after baking. Then, slice between the hasselback cuts to create bite-sized pieces perfect for serving.
- Garnish and serve: Sprinkle with chopped chives or parsley for a fresh touch and pop them on a serving platter. They’re fantastic warm but still delicious at room temperature.
Pro tip: Don’t slice all the way through! Keeping the bottom intact is key for holding the sausage together and creating those crispy “fans.” Also, the honey in the glaze caramelizes beautifully—watch it closely near the end of baking to avoid over-darkening.
Cooking Tips & Techniques
Getting that perfect crispy crust on the kielbasa bites while keeping them juicy inside is all about balance and attention to detail. Here are some tips I’ve picked up from my kitchen misadventures and wins:
- Sharp knife matters: I’ve learned the hard way that a dull blade squashes the sausage and ruins the hasselback effect. Take your time and use a well-sharpened knife.
- Don’t skip the glaze: The mustard and honey mix is what sets this recipe apart. It creates that irresistible tangy-sweet crust. Brush it generously!
- Watch your oven: Every oven behaves a bit differently. Start checking around 15 minutes to avoid burning the glaze.
- Use a wire rack if possible: Placing the kielbasa on a rack over the baking sheet allows air to circulate, helping crisp the edges all around.
- Multitask smartly: While the bites bake, prep your garnishes or whip up a quick dipping sauce to serve alongside. The kitchen will smell amazing—try not to sneak too many bites before guests arrive!
- Leftovers reheat well: Pop them in a skillet or toaster oven to bring back that crisp texture.
Honestly, the first time I tried this recipe, I forgot to leave the bottom intact and ended up with a kielbasa crumble mess. Lesson learned! Now, this method is my go-to when I want a quick, impressive appetizer.
Variations & Adaptations
If you want to mix things up or cater to different tastes, these bites are super adaptable. Here are a few ideas I’ve played around with:
- Spicy Kick: Add ½ teaspoon cayenne pepper or swap regular Dijon for a spicy brown mustard. I tried this for a game day party and it was a hit with the spice lovers.
- Cheesy Twist: Sprinkle shredded sharp cheddar or Parmesan cheese into the hasselback cuts before baking. The cheese melts and crisps up, adding rich flavor and texture.
- Sweet & Smoky: Replace honey with maple syrup and add a dash of liquid smoke for a deep, smoky-sweet combo.
- Low-Sodium Option: Use a low-sodium kielbasa or chicken sausage and reduce the amount of salt in your glaze.
- Herb Variations: Swap thyme for rosemary or oregano, depending on what’s fresh or your personal preference.
- Alternative Cooking Methods: If you’re short on oven space, these bites can be pan-fried on medium heat, turning often until crispy and glazed, though baking yields the best even crispiness.
One of my favorite personal tweaks is adding a sprinkle of crushed red pepper flakes right after baking for a little heat without overpowering the mustard’s tang. Feel free to experiment—the recipe is forgiving and delicious no matter what.
Serving & Storage Suggestions
These Crispy Mustard Hasselback Kielbasa Bites are perfect served warm, straight from the oven, but they hold up well at room temperature too—great for buffet-style serving. I like to arrange them on a platter lined with fresh greens and add small bowls of dipping sauces like honey mustard, spicy mayo, or a cool ranch dip alongside.
For storage, keep leftovers in an airtight container in the fridge for up to 3 days. To reheat, I recommend warming them in a skillet over medium heat for a few minutes or using a toaster oven to bring back that crispy finish. Avoid microwaving if you want to keep the texture intact, as it tends to make the bites soggy.
Flavors actually deepen after a day or two in the fridge—the mustard glaze seeps further into the sausage, making the bites even tastier. So, they’re great for meal prep or making ahead of a party.
Nutritional Information & Benefits
Each serving (about 4-5 bites) roughly contains:
| Nutrient | Amount |
|---|---|
| Calories | 180-220 kcal |
| Protein | 10-12 g |
| Fat | 14-16 g |
| Carbohydrates | 4-6 g |
| Sodium | Varies (check kielbasa label) |
The kielbasa provides a solid protein boost, while the mustard adds antioxidants and compounds that may aid digestion. Using smoked paprika and fresh herbs gives you a bit of extra nutrition and flavor without extra calories.
Keep in mind, kielbasa can be high in sodium, so it’s best enjoyed in moderation or balanced with fresh veggies or a salad. For those watching carbs, this appetizer is relatively low-carb, making it a nice option for many diet plans.
Conclusion
There you have it—Crispy Mustard Hasselback Kielbasa Bites that bring bold flavor, crunchy texture, and effortless charm to any party spread. I love this recipe because it’s quick, uses simple ingredients, and always impresses without stressing me out. Plus, it’s fun to make and even more fun to eat.
Don’t hesitate to customize the mustard glaze or play with herbs to suit your taste. If you try this recipe, let me know how you like it or what twists you add—I’m always excited to hear your takes!
Ready to wow your guests with minimal fuss? Grab your kielbasa and get slicing. And hey, don’t forget to share this recipe with friends who love easy, tasty appetizers. Happy cooking!
FAQs
Can I use fresh sausage instead of kielbasa for this recipe?
Fresh sausage isn’t recommended here since kielbasa is pre-cooked and firm, which holds up well to hasselback slicing and baking. Using raw sausage would require longer cooking and might not crisp as nicely.
How thin should I slice the kielbasa?
About ⅛ inch (3 mm) apart is ideal. Thin enough to fan out and crisp but not so thin that the sausage falls apart.
Can I prepare these bites ahead of time?
Yes! You can slice and glaze the kielbasa up to a day in advance, then bake right before serving for best freshness and crispiness.
What dipping sauces pair well with these bites?
Honey mustard, ranch dressing, spicy mayo, or even a smoky BBQ sauce complement the flavors beautifully.
Are these bites gluten-free?
They can be if you use a kielbasa brand labeled gluten-free and ensure your mustard and other ingredients don’t contain gluten. Always check labels to be sure.
Pin This Recipe!

Crispy Mustard Hasselback Kielbasa Bites Easy Party Appetizers Recipe

These crispy mustard hasselback kielbasa bites are quick, easy, and perfect for parties. The hasselback slicing technique allows the mustard glaze to seep deep and crisps the edges for irresistible flavor.
- Prep Time: 10 minutes
- Cook Time: 15-18 minutes
- Total Time: 25-28 minutes
- Yield: 4 servings 1x
- Category: Appetizer
- Cuisine: American
Ingredients
- 1 14-ounce (400g) smoked kielbasa sausage, pre-cooked and firm
- 2 tablespoons Dijon mustard
- 1 tablespoon whole grain mustard
- 1 tablespoon honey
- 1 tablespoon olive oil
- 1 teaspoon smoked paprika
- ½ teaspoon garlic powder
- 1 teaspoon fresh thyme, chopped (optional)
- Freshly cracked black pepper, to taste
- Chopped chives or parsley, for garnish
Instructions
- Preheat your oven to 400°F (200°C). Line a baking sheet with parchment paper or a silicone mat.
- Place the kielbasa on a cutting board. Using a sharp chef’s knife, make thin slices about 1/8 inch (3 mm) apart, cutting almost all the way through but leaving the bottom intact so the sausage holds together. The slices should fan slightly but stay connected.
- In a small bowl, whisk together Dijon mustard, whole grain mustard, honey, olive oil, smoked paprika, garlic powder, fresh thyme, and black pepper until well combined.
- Using a pastry brush, generously coat the top and inside the hasselback cuts with the mustard mixture, making sure to get the glaze between the slices.
- Place the kielbasa on the prepared baking sheet and bake for 15-18 minutes. About halfway through, brush with any leftover glaze and rotate the pan for even cooking.
- Check for crispiness; edges should be golden and slightly caramelized, sausage firm but juicy inside. For extra crispiness, broil for 1-2 minutes watching closely to avoid burning.
- Let the kielbasa rest for 5 minutes after baking. Slice between the hasselback cuts to create bite-sized pieces.
- Garnish with chopped chives or parsley and serve warm or at room temperature.
Notes
Do not slice all the way through the kielbasa to keep the sausage intact and create crispy fans. Watch the glaze near the end of baking to avoid over-darkening. Leftovers reheat well in a skillet or toaster oven to maintain crispiness. For gluten-free, verify all ingredient labels. Variations include adding cayenne for spice or cheese in the cuts before baking.
Nutrition
- Serving Size: About 4-5 bites per
- Calories: 180220
- Fat: 1416
- Carbohydrates: 46
- Protein: 1012
Keywords: kielbasa, hasselback, mustard glaze, party appetizers, easy snack, crispy sausage bites



