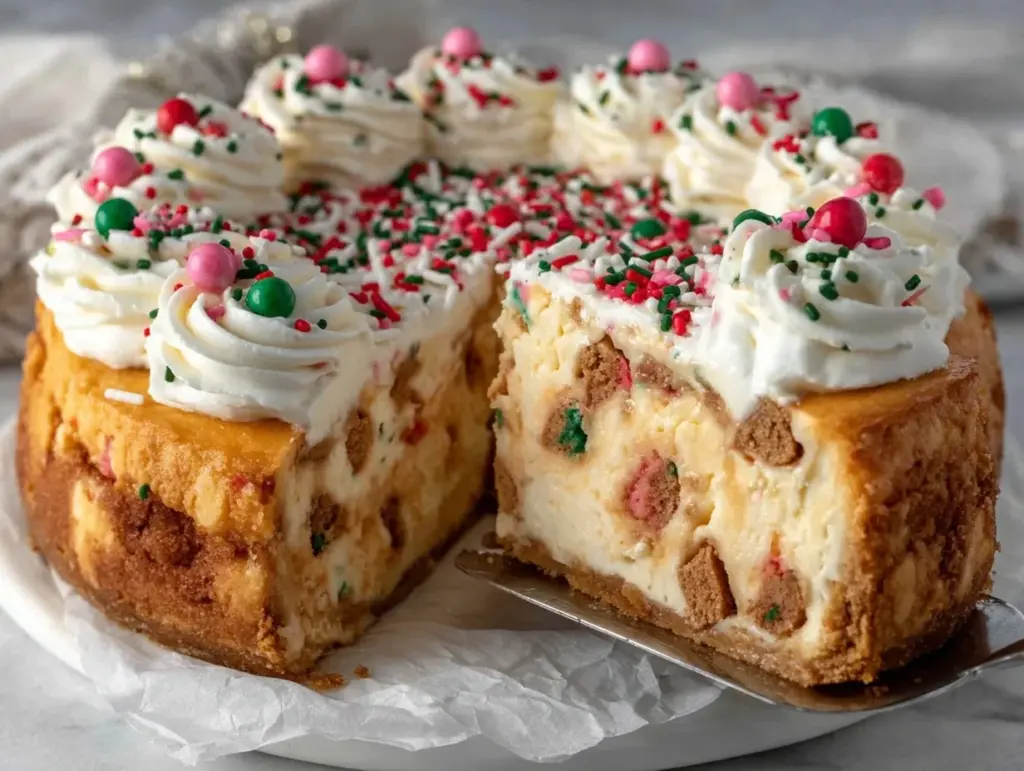
The smell of warm sugar cookies mingling with creamy cheesecake is a holiday scent that never fails to bring a smile. Honestly, the first time I made this decadent sugar cookie cheesecake, it was a total game-changer for my holiday dessert lineup. I’d been searching for something that combined the nostalgic comfort of sugar cookies with the silky richness of cheesecake—and this recipe hits both notes perfectly.
As someone who’s baked this dessert more times than I can count, I can tell you it’s the kind of sweet treat that gets everyone asking for seconds. The buttery crust, the smooth cream cheese filling, and those festive sprinkles on top? Let’s just say it’s not your average cheesecake. I love how it brings a bit of joyful indulgence to family gatherings or cozy winter nights.
If you’re looking for a holiday dessert that’s both impressive and surprisingly easy to make, this decadent sugar cookie cheesecake is your new best friend. Whether you’re baking for a crowd or just treating yourself (hey, no judgment!), this recipe’s got the perfect balance of sweetness and creamy texture. Plus, it’s a fantastic way to shake up your usual holiday sweets with a playful twist on two classics in one.
Why You’ll Love This Recipe
- Quick & Easy: Comes together in under an hour, making it perfect for last-minute holiday dessert needs or spontaneous celebrations.
- Simple Ingredients: Uses pantry staples like sugar cookies and cream cheese, so no need for fancy or hard-to-find items.
- Perfect for Holidays: The festive vibe of sugar cookies combined with cheesecake makes it ideal for Christmas parties, holiday potlucks, or cozy winter evenings.
- Crowd-Pleaser: Kids, adults, and even picky eaters tend to adore this dessert — it’s that universally appealing.
- Unbelievably Delicious: The creamy cheesecake with a crumbly sugar cookie crust offers a mouthfeel that’s just next-level comfort food.
What really sets this decadent sugar cookie cheesecake apart is the way it pairs a buttery, slightly crunchy sugar cookie crust with a luscious, velvety cheesecake filling. I like to blend some crushed sugar cookies right into the filling for that little surprise of texture throughout. Plus, topping it off with colorful sprinkles adds a festive pop that’s as fun to look at as it is to eat.
This isn’t your everyday cheesecake. It’s a dessert that feels special but doesn’t require hours of fussing in the kitchen. And trust me, after baking this recipe multiple times over the holidays, I’ve learned the little tweaks that make it foolproof and utterly irresistible. It’s comfort food with a spark of holiday cheer in every bite.
What Ingredients You Will Need
This recipe uses simple, wholesome ingredients to deliver bold flavor and a satisfying texture without the fuss. Most of these are pantry staples, and if you’re like me, you probably already have them on hand.
- Sugar Cookies: About 20 crushed sugar cookies (store-bought or homemade; I recommend buttery, soft ones like [Lofthouse] for the best texture).
- Cream Cheese: 24 oz (680 g), softened – This is the star of the filling, giving it that rich, creamy texture.
- Sour Cream: ½ cup (120 ml) – Adds tanginess and smoothness to the filling.
- Granulated Sugar: ¾ cup (150 g) – Sweetens the cheesecake without overpowering the sugar cookie flavor.
- Vanilla Extract: 2 tsp – I prefer pure vanilla for the best aroma.
- Eggs: 3 large, room temperature – Bind the filling together and give it structure.
- Butter: 6 tbsp (85 g), melted – Blended with crushed cookies to form the crust.
- All-Purpose Flour: 2 tbsp (15 g) – Helps stabilize the filling slightly.
- Sprinkles: ¼ cup (optional) – For a festive, colorful topping; use holiday-themed sprinkles if you want.
If you want to swap things up, you can use dairy-free cream cheese and sour cream alternatives to make it vegan-friendly. Also, if you’re gluten-free, just grab gluten-free sugar cookies, and this dessert is still totally doable. For a richer crust, sometimes I add a pinch of cinnamon or nutmeg to the cookie crumbs, which adds a cozy holiday touch.
Equipment Needed
- 9-inch (23 cm) Springform Pan: Makes it easy to remove the cheesecake without breaking it. If you don’t have one, a regular cake pan lined with parchment paper works, but the springform is best.
- Mixing Bowls: At least two, for crust and filling.
- Electric Mixer or Stand Mixer: Essential for beating the cream cheese until smooth and lump-free.
- Measuring Cups and Spoons: For accuracy—especially important with baking.
- Food Processor or Rolling Pin: To crush the sugar cookies for the crust (a food processor makes it quick, but placing cookies in a zip-top bag and rolling with a pin works just fine).
- Spatula: For folding ingredients and scraping the bowl clean.
Personally, I’ve found that a good-quality springform pan makes the whole cheesecake experience much less stressful—worth the investment if you bake often. Also, an electric mixer saves time and effort; trying to get cream cheese perfectly smooth by hand is a pain, believe me. For budget-friendly alternatives, just improvise with what you have—this recipe is forgiving as long as you keep the mixing gentle and thorough.
Detailed Preparation Method
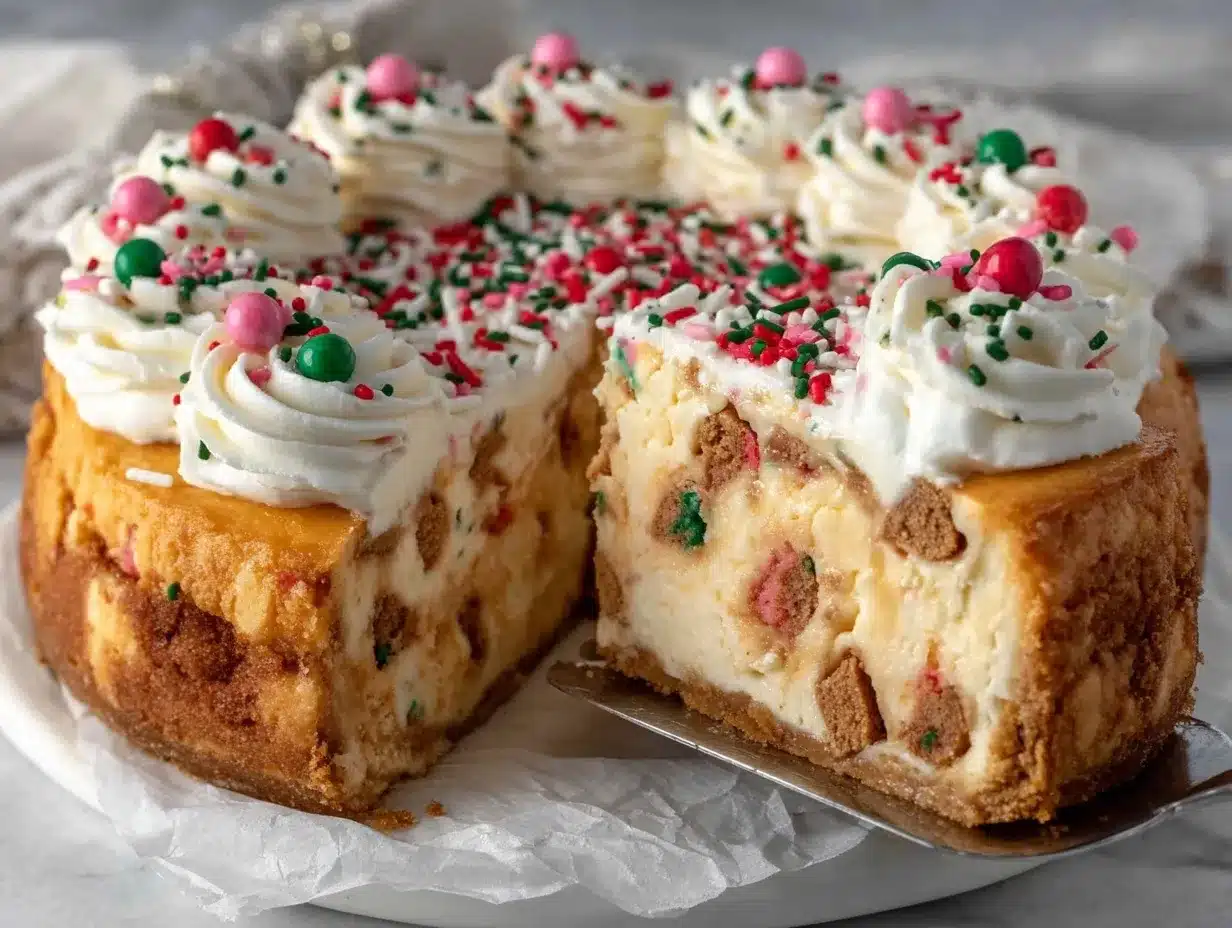
- Prepare the crust: Preheat your oven to 325°F (163°C). Crush 20 sugar cookies into fine crumbs using a food processor or rolling pin. In a medium bowl, mix the cookie crumbs with 6 tablespoons (85 g) melted butter until the mixture resembles wet sand. Press this evenly into the bottom of your 9-inch (23 cm) springform pan. Bake for 10 minutes, then remove from oven and let it cool while you make the filling.
- Make the filling: In a large bowl, beat 24 oz (680 g) softened cream cheese with an electric mixer on medium speed until smooth and creamy (about 2-3 minutes). Add ¾ cup (150 g) granulated sugar, ½ cup (120 ml) sour cream, and 2 teaspoons vanilla extract, mixing until combined. Then, add 3 large eggs one at a time, mixing briefly after each addition—don’t overbeat or you’ll risk cracks later. Finally, sift in 2 tablespoons (15 g) all-purpose flour and gently fold it in with a spatula until just combined.
- Combine cookie crumbs in the filling (optional): If you want that extra sugar cookie texture throughout, fold in about ½ cup of crushed sugar cookies into the filling now.
- Pour and bake: Pour the cheesecake filling over the cooled crust, smoothing the top with a spatula. Bake at 325°F (163°C) for 50-60 minutes. The edges should be set, but the center will still jiggle slightly—this is perfect for a creamy finish.
- Cool down: Turn off the oven and crack the door open, letting the cheesecake cool inside for 1 hour. This slow cooling helps prevent cracking.
- Chill thoroughly: Remove from oven, sprinkle the top with festive sprinkles if desired, and refrigerate the cheesecake for at least 4 hours or overnight. This step is crucial for the flavors to meld and the texture to firm up beautifully.
- Serve: Before serving, run a knife around the edges to loosen the cheesecake from the pan, then release the springform. Slice with a sharp knife wiped clean between cuts for neat pieces.
Heads up: If your cream cheese isn’t softened enough, lumps will sneak in. I learned this the hard way! Also, don’t rush the cooling process—letting it cool in the oven gradually is a trick I picked up to avoid unsightly cracks. Lastly, patience with chilling is key; cheesecake texture improves dramatically after a good rest.
Cooking Tips & Techniques
When it comes to this decadent sugar cookie cheesecake, little tricks make a big difference. First off, always use full-fat cream cheese and sour cream for that luxuriously creamy texture. Low-fat versions just won’t deliver the same melt-in-your-mouth effect.
Mixing is where many people trip up. Beat the cream cheese until it’s completely smooth before adding sugar and other ingredients. This prevents lumps and gives you a silky filling. Also, beat eggs in one at a time and avoid overmixing after adding them to keep the cheesecake from cracking.
Use room temperature ingredients throughout. Cold cream cheese or eggs can cause the batter to get lumpy or mix unevenly. I usually take everything out of the fridge about an hour before baking.
For the crust, pressing firmly and evenly is key. I like to use the bottom of a glass to press crumbs in tightly, creating a solid base that won’t crumble when you slice the cheesecake.
Finally, don’t skip the water bath if you want ultra-smooth cheesecake. While optional, wrapping your springform pan in foil and placing it in a water bath during baking helps regulate temperature and prevents cracks. I’ve made this recipe both ways, and a water bath definitely ups the texture game if you’ve got the time.
Variations & Adaptations
- Gluten-Free Version: Swap regular sugar cookies for gluten-free sugar cookies. Make sure your flour is gluten-free or omit it if possible.
- Spiced Twist: Add 1 teaspoon cinnamon and ¼ teaspoon nutmeg to the crust and filling for a warm, cozy flavor perfect for winter holidays.
- Chocolate Chip Variation: Fold in ½ cup mini chocolate chips into the filling before baking for a little chocolate surprise in every bite.
- Dairy-Free Option: Use vegan cream cheese and coconut-based sour cream. Choose dairy-free sugar cookies or make your own.
- Mini Cheesecakes: Use a muffin tin lined with cupcake liners and reduce baking time to 20-25 minutes for individual servings—great for parties.
One of my favorite tweaks was adding a thin layer of raspberry jam between the crust and filling. It adds a tart brightness that beautifully cuts through the rich creaminess. Honestly, experimenting with this recipe is part of the fun, and it holds up well to all sorts of customizations.
Serving & Storage Suggestions
Serve this decadent sugar cookie cheesecake chilled, straight from the fridge. The texture is best cold, with a smooth, creamy bite that melts in your mouth. If you want to get fancy, garnish slices with fresh berries or a drizzle of caramel sauce.
For a festive touch, plate with a dusting of powdered sugar or extra colorful sprinkles on top. Pair it with a cup of hot coffee, tea, or even a glass of dessert wine for a cozy holiday treat.
Store leftovers covered tightly in the refrigerator for up to 5 days. Cheesecake actually tastes better after a day or two as the flavors marry. To freeze, wrap the cheesecake (whole or in slices) in plastic wrap and then foil; it keeps for up to 3 months. Thaw overnight in the fridge before serving.
When reheating, just let it come to room temperature for about 30 minutes—never microwave cheesecake as it can ruin the texture. The flavors mellow beautifully over time, so it’s a dessert that rewards patience.
Nutritional Information & Benefits
This decadent sugar cookie cheesecake offers about 350-400 calories per slice (based on 12 servings), with 18-22 grams of fat and around 30 grams of carbs. It’s definitely a treat, but with the cream cheese and sour cream, you get a good dose of protein and calcium, which balances the indulgence a bit.
Using real butter and full-fat dairy enhances the richness and satiety factor, making you less likely to overeat. If you swap in gluten-free or dairy-free alternatives, it can cater to specific dietary needs without losing too much flavor.
While it’s not a low-calorie dessert, sharing this cheesecake with family and friends makes every bite worthwhile. Plus, the sugar cookies add a nostalgic, comforting element that makes this dessert feel like a warm holiday hug.
Conclusion
In a sea of holiday desserts, this decadent sugar cookie cheesecake stands out as a fun, flavorful, and easy option that’s sure to impress. It combines two favorites—sugar cookies and cheesecake—into one festive, crowd-pleasing dessert that’s creamy, sweet, and utterly satisfying.
Feel free to tailor the recipe to your taste buds or dietary needs; experimenting is part of what makes baking so enjoyable. I personally love how this cheesecake brings everyone to the table, sharing smiles and happy bellies.
If you try this recipe, I’d love to hear how it turned out for you or any creative spins you added. Don’t forget to share and comment—your feedback truly makes my day. Wishing you a joyful holiday season filled with delicious moments!
FAQs
Can I make this sugar cookie cheesecake ahead of time?
Absolutely! It’s best made a day or two in advance to let the flavors meld and the texture firm up. Just keep it covered in the fridge.
What if I don’t have a springform pan?
You can use a regular 9-inch (23 cm) cake pan lined with parchment paper for easier removal, but a springform pan makes it much simpler to serve without breaking the cheesecake.
Can I use homemade sugar cookies instead of store-bought?
Yes! Homemade sugar cookies work wonderfully, especially if they’re soft and buttery. Just crush them finely for the crust and optional filling addition.
Why did my cheesecake crack on top?
Common reasons include overmixing, too high baking temperature, or rapid cooling. Try mixing gently, baking at 325°F (163°C), and cooling the cheesecake slowly in the oven with the door cracked.
How do I store leftover cheesecake?
Store leftovers tightly covered in the refrigerator for up to 5 days or freeze wrapped well for up to 3 months. Thaw overnight in the fridge before serving.
Pin This Recipe!
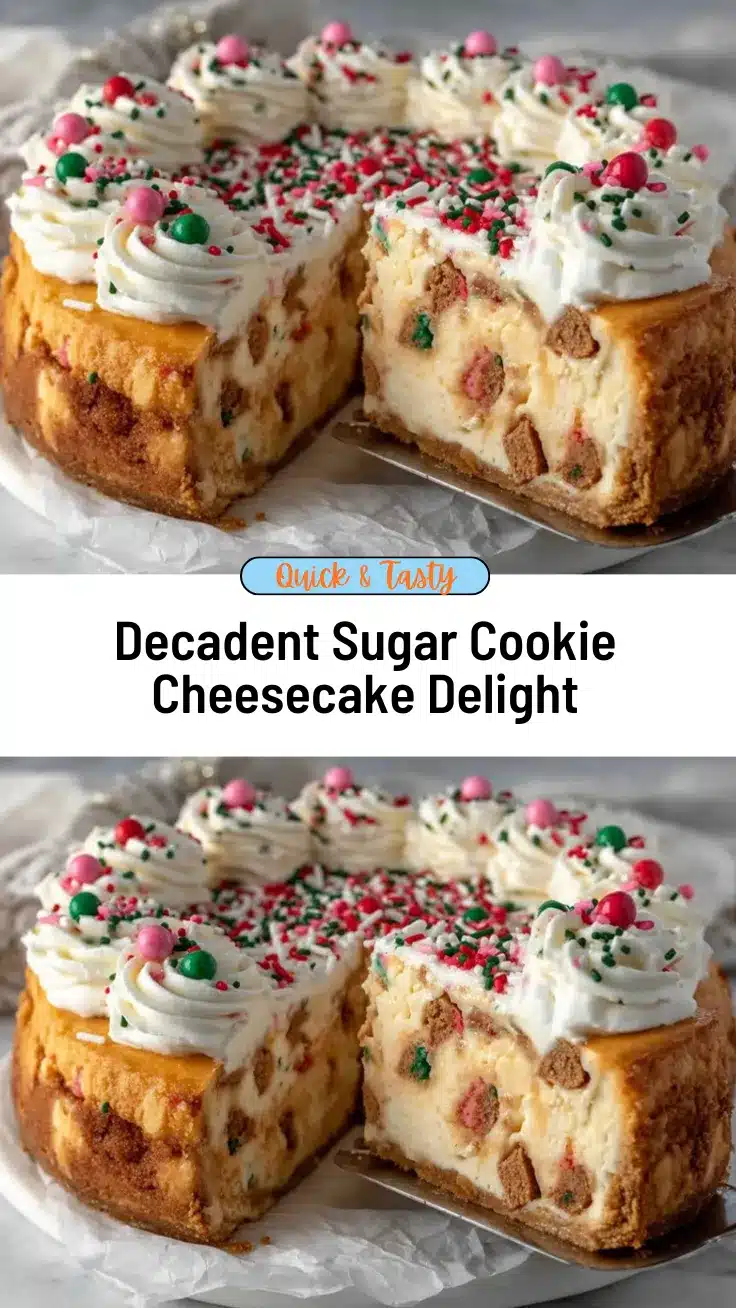
Decadent Sugar Cookie Cheesecake

A festive holiday dessert combining a buttery sugar cookie crust with a creamy cheesecake filling, topped with colorful sprinkles for a joyful treat.
- Prep Time: 15 minutes
- Cook Time: 1 hour 10 minutes
- Total Time: 5 hours 25 minutes
- Yield: 12 servings 1x
- Category: Dessert
- Cuisine: American
Ingredients
- About 20 crushed sugar cookies (store-bought or homemade; buttery, soft ones recommended)
- 24 oz (680 g) cream cheese, softened
- ½ cup (120 ml) sour cream
- ¾ cup (150 g) granulated sugar
- 2 tsp vanilla extract
- 3 large eggs, room temperature
- 6 tbsp (85 g) butter, melted
- 2 tbsp (15 g) all-purpose flour
- ¼ cup sprinkles (optional)
Instructions
- Preheat oven to 325°F (163°C). Crush 20 sugar cookies into fine crumbs using a food processor or rolling pin.
- In a medium bowl, mix cookie crumbs with 6 tablespoons melted butter until mixture resembles wet sand.
- Press crust mixture evenly into bottom of 9-inch springform pan. Bake for 10 minutes, then cool.
- In a large bowl, beat softened cream cheese with an electric mixer on medium speed until smooth (2-3 minutes).
- Add granulated sugar, sour cream, and vanilla extract; mix until combined.
- Add eggs one at a time, mixing briefly after each addition; avoid overmixing.
- Sift in all-purpose flour and gently fold in until just combined.
- Optionally fold in ½ cup crushed sugar cookies for extra texture.
- Pour filling over cooled crust and smooth top with spatula.
- Bake at 325°F (163°C) for 50-60 minutes until edges are set and center jiggles slightly.
- Turn off oven, crack door open, and let cheesecake cool inside for 1 hour.
- Remove from oven, sprinkle with festive sprinkles if desired, and refrigerate at least 4 hours or overnight.
- Before serving, run a knife around edges to loosen, release springform, and slice with a clean sharp knife.
Notes
Use full-fat cream cheese and sour cream for best texture. Avoid overmixing eggs to prevent cracks. Let cheesecake cool slowly in oven with door cracked to avoid cracking. Chilling overnight improves texture. Optional water bath can be used to prevent cracks and improve smoothness.
Nutrition
- Serving Size: 1 slice (1/12th of c
- Calories: 375
- Sugar: 20
- Sodium: 250
- Fat: 20
- Saturated Fat: 12
- Carbohydrates: 30
- Protein: 7
Keywords: sugar cookie cheesecake, holiday dessert, easy cheesecake, festive dessert, sugar cookie crust, creamy cheesecake, Christmas dessert



