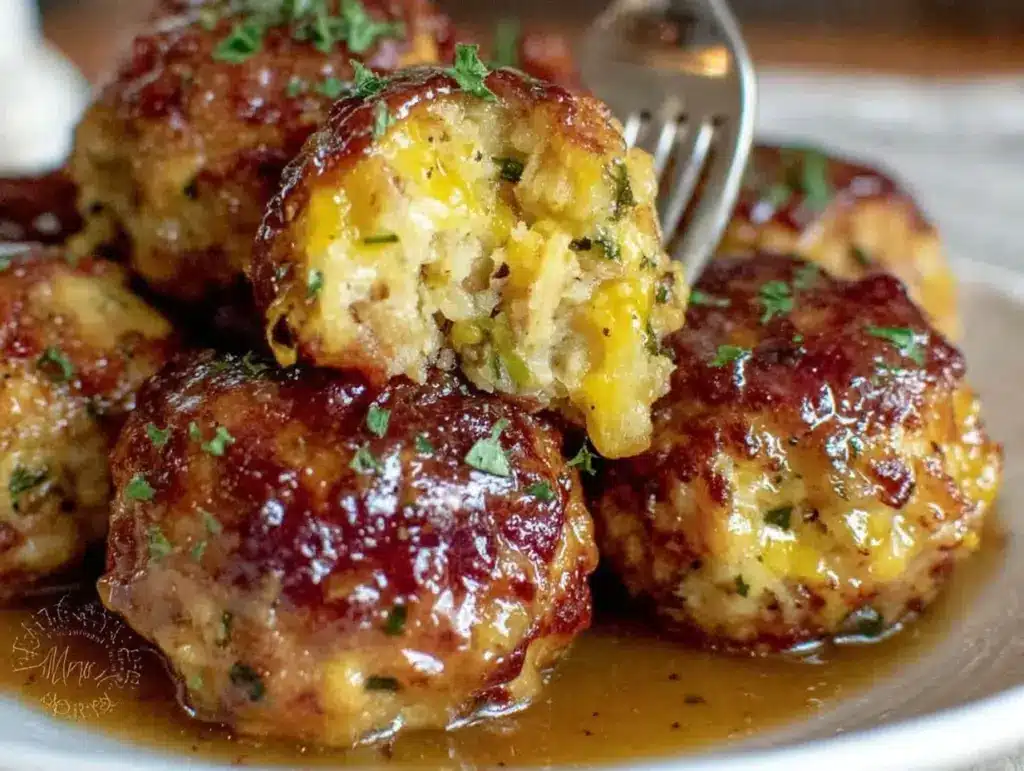
The crispy golden crust with a tender, savory center is what makes these crispy stuffing balls a Thanksgiving legend in my family. Honestly, the smell of those herbs and bread mingling in the oven takes me right back to childhood holiday dinners. I first made this recipe years ago when I was tasked with bringing a side dish that everyone could snack on before the main feast. It quickly became the star of the table, and I’ve been perfecting it ever since.
This recipe isn’t just your average stuffing—it’s a handheld, bite-sized version that’s easy to pass around and impossible to resist. Whether you’re hosting a big family gathering or a cozy holiday dinner, these stuffing balls bring that nostalgic comfort with a crispy twist. I’ve tested this recipe more times than I can count, tweaking the seasoning and texture for the perfect balance. As someone who loves both traditional flavors and easy entertaining, these crispy stuffing balls hit the spot every time.
What I love most is how this recipe turns humble ingredients into something deliciously memorable. The crisp exterior contrasts beautifully with the moist, herb-infused interior, making every bite a cozy celebration. If you’re looking for a classic Thanksgiving side dish that’s simple, satisfying, and sure to impress, these crispy stuffing balls are your new go-to.
Why You’ll Love This Recipe
- Quick & Easy: Comes together in about 30 minutes of prep, perfect for busy holiday prep.
- Simple Ingredients: Uses pantry staples and fresh herbs you likely already have on hand.
- Perfect for Thanksgiving: Ideal as a side dish or party appetizer to share with friends and family.
- Crowd-Pleaser: Kids and adults alike can’t get enough of these crispy, flavorful bites.
- Unbelievably Delicious: The crispy outside with a moist, savory center keeps everyone coming back for more.
- Unique Twist: Instead of just stuffing on the side, turning it into balls makes it portable and fun to eat.
This recipe stands apart from your typical stuffing because of the golden crust that forms during baking. I learned that pressing the mixture firmly and adding just the right amount of moisture leads to that perfect texture. Plus, mixing in sautéed onions and celery gives it a fresh, aromatic lift that makes it more than just bread crumbs and herbs. It’s comfort food with a little party-ready flair.
It’s not just about taste; it’s about creating moments where everyone can grab a crispy stuffing ball while chatting before the big meal. Trust me—once you try this, it’ll become a tradition you’ll look forward to every year.
What Ingredients You Will Need
This recipe uses simple, wholesome ingredients to deliver bold flavor and satisfying texture without the fuss. Most of these are pantry basics, so you won’t have to make a special trip to the store. Here’s what you’ll want to gather:
- Day-old bread (about 8 cups, cubed) – I like using a hearty white or sourdough for the best texture.
- Unsalted butter (4 tablespoons) – for sautéing vegetables and adding richness.
- Yellow onion (1 medium, finely chopped) – brings sweetness and depth.
- Celery stalks (2, finely chopped) – adds freshness and slight crunch.
- Fresh parsley (1/4 cup, chopped) – brightens the flavor.
- Fresh sage (1 tablespoon, chopped) – classic Thanksgiving herb.
- Fresh thyme (1 teaspoon, chopped) – subtle earthiness.
- Chicken or vegetable broth (1 to 1 1/4 cups) – moistens the stuffing without making it soggy.
- Large eggs (2, beaten) – helps bind the mixture for shape and structure.
- Salt & black pepper (to taste) – essential seasoning.
- Olive oil (for brushing or drizzling) – helps achieve the crispy exterior.
Pro tips: I recommend using a firm, small-curd bread because it holds together better and crisps nicely. If you want a vegetarian version, swap the chicken broth for vegetable broth. For a dairy-free option, replace butter with coconut oil or dairy-free margarine. Fresh herbs make a huge difference here, but dried can be used in a pinch—just reduce the amounts by half.
Equipment Needed
- Large mixing bowl – to toss all the ingredients together.
- Skillet or frying pan – for sautéing onions and celery.
- Baking sheet or rimmed tray – to bake the stuffing balls on.
- Parchment paper or silicone baking mat – prevents sticking and eases cleanup.
- Measuring cups and spoons – for accurate ingredient amounts.
- Mixing spoon or spatula – to combine everything thoroughly.
- Optional: Cookie scoop or ice cream scoop – helps portion the balls evenly.
If you don’t have a cookie scoop, rolling the balls with your hands works just fine (just keep your hands lightly oiled or wet to prevent sticking). For budget-friendly baking sheets, any sturdy rimmed pan will do. I’ve also found that using parchment paper makes cleanup a breeze and helps keep the bottoms of the balls perfectly golden.
Detailed Preparation Method
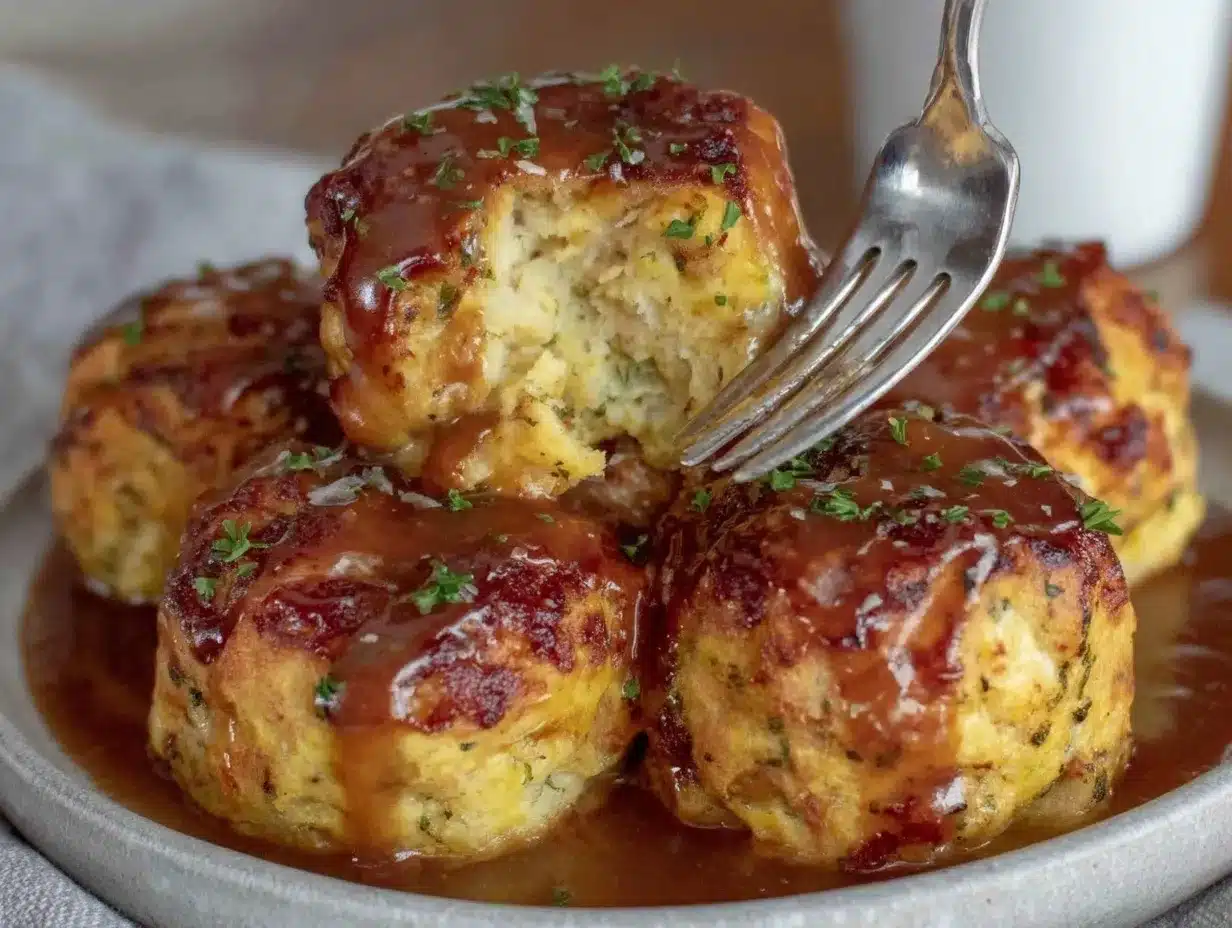
- Prepare the bread: Start by cutting about 8 cups (about 200 grams) of day-old bread into 1/2-inch cubes. If your bread is fresh, toast the cubes lightly in the oven at 325°F (160°C) for about 10 minutes to dry them out. This step is crucial to avoid soggy stuffing balls.
- Sauté the aromatics: In a large skillet, melt 4 tablespoons (57 grams) of unsalted butter over medium heat. Add the finely chopped onion and celery (1 medium onion and 2 celery stalks) and cook for about 5-7 minutes until softened and translucent. You want them tender but not browned. Remove from heat and let cool slightly.
- Mix the stuffing base: In a large mixing bowl, combine the bread cubes with the sautéed vegetables. Add the chopped fresh herbs: 1/4 cup parsley, 1 tablespoon sage, and 1 teaspoon thyme. Season with 1 teaspoon salt and 1/2 teaspoon freshly ground black pepper.
- Add broth and eggs: Pour in 1 to 1 1/4 cups (240-300 ml) of chicken or vegetable broth gradually, stirring gently to moisten the bread without making it soggy. Then, add 2 large beaten eggs to bind the mixture. The mixture should hold together when pressed but not be mushy.
- Form the balls: Using a cookie scoop or your hands, form the mixture into 1 1/2-inch (4 cm) balls. You should get about 20-24 balls. Place them on a parchment-lined baking sheet, spacing them about 1 inch apart.
- Brush with oil: Lightly brush or drizzle the tops of the stuffing balls with olive oil. This step helps create that irresistible crispy crust.
- Bake: Preheat your oven to 375°F (190°C). Bake the stuffing balls for 25-30 minutes, flipping halfway through to brown evenly. They should be golden and crisp on the outside but tender inside.
- Cool slightly and serve: Let the balls cool for 5 minutes before transferring to a serving platter. This resting time helps them firm up and makes handling easier.
Tip: If your mixture feels too dry and crumbly, add a splash more broth. Too wet? Add a handful of extra bread cubes. The key is getting a moldable but not soggy texture. When you bake, watch for that golden color—it’s your sign to pull them out.
Cooking Tips & Techniques
Getting crispy stuffing balls just right can sometimes be tricky, but a few tricks make all the difference. First, using day-old bread or lightly toasting fresh bread ensures the balls won’t fall apart or get mushy. Moisture control is everything—you want enough broth to keep the stuffing tender but not so much that it’s soggy.
When sautéing onions and celery, cook them low and slow until soft. This releases their natural sweetness without browning, which can alter the flavor. Fresh herbs add a lively punch; don’t skip them! If you only have dried herbs, reduce the quantity since they’re more concentrated.
Forming the balls with lightly oiled hands prevents sticking and gives the balls a smooth finish. Don’t overcrowd your baking sheet—air circulation helps them crisp better. Flipping halfway through baking promotes even browning on all sides.
One mistake I’ve made is baking at too low a temperature to “slow cook” the balls. That just leads to soggy outsides. A hotter oven around 375°F (190°C) is perfect to get that crunch without drying out the inside. Also, brushing with olive oil is non-negotiable for that golden crust—it’s a small step with a big payoff.
Variations & Adaptations
- Vegetarian Version: Use vegetable broth instead of chicken broth and add chopped mushrooms sautéed with the onions for a deeper flavor.
- Gluten-Free: Swap regular bread with gluten-free bread cubes. Ensure your broth and seasonings are gluten-free as well.
- Cheesy Twist: Fold in 1/2 cup (50 grams) of shredded sharp cheddar or Parmesan into the stuffing mixture before forming balls for a melty surprise.
- Spicy Kick: Add a pinch of crushed red pepper flakes or diced jalapeños to the sautéed vegetables for a subtle heat.
- Make Ahead: Assemble the balls and freeze them on a baking sheet before transferring to a bag. Bake from frozen, adding 5-7 minutes to the cooking time.
Personally, I once tried mixing in some cooked sausage with the vegetables, which added a wonderful savory depth. Just brown the sausage first, drain excess fat, and stir it in with the sautéed veggies. It’s a game-changer for meat lovers.
Serving & Storage Suggestions
Serve these crispy stuffing balls warm, right out of the oven, alongside your turkey and cranberry sauce. They’re perfect as finger food on a buffet table or as a side plate addition. For a fun presentation, place them in a decorative bowl with toothpicks for easy grabbing.
Leftovers store beautifully! Keep them in an airtight container in the refrigerator for up to 3 days. To reheat, pop them in a 350°F (175°C) oven for 10-12 minutes to bring back the crispiness. Avoid microwaving if you want to keep the exterior crisp.
For longer storage, freeze the balls before baking or after cooling. When ready, bake from frozen or thaw in the fridge overnight. Flavors actually develop and intensify after a day in the fridge, so making them a day ahead is a smart move.
Nutritional Information & Benefits
Each crispy stuffing ball (based on 24 servings) contains approximately 90 calories, 5 grams of fat, 8 grams of carbohydrates, and 2 grams of protein. The fresh herbs provide antioxidants, while the sautéed vegetables add fiber and vitamins. Using whole ingredients and moderate butter keeps it balanced—not too heavy but still satisfying.
This recipe can easily be made gluten-free, vegetarian, or dairy-free to suit various dietary needs. Just swap the bread and broth accordingly. It’s a comforting side dish that fits well into many meal plans, offering that classic Thanksgiving taste without overwhelming your plate.
Conclusion
These crispy stuffing balls are a must-try for anyone wanting a classic Thanksgiving side dish with a fun, handheld twist. They’re easy to make, packed with flavor, and always disappear fast at the table. I love how this recipe brings a little extra joy to holiday meals with its crispy texture and herbaceous goodness.
Feel free to tweak the herbs, add your favorite mix-ins, or even make them ahead for stress-free entertaining. It’s a recipe that invites creativity while staying true to those comforting Thanksgiving flavors we all cherish.
If you try this recipe, I’d love to hear how you customized it and what your family thought. Don’t forget to share it with friends who need a new holiday favorite. Happy cooking and happy holidays!
FAQs About Crispy Stuffing Balls
Can I make stuffing balls ahead of time?
Absolutely! You can assemble them and refrigerate for up to 24 hours before baking, or freeze them raw for longer storage. Just bake from chilled or frozen, adding a few extra minutes to the cooking time.
What type of bread works best?
Day-old, sturdy bread like sourdough or a white country loaf works best. Fresh bread should be toasted to dry it out and prevent sogginess.
Can I bake these stuffing balls without eggs?
Eggs help bind the mixture, but you can substitute with a flax egg (1 tablespoon flaxseed meal + 3 tablespoons water) or mashed potatoes for a vegan option.
How do I get the stuffing balls crispy?
Brush them with olive oil before baking and bake at 375°F (190°C) on a parchment-lined sheet, flipping halfway through. Don’t overcrowd the pan to allow air circulation.
Are these suitable for gluten-free diets?
Yes! Use gluten-free bread and check that your broth and seasonings are gluten-free. The texture might vary slightly but taste remains delicious.
Pin This Recipe!

Crispy Stuffing Balls Recipe Easy Perfect Thanksgiving Side Dish

These crispy stuffing balls feature a golden crust with a tender, herb-infused center, making them a perfect handheld Thanksgiving side dish that’s easy to share and delicious to eat.
- Prep Time: 30 minutes
- Cook Time: 30 minutes
- Total Time: 1 hour
- Yield: 24 servings 1x
- Category: Side Dish
- Cuisine: American
Ingredients
- 8 cups day-old bread, cubed (hearty white or sourdough)
- 4 tablespoons unsalted butter
- 1 medium yellow onion, finely chopped
- 2 celery stalks, finely chopped
- 1/4 cup fresh parsley, chopped
- 1 tablespoon fresh sage, chopped
- 1 teaspoon fresh thyme, chopped
- 1 to 1 1/4 cups chicken or vegetable broth
- 2 large eggs, beaten
- Salt and black pepper to taste
- Olive oil for brushing or drizzling
Instructions
- Cut about 8 cups (about 200 grams) of day-old bread into 1/2-inch cubes. If bread is fresh, toast cubes at 325°F (160°C) for about 10 minutes to dry.
- In a large skillet, melt 4 tablespoons unsalted butter over medium heat. Add chopped onion and celery and cook for 5-7 minutes until softened and translucent. Remove from heat and cool slightly.
- In a large mixing bowl, combine bread cubes with sautéed vegetables. Add parsley, sage, thyme, salt, and pepper.
- Gradually pour in 1 to 1 1/4 cups broth, stirring gently to moisten bread without sogginess. Add beaten eggs and mix until mixture holds together when pressed but is not mushy.
- Form mixture into 1 1/2-inch balls (about 20-24) using a cookie scoop or hands. Place on parchment-lined baking sheet, spacing about 1 inch apart.
- Lightly brush or drizzle tops with olive oil to help create crispy crust.
- Preheat oven to 375°F (190°C). Bake balls for 25-30 minutes, flipping halfway through, until golden and crisp outside but tender inside.
- Let cool for 5 minutes before serving.
Notes
Use day-old or toasted bread to avoid soggy stuffing balls. Adjust broth quantity to achieve moldable but not soggy mixture. Brush with olive oil before baking for a crispy crust. Flip halfway through baking for even browning. Can be made ahead and frozen. For vegetarian version, use vegetable broth; for dairy-free, substitute butter with coconut oil or margarine. Fresh herbs preferred but dried can be used at half quantity.
Nutrition
- Serving Size: 1 stuffing ball
- Calories: 90
- Fat: 5
- Carbohydrates: 8
- Protein: 2
Keywords: stuffing balls, Thanksgiving side dish, crispy stuffing, holiday recipe, easy stuffing recipe, bite-sized stuffing, savory appetizer



