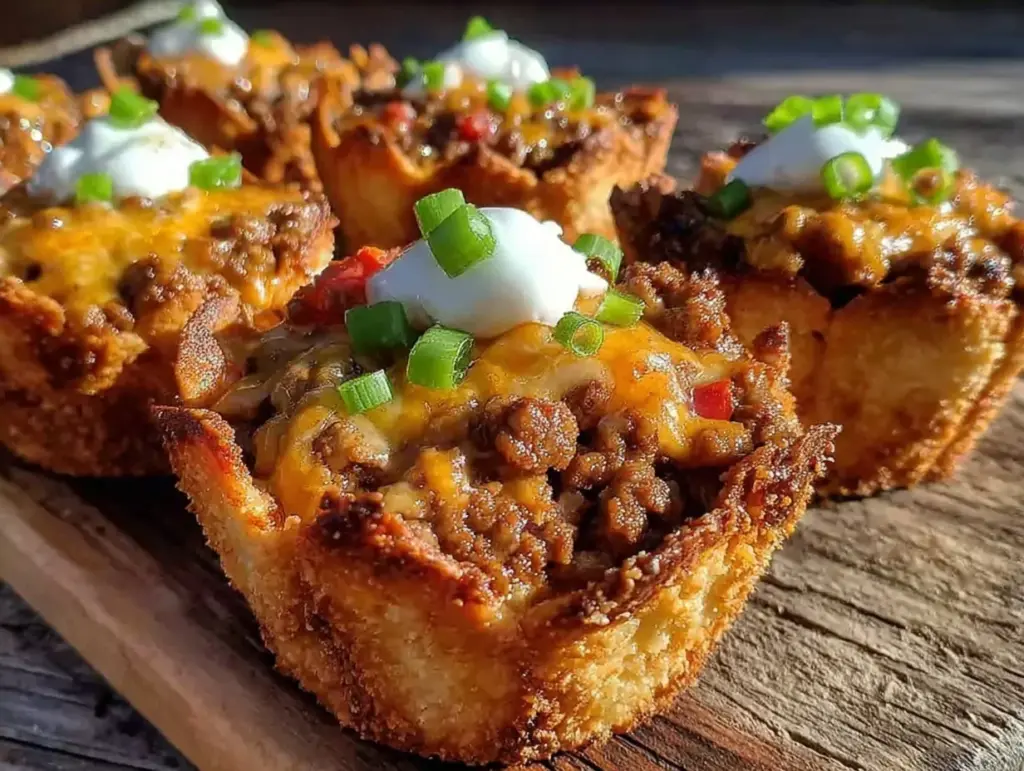
There’s something about the smell of warm, crispy taco shells that instantly takes me back to casual family get-togethers and late-night snack raids. Honestly, I first whipped up these crispy crunchy taco cups when I was craving a taco fix but didn’t want the mess of a full meal. This recipe quickly became a staple for snack time because it’s just so easy and fun to eat. Plus, the taco cups are the perfect little handheld bites that bring all the flavor of your favorite tacos with a satisfying crunch that you just can’t resist.
As someone who’s tried countless taco recipes, I can say this version really stands out. It’s simple, uses only 5 ingredients, and comes together in no time. I love making them for casual hangouts or when friends drop by unexpectedly—it’s always a hit! These crispy crunchy taco cups are perfect for snack lovers who want something tasty, quick, and a bit different from the usual chips and salsa routine. If you’re a big fan of tacos and handheld snacks, trust me, you’ll want to keep this recipe on speed dial.
Over the years, I’ve tested this recipe multiple times—tweaking the seasoning and perfecting the crunch—and it never disappoints. Plus, it’s easy to customize if you want to switch things up. So, whether you’re hosting a game night or just want a fun snack for yourself, these taco cups will quickly become your go-to.
Why You’ll Love This Crispy Crunchy Taco Cups Recipe
After making these crispy crunchy taco cups dozens of times, I can confidently say they’re a snack game-changer. Here’s why you’re going to love this recipe:
- Quick & Easy: Comes together in under 20 minutes—perfect when you want a tasty snack without the fuss.
- Simple Ingredients: Only 5 ingredients needed, most of which you probably already have in your pantry or fridge.
- Perfect for Parties: Great finger food for casual gatherings, game nights, or even a fun appetizer for taco-themed dinners.
- Crowd-Pleaser: The crispy shell paired with savory filling always gets rave reviews from kids and adults alike.
- Unbelievably Delicious: The combo of crunchy taco shell, seasoned meat, and melty cheese is pure snack heaven.
This recipe isn’t just another taco hack. What sets it apart is the way the taco shells are baked into perfectly shaped cups that hold all the flavors without breaking apart. Plus, using just 5 ingredients keeps it fuss-free but packed with flavor. I usually blend in a homemade taco seasoning mix for that perfectly balanced spice kick—nothing too overpowering but just right. Honestly, after the first bite, you might find yourself closing your eyes and savoring the crunch and savory goodness.
This recipe works well for anyone craving a quick snack that feels indulgent but is actually pretty simple to make. It’s a great way to impress guests without sweating over the stove for hours. Plus, the handheld size makes it easy to munch on while chatting or watching your favorite show.
What Ingredients You Will Need
This crispy crunchy taco cups recipe uses straightforward ingredients that come together to deliver bold flavor and satisfying texture without any complicated fuss. Most are pantry staples, and a couple are fresh items you can find year-round.
- Mini Flour Tortillas (6-inch size recommended) – These form the base of your taco cups. I prefer using fresh, soft tortillas for easy shaping and a great crunch after baking.
- Ground Beef (1 pound / 450 grams) – Classic choice for taco filling. You can swap for ground turkey or chicken if you want a leaner option.
- Taco Seasoning (2 tablespoons) – Use your favorite store-bought mix or make your own with chili powder, cumin, paprika, garlic powder, onion powder, and a pinch of salt.
- Shredded Cheddar Cheese (1 cup / 100 grams) – Sharp cheddar works best for that melty, flavorful topping. You could also try Monterey Jack or a Mexican blend.
- Olive Oil (1 tablespoon) – Helps crisp up the tortillas in the oven and adds a nice golden finish.
If you want to add a bit of freshness, consider serving with diced tomatoes, sliced jalapeños, or chopped cilantro on top after baking. For a creamy touch, a dollop of sour cream or guacamole is perfect. I usually keep these extras optional because the taco cups themselves stand strong on flavor!
Equipment Needed
- Muffin Tin – Essential for shaping the mini flour tortillas into cups. A standard 12-cup muffin pan works perfectly.
- Skillet or Frying Pan – For browning the ground beef and mixing in the taco seasoning.
- Mixing Spoon or Spatula – To stir and combine ingredients while cooking.
- Measuring Spoons and Cups – For precise seasoning and ingredient amounts.
- Oven – To bake the tortilla cups until golden and crispy.
If you don’t have a muffin tin, you can improvise by shaping tortillas over an oven-safe bowl or ramekin, but a muffin pan really helps keep the shape consistent. Personally, I’ve tried silicone muffin pans too—they work fine but tend to produce slightly softer shells. For best results, use a metal pan with a non-stick coating.
Detailed Preparation Method
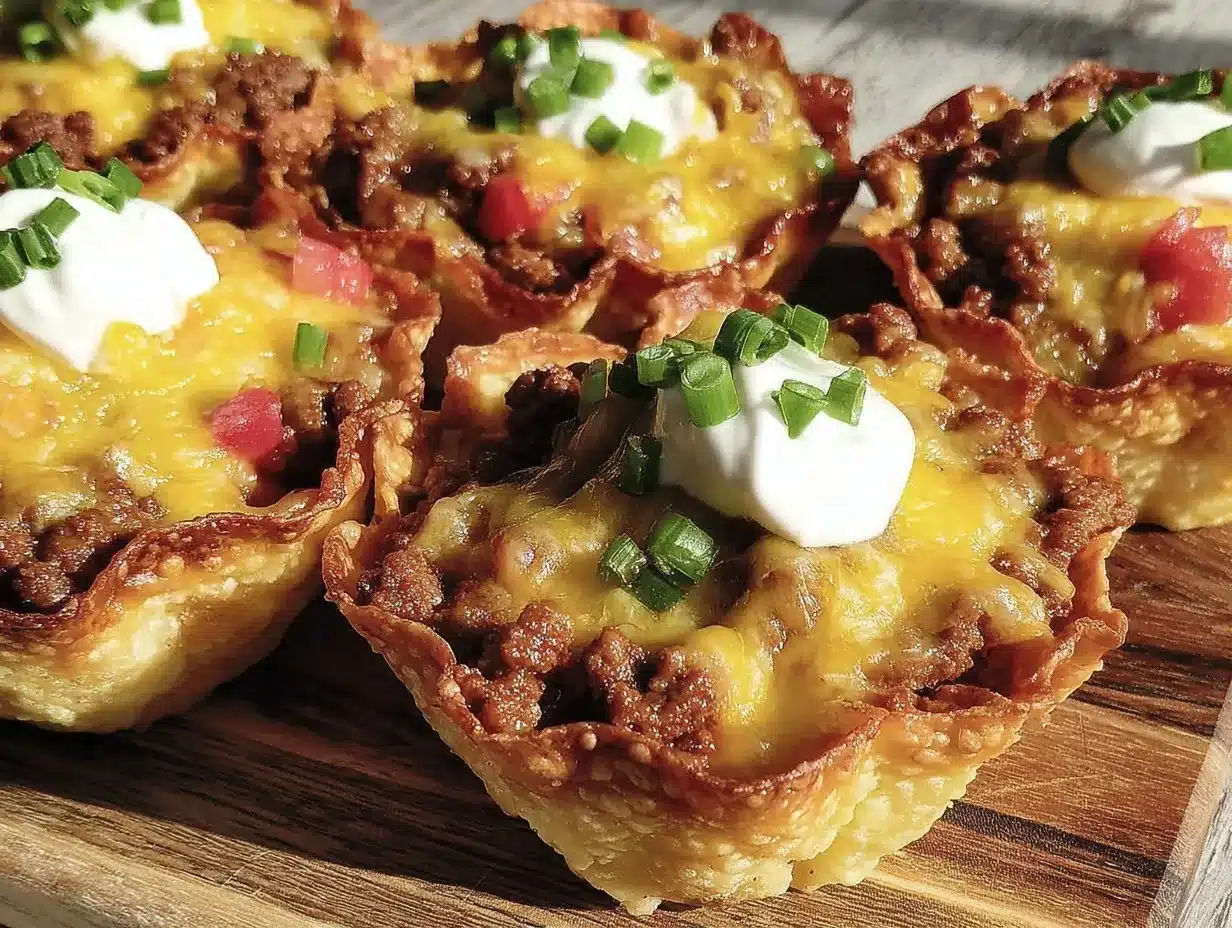
- Preheat your oven to 375°F (190°C). This temperature crisps the tortillas nicely without burning.
- Prepare the taco cups: Lightly brush both sides of each mini flour tortilla with olive oil. This step is key for that crispy, golden texture. Next, gently press each tortilla into the muffin tin cups, shaping them into little bowls. Don’t worry if the tortillas overlap a bit; it just makes the cups sturdier.
- Bake the tortilla cups for about 8-10 minutes. You want them golden and crunchy but not burnt. Keep an eye on them starting at 8 minutes—each oven varies. They’ll firm up as they cool.
- While the tortilla cups bake, cook the ground beef. Heat a skillet over medium heat, add the ground beef, and break it apart with a spatula. Cook for 6-8 minutes, stirring occasionally until fully browned and no pink remains.
- Drain excess fat if needed, then stir in the taco seasoning. Add 2 tablespoons of taco seasoning along with 1/4 cup (60 ml) of water to the skillet. Mix well and let it simmer for 3-4 minutes until the beef is well coated and the sauce thickens slightly.
- Remove the tortilla cups from the oven. Spoon the seasoned ground beef evenly into each cup—about 2 tablespoons per cup works well.
- Top each cup with shredded cheddar cheese. Use about 1 tablespoon of cheese per cup. Return the muffin pan to the oven and bake for another 5 minutes, or until the cheese is melted and bubbly.
- Let the taco cups cool for a few minutes before removing. This helps them hold their shape better and avoids burning your fingers. Use a small spatula or knife to gently lift them out.
- Serve warm, optionally garnished with your favorite taco toppings. A dollop of sour cream, fresh salsa, or a sprinkle of cilantro adds a nice fresh touch.
If the cheese isn’t melting evenly, you might want to switch to the oven’s broiler for a quick 1-2 minute finish—just watch closely! Also, if your tortilla cups feel a little floppy after baking, try baking them a minute or two longer next time (but not too long or they’ll burn).
Cooking Tips & Techniques
Getting these crispy crunchy taco cups just right isn’t rocket science, but a few tricks help nail the texture and flavor every time. Here’s what I’ve learned:
- Choose the right tortillas: Flour tortillas work best here; corn ones tend to crack. Look for smaller 6-inch sizes so the cups fit nicely in the muffin tin.
- Don’t skip the olive oil brush: It’s the secret to that golden, crispy shell. You can lightly spray oil instead, but brushing lets you control coverage better.
- Press gently but firmly: When shaping the tortillas in the muffin tin, make sure they’re snug against the sides to keep their shape while baking.
- Drain the beef fat: Too much grease will make the taco cups soggy. I usually drain off excess fat before adding seasoning, then simmer the meat a bit to thicken.
- Season well: Don’t be shy with the taco seasoning. It’s what gives these cups their signature flavor punch.
- Bake in batches if needed: If you’re making a big batch, bake the cups first, then fill and bake the cheesy topping in smaller batches to keep everything fresh and crispy.
- Multitask: While the taco cups bake the first time, cook and season the beef. This saves time and keeps things moving smoothly.
Once, I forgot to brush the tortillas with oil, and the cups turned out dry and crumbly—lesson learned! Also, letting the cups cool slightly before filling helps avoid spills and keeps them intact.
Variations & Adaptations
One of the best things about this crispy crunchy taco cups recipe is how easy it is to adapt to different tastes and dietary needs. Here are a few fun variations I’ve tried or suggest:
- Vegetarian version: Swap the ground beef for seasoned black beans or lentils. Add diced bell peppers and corn for extra texture.
- Spicy twist: Mix in chopped jalapeños or a dash of hot sauce into the beef filling. A sprinkle of cayenne in the seasoning mix amps up the heat.
- Gluten-free option: Use gluten-free tortillas, often made with corn or alternative flours. Just be gentle shaping them as they can be more fragile.
- Cheese swap: Try pepper jack for a spicy kick or mozzarella for a milder, gooey texture.
- Seasonal flair: Add diced fresh mango or pineapple for a sweet contrast to the savory beef.
Personally, I love making a batch with ground turkey and adding a bit of smoked paprika for a deeper flavor profile. It’s a hit with my family and makes the snack a little lighter but still super tasty.
Serving & Storage Suggestions
These crispy crunchy taco cups are best served warm, fresh out of the oven. The cheese is gooey, and the tortilla cups are perfectly crunchy—honestly, that’s the absolute best way to enjoy them.
For presentation, I like to arrange them on a colorful platter with sides like fresh salsa, guacamole, or sour cream for dipping. They pair wonderfully with a cold soda or a refreshing iced tea.
If you have leftovers (though they rarely last long!), store them in an airtight container in the refrigerator for up to 2 days. To reheat, pop them in the oven at 350°F (175°C) for 5-7 minutes to crisp them back up. Avoid microwaving, as it makes the shells soggy.
Interestingly, the flavors actually deepen after a few hours in the fridge, so if you make them ahead, just reheat gently and enjoy that richer taste.
Nutritional Information & Benefits
Each crispy crunchy taco cup contains approximately:
| Nutrition | Per Serving (1 taco cup) |
|---|---|
| Calories | 160-180 kcal |
| Protein | 10-12 grams |
| Fat | 9-11 grams |
| Carbohydrates | 10-12 grams |
| Fiber | 1-2 grams |
The key ingredients like lean ground beef provide a good protein boost, making these taco cups more than just empty snacks. The cheese adds calcium and a creamy texture, while the tortillas supply satisfying carbs. For those watching carbs, swapping for low-carb tortillas or using lettuce wraps can lighten the carb load.
Be mindful of dairy allergies if you’re using cheddar cheese—substitute with dairy-free cheese to fit your needs. Overall, this recipe strikes a nice balance between indulgence and simplicity, making it a snack that feels good and tastes even better.
Conclusion
So, there you have it—an easy, 5-ingredient crispy crunchy taco cups recipe that’s perfect for snack lovers craving that classic taco flavor in a fun, handheld form. Whether you’re feeding a crowd or just treating yourself, this recipe hits the spot every time. I love how customizable it is, letting you tweak the fillings and toppings to match your mood or dietary preferences.
Give it a try and see how quickly these little taco cups disappear! I’d love to hear how you make them your own, so don’t hesitate to share your twists or ask questions in the comments below. Now, go ahead and make snack time a little more exciting—your taste buds will thank you!
FAQs About Crispy Crunchy Taco Cups
How do I keep the taco cups from getting soggy?
Brush the tortillas with olive oil before baking and bake them until golden and crispy. Also, drain excess fat from the meat filling to avoid sogginess.
Can I make these taco cups ahead of time?
You can bake the tortilla cups a day ahead and store them in an airtight container. Fill and bake with cheese just before serving for the best texture.
What can I use instead of ground beef?
Ground turkey, chicken, or even seasoned beans work great as substitutes for a lighter or vegetarian option.
Are corn tortillas good for this recipe?
Corn tortillas tend to crack when shaped into cups, so flour tortillas are recommended for best results.
Can I freeze crispy crunchy taco cups?
Yes, you can freeze the baked tortilla cups separately. Thaw and fill with fresh meat and cheese before baking to enjoy later.
Pin This Recipe!

Crispy Crunchy Taco Cups

An easy 5-ingredient snack recipe featuring mini flour tortillas baked into crispy cups filled with seasoned ground beef and melted cheddar cheese. Perfect for quick snacks, parties, or casual get-togethers.
- Prep Time: 10 minutes
- Cook Time: 15 minutes
- Total Time: 25 minutes
- Yield: 12 servings 1x
- Category: Snack
- Cuisine: Mexican
Ingredients
- 6-inch mini flour tortillas
- 1 pound ground beef
- 2 tablespoons taco seasoning
- 1 cup shredded cheddar cheese
- 1 tablespoon olive oil
Instructions
- Preheat your oven to 375°F (190°C).
- Lightly brush both sides of each mini flour tortilla with olive oil. Gently press each tortilla into the muffin tin cups, shaping them into little bowls.
- Bake the tortilla cups for about 8-10 minutes until golden and crunchy but not burnt.
- While the tortilla cups bake, heat a skillet over medium heat, add the ground beef, and cook for 6-8 minutes until fully browned.
- Drain excess fat if needed, then stir in the taco seasoning and 1/4 cup (60 ml) water. Simmer for 3-4 minutes until the beef is well coated and sauce thickens slightly.
- Remove the tortilla cups from the oven. Spoon about 2 tablespoons of the seasoned ground beef into each cup.
- Top each cup with about 1 tablespoon of shredded cheddar cheese. Return the muffin pan to the oven and bake for another 5 minutes until the cheese is melted and bubbly.
- Let the taco cups cool for a few minutes before removing from the muffin tin.
- Serve warm, optionally garnished with sour cream, fresh salsa, or cilantro.
Notes
Brush tortillas with olive oil for a golden, crispy shell. Drain excess fat from beef to avoid sogginess. Let taco cups cool slightly before filling to keep shape. If cheese doesn’t melt evenly, use broiler for 1-2 minutes. For gluten-free, use gluten-free tortillas carefully as they are more fragile. Store leftovers in airtight container in fridge up to 2 days; reheat in oven to maintain crispiness.
Nutrition
- Serving Size: 1 taco cup
- Calories: 170
- Sugar: 1
- Sodium: 350
- Fat: 10
- Saturated Fat: 4
- Carbohydrates: 11
- Fiber: 1.5
- Protein: 11
Keywords: taco cups, crispy taco cups, easy taco recipe, snack recipe, 5-ingredient recipe, party appetizer, ground beef tacos



