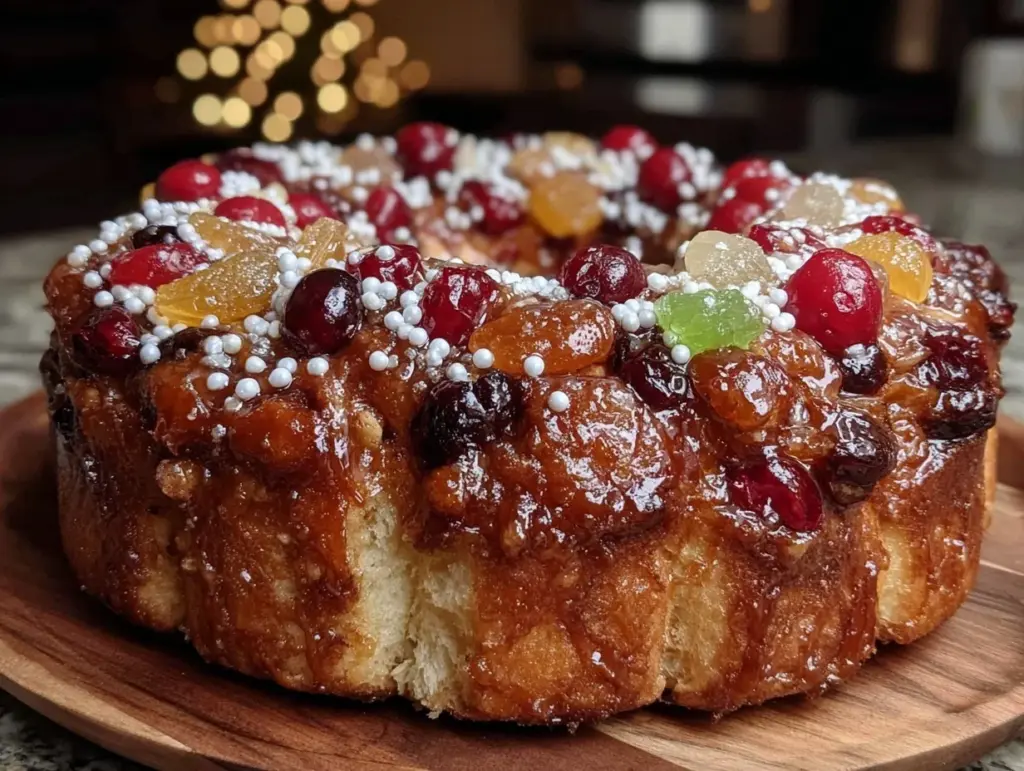
The smell of freshly baked Rosca de Reyes with candied fruit and sugar wafting through the kitchen instantly transports me back to cozy January mornings filled with laughter and shared stories. I first tried making this traditional Mexican bread during a chilly winter, and honestly, it became an instant favorite in my household. It’s more than just a sweet treat; it’s a celebration in every slice, brimming with history and vibrant flavors.
Rosca de Reyes, or Three Kings’ Bread, is a festive staple enjoyed across Latin America and Spain, marking the arrival of the Three Wise Men. What makes this homemade version stand out is the perfect balance between the soft, airy dough and the colorful, tangy candied fruits topped with a sprinkling of coarse sugar. After baking this delightful bread multiple times, tweaking it here and there, I can tell you it’s easier than you might think to recreate this magic right in your own kitchen.
If you’re looking for a recipe that blends tradition with a touch of sweetness and a hint of citrus, this Rosca de Reyes recipe is your go-to. It’s perfect for bringing family and friends together, whether you’re new to baking or an experienced home cook. Trust me, once you get a slice of this homemade Rosca, you’ll want it to be a yearly tradition too.
Why You’ll Love This Recipe
- Simple Ingredients: No exotic items needed—just everyday pantry staples and vibrant candied fruits to brighten it up.
- Perfect for Celebrations: Whether it’s for a traditional Epiphany gathering or just a cozy brunch, this Rosca is a crowd favorite.
- Irresistible Texture: The dough is soft and fluffy, with just the right amount of chewiness that pairs beautifully with the sweet, slightly tart candied fruit.
- Fun to Make: Shaping the Rosca and decorating with colorful fruit is a joyful, hands-on activity that’s great for involving the whole family.
- Flavor Boost: Infused with orange zest and a hint of anise, this bread carries subtle aromatic notes that make it unforgettable.
- Customizable: You can easily swap candied fruits for other toppings or add nuts to your liking, making it truly your own.
This isn’t just any Rosca de Reyes recipe; it’s one I’ve perfected after several attempts, ensuring the dough rises beautifully and the flavor sings. I particularly love the candied fruit topping sprinkled with coarse sugar—it adds that delightful crunch and visual appeal that’s just irresistible. It’s like a little celebration on your plate with every slice.
What Ingredients You Will Need
This recipe uses simple, wholesome ingredients to deliver bold flavor and that iconic Rosca texture without any fuss. Here’s what you’ll want to have ready:
- For the Dough:
- 3¼ cups (410 g) all-purpose flour, sifted (I prefer King Arthur for best consistency)
- ½ cup (100 g) granulated sugar
- 2¼ tsp (7 g) active dry yeast (one packet)
- ½ tsp salt
- ½ cup (120 ml) whole milk, warm (about 110°F/43°C)
- ¼ cup (60 g) unsalted butter, softened
- 3 large eggs, room temperature
- 1 tsp vanilla extract
- 1 tbsp orange zest (adds fresh citrus aroma)
- ½ tsp ground anise seed (optional, but highly recommended)
- For the Topping:
- 1 cup mixed candied fruit (such as figs, cherries, citrus peels, and pineapple)
- ¼ cup (50 g) coarse sugar (for sprinkling)
- 1 egg, beaten (for egg wash)
- Optional:
- A small plastic baby figurine or dried bean (traditional “hidden” surprise)
If you want to make this gluten-free, you can swap the all-purpose flour for a high-quality gluten-free blend, but be mindful that the texture will be different. Also, if you prefer dairy-free, almond or oat milk works well instead of whole milk. For the candied fruit, feel free to source from your local grocery or make your own if you’re feeling adventurous.
Equipment Needed
- Large mixing bowl – for combining and proofing the dough
- Stand mixer with a dough hook attachment (optional but helpful for kneading)
- Measuring cups and spoons – precise measurements matter here
- Pastry brush – for applying the egg wash
- Baking sheet lined with parchment paper – ensures easy cleanup and even baking
- Kitchen towel or plastic wrap – to cover the dough while it rises
- Cooling rack – to let your Rosca cool evenly after baking
If you don’t have a stand mixer, no worries! Hand-kneading is perfectly fine, just be ready to roll up your sleeves. I’ve found that a silicone mixing bowl is easier to clean and less prone to sticking. Also, a digital kitchen scale will really help keep your measurements on point if you have one handy.
Detailed Preparation Method
- Activate the yeast: In a small bowl, combine the warm milk (120 ml) with 1 teaspoon sugar and the active dry yeast (7 g). Stir gently and let it sit for 5-10 minutes until foamy and bubbly. This shows the yeast is alive and ready.
- Mix dry ingredients: In a large bowl, whisk together the sifted flour (410 g), remaining sugar (about 99 g), salt (½ tsp), orange zest, and ground anise (if using). This ensures even distribution.
- Combine wet ingredients: In another bowl, lightly beat the eggs (3 large) with vanilla extract and softened butter.
- Form the dough: Pour the yeast mixture and egg-butter mix into the dry ingredients. Stir with a wooden spoon or dough hook on low speed until it starts to come together, then knead for about 8-10 minutes until the dough is smooth, elastic, and slightly tacky but not sticky. If kneading by hand, flour your surface lightly and fold the dough over itself repeatedly.
- First rise: Shape the dough into a ball and place it in a lightly oiled bowl. Cover with a kitchen towel or plastic wrap and let it rise in a warm spot for 1 to 1½ hours, or until doubled in size.
- Shape the Rosca: Once risen, punch down the dough gently to release air. Transfer to a floured surface and shape into a long rope, about 18-20 inches (45-50 cm) long. Form a large ring by joining the ends and pinching them together securely.
- Add the surprise: If desired, tuck a small plastic baby figurine or dried bean inside the dough ring. Be sure to warn anyone eating it!
- Second rise: Place the ring on a parchment-lined baking sheet. Cover loosely and let it proof for another 45 minutes until puffy.
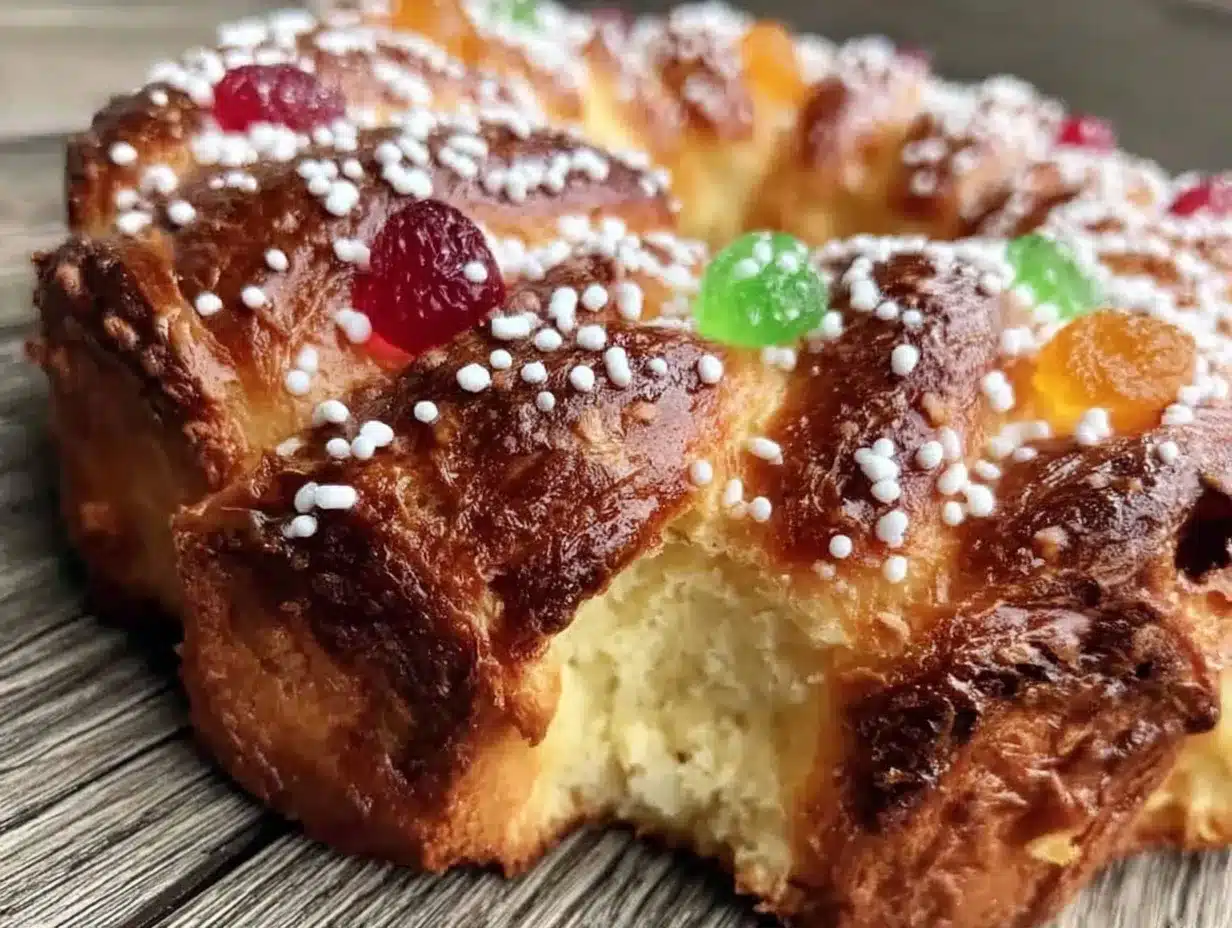
- Decorate: Brush the dough gently with beaten egg. Arrange the candied fruit pieces on top, pressing lightly to adhere. Sprinkle the coarse sugar evenly over everything.
- Bake: Preheat your oven to 350°F (175°C). Bake the Rosca for 25-30 minutes or until golden brown and cooked through. The bottom should sound hollow when tapped.
- Cool: Let the bread cool on a rack before slicing. This helps the crumb set and keeps the texture perfect.
Pro tip: If the top browns too quickly, tent with foil halfway through baking to prevent burning. Also, don’t skip the egg wash—it gives that signature shiny, inviting crust. You’ll know the dough is ready to shape when it springs back slowly after you poke it.
Cooking Tips & Techniques
Getting the perfect Rosca de Reyes can feel a bit intimidating, but a few tricks make all the difference. First, temperature is key—make sure your milk is warm, not hot, to avoid killing the yeast. I’ve learned the hard way that too cold or too hot water can stall the rise completely.
When kneading, patience pays off. The dough should be elastic and smooth, so if it’s sticking like crazy, sprinkle just a bit more flour, but don’t overdo it or you’ll get a dense loaf. Using a stand mixer really cuts down on arm fatigue, but if you’re hand-kneading, a good 10 minutes will do the trick.
Also, don’t rush the rising times. Letting the dough fully double in size ensures a light texture. I often place my bowl near a warm oven or on top of the fridge to maintain a cozy environment. And when decorating, be gentle so you don’t deflate the dough.
Last but not least, keep an eye on baking time. Ovens vary, so start checking at 25 minutes. If it’s golden and sounds hollow, it’s done. Leaving it longer could dry it out.
Variations & Adaptations
One of the best things about this Rosca de Reyes recipe is how easy it is to customize. Here are some tasty ideas I’ve tried and love:
- Nutty Rosca: Add chopped toasted almonds or pecans along with the candied fruit for extra crunch and flavor.
- Chocolate Twist: Swirl a thin layer of chocolate hazelnut spread inside the dough before shaping for a sweet surprise.
- Vegan Version: Substitute butter with coconut oil, use plant-based milk, and replace eggs with flax eggs (1 tbsp flaxseed meal + 3 tbsp water per egg).
- Gluten-Free: Use a gluten-free all-purpose blend and add 1 tsp xanthan gum to help with structure. The texture will be a bit different but still delicious.
- Seasonal Fruit: Swap candied fruit for fresh berries or dried cranberries in winter for a fresh, tart note.
When baking with these variations, keep an eye on dough texture and rising time, as substitutions may affect them slightly. I once tried adding orange marmalade inside the dough—surprisingly delightful and a hit with guests!
Serving & Storage Suggestions
Rosca de Reyes is best served at room temperature, sliced thickly with a hot cup of coffee or spiced hot chocolate. It’s a perfect centerpiece for a festive brunch or cozy afternoon snack. If you want to dress it up, a light dusting of powdered sugar or a drizzle of honey adds a nice touch.
To store, wrap the bread tightly in plastic wrap or keep it in an airtight container at room temperature for up to 3 days. For longer storage, slice and freeze it in a sealed bag for up to 2 months. When ready to enjoy, thaw at room temperature and warm slices briefly in a toaster or oven to revive that fresh-baked feel.
Flavors actually mellow and blend wonderfully after a day, so if you can wait, it tastes even better the next day. Just don’t forget to remove the hidden figurine before slicing!
Nutritional Information & Benefits
A typical slice (about 1/12th of the Rosca) provides roughly 250 calories, with 5 grams of fat, 45 grams of carbohydrates, and 5 grams of protein. Thanks to the eggs and milk, it has a decent protein boost compared to plain sweet breads.
The orange zest adds a hit of vitamin C, and the candied fruit offers small amounts of fiber and antioxidants, though keep in mind the sugar content from the fruit and dough.
This recipe can be adapted to be lower in sugar or dairy-free to suit your dietary needs. Just swapping whole milk for plant-based milk and reducing sugar slightly can make it lighter. It’s a festive treat that balances indulgence with some nutritional value.
Conclusion
This Rosca de Reyes with candied fruit and sugar recipe is truly a treasure—easy enough for home bakers, yet rich in flavor and tradition. I love how it brings people together, whether sharing stories around the table or delighting in that first warm slice. It’s a recipe that’s both comforting and festive, with plenty of room for your personal touch.
Try making it your own by experimenting with different fruits or toppings, and don’t forget to tuck in the surprise! I’d love to hear how your Rosca turns out or any creative twists you add—please share your experiences in the comments. Happy baking and enjoy every bite!
FAQs
Can I make Rosca de Reyes ahead of time?
Yes! You can bake it a day in advance and store it wrapped at room temperature. The flavors actually improve after resting overnight.
What can I use instead of candied fruit?
Fresh berries, dried cranberries, or chopped nuts work well as alternatives and add different textures and flavors.
Is it necessary to put a figurine inside the Rosca?
It’s traditional but optional. If you do include one, make sure to warn everyone and remove it before slicing to avoid accidents.
Can I make this recipe gluten-free?
Yes, by using a gluten-free flour blend and adding xanthan gum, you can adapt the recipe, though texture will vary slightly.
How do I know when the dough has risen enough?
The dough should double in size and when you gently press it with a finger, the indentation should slowly spring back.
Pin This Recipe!

Rosca de Reyes Recipe Easy Homemade Rosca with Candied Fruit and Sugar

A traditional Mexican sweet bread featuring soft, airy dough topped with colorful candied fruits and coarse sugar, perfect for celebrations and family gatherings.
- Prep Time: 30 minutes
- Cook Time: 25-30 minutes
- Total Time: 2 hours 45 minutes
- Yield: 12 servings 1x
- Category: Dessert
- Cuisine: Mexican
Ingredients
- 3¼ cups (410 g) all-purpose flour, sifted
- ½ cup (100 g) granulated sugar
- 2¼ tsp (7 g) active dry yeast (one packet)
- ½ tsp salt
- ½ cup (120 ml) whole milk, warm (about 110°F/43°C)
- ¼ cup (60 g) unsalted butter, softened
- 3 large eggs, room temperature
- 1 tsp vanilla extract
- 1 tbsp orange zest
- ½ tsp ground anise seed (optional)
- 1 cup mixed candied fruit (such as figs, cherries, citrus peels, and pineapple)
- ¼ cup (50 g) coarse sugar (for sprinkling)
- 1 egg, beaten (for egg wash)
- Optional: A small plastic baby figurine or dried bean (traditional “hidden” surprise)
Instructions
- Activate the yeast: In a small bowl, combine the warm milk (120 ml) with 1 teaspoon sugar and the active dry yeast (7 g). Stir gently and let it sit for 5-10 minutes until foamy and bubbly.
- Mix dry ingredients: In a large bowl, whisk together the sifted flour (410 g), remaining sugar (about 99 g), salt (½ tsp), orange zest, and ground anise (if using).
- Combine wet ingredients: In another bowl, lightly beat the eggs (3 large) with vanilla extract and softened butter.
- Form the dough: Pour the yeast mixture and egg-butter mix into the dry ingredients. Stir with a wooden spoon or dough hook on low speed until it starts to come together, then knead for about 8-10 minutes until the dough is smooth, elastic, and slightly tacky but not sticky.
- First rise: Shape the dough into a ball and place it in a lightly oiled bowl. Cover with a kitchen towel or plastic wrap and let it rise in a warm spot for 1 to 1½ hours, or until doubled in size.
- Shape the Rosca: Punch down the dough gently to release air. Transfer to a floured surface and shape into a long rope, about 18-20 inches (45-50 cm) long. Form a large ring by joining the ends and pinching them together securely.
- Add the surprise: If desired, tuck a small plastic baby figurine or dried bean inside the dough ring.
- Second rise: Place the ring on a parchment-lined baking sheet. Cover loosely and let it proof for another 45 minutes until puffy.
- Decorate: Brush the dough gently with beaten egg. Arrange the candied fruit pieces on top, pressing lightly to adhere. Sprinkle the coarse sugar evenly over everything.
- Bake: Preheat oven to 350°F (175°C). Bake the Rosca for 25-30 minutes or until golden brown and cooked through. The bottom should sound hollow when tapped.
- Cool: Let the bread cool on a rack before slicing.
Notes
If the top browns too quickly, tent with foil halfway through baking. Use warm milk (not hot) to activate yeast properly. Don’t skip the egg wash for a shiny crust. Dough is ready to shape when it springs back slowly after poking. For gluten-free, use a gluten-free flour blend with xanthan gum. For dairy-free, substitute milk and butter with plant-based alternatives. Remove hidden figurine before slicing.
Nutrition
- Serving Size: 1 slice (1/12th of t
- Calories: 250
- Fat: 5
- Carbohydrates: 45
- Protein: 5
Keywords: Rosca de Reyes, Three Kings Bread, Mexican bread, candied fruit bread, traditional Mexican dessert, festive bread, holiday bread



