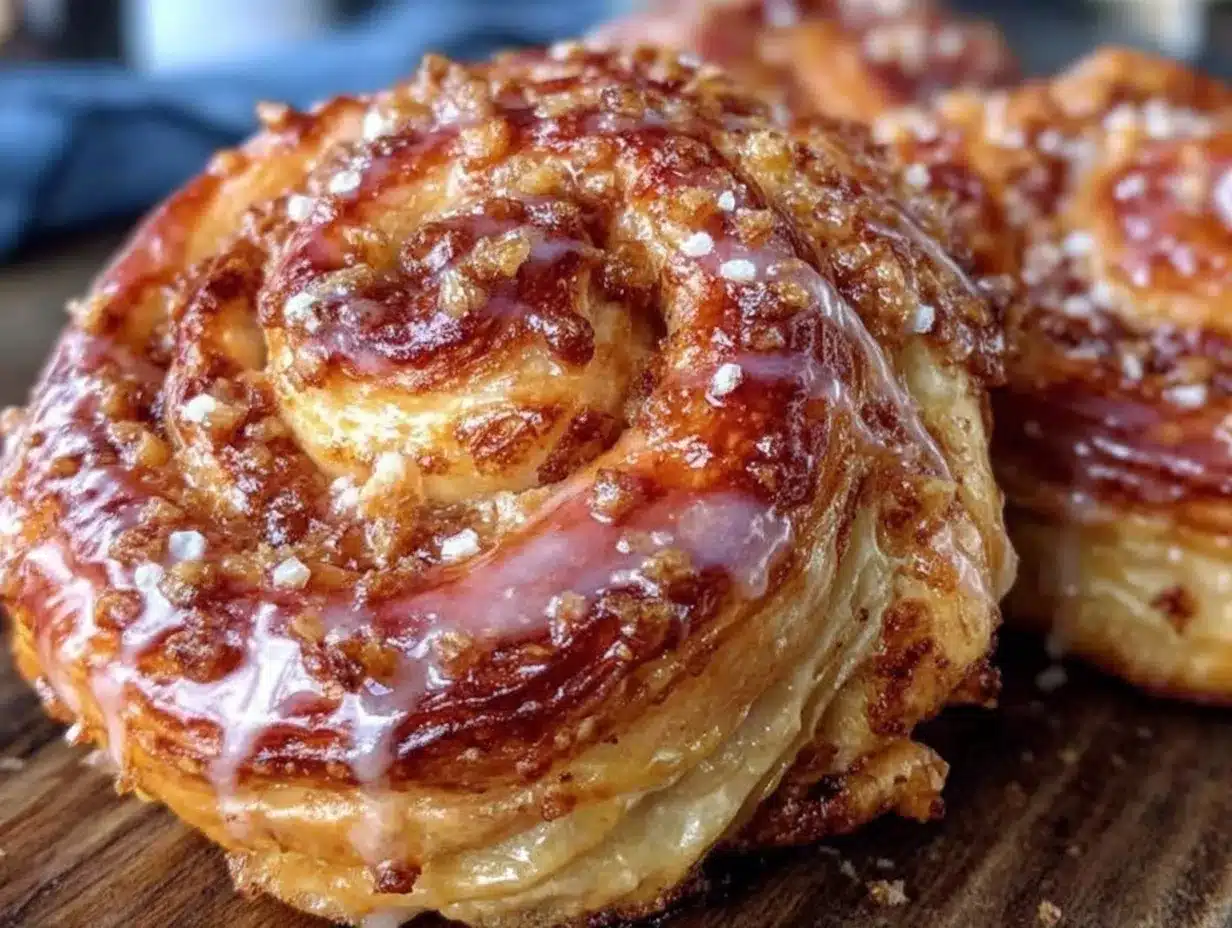
The smell of warm, buttery pastries fresh out of the oven is honestly one of life’s simplest joys. I still remember the first time I made these cheese Danish pastries at home—it was a weekend morning, and the whole kitchen was filled with flaky layers and a sweet, creamy aroma that just pulled everyone out of bed. If you’ve ever wondered how to get that perfect balance of flaky, buttery dough with a luscious, velvety cheese filling, you’re in for a treat with this recipe.
Cheese Danish pastries have a fascinating history, tracing back to Danish bakers who mastered the art of laminated dough. Over time, this classic pastry has become a beloved staple for breakfasts, brunches, and special occasions worldwide. What I love about my homemade version is how simple it is to make without compromising on that café-quality taste. Plus, making them yourself means you get to enjoy them fresh and warm, something store-bought versions just can’t compete with.
Whether you’re aiming to impress guests, need a comforting weekend project, or just want to treat yourself to a flaky, creamy delight, this cheese Danish pastries recipe is a winner. I’ve baked it countless times, tweaking the dough and filling until it’s just right. It’s a bit of magic you can create in your own kitchen, and I can’t wait to share how to make these irresistible pastries with you.
Why You’ll Love This Recipe
- Quick & Easy: Despite the fancy look, this recipe comes together in about 2 hours, including chilling time, perfect for weekend bakers.
- Simple Ingredients: No need for exotic items—just pantry staples like butter, cream cheese, and flour.
- Perfect for Brunch & Special Occasions: These pastries shine at holiday breakfasts, brunch parties, or as a sweet treat any time.
- Crowd-Pleaser: Kids and adults alike rave about the flaky crust and creamy cheese center—it’s always the first to disappear!
- Unbelievably Delicious: The contrast between the crisp, golden layers and the soft, slightly tangy cheese filling is pure comfort food.
What sets this cheese Danish pastries recipe apart is the technique I use to achieve that ultra-flaky dough without needing a professional bakery setup. I blend cold butter into the dough in a way that creates perfect layers when baked. The filling is lightly sweetened cream cheese with a hint of vanilla and lemon zest—simple but with depth. Honestly, it’s like having your favorite bakery treat right at home, but better because you made it yourself.
After baking these pastries several times, I’ve learned that the magic truly happens in the chilling steps and gentle handling of the dough. Trust me, it’s worth the patience!
What Ingredients You Will Need
This cheese Danish pastries recipe relies on straightforward, wholesome ingredients that come together to create those flaky layers and creamy filling you love. Most are easy to find, and the few specialty notes I share will help you pick the best options.
- For the Dough:
- All-purpose flour – 2 ½ cups (310g), sifted for a light texture
- Unsalted butter – 1 cup (225g), very cold and cut into cubes (I prefer European-style butter like Plugrá for richer flavor)
- Granulated sugar – 2 tbsp (25g), just a touch for subtle sweetness
- Salt – ½ tsp (3g), balances the sweetness perfectly
- Instant yeast – 2 ¼ tsp (7g), for a slight lift in the dough
- Whole milk – ¾ cup (180ml), warmed to about 110°F (43°C)
- Egg – 1 large, room temperature (helps bind the dough)
- For the Cream Cheese Filling:
- Cream cheese – 8 oz (225g), softened (I like Philadelphia for smoothness)
- Powdered sugar – ½ cup (60g), for sweetness without graininess
- Vanilla extract – 1 tsp, adds warm aroma
- Lemon zest – 1 tsp (from about half a lemon), brightens the flavor
- Egg yolk – 1 large, for richness and helps set the filling
- For the Egg Wash:
- Egg – 1 large, beaten with 1 tbsp water (gives pastries a beautiful golden finish)
- Optional Toppings:
- Powdered sugar, for dusting
- Apricot jam glaze (heat 2 tbsp apricot jam with 1 tbsp water)
Tip: If you want a dairy-free version, swap the cream cheese with a plant-based alternative and use a suitable non-dairy milk. For gluten-free, almond or oat flour blends can work, but the texture will be slightly different.
Equipment Needed
- Mixing Bowls: Multiple sizes for dough and filling prep.
- Rolling Pin: A sturdy, smooth rolling pin is essential for laminating the dough layers evenly. I find a wooden pin works best, but silicone-coated ones can help prevent sticking.
- Baking Sheets: Standard half-sheet pans lined with parchment paper make cleanup easier and ensure even baking.
- Pastry Brush: For applying the egg wash evenly without tearing the dough.
- Bench Scraper or Knife: Handy for cutting and shaping the dough precisely.
- Plastic Wrap or Damp Kitchen Towel: Keeps dough from drying out during resting and chilling.
Optional but helpful: A stand mixer with a dough hook can speed up mixing and kneading, but I often do it by hand to feel the dough’s texture better. For budget-friendly alternatives, a rolling pin can be improvised with a clean wine bottle if needed!
Detailed Preparation Method
- Activate the Yeast: In a small bowl, whisk warm milk (110°F/43°C) with the yeast and 1 tsp sugar. Let it sit for 5-10 minutes until foamy. If it doesn’t foam, your yeast might be old—start over with fresh yeast.
- Make the Dough: In a large bowl, combine the flour, remaining sugar, and salt. Add the cold butter cubes and use your fingertips or a pastry cutter to work the butter into the flour until the mixture resembles coarse crumbs—some pea-sized pieces of butter should remain visible for flakiness.
- Add the yeast mixture and the beaten egg to the flour-butter mixture. Stir with a wooden spoon until the dough just comes together. Don’t overmix—slightly shaggy dough is perfect.
- First Chill: Turn the dough out onto a lightly floured surface and shape into a rough rectangle. Wrap tightly in plastic wrap and chill in the fridge for at least 1 hour. Chilling firms the butter and relaxes the gluten.
- Prepare the Filling: While dough chills, beat the softened cream cheese with powdered sugar, vanilla, lemon zest, and egg yolk until smooth and creamy. Cover and refrigerate.
- Laminate the Dough: Remove dough from fridge and place on a floured surface. Roll into a 12×8 inch (30×20 cm) rectangle. Fold the dough into thirds, like a letter. Turn 90 degrees and roll out again to the same size. Repeat the fold and roll process 2 more times. Chill dough for 30 minutes afterward to keep butter cold.
- Shape Pastries: Roll dough into a 16×12 inch (40×30 cm) rectangle. Cut into 12 squares (about 4×4 inches / 10×10 cm). Place about 1 tbsp of cream cheese filling in the center of each square.
- Fold corners towards the center, pinching lightly to seal and create a Danish shape. Place on parchment-lined baking sheets.
- Final Rise: Cover loosely with plastic wrap and let pastries rise at room temperature for 45-60 minutes until slightly puffed.
- Preheat Oven: Heat your oven to 375°F (190°C).
- Apply Egg Wash: Brush the tops gently with beaten egg wash for that irresistible golden shine.
- Bake: Bake for 18-22 minutes or until pastries are puffed and golden brown. Keep an eye near the end—ovens vary!
- Cool & Glaze: Let cool on racks for 10 minutes. If desired, brush lightly with warmed apricot glaze or dust with powdered sugar before serving.
Tip: If your filling starts to leak, it’s usually because the filling was too warm or the dough too thin at the edges. Keep everything chilled and handle dough gently.
Cooking Tips & Techniques
Making cheese Danish pastries at home might seem intimidating, but a few tips make all the difference. First, keep your ingredients cold—especially butter and dough. Warm butter melts into the dough and ruins those flaky layers you want so badly.
Don’t rush the chilling steps. Those breaks are where the magic of lamination happens. I learned the hard way that skipping or shortening these leads to tougher, less flaky pastries. Also, when rolling, use a light touch. Pressing too hard can squeeze butter out, making the dough greasy or flat.
Egg wash is your friend. It gives that gorgeous golden finish and helps the pastries develop a slight crispiness on top. Brush gently and avoid pooling egg wash in the folds to prevent sogginess.
When you fold the dough, think of it like making layers of a croissant but a little easier. The goal is to trap those layers of butter and flour to puff beautifully in the oven.
Finally, don’t be discouraged by imperfect shapes or tiny filling leaks. Homemade pastries have character! Each one will taste fantastic even if it’s not perfectly symmetrical.
Variations & Adaptations
- Fruit-Filled Danish: Swap half the cream cheese filling for your favorite fruit preserves like raspberry, apricot, or blueberry. Dollop fruit in the center before adding cream cheese on top for a layered effect.
- Whole Wheat Twist: Substitute half the all-purpose flour with whole wheat pastry flour for nuttier flavor and added fiber. The texture will be slightly denser but still delicious.
- Vegan Cheese Danish: Use vegan cream cheese and plant-based milk (like oat or almond) to make these dairy-free. Replace the egg wash with a mix of maple syrup and plant milk for shine.
- Spiced Filling: Add a pinch of cinnamon or cardamom to the cream cheese filling for a cozy, aromatic touch perfect for fall mornings.
- Almond Danish: Top pastries with slivered almonds before baking and add a drizzle of almond glaze made from powdered sugar and almond extract after cooling.
One personal favorite is the fruit-filled version with homemade blueberry jam. It adds just the right balance of tartness to cut through the richness of the cheese. Give it a try when berries are in season!
Serving & Storage Suggestions
These cheese Danish pastries are best enjoyed fresh and slightly warm. Serve them alongside a cup of strong coffee or your favorite tea for a perfect morning treat. If you want to impress guests, place them on a pretty platter and dust lightly with powdered sugar or brush with a shiny apricot glaze.
To store, keep pastries in an airtight container at room temperature for up to 2 days. If you want them to last longer, freeze unbaked shaped pastries on a tray, then transfer to a freezer bag for up to 2 months. When ready to bake, thaw overnight in the fridge and allow to rise before baking as usual.
For leftovers, reheat in a 325°F (160°C) oven for about 5-7 minutes to bring back that fresh-baked crispness. Microwave reheating tends to make them soggy, so oven warming is best.
Flavors actually deepen a bit after resting, so if you have patience, making these a day ahead can sometimes improve the experience.
Nutritional Information & Benefits
Each cheese Danish pastry contains approximately 300-350 calories, with a good balance of fats from butter and cream cheese, moderate carbohydrates, and some protein. The cream cheese adds calcium and contributes to that creamy texture without too much heaviness.
Using real butter and cream cheese delivers rich flavor, but you can lighten the recipe by using reduced-fat cream cheese or swapping half the butter for a neutral oil, though that will affect flakiness.
This recipe is vegetarian-friendly and can be modified for gluten-free or vegan diets with ingredient swaps mentioned earlier. Just be mindful of allergens like dairy, eggs, and gluten.
From a wellness perspective, making pastries at home means you control the quality of ingredients—no preservatives or artificial additives here, just honest, delicious baking.
Conclusion
Honestly, these cheese Danish pastries are one of those recipes that make you feel like a pro baker without the stress. The flaky layers combined with the rich, creamy filling create a treat that’s hard to beat. Whether you’re making them for a special occasion or just because you deserve a little indulgence, this recipe hits all the right notes.
Feel free to customize with your favorite flavors and share your baking stories—I’d love to hear how your cheese Danish pastries turn out! Baking is all about experimenting and enjoying the process, so don’t worry about perfection.
Give this recipe a try, and I promise you’ll be hooked on these flaky, creamy homemade delights. Happy baking!
Frequently Asked Questions
How long do cheese Danish pastries stay fresh?
They’re best eaten within 1-2 days when stored in an airtight container at room temperature. You can freeze unbaked pastries for longer storage.
Can I make the dough ahead of time?
Yes! You can prepare the dough, do the first chill, and refrigerate it overnight. Just bring it back to temperature before laminating and shaping.
What’s the best way to prevent the filling from leaking?
Keep the filling chilled until use and avoid overfilling the pastries. Also, ensure the dough edges are sealed well when folding.
Can I use store-bought puff pastry instead of making dough from scratch?
Absolutely! Using good-quality puff pastry is a great shortcut. Just add the cheese filling and bake as directed, adjusting time as needed.
Is it okay to substitute cream cheese with ricotta?
Ricotta has a different texture and moisture content, so the filling will be less creamy and might be wetter. If you try it, drain ricotta well and consider adding a bit of powdered sugar and vanilla to mimic the flavor.
Pin This Recipe!

Cheese Danish Pastries Recipe Easy Flaky Creamy Homemade Delight

This recipe creates flaky, buttery Danish pastries filled with a luscious, velvety cream cheese filling, perfect for breakfasts, brunches, and special occasions.
- Prep Time: 30 minutes
- Cook Time: 20 minutes
- Total Time: 2 hours
- Yield: 12 pastries
- Category: Breakfast, Brunch, Dessert
- Cuisine: Danish
Ingredients
- All-purpose flour – 2 ½ cups (310g), sifted
- Unsalted butter – 1 cup (225g), very cold and cut into cubes
- Granulated sugar – 2 tbsp (25g)
- Salt – ½ tsp (3g)
- Instant yeast – 2 ¼ tsp (7g)
- Whole milk – ¾ cup (180ml), warmed to about 110°F (43°C)
- Egg – 1 large, room temperature
- Cream cheese – 8 oz (225g), softened
- Powdered sugar – ½ cup (60g)
- Vanilla extract – 1 tsp
- Lemon zest – 1 tsp (from about half a lemon)
- Egg yolk – 1 large
- Egg – 1 large, beaten with 1 tbsp water (for egg wash)
- Optional toppings: powdered sugar for dusting, apricot jam glaze (heat 2 tbsp apricot jam with 1 tbsp water)
Instructions
- Activate the yeast by whisking warm milk (110°F/43°C) with yeast and 1 tsp sugar in a small bowl. Let sit 5-10 minutes until foamy.
- In a large bowl, combine flour, remaining sugar, and salt. Add cold butter cubes and work into flour until mixture resembles coarse crumbs with some pea-sized butter pieces.
- Add yeast mixture and beaten egg to flour-butter mixture. Stir until dough just comes together; do not overmix.
- Turn dough onto floured surface, shape into rough rectangle, wrap tightly in plastic wrap, and chill in fridge for at least 1 hour.
- Beat softened cream cheese with powdered sugar, vanilla, lemon zest, and egg yolk until smooth. Cover and refrigerate.
- Remove dough from fridge, roll into 12×8 inch rectangle. Fold into thirds like a letter, turn 90 degrees, roll out again. Repeat fold and roll 2 more times. Chill dough for 30 minutes.
- Roll dough into 16×12 inch rectangle. Cut into 12 squares (4×4 inches). Place about 1 tbsp cream cheese filling in center of each square.
- Fold corners toward center, pinch lightly to seal and create Danish shape. Place on parchment-lined baking sheets.
- Cover loosely with plastic wrap and let pastries rise at room temperature for 45-60 minutes until slightly puffed.
- Preheat oven to 375°F (190°C).
- Brush tops with beaten egg wash.
- Bake for 18-22 minutes until puffed and golden brown.
- Cool on racks for 10 minutes. Optionally brush with warmed apricot glaze or dust with powdered sugar before serving.
Notes
Keep ingredients cold, especially butter and dough, to ensure flaky layers. Do not rush chilling steps. Use gentle rolling pressure to avoid squeezing out butter. Egg wash gives a golden finish. Handle dough gently to prevent filling leaks.
Nutrition
- Serving Size: 1 pastry
- Calories: 325
- Sugar: 10
- Sodium: 180
- Fat: 20
- Saturated Fat: 12
- Carbohydrates: 30
- Fiber: 1
- Protein: 6
Keywords: Cheese Danish, Danish pastries, cream cheese filling, flaky pastry, homemade Danish, breakfast pastry, brunch recipe