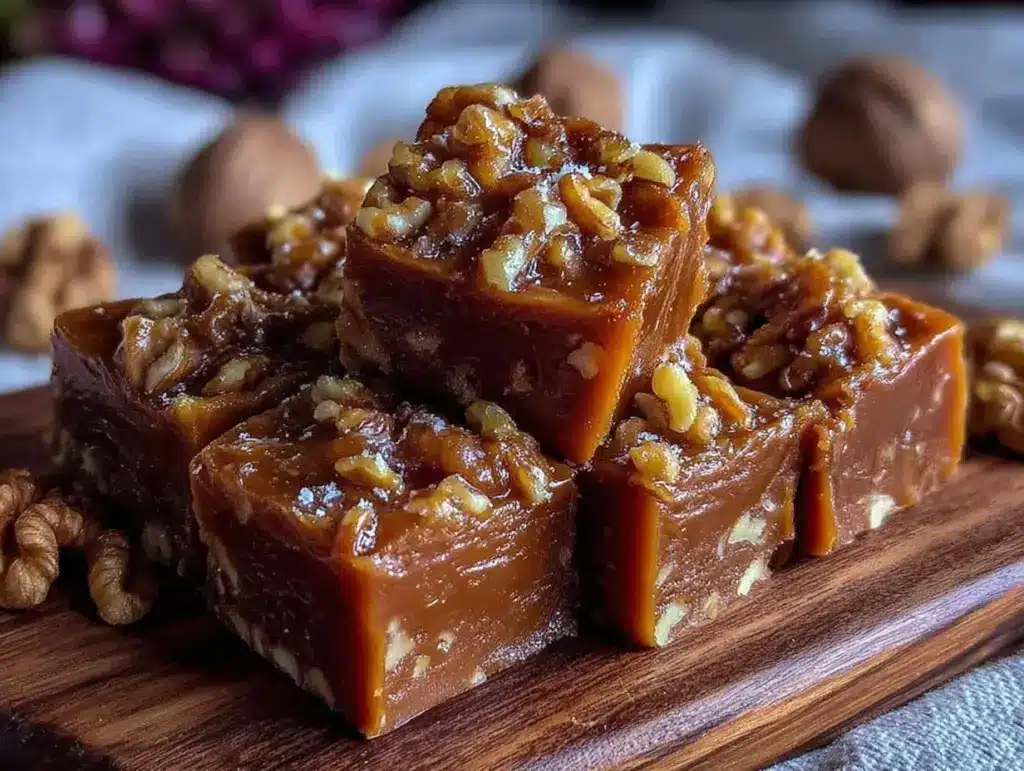
The smell of rich maple syrup mingling with toasted walnuts fills the kitchen and instantly takes me back to cozy autumn afternoons spent with family. I first stumbled upon this irresistible maple walnut fudge recipe during a chilly weekend when I wanted a sweet treat that felt both comforting and a little fancy. Honestly, this fudge quickly became my go-to homemade gift and a staple for holiday gatherings. It’s not just any fudge—it’s the kind that melts gently on your tongue, offering that perfect blend of buttery sweetness and crunchy walnut goodness.
Having tested this recipe countless times, tweaking the maple-to-sugar ratio and toasting the walnuts just right, I’m confident this is the easiest way to whip up a batch that looks like you spent hours in the kitchen. Plus, it’s a treat that’s surprisingly versatile, perfect for anyone who loves the deep flavor of pure maple combined with the satisfying texture of walnuts. Whether you’re a fudge fanatic or new to making candy at home, this recipe is certain to become a favorite in your collection.
If you’re after a sweet that’s perfect for gifting, a cozy night in, or impressing guests without breaking a sweat, this maple walnut fudge recipe delivers every time. You’ll love how it balances the natural sweetness of maple syrup with the earthy crunch of walnuts, creating an unforgettable homemade treat that’s simply irresistible.
Why You’ll Love This Recipe
After making this maple walnut fudge recipe over and over, here’s why it stands out from the crowd:
- Quick & Easy: Ready in under 30 minutes, it’s perfect for those last-minute dessert cravings or holiday preparations.
- Simple Ingredients: No fancy or hard-to-find items here—just maple syrup, sugar, butter, and walnuts.
- Perfect for Gifting: Pack it up in festive tins or boxes, and you’ve got a homemade gift that looks and tastes impressive.
- Crowd-Pleaser: Kids and adults alike can’t resist this fudge’s creamy texture and nutty crunch.
- Unbelievably Delicious: The natural maple flavor shines through, giving a unique twist to classic fudge.
This isn’t just another fudge recipe—it’s one where I’ve perfected the heating and cooling steps to create a creamy yet firm texture that cuts cleanly without crumbling. Toasting the walnuts beforehand brings out their deep, toasty flavor, making every bite a delightful surprise. Plus, swapping in pure maple syrup gives it a richer, more complex sweetness than your average fudge. It’s honestly a treat that makes you pause and savor, the kind of recipe you’ll want to keep coming back to year after year.
What Ingredients You Will Need
This maple walnut fudge recipe uses simple ingredients that come together beautifully to create a rich, creamy, and nutty treat. Most of these are pantry staples, and you probably already have them on hand!
- Pure Maple Syrup (1 cup / 240 ml) – I always go for Grade A amber for that perfect balance of sweetness and maple flavor.
- Granulated Sugar (1 ½ cups / 300 g) – Adds the classic fudge sweetness and helps with the texture.
- Unsalted Butter (½ cup / 115 g, softened) – Adds richness and smoothness to the fudge.
- Evaporated Milk (1 cup / 240 ml) – This gives the fudge its creamy, fudgy body without being too runny.
- Vanilla Extract (1 tsp) – Enhances the maple flavor and adds a warm, comforting note.
- Walnuts (1 cup / 120 g, toasted and chopped) – Toasting is key here to bring out their deep, nutty flavor and adds a lovely crunch.
- Salt (a pinch) – Balances the sweetness and deepens the overall flavor.
Ingredient Tips: For the best texture, use fresh walnuts and toast them lightly in a dry pan until fragrant—don’t skip this step! If you prefer a dairy-free fudge, you can swap evaporated milk with coconut milk and use a plant-based butter substitute. Also, if you want a less sweet fudge, try cutting the sugar down by a couple of tablespoons, but remember that will affect the firm set slightly.
Equipment Needed
- Medium heavy-bottomed saucepan: Essential for even heat distribution to prevent burning the sugar mixture.
- Candy thermometer: Highly recommended to get the perfect fudge temperature (target around 234°F / 112°C, or soft ball stage).
- Wooden spoon or heatproof spatula: For stirring the fudge mixture gently but thoroughly.
- 9×9 inch (23×23 cm) square baking pan: To pour and set the fudge evenly.
- Parchment paper: To line the pan for easy removal of the fudge.
If you don’t have a candy thermometer, a quick pinch test in cold water can work (see preparation steps below). For budget-friendly options, you can find reliable candy thermometers online or at most kitchen stores for under $15. Personally, I’ve found that investing in a good thermometer saves so much guesswork and frustration when making fudge or candy. Also, make sure to clean your utensils immediately after use since fudge residue hardens quickly!
Detailed Preparation Method
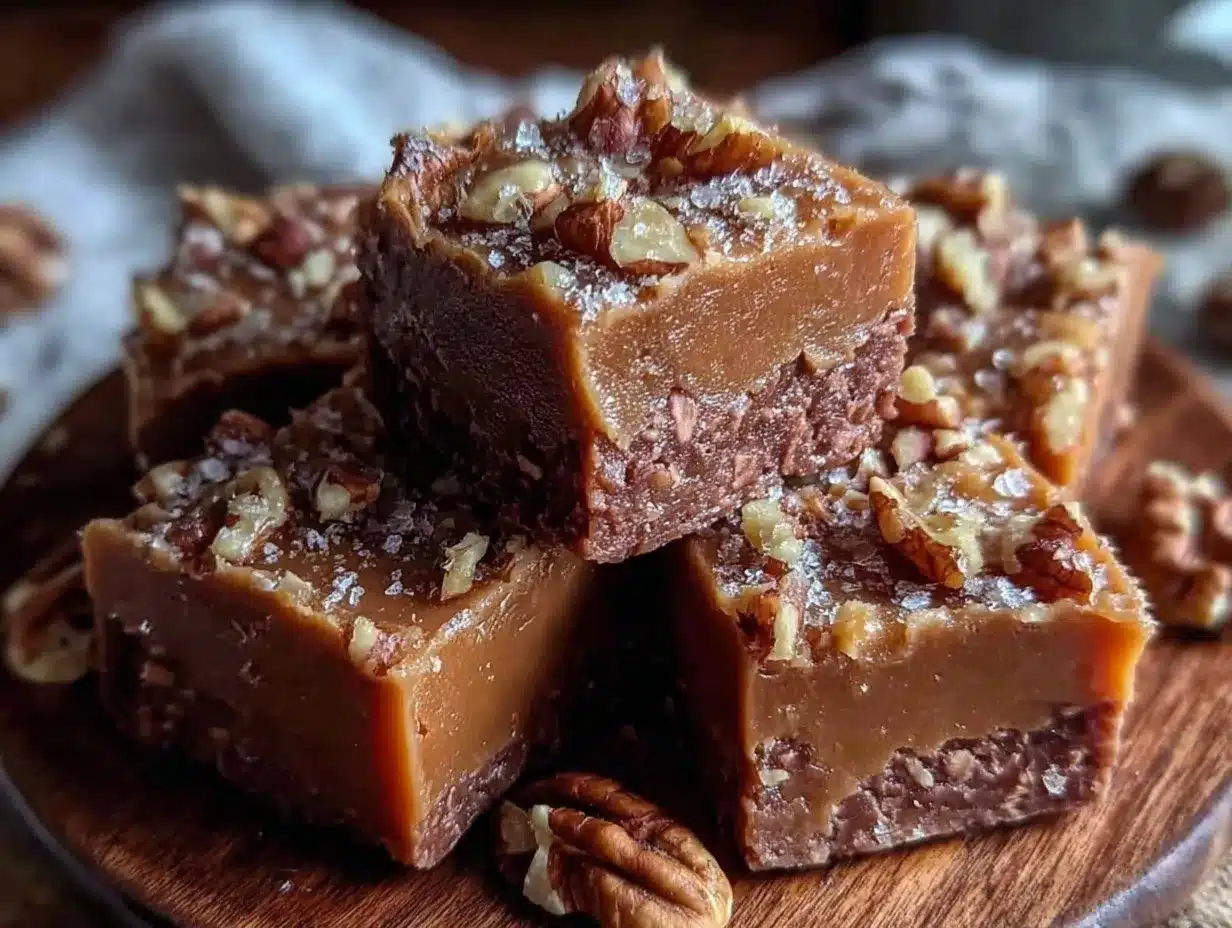
- Prepare your pan: Line a 9×9 inch (23×23 cm) pan with parchment paper, leaving some overhang on the sides for easy fudge removal. Set aside.
- Toast the walnuts: In a dry skillet over medium heat, toast 1 cup (120 g) chopped walnuts for 4-5 minutes, stirring frequently until fragrant and lightly browned. Remove from heat and set aside.
- Combine sugar, maple syrup, butter, and evaporated milk: In a medium heavy-bottomed saucepan, add 1 ½ cups (300 g) granulated sugar, 1 cup (240 ml) pure maple syrup, ½ cup (115 g) softened unsalted butter, and 1 cup (240 ml) evaporated milk. Stir gently to combine.
- Cook the mixture: Place the saucepan over medium heat and bring to a gentle boil, stirring constantly with a wooden spoon or heatproof spatula. Attach a candy thermometer to the side of the pan, ensuring the tip is submerged but not touching the bottom.
- Reach soft ball stage: Continue cooking and stirring until the mixture reaches 234°F (112°C) on the candy thermometer. This usually takes about 10-15 minutes. If you don’t have a thermometer, drop a small amount of the mixture into cold water; it should form a soft, flexible ball.
- Remove from heat and cool: Take the pan off the heat and let the fudge mixture cool to about 110°F (43°C) without stirring—this usually takes around 10 minutes. This resting period is crucial for the fudge to set properly.
- Add vanilla and walnuts: Stir in 1 teaspoon vanilla extract and the toasted walnuts with a wooden spoon. The mixture should start to thicken slightly.
- Beat the fudge: Beat the fudge vigorously for 3-5 minutes by hand until it thickens and loses its glossy shine. This step gives fudge that classic creamy texture.
- Pour and set: Quickly pour the fudge into the prepared pan, smoothing the top with a spatula. Allow it to cool completely at room temperature for 2 hours or until firm.
- Cut and serve: Use the parchment overhang to lift the fudge out of the pan. Cut into 1-inch (2.5 cm) squares with a sharp knife. Store in an airtight container at room temperature or in the fridge.
Pro Tip: Don’t rush the cooling or beating steps—they’re the secret to perfect texture. If your fudge ends up grainy, you might have cooked it too fast or stirred too much while hot. Patience pays off!
Cooking Tips & Techniques
Making fudge can feel intimidating, but a few tricks make it a breeze:
- Use a heavy-bottomed pan: This prevents hot spots that can burn your sugar mixture, giving you smooth fudge every time.
- Stir gently and constantly: When bringing the mixture to boil, keep stirring to avoid scorching. But once it reaches soft ball stage, stop stirring to prevent crystallization.
- Temperature is key: The soft ball stage (234°F / 112°C) is crucial for fudge texture. Too low, and the fudge won’t set; too high, and it’ll be hard and crumbly.
- Cool without stirring: Letting the mixture cool off heat without stirring helps sugar crystals form properly.
- Beat after cooling: This step creates a creamy texture by encouraging small sugar crystals—skip it, and you’ll get grainy fudge.
- Toast walnuts for flavor: Raw walnuts can taste bitter or bland; toasting brings out their nuttiness and crunch.
I learned the hard way that rushing the cooling or beating steps leads to disappointing grainy fudge. Also, always use fresh ingredients—old nuts or evaporated milk past its prime can affect taste and texture. Finally, keep your knives warm when cutting fudge for cleaner slices.
Variations & Adaptations
This maple walnut fudge recipe is wonderfully adaptable to your taste and dietary needs:
- Chocolate Maple Walnut Fudge: Add ½ cup (120 ml) cocoa powder to the sugar mixture before cooking for a rich chocolate twist.
- Gluten-Free Option: This recipe is naturally gluten-free—just double-check that your vanilla extract and evaporated milk are gluten-free labeled.
- Nut-Free Version: Swap walnuts for toasted pumpkin seeds or leave nuts out entirely for a smooth fudge.
- Spiced Maple Walnut Fudge: Stir in ½ tsp cinnamon and a pinch of nutmeg with the vanilla for a cozy spice flavor.
- Dairy-Free Variation: Use full-fat coconut milk instead of evaporated milk and vegan butter in place of regular butter.
One personal favorite is the chocolate maple walnut fudge during winter holidays—it’s like a warm hug in candy form! Just be mindful that adding cocoa powder changes the cooking time slightly and may require careful temperature checks.
Serving & Storage Suggestions
Serve your maple walnut fudge at room temperature for the perfect melt-in-your-mouth experience. It pairs beautifully with a cup of strong coffee, black tea, or even a glass of cold milk to balance the sweetness.
If presenting for a party or gift, arrange fudge squares on a pretty platter or wrap them individually in parchment paper tied with twine—simple but charming. They also make a lovely addition to dessert tables or holiday cookie trays.
Store fudge in an airtight container at room temperature for up to one week. For longer storage, keep it in the refrigerator for up to 3 weeks or freeze in a sealed container for up to 3 months. When freezing, thaw overnight in the fridge before serving. Reheat gently by letting it sit at room temperature for 15-20 minutes to soften slightly.
Flavors actually deepen and mellow after a day or two, so if you can resist, letting fudge rest wrapped tightly enhances the maple and walnut notes.
Nutritional Information & Benefits
Each 1-inch (2.5 cm) fudge square roughly contains:
| Calories | 120 |
|---|---|
| Fat | 7g (mostly from butter and walnuts) |
| Sugar | 12g |
| Protein | 1g |
| Carbohydrates | 15g |
Walnuts add heart-healthy omega-3 fatty acids and antioxidants, while pure maple syrup provides minerals like manganese and zinc, along with a lower glycemic index than refined sugar. Though this fudge is definitely a sweet treat, its simple ingredients mean you’re avoiding artificial additives or preservatives often found in store-bought candy.
For those with dietary restrictions, this recipe can be adjusted for gluten-free or dairy-free needs without sacrificing flavor or texture. Just keep in mind the calorie and sugar content if you’re watching intake—fudge is a delightful indulgence best enjoyed in moderation!
Conclusion
This irresistible maple walnut fudge recipe is a sweet treat that feels both special and surprisingly simple to make. With just a handful of ingredients and a little patience, you get creamy, flavorful fudge that’s perfect for sharing or savoring solo. It’s a recipe I keep coming back to, whether for cozy nights in or as a thoughtful homemade gift that always impresses.
Feel free to tweak the nuts, add spices, or even mix in chocolate chips to make this fudge uniquely yours. I love how flexible it is, and honestly, each batch brings a little joy to my kitchen and those lucky enough to get a taste.
If you try this recipe, I’d love to hear how it turns out or what variations you create! Please leave a comment or share your photos. Happy fudge making—here’s to many sweet moments ahead!
Frequently Asked Questions
Can I use light or dark maple syrup for this fudge?
You can use either, but I recommend Grade A amber or dark for a richer maple flavor. Light syrup works but is milder.
What if I don’t have a candy thermometer?
Use the cold water test: drop a small spoonful of the hot mixture into cold water. If it forms a soft ball that you can pick up and shape with your fingers, it’s ready.
How long does homemade fudge keep?
Stored in an airtight container at room temp, fudge stays fresh for about a week. Refrigerated, it lasts up to 3 weeks, and frozen fudge can keep for 3 months.
Can I substitute walnuts with other nuts?
Absolutely! Pecans or almonds work well and can be toasted the same way. Just make sure to chop them to similar sizes for even texture.
Why is my fudge grainy or crumbly?
This usually happens if the sugar crystallizes too early or the mixture was cooked too long or stirred too vigorously while hot. Follow cooling and beating steps carefully to avoid this.
Pin This Recipe!

Irresistible Maple Walnut Fudge

A rich, creamy homemade fudge combining the natural sweetness of pure maple syrup with toasted walnuts for a perfect melt-in-your-mouth treat. Easy to make and ideal for gifting or holiday gatherings.
- Prep Time: 10 minutes
- Cook Time: 15 minutes
- Total Time: 2 hours 25 minutes
- Yield: 36 servings 1x
- Category: Dessert
- Cuisine: American
Ingredients
- 1 cup (240 ml) pure maple syrup (Grade A amber recommended)
- 1 ½ cups (300 g) granulated sugar
- ½ cup (115 g) unsalted butter, softened
- 1 cup (240 ml) evaporated milk
- 1 teaspoon vanilla extract
- 1 cup (120 g) walnuts, toasted and chopped
- Pinch of salt
Instructions
- Line a 9×9 inch (23×23 cm) square baking pan with parchment paper, leaving some overhang for easy fudge removal. Set aside.
- Toast 1 cup (120 g) chopped walnuts in a dry skillet over medium heat for 4-5 minutes, stirring frequently until fragrant and lightly browned. Remove from heat and set aside.
- In a medium heavy-bottomed saucepan, combine 1 ½ cups (300 g) granulated sugar, 1 cup (240 ml) pure maple syrup, ½ cup (115 g) softened unsalted butter, and 1 cup (240 ml) evaporated milk. Stir gently to combine.
- Place the saucepan over medium heat and bring to a gentle boil, stirring constantly with a wooden spoon or heatproof spatula. Attach a candy thermometer to the side of the pan, ensuring the tip is submerged but not touching the bottom.
- Continue cooking and stirring until the mixture reaches 234°F (112°C) on the candy thermometer (soft ball stage), about 10-15 minutes. If no thermometer is available, drop a small amount into cold water; it should form a soft, flexible ball.
- Remove the pan from heat and let the fudge mixture cool to about 110°F (43°C) without stirring, about 10 minutes.
- Stir in 1 teaspoon vanilla extract and the toasted walnuts with a wooden spoon. The mixture should start to thicken slightly.
- Beat the fudge vigorously by hand for 3-5 minutes until it thickens and loses its glossy shine, creating a creamy texture.
- Quickly pour the fudge into the prepared pan, smoothing the top with a spatula. Allow it to cool completely at room temperature for 2 hours or until firm.
- Use the parchment overhang to lift the fudge out of the pan. Cut into 1-inch (2.5 cm) squares with a sharp knife. Store in an airtight container at room temperature or in the fridge.
Notes
Use a heavy-bottomed pan to prevent burning. Stir constantly while heating but stop stirring once the mixture reaches soft ball stage to avoid crystallization. Toast walnuts lightly to enhance flavor. Beat fudge after cooling to achieve creamy texture. Keep knives warm when cutting for clean slices. For dairy-free version, substitute evaporated milk with coconut milk and butter with plant-based butter. Adjust sugar to taste but note it affects texture.
Nutrition
- Serving Size: 1 square (1 inch / 2
- Calories: 120
- Sugar: 12
- Fat: 7
- Carbohydrates: 15
- Protein: 1
Keywords: maple walnut fudge, homemade fudge, easy fudge recipe, holiday treats, maple syrup dessert, walnut candy, gift fudge



