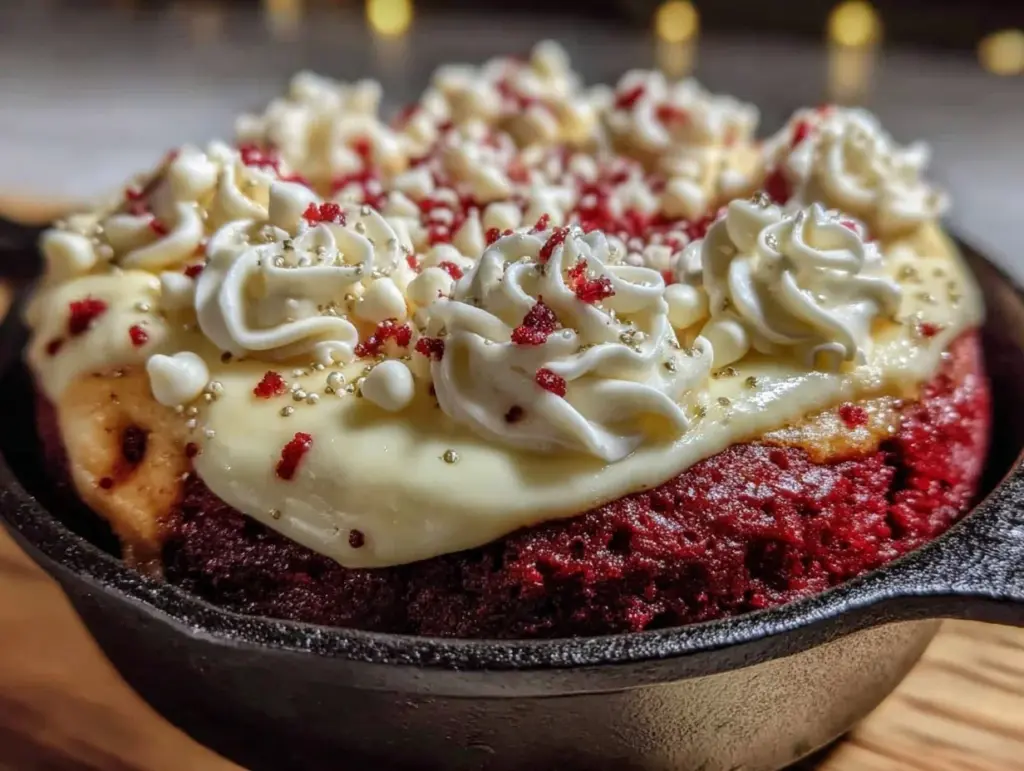
The smell of warm red velvet cheesecake baking in the skillet fills the kitchen with the kind of sweet, cozy aroma that instantly makes you feel like everything’s right in the world. Honestly, I first whipped up this Decadent Valentine’s Red Velvet Cheesecake Skillet during a last-minute Valentine’s Day surprise for my partner, and it quickly became a favorite in our household. It’s the perfect marriage of rich, velvety cake and creamy cheesecake, all baked together in one pan — no fancy layers or fuss. If you love dessert that feels indulgent but isn’t complicated, this recipe is totally for you.
I’ve made this skillet dessert more times than I can count, tweaking the cream cheese filling and perfecting the red velvet batter to get that dreamy, moist texture. It’s become my go-to when I want something special that still feels approachable, whether for a romantic night in or just a sweet treat after dinner. Plus, it’s a crowd-pleaser that’s easy enough for bakers at all levels.
This Decadent Valentine’s Red Velvet Cheesecake Skillet recipe combines classic Valentine’s flavors with a homey, rustic twist. It’s ideal for anyone craving something luscious but simple to make, and it hits that sweet spot between comfort food and elegant dessert. You’ll find this skillet cake is just the right balance of rich, creamy, and fluffy — perfect for sharing or savoring solo with a big scoop of vanilla ice cream.
Why You’ll Love This Recipe
After testing this Decadent Valentine’s Red Velvet Cheesecake Skillet many times, I can say it’s a winner for so many reasons. Here’s why it stands out:
- Quick & Easy: It comes together in about 15 minutes of prep and bakes in under 40 minutes — perfect for those last-minute dessert cravings.
- Simple Ingredients: No need for specialty items. You probably already have everything in your pantry or fridge.
- Perfect for Valentine’s Day: The rich red velvet paired with creamy cheesecake is a romantic treat that’s easy to share.
- Crowd-Pleaser: Kids, adults, cheesecake lovers, and red velvet fans all give it rave reviews — trust me on this!
- Unbelievably Delicious: The texture combo is next-level: moist red velvet cake with pockets of creamy, tangy cheesecake that melt in your mouth.
What makes this skillet version different? Instead of layering or making separate components, everything bakes together, creating a marbled effect that’s as pretty as it is tasty. I also love blending the cream cheese filling just right so it stays soft and luscious without cracking or drying out. It’s comfort food with a little something special — no stress, just pure indulgence.
If you want a dessert that feels fancy but is actually super doable, this recipe delivers every time. It’s the kind of treat that makes you close your eyes after the first bite and savor the moment — perfect for Valentine’s Day or any day you want to feel a little spoiled.
What Ingredients You Will Need
This Decadent Valentine’s Red Velvet Cheesecake Skillet uses straightforward ingredients that come together to create bold flavor and dreamy texture without complicated steps. Here’s what you’ll need:
- For the Red Velvet Batter:
- All-purpose flour (1 1/2 cups / 190g) — I prefer King Arthur for consistent results
- Cocoa powder, unsweetened (2 tbsp / 10g) — Dutch-processed works best for that rich red velvet color
- Baking powder (1 tsp / 4g)
- Baking soda (1/2 tsp / 2g)
- Salt (1/4 tsp / 1.5g)
- Granulated sugar (1 cup / 200g)
- Vegetable oil (1/2 cup / 120ml) — keeps it moist without overpowering flavor
- Buttermilk (1 cup / 240ml) — if you don’t have buttermilk, add 1 tbsp lemon juice to regular milk and let it sit 5 minutes
- Large eggs (2, room temperature)
- Vanilla extract (1 tsp / 5ml)
- Red food coloring (1 tbsp or more for vibrant color)
- For the Cheesecake Filling:
- Cream cheese (8 oz / 225g, softened) — I like Philadelphia brand for creamy texture
- Granulated sugar (1/3 cup / 65g)
- Large egg (1, room temperature)
- Vanilla extract (1/2 tsp / 2.5ml)
All these ingredients are pretty standard, so no need for specialty runs to the store. If you want to switch it up, you can try swapping all-purpose flour for gluten-free blend, or use coconut oil instead of vegetable oil for a subtle twist. The key is to use good quality cream cheese and fresh eggs for that silky cheesecake center.
Equipment Needed
- 8-inch oven-safe skillet (cast iron preferred for even heat) — if you don’t have a skillet, a round 8-inch cake pan works too
- Mixing bowls (one large for batter, one medium for cheesecake filling)
- Electric mixer or hand whisk — a mixer makes the cheesecake filling extra smooth but whisk works fine
- Measuring cups and spoons — accuracy helps here for perfect texture
- Rubber spatula — essential for scraping down the sides and folding ingredients
- Cooling rack — to let your skillet cake rest without condensation
I’ve tried making this in glass and metal pans, but the cast iron skillet gives it a slightly crispier edge that’s irresistible. If you’re on a budget, a simple non-stick cake pan will still bake it beautifully. Just be sure it’s oven safe and about the same size so the baking times stay consistent.
Detailed Preparation Method
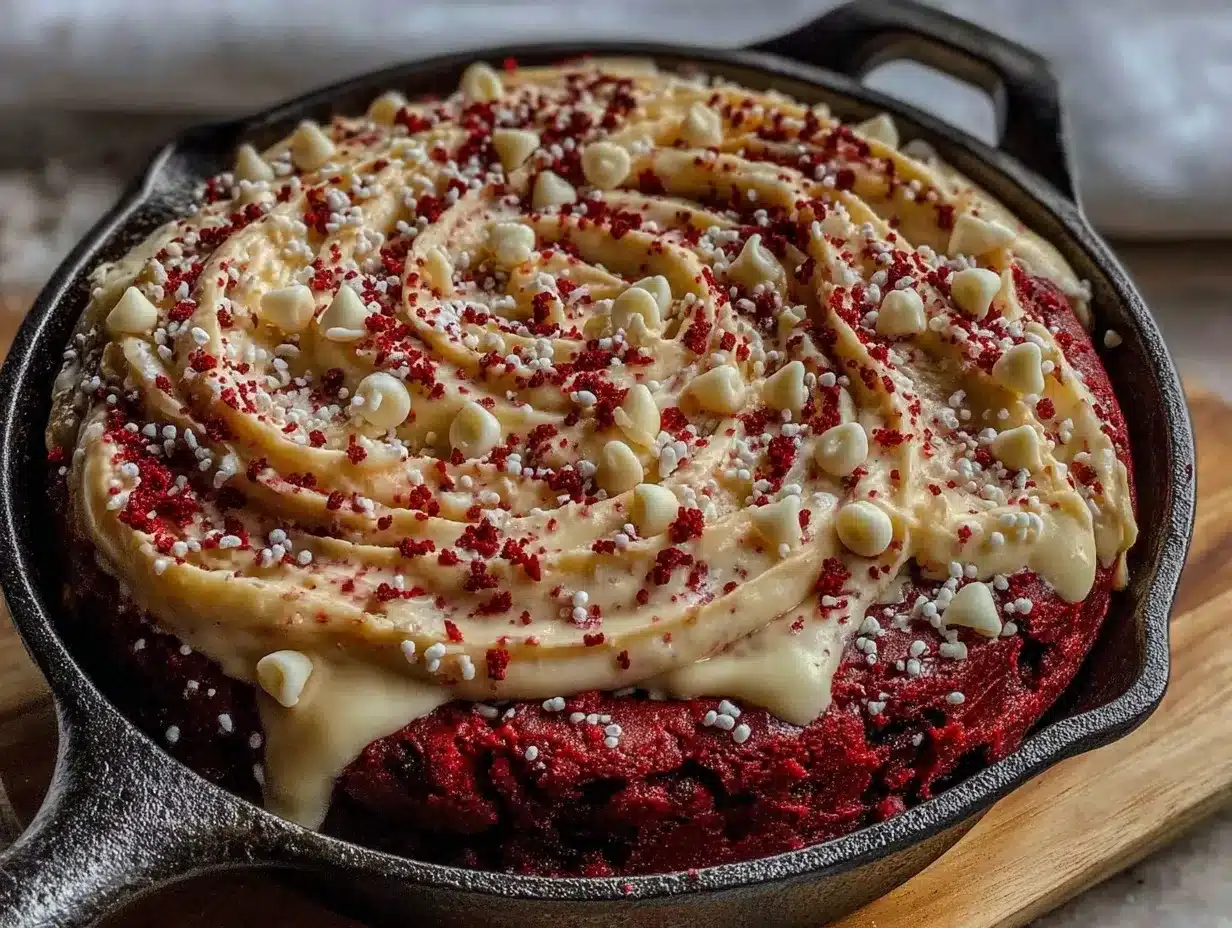
- Preheat your oven to 350°F (175°C). Place your 8-inch cast iron skillet inside while the oven heats to warm it up (this helps the edges crisp).
- Mix dry ingredients for the red velvet batter. In a large bowl, sift together 1 1/2 cups (190g) all-purpose flour, 2 tbsp (10g) cocoa powder, 1 tsp (4g) baking powder, 1/2 tsp (2g) baking soda, and 1/4 tsp (1.5g) salt. Set aside.
- Combine wet ingredients for the batter. In a separate bowl, whisk together 1 cup (200g) sugar, 1/2 cup (120ml) vegetable oil, 1 cup (240ml) buttermilk, 2 large eggs (room temp), 1 tsp (5ml) vanilla extract, and 1 tbsp red food coloring until fully blended.
- Slowly add the dry ingredients to the wet ingredients. Gently fold the dry mix into the wet until just combined. Don’t overmix — the batter should be smooth but still a bit thick. It’s okay if a few small lumps remain.
- Prepare the cheesecake filling. In a medium bowl, beat 8 oz (225g) softened cream cheese with 1/3 cup (65g) sugar until creamy and smooth. Add 1 large egg and 1/2 tsp (2.5ml) vanilla extract, beating until fully incorporated and silky. If it looks lumpy, keep mixing — it will smooth out.
- Remove the hot skillet from the oven carefully. Spray it lightly with non-stick spray or grease with butter. Pour half of the red velvet batter evenly into the skillet.
- Add dollops of the cheesecake filling over the batter. Use a spoon to drop the cream cheese mixture in small spoonfuls over the batter surface.
- Pour the remaining red velvet batter on top. It’s okay if the cheesecake filling pokes through a bit — that’s part of the marbling effect.
- Use a butter knife or skewer to swirl the batter and cheesecake filling. Gently swirl to create a marbled pattern, but don’t overdo it or the layers will blend too much.
- Bake for 35-40 minutes. The edges should be set and slightly pulling away from the skillet, and the center should look slightly jiggly but mostly set. Avoid overbaking or the cheesecake will dry out.
- Remove from oven and cool on a wire rack. Let it cool for at least 30 minutes before serving. This resting time lets the cheesecake filling set perfectly.
- Serve warm or at room temperature. It’s incredible with a scoop of vanilla ice cream or a drizzle of chocolate sauce.
Pro tip: If you notice the edges are browning too fast, tent loosely with foil halfway through baking. Also, using room temperature eggs really helps the batter and filling blend smoothly.
Cooking Tips & Techniques
There are a few tricks I’ve learned that make this Decadent Valentine’s Red Velvet Cheesecake Skillet turn out perfectly every time. First, don’t skip warming the skillet in the oven before adding batter — it creates a lovely crusty edge that contrasts the creamy center. Trust me, it’s worth the extra minute or two.
When mixing the batter, be gentle. Overmixing flour can lead to a dense cake, and since red velvet is supposed to be light and tender, folding just until combined is key. Also, make sure your cream cheese is fully softened — cold cream cheese lumps will ruin the smooth cheesecake texture.
Swirling the cheesecake filling into the batter is an art. Use a gentle hand; you want pretty marbled streaks, not a uniform mixture. Remember, the visual effect is part of the fun, especially if you’re serving this for Valentine’s Day or a special occasion.
Timing is everything. Start checking the cake around 35 minutes, but don’t rush removing it from the oven. The center should still have a slight jiggle — it will set as it cools. Overbaking dries out the filling and cake, so patience pays off.
I’ve found that letting the skillet rest for at least 30 minutes before slicing helps the flavors settle and makes serving cleaner. If you want to speed things up, pop it in the fridge for 15 minutes, but warm slices tend to taste best!
Variations & Adaptations
This recipe is versatile, so feel free to tweak it based on what you love or what you have on hand. Here are some variations I’ve tried or recommend:
- Seasonal Twist: Swap red food coloring for natural beet juice for a subtle earthiness and natural color boost. It’s a fun way to avoid artificial dyes.
- Diet-Friendly: Use almond flour or a gluten-free blend instead of all-purpose flour for a gluten-free version. Coconut oil works well in place of vegetable oil.
- Flavor Boost: Add a tablespoon of espresso powder to the batter for a subtle mocha undertone that pairs beautifully with red velvet.
- Cooking Method: If you don’t have a skillet, bake this in a greased 8-inch round cake pan. Baking time remains the same, but edges won’t be quite as crisp.
- Personal Favorite: I sometimes sprinkle mini chocolate chips over the batter before swirling in the cheesecake filling for an extra chocolate surprise in every bite.
Feel free to swap vanilla extract for almond extract in the cheesecake filling for a different aromatic profile, or drizzle with cream cheese glaze after baking for extra sweetness.
Serving & Storage Suggestions
This Red Velvet Cheesecake Skillet is best served warm or at room temperature. Honestly, the warm, melty cheesecake pockets combined with soft cake are pure bliss. I like to serve it with a scoop of vanilla bean ice cream or a dollop of freshly whipped cream to cool the richness just a bit.
For a festive touch, sprinkle with edible rose petals or dust lightly with powdered sugar before serving — perfect for Valentine’s Day ambiance.
To store, cover the skillet tightly with plastic wrap or transfer leftovers to an airtight container. It keeps well in the fridge for up to 4 days. When you’re ready to enjoy again, reheat individual slices in the microwave for about 15-20 seconds or warm the whole skillet in a 300°F (150°C) oven for 10 minutes.
Freezing is also an option — wrap tightly in foil and freeze for up to 2 months. Thaw overnight in the fridge and warm gently before serving. Flavors actually deepen after a day or two in the fridge, so if you can wait, your leftovers will taste even better.
Nutritional Information & Benefits
This decadent dessert isn’t exactly low-cal, but it offers some nutritional perks thanks to its ingredients. Cream cheese provides protein and calcium, while the eggs add protein and essential vitamins. Red velvet’s cocoa powder adds antioxidants, which is a nice bonus for a treat.
Estimated nutrition per serving (based on 8 servings): approximately 320 calories, 18g fat, 35g carbs, and 5g protein. For those watching carbs, swapping sugar for a natural sweetener or using almond flour cuts the carb count.
It’s important to note this recipe contains common allergens like dairy, gluten, and eggs. For dairy-free or vegan adaptations, try vegan cream cheese and egg replacers, but texture will differ.
From my perspective as a home baker who loves treating myself without guilt, this skillet dessert is a perfect balance: indulgent but made from recognizable ingredients, so I feel good about sharing it with friends and family.
Conclusion
If you’re looking for a dessert that’s both showstopping and approachable, this Decadent Valentine’s Red Velvet Cheesecake Skillet is exactly that. It’s simple to make but feels special, with luscious layers of red velvet cake and creamy cheesecake baked together to create a cozy, indulgent treat.
Don’t hesitate to make it your own — whether you swirl boldly, add chocolate chips, or try a seasonal spin, this recipe is forgiving and fun. I love it because it brings a little warmth and sweetness to any occasion, especially Valentine’s Day, without hours of fuss.
Give it a try, then come back and tell me how yours turned out! Share your variations, tips, or favorite ways to serve it in the comments — I’m always excited to hear from fellow dessert lovers.
Happy baking, and remember: sometimes the best desserts are the ones you make with a little love and a whole lot of cream cheese.
FAQs
Can I make this red velvet cheesecake skillet ahead of time?
Yes! You can prepare the batter and cheesecake filling a day ahead, keep them refrigerated separately, then assemble and bake fresh. Or bake the whole skillet and store leftovers in the fridge for up to 4 days.
What if I don’t have buttermilk? Can I substitute it?
Absolutely. For 1 cup of buttermilk, add 1 tablespoon of lemon juice or white vinegar to regular milk and let it sit for 5 minutes before using. This mimics the acidity and texture of buttermilk.
Can I use a different pan if I don’t have a cast iron skillet?
Yes, a greased 8-inch round cake pan or even a pie dish will work. Just keep an eye on baking time and watch for the edges to set.
How can I make this dessert dairy-free or vegan?
Try vegan cream cheese and plant-based milk, plus an egg replacer like flax eggs or commercial substitutes. The texture will vary, but it’s doable with some experimentation.
Why is my cheesecake filling cracking or drying out?
Cracks usually happen from overbaking or too high heat. Make sure to bake until the center is just set with a slight jiggle and avoid opening the oven door too often. Cooling gradually also helps prevent cracks.
Pin This Recipe!

Decadent Valentine’s Red Velvet Cheesecake Skillet

A rich and creamy red velvet cheesecake baked together in one skillet, perfect for Valentine’s Day or any special occasion. This easy dessert combines moist red velvet cake with luscious cheesecake filling for an indulgent treat.
- Prep Time: 15 minutes
- Cook Time: 35-40 minutes
- Total Time: 50-55 minutes
- Yield: 8 servings 1x
- Category: Dessert
- Cuisine: American
Ingredients
- 1 1/2 cups (190g) all-purpose flour
- 2 tbsp (10g) unsweetened cocoa powder (Dutch-processed preferred)
- 1 tsp (4g) baking powder
- 1/2 tsp (2g) baking soda
- 1/4 tsp (1.5g) salt
- 1 cup (200g) granulated sugar
- 1/2 cup (120ml) vegetable oil
- 1 cup (240ml) buttermilk (or 1 cup milk + 1 tbsp lemon juice, let sit 5 minutes)
- 2 large eggs (room temperature)
- 1 tsp (5ml) vanilla extract
- 1 tbsp red food coloring (or more for vibrant color)
- 8 oz (225g) cream cheese, softened
- 1/3 cup (65g) granulated sugar
- 1 large egg (room temperature)
- 1/2 tsp (2.5ml) vanilla extract
Instructions
- Preheat oven to 350°F (175°C) and place an 8-inch cast iron skillet inside to warm.
- In a large bowl, sift together flour, cocoa powder, baking powder, baking soda, and salt.
- In a separate bowl, whisk sugar, vegetable oil, buttermilk, eggs, vanilla extract, and red food coloring until blended.
- Gently fold dry ingredients into wet ingredients until just combined; batter should be smooth with some small lumps.
- In a medium bowl, beat softened cream cheese with sugar until smooth. Add egg and vanilla extract, beating until silky.
- Remove hot skillet from oven, grease lightly with non-stick spray or butter.
- Pour half of the red velvet batter into the skillet evenly.
- Drop spoonfuls of cheesecake filling over the batter surface.
- Pour remaining red velvet batter on top, allowing cheesecake filling to poke through slightly.
- Use a butter knife or skewer to gently swirl the batter and cheesecake filling to create a marbled effect.
- Bake for 35-40 minutes until edges are set and slightly pulling away, center slightly jiggly but mostly set.
- Remove from oven and cool on a wire rack for at least 30 minutes before serving.
- Serve warm or at room temperature, optionally with vanilla ice cream or chocolate sauce.
Notes
Warm the skillet before adding batter to create a crispy edge. Use room temperature eggs for smooth batter and filling. Swirl gently to create marbled effect without blending layers. Tent with foil if edges brown too quickly. Let cool at least 30 minutes before slicing for best texture. Can substitute gluten-free flour and coconut oil for dietary adaptations.
Nutrition
- Serving Size: 1 slice (1/8 of skil
- Calories: 320
- Fat: 18
- Carbohydrates: 35
- Protein: 5
Keywords: red velvet cheesecake, skillet dessert, Valentine’s Day dessert, easy cheesecake, red velvet cake, marbled cheesecake, cast iron skillet dessert



