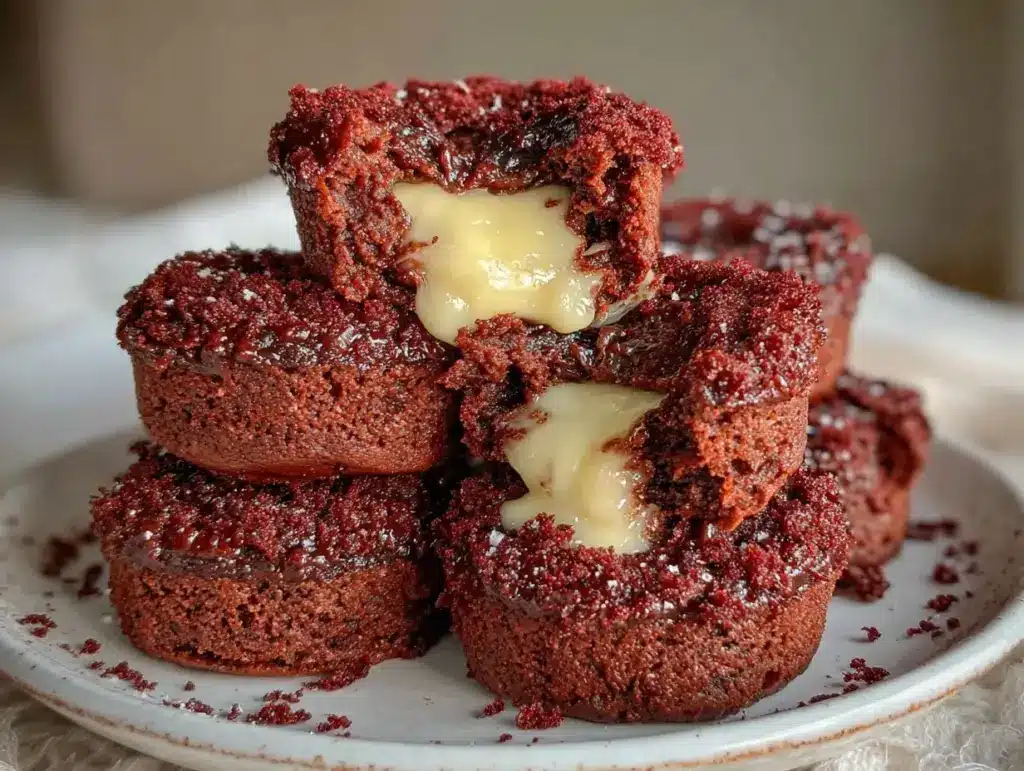
The first time I bit into a red velvet lava cake, I remember thinking, “Why haven’t I been making these at home all along?” The rich, velvet crumb giving way to a molten core of melty white chocolate ganache — honestly, it’s like a little party in your mouth. Red velvet has always been one of those classic flavors with a bit of drama, and turning it into a lava cake just cranks that up a notch. I’ve made these irresistible red velvet lava cakes with white chocolate ganache so many times now, I’ve lost count, and each time they surprise me with that perfect gooey center and a tender, spongy exterior.
If you’re someone who loves desserts with a bit of flair but doesn’t want to spend hours in the kitchen, you’re going to adore this recipe. It’s straightforward, uses ingredients you probably already have, and delivers that wow factor every single time. Plus, the white chocolate ganache filling adds a creamy sweetness that balances the slight tang of the red velvet — trust me, it’s a match made in dessert heaven.
As a longtime dessert fan and occasional kitchen experimenter, I’ve tweaked this recipe until it’s just right. Whether you’re baking for a special occasion or simply craving a cozy homemade treat, these red velvet lava cakes will have you closing your eyes with each bite. They’re perfect for sharing (or not, I won’t judge), and they bring a little bit of fancy without the fuss. Let’s get into how you can make these show-stoppers at home!
Why You’ll Love This Recipe
- Quick & Easy: Comes together in about 30 minutes from start to finish — perfect for last-minute dessert cravings or impressing guests without stress.
- Simple Ingredients: No need for specialty shopping trips; pantry staples like cocoa powder, flour, eggs, and white chocolate are all you need.
- Perfect for Special Occasions: These red velvet lava cakes steal the spotlight at Valentine’s Day, birthdays, or cozy dinner parties.
- Crowd-Pleaser: Kids and adults alike can’t resist the gooey center and rich flavors — they’ll be asking for seconds.
- Unbelievably Delicious: The contrast of the tender red velvet cake and the smooth, indulgent white chocolate ganache is just next-level.
This isn’t just another red velvet dessert. The trick lies in the molten white chocolate core — I blend cream and white chocolate to create a silky ganache that melts perfectly inside the cake. After testing this recipe more than a dozen times, I can confidently say it’s foolproof when you follow the timing and temperature guidelines. If you love that feeling of cutting into a cake and having luscious chocolate spill out, you’ll be smitten with these lava cakes.
Plus, they strike that balance of feeling decadent but not overly heavy, which makes them a go-to for when you want something special but manageable. Honestly, once you try these, you might find yourself making them a regular in your dessert rotation!
What Ingredients You Will Need
This recipe uses simple, wholesome ingredients to deliver bold flavor and that signature molten texture without the fuss. Most of these are pantry staples, and substitutions are easy if needed.
- For the red velvet batter:
- All-purpose flour – 1 cup (120g), sifted for a light texture
- Cocoa powder (unsweetened) – 2 tablespoons (15g), choose a Dutch-processed for richer color
- Granulated sugar – ¾ cup (150g)
- Unsalted butter – ½ cup (113g), melted and slightly cooled (I prefer Kerrygold for its creamy flavor)
- Large eggs – 2, room temperature (helps with fluffiness)
- Buttermilk – ⅓ cup (80ml), or substitute with milk + 1 tsp vinegar for tang
- Vanilla extract – 1 teaspoon, pure is best for depth
- Red food coloring – 1 to 1½ teaspoons (liquid or gel works fine)
- Baking powder – ½ teaspoon
- Baking soda – ¼ teaspoon
- Salt – ¼ teaspoon
- For the white chocolate ganache filling:
- White chocolate chips or finely chopped white chocolate – ¾ cup (135g), I love Ghirardelli for smooth melting
- Heavy cream – ⅓ cup (80ml), warmed to help melt chocolate perfectly
- Butter – 1 tablespoon (14g), adds silkiness to the ganache
Ingredient Tips: For best results, look for firm, good-quality white chocolate with at least 30% cocoa butter content. Avoid white chocolate chips labeled “candy coating” as they don’t melt as smoothly. If you want a dairy-free twist, swap heavy cream for coconut cream and use dairy-free white chocolate.
Equipment Needed
- Ramekins or small oven-safe muffin cups (4 to 6 oz / 120-180 ml capacity) – I prefer ceramic ramekins for even heat distribution, but silicone molds work too.
- Mixing bowls – at least two, one for wet ingredients and one for dry.
- Whisk or electric hand mixer – to blend ingredients smoothly.
- Measuring cups and spoons – for accuracy.
- Small saucepan – to warm cream for ganache.
- Spatula – to fold batter gently without deflating.
- Baking sheet – to place ramekins on for easy handling.
If you don’t have ramekins, small ovenproof coffee cups or even a muffin tin lined with foil cups can work in a pinch. Just make sure whatever you use is oven-safe and can hold the batter without spilling. A silicone spatula makes mixing and folding easier and less messy, and I always recommend investing in a good whisk for smooth ganache prep. Keeping your equipment clean and dry helps prevent any unwanted texture issues, especially with the ganache.
Detailed Preparation Method
- Preheat your oven to 425°F (220°C). This high heat is key to creating that lava effect — the outside bakes quickly while the center stays molten. Lightly butter or spray your ramekins and dust them with cocoa powder to prevent sticking (flour can leave a residue in red velvet).
- Prepare the white chocolate ganache filling: In a small saucepan, gently warm the heavy cream over low heat until it’s just simmering (about 2-3 minutes). Remove from heat and add the white chocolate and butter. Let it sit for a minute to soften, then whisk until smooth and glossy. Transfer to a small bowl and refrigerate while you make the batter. It should thicken but remain pourable.
- Mix dry ingredients: In a medium bowl, sift together the flour, cocoa powder, baking powder, baking soda, and salt. Set aside.
- Whisk wet ingredients: In another bowl, combine the melted butter, sugar, eggs, buttermilk, vanilla, and red food coloring. Whisk briskly until the mixture is smooth and homogenous — the color should be vibrant and even.
- Combine wet and dry: Gradually add the dry ingredients to the wet, folding gently with a spatula until just combined. Be careful not to overmix; a few tiny lumps are okay. The batter will be thick but smooth and glossy.
- Fill ramekins: Spoon about 2 tablespoons (30 ml) of batter into the bottom of each ramekin — this forms the cake base. Next, add about 1 tablespoon (15 ml) of chilled white chocolate ganache in the center. Finally, top with enough batter to cover the ganache (about 2-3 tablespoons / 30-45 ml), making sure the ganache is fully enclosed.
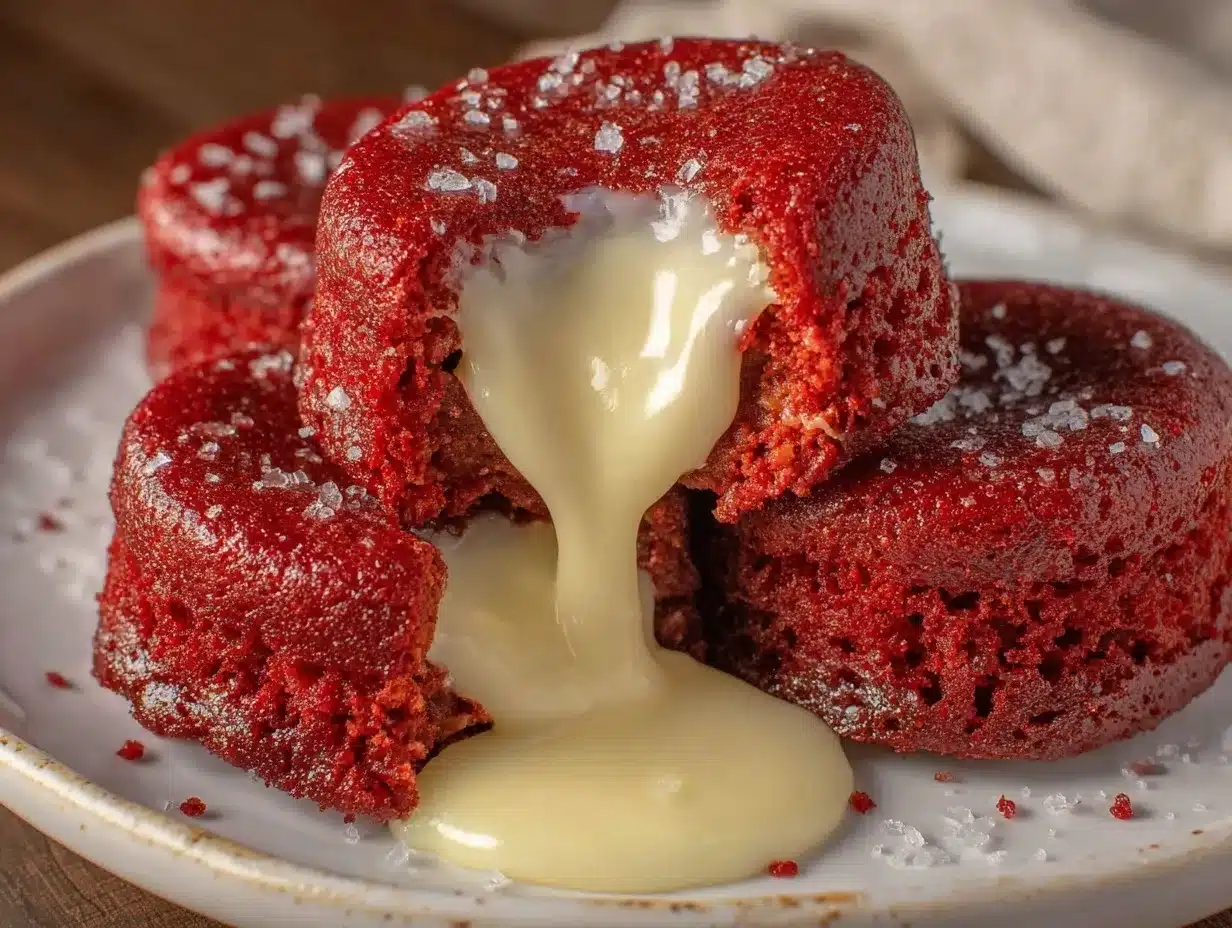
- Bake: Place ramekins on a baking sheet and bake for 12-14 minutes. You’ll know they’re done when the edges are set and springy but the center still looks slightly jiggly — the key to that gooey lava inside! Avoid overbaking, or the ganache will firm up too much.
- Cool and serve: Let the cakes sit for 2 minutes after baking, then carefully run a knife around the edges to loosen. Invert onto serving plates or serve directly in the ramekins. Add a dusting of powdered sugar or a dollop of whipped cream if you like.
Pro Tips: If your ganache is too runny to fill, pop it back in the fridge for 5-10 minutes. If it’s too firm, gently warm it in a microwave for a few seconds. And remember — the first time you bake these, keep a close eye on the timer; ovens vary and a minute or two can make all the difference.
Cooking Tips & Techniques
Getting that perfect lava cake texture takes a bit of attention, but it’s totally doable with a few tricks. First off, the batter consistency matters — it should be thick enough to hold the ganache but not so dense that it won’t rise. I’ve learned to sift my dry ingredients well and gently fold them in to keep air bubbles that help the cake rise.
Temperature and timing are your best friends here. The high oven heat quickly cooks the outside while leaving the center molten. If you bake too long, you lose the lava effect; too short, and the cakes collapse. I usually start checking at 12 minutes, poking the edge gently to feel for firmness.
Another tip: chilling the ganache makes it easier to portion and keeps it from melting into the batter prematurely. And when filling ramekins, I use a small spoon or piping bag to keep the ganache centered.
Lastly, don’t skip the buttering and dusting of the ramekins — it makes unmolding easier and keeps the cakes intact. If you’re nervous about flipping them, serve them straight from the ramekins with a spoon; just as delightful!
Variations & Adaptations
- Dietary tweaks: Swap all-purpose flour with gluten-free flour blend for a gluten-free treat. Use dairy-free cream and vegan white chocolate to make it vegan-friendly.
- Flavor twists: Add a pinch of cinnamon or espresso powder to the batter for a deeper flavor. For a fruity surprise, stir in fresh raspberries on top of the ganache before covering with batter.
- Alternative fillings: Try dark chocolate ganache or cream cheese filling instead of white chocolate for a different vibe. Peanut butter ganache also pairs beautifully with red velvet.
- Cooking method: These lava cakes can be steamed for a softer texture or even made in a microwave if you’re in a hurry (though the texture won’t be quite the same).
- Personal variation: I once added a splash of orange zest to the batter and swapped white chocolate ganache for a blood orange curd — it was a tangy, vibrant twist that still delivered the molten magic.
Serving & Storage Suggestions
These red velvet lava cakes are best served warm — that’s when the molten center is at its peak. I like to add a dusting of powdered sugar or a few fresh berries for color and brightness. A scoop of vanilla ice cream or a dollop of whipped cream pairs beautifully, cutting through the richness.
If you’re serving at a party, you can bake them in advance and warm them in the oven at 350°F (175°C) for 5 minutes before serving. They reheat well individually in the microwave for about 20 seconds but watch carefully to avoid overcooking.
Leftover cakes can be stored covered in the refrigerator for up to 2 days. The lava center will firm up, so gently reheat before serving to bring back that ooey-gooey goodness. You can also freeze unbaked batter in ramekins, wrapped tightly, for up to 1 month — just thaw overnight in the fridge before baking.
Flavors tend to deepen after resting, so a little patience can reward you with an even richer dessert experience.
Nutritional Information & Benefits
Each red velvet lava cake (serving size: 1 individual ramekin) contains approximately 320-350 calories, with 18-20 grams of fat, 35 grams of carbohydrates, and 5-6 grams of protein. The white chocolate ganache adds richness and a creamy texture, contributing to the fat content.
While this dessert is on the indulgent side, it does provide some calcium and antioxidants from the cocoa powder. Using real butter and good-quality chocolate adds flavor and texture that processed alternatives can’t match. For those watching sugar intake, you can reduce sugar slightly or experiment with natural sweeteners.
Gluten-free and dairy-free adaptations make this recipe accessible for various dietary needs. Just be mindful of allergens like eggs, dairy, and chocolate when serving guests.
From a wellness perspective, I enjoy this dessert as an occasional treat that satisfies sweet cravings without being overly complicated or artificial — homemade, honest ingredients make all the difference!
Conclusion
These irresistible red velvet lava cakes with white chocolate ganache combine classic flavors and molten magic into a homemade dessert that’s both simple and impressive. Whether you’re baking for a special celebration or a cozy night in, this recipe delivers that perfect gooey center and tender crumb every time.
Feel free to customize the filling or tweak the flavor to suit your taste — that’s part of the fun! I personally love how these cakes bring a little extra joy to dessert time, making moments feel special without hours of work.
If you give this recipe a try, I’d love to hear how it turns out for you! Share your thoughts, photos, or any creative twists you’ve made in the comments below. Happy baking, and here’s to many warm, chocolatey bites ahead!
FAQs
How do I know when my red velvet lava cakes are done?
The edges should be set and springy to the touch, but the center should still jiggle slightly when you gently shake the ramekin. This indicates the ganache inside is still molten.
Can I make these lava cakes ahead of time?
You can prepare the batter and ganache, fill ramekins, then refrigerate for up to 24 hours before baking. Just add a couple of extra minutes to the baking time if baking straight from the fridge.
What if I don’t have red food coloring?
The classic red velvet color comes from the food coloring, but you can omit it or use natural alternatives like beet juice powder. The flavor will be just as delicious, but color will be more muted.
Can I use white chocolate chips instead of chopped white chocolate?
Yes, but choose good-quality chips labeled for baking. Avoid “candy melts” as they don’t melt as smoothly and can affect texture.
How do I prevent the lava cakes from sticking to the ramekins?
Generously butter and dust the ramekins with cocoa powder before filling. This creates a non-stick layer that helps with easy removal or serving directly in the ramekin.
Pin This Recipe!

Irresistible Red Velvet Lava Cakes Recipe Easy Homemade Dessert with White Chocolate Ganache

These red velvet lava cakes feature a tender, spongy exterior with a molten core of creamy white chocolate ganache. Quick and easy to make, they deliver a rich, gooey dessert perfect for special occasions or cozy nights in.
- Prep Time: 15 minutes
- Cook Time: 14 minutes
- Total Time: 29 minutes
- Yield: 4 servings 1x
- Category: Dessert
- Cuisine: American
Ingredients
- 1 cup (120g) all-purpose flour, sifted
- 2 tablespoons (15g) unsweetened cocoa powder (Dutch-processed preferred)
- ¾ cup (150g) granulated sugar
- ½ cup (113g) unsalted butter, melted and slightly cooled
- 2 large eggs, room temperature
- ⅓ cup (80ml) buttermilk (or milk + 1 tsp vinegar as substitute)
- 1 teaspoon vanilla extract
- 1 to 1½ teaspoons red food coloring (liquid or gel)
- ½ teaspoon baking powder
- ¼ teaspoon baking soda
- ¼ teaspoon salt
- ¾ cup (135g) white chocolate chips or finely chopped white chocolate
- ⅓ cup (80ml) heavy cream
- 1 tablespoon (14g) butter
Instructions
- Preheat your oven to 425°F (220°C). Lightly butter or spray ramekins and dust with cocoa powder to prevent sticking.
- Prepare the white chocolate ganache: Warm heavy cream in a small saucepan over low heat until just simmering (2-3 minutes). Remove from heat, add white chocolate and butter, let sit for a minute, then whisk until smooth and glossy. Refrigerate until thickened but pourable.
- In a medium bowl, sift together flour, cocoa powder, baking powder, baking soda, and salt.
- In another bowl, whisk melted butter, sugar, eggs, buttermilk, vanilla extract, and red food coloring until smooth and homogenous.
- Gradually fold dry ingredients into wet ingredients gently until just combined; batter should be thick and glossy with a few tiny lumps.
- Spoon about 2 tablespoons (30 ml) of batter into the bottom of each ramekin. Add 1 tablespoon (15 ml) of chilled ganache in the center. Top with 2-3 tablespoons (30-45 ml) of batter to fully enclose the ganache.
- Place ramekins on a baking sheet and bake for 12-14 minutes until edges are set and springy but centers still jiggle slightly.
- Let cakes sit for 2 minutes after baking. Run a knife around edges to loosen and invert onto plates or serve directly in ramekins. Optionally dust with powdered sugar or add whipped cream.
Notes
Use good-quality white chocolate with at least 30% cocoa butter for smooth ganache. Avoid candy coating white chocolate. Chill ganache to thicken before filling. Watch baking time closely to maintain molten center. Butter and dust ramekins with cocoa powder for easy removal. Can refrigerate filled ramekins up to 24 hours before baking, adding extra baking time if baking cold.
Nutrition
- Serving Size: 1 individual ramekin
- Calories: 335
- Sugar: 25
- Sodium: 180
- Fat: 19
- Saturated Fat: 11
- Carbohydrates: 35
- Fiber: 2
- Protein: 6
Keywords: red velvet lava cake, white chocolate ganache, molten lava cake, easy dessert, homemade dessert, red velvet dessert, quick dessert, special occasion dessert



