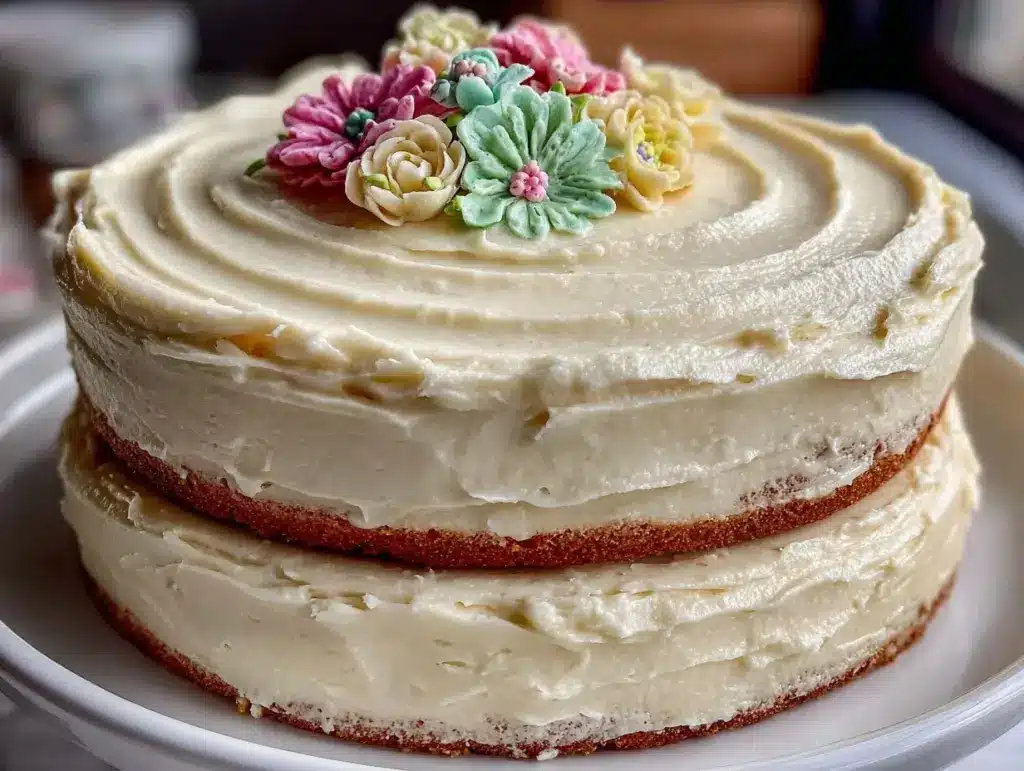
The smell of warm vanilla cake baking in the oven, with its sweet, buttery aroma filling every corner of the kitchen, instantly brings a smile to my face. Honestly, there’s something magical about a classic vanilla cake that never gets old. I first baked this decadent three-tier vanilla celebration cake for my sister’s milestone birthday, and I was blown away by how it stole the show. It’s not just any cake — it’s the kind that makes you pause, savor the moment, and maybe even sneak a second slice when no one’s looking.
Making a three-tier cake might sound intimidating, but trust me, this recipe breaks it down into easy, manageable steps that anyone can follow. The layers are moist and tender, with a vanilla flavor that’s rich but not overpowering — just the right balance to satisfy your sweet tooth and impress guests. Whether you’re planning a wedding, anniversary, or just want to treat your loved ones to something special, this vanilla celebration cake is the perfect choice.
I’ve baked this recipe more times than I can count now, tweaking it here and there to get it just right. From picking the best vanilla extract to mastering the frosting texture, I’ve learned a bunch of little tricks that I’m excited to share with you. So if you’re ready to wow your crowd with a stunning, homemade three-tier vanilla cake, let’s get started!
Why You’ll Love This Recipe
- Simple yet Stunning: This cake looks like a bakery masterpiece but comes together with basic ingredients and straightforward steps.
- Perfect for Any Celebration: Whether it’s a birthday, bridal shower, or holiday feast, this three-tier vanilla cake brings the wow factor.
- Moist and Flavorful: Through careful mixing and quality vanilla, each layer is tender and packed with flavor.
- Customizable: You can easily dress it up with your favorite frosting, fresh flowers, or sprinkles to match your event’s vibe.
- Family-Approved: This recipe has been tested by my kids and friends who all begged for seconds — a true crowd-pleaser!
- Step-by-Step Friendly: I break down the process to keep it stress-free, even if you’ve never tackled a tiered cake before.
What sets this three-tier vanilla celebration cake apart? It’s the balance between classic comfort and elegant presentation. The layers are light but rich, and the frosting is luscious without being too sweet. Plus, the method of layering and frosting ensures a neat, professional look. Honestly, it’s my go-to when I want to impress without hours of fuss. Give it a try, and you might just find yourself baking this cake for every special occasion!
What Ingredients You Will Need
This recipe relies on pantry staples and fresh ingredients to deliver that irresistible vanilla flavor and beautiful texture. Here’s what you’ll gather:
- For the Cake Batter:
- All-purpose flour — 4 cups (480g), sifted for a light crumb
- Baking powder — 2 ½ teaspoons (helps the layers rise evenly)
- Salt — ½ teaspoon
- Unsalted butter — 1 cup (227g), softened to room temperature (I prefer Kerrygold for its creamy richness)
- Granulated sugar — 2 cups (400g)
- Large eggs — 6, at room temperature (important for proper mixing)
- Pure vanilla extract — 2 tablespoons (the star flavor; I always use Nielsen-Massey Madagascar Bourbon Vanilla)
- Whole milk — 1 ½ cups (360ml), warmed slightly (can swap with almond or oat milk if dairy-free)
- For the Vanilla Buttercream Frosting:
- Unsalted butter — 1 ½ cups (340g), softened
- Powdered sugar — 5 cups (600g), sifted to avoid lumps
- Pure vanilla extract — 2 teaspoons
- Heavy cream — 3-4 tablespoons (or more for desired consistency)
- Pinch of salt (balances the sweetness)
Optional for decoration:
- Fresh flowers or edible gold leaf for a fancy touch
- Sprinkles or pearl sugar for a playful finish
Pro tip: Using room temperature eggs and butter makes mixing easier and helps the batter come together beautifully. Also, I always recommend sifting the flour and powdered sugar to keep the cake and frosting silky smooth. If you want a gluten-free option, you can swap the all-purpose flour for a 1:1 gluten-free baking flour blend — just double-check that it contains xanthan gum.
Equipment Needed
- Three round cake pans (6-inch, 8-inch, and 10-inch) with removable bottoms if possible for easy release
- Electric mixer — stand or hand mixer works fine; I personally use a stand mixer for better consistency
- Mixing bowls — multiple sizes to keep wet and dry ingredients separate
- Measuring cups and spoons (accurate measurement is key!)
- Cooling racks — to cool the cakes evenly without sogginess
- Offset spatula and bench scraper — essential for smooth frosting application
- Pastry bags and round piping tips (optional) if you want to decorate with precision
- Turntable cake stand (optional) but highly recommended for easy frosting and decorating
If you don’t have three cake pans in varying sizes, no worries — you can bake the layers in batches using the same pan, just adjust the baking time accordingly. Also, a simple butter knife can substitute for an offset spatula if needed. Keeping your tools clean and dry is important, especially when frosting, to avoid lumps or streaks. Budget-wise, you can find affordable cake pans and decorating tools online or at local kitchen stores without breaking the bank.
Detailed Preparation Method
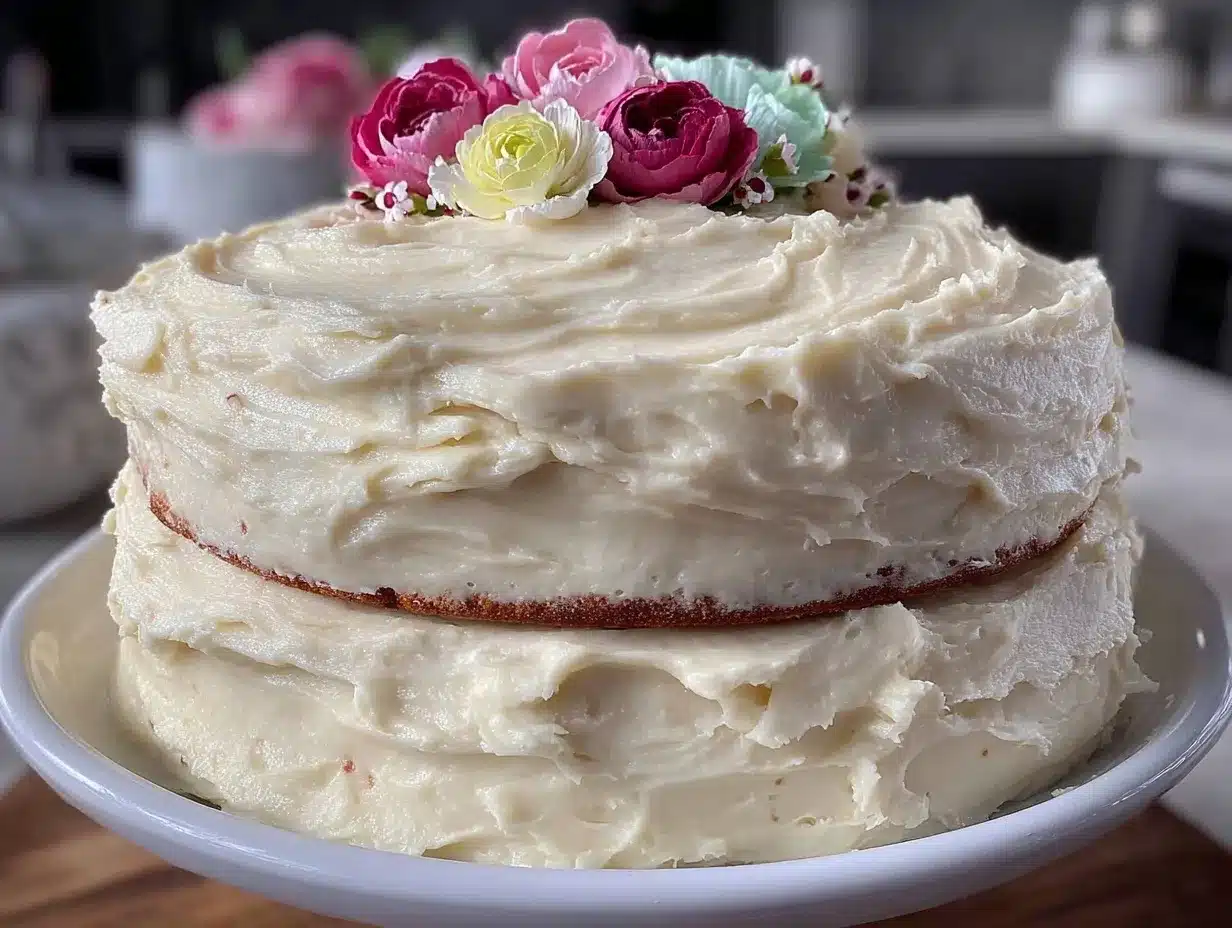
- Preheat and Prep: Set your oven to 350°F (175°C). Grease and flour all three cake pans or line them with parchment paper circles to prevent sticking. This step saves you from a messy cake rescue later!
- Mix Dry Ingredients: In a medium bowl, whisk together the sifted flour, baking powder, and salt. Set aside — this ensures even distribution of the leavening agents.
- Cream Butter and Sugar: In your mixer bowl, beat the softened butter and granulated sugar on medium speed for about 5 minutes, until the mixture is pale and fluffy. This aeration step is crucial for a light cake texture.
- Add Eggs and Vanilla: Add eggs one at a time, beating well after each addition. Pour in the vanilla extract and mix until combined. The batter might look a bit curdled here — that’s normal.
- Alternate Adding Dry Ingredients and Milk: With the mixer on low, add the dry ingredients in three additions, alternating with the warmed milk (start and end with flour). Mix just until blended — overmixing can make the cake tough.
- Divide Batter and Bake: Evenly distribute the batter among the three pans (about 4 cups of batter per pan). Smooth the tops with a spatula. Bake for 25-30 minutes (for the 6-inch), 30-35 minutes (for the 8-inch), and 35-40 minutes (for the 10-inch). Use a toothpick inserted in the center to check doneness — it should come out clean.
- Cool Completely: Allow cakes to cool in pans for 10 minutes, then turn them out onto cooling racks to cool fully. Cake layers need to be completely cool before frosting to avoid melting the buttercream.
- Prepare Buttercream Frosting: Beat the softened butter on medium speed until creamy (about 3 minutes). Gradually add sifted powdered sugar, one cup at a time, beating on low speed to prevent sugar clouds. Add vanilla, salt, and cream. Increase speed and beat until fluffy and spreadable. Adjust with more cream or sugar to get the perfect consistency.
- Level and Stack: Using a serrated knife or cake leveler, trim the domed tops off each cake layer for a flat surface. Place the largest layer on your cake board or plate, spread a thick layer of buttercream on top, then add the next size cake layer. Repeat with the smallest layer on top. Use a crumb coat (thin layer of frosting) all over the stacked cake to seal crumbs.
- Final Frosting and Decorating: Chill the crumb-coated cake for 20 minutes in the fridge to set. Then, apply a thicker, smooth final coat of buttercream. Use an offset spatula and bench scraper for neat edges. Decorate as you like — fresh flowers, piped borders, or simple sprinkles work beautifully.
Quick tip: If your frosting feels too soft while working, pop it in the fridge for 10 minutes — it firms up nicely but stays spreadable. And don’t rush the cooling steps; patience here makes all the difference for a clean, professional-looking cake.
Cooking Tips & Techniques
Getting this three-tier vanilla celebration cake just right takes some small but important touches. Here’s what I’ve learned from my many baking sessions:
- Room Temperature Ingredients: Cold eggs or butter can cause your batter to curdle or mix unevenly. Always take them out 30-60 minutes before baking.
- Don’t Overmix: Once you add the flour, mix just until combined. Overmixing develops gluten and makes the cake dense.
- Even Batter Distribution: Use a kitchen scale or measuring cups to divide batter evenly among pans so layers bake uniformly.
- Check Oven Temperature: Ovens can be tricky. Use an oven thermometer to avoid under or overbaking your layers.
- Cooling Matters: Cakes continue to bake a little after being removed from the oven. Let them cool in pans briefly before turning out; rushing this can cause breakage.
- Crumb Coat is Your Friend: Applying a thin crumb coat seals in loose crumbs and prevents them from mixing into your final frosting layer — giving a clean finish.
- Frosting Consistency: Buttercream should be soft but firm enough to hold shape. If it’s too stiff, add a splash of cream; if too soft, chill briefly.
- Use a Turntable: If you have one, it makes smoothing frosting easier and faster, but you can manage without by rotating your plate carefully.
Trust me, these tips can save you from the usual cake disasters and help you present a cake that looks like it came from a pro bakery. Plus, they make the experience way more fun (and less stressful) — and that’s what baking’s all about!
Variations & Adaptations
This three-tier vanilla celebration cake is a fantastic base that welcomes all kinds of creative twists. Here are some ideas to make it your own:
- Flavor Swaps: Add lemon zest and juice to the batter for a bright, citrus version. Or try almond extract in place of vanilla for a nutty twist.
- Filling Ideas: Layer raspberry jam, lemon curd, or chocolate ganache between your cake layers for surprise bursts of flavor.
- Dietary Adjustments: Use gluten-free flour blends to make it safe for gluten intolerance. Swap dairy butter and milk for plant-based alternatives to keep it vegan-friendly.
- Frosting Variations: Instead of classic buttercream, try cream cheese frosting or whipped coconut cream for something lighter.
- Baking Method: If you prefer, bake the cake layers the day before and freeze them tightly wrapped. This makes assembly day a breeze!
One variation I tried recently was adding a thin layer of crushed toasted pistachios between the layers and on top — it gave a lovely crunch and elegant look. Honestly, this recipe is forgiving and flexible, perfect for experimenting with your favorite flavors or dietary needs. Just keep the basic ratios in mind, and you’ll be golden!
Serving & Storage Suggestions
This three-tier vanilla celebration cake is best served at room temperature to enjoy the full depth of vanilla flavor and moist texture. I usually slice it about 30 minutes after taking it out of the fridge so the buttercream softens perfectly.
Pair it with a cup of freshly brewed coffee or a glass of sparkling wine to make your celebration extra special. For a fun twist, serve alongside fresh berries or a light fruit salad.
To store, keep the cake covered in an airtight container or cake dome in the refrigerator for up to 4 days. If you need to keep it longer, you can freeze individual slices wrapped tightly in plastic wrap and foil for up to 3 months.
When reheating, let frozen slices thaw overnight in the fridge, then bring to room temperature before serving. Avoid microwaving whole slices as that can ruin the frosting texture.
Fun fact: The flavors actually deepen and marry beautifully after a day or two in the fridge, so sometimes waiting is worth it!
Nutritional Information & Benefits
Per serving (based on 12 generous slices): approximately 420 calories, 20g fat, 55g carbohydrates, and 4g protein. While this cake is definitely a treat, it contains wholesome ingredients like real butter and eggs, which provide essential vitamins and healthy fats.
Using pure vanilla extract adds antioxidant properties, and opting for whole milk keeps the cake moist and rich. You can adjust to lower sugar or dairy-free versions by swapping ingredients without losing much flavor.
This recipe fits well into most celebratory diets, but if you have allergies to dairy or gluten, simple substitutions mentioned earlier will make it inclusive. From my experience as a home baker, it’s a perfect way to enjoy a classic dessert with a little homemade love and care.
Conclusion
This decadent three-tier vanilla celebration cake truly combines elegance with ease — a recipe I love because it brings people together and creates joyful memories. Whether you’re a beginner or seasoned baker, the steps are clear, and the results are consistently impressive.
Feel free to customize the flavors, frosting, or decorations to match your style and event. I’d love to hear how your cake turns out or any fun twists you try! Drop a comment below or share your pictures — nothing makes me happier than seeing your baking adventures.
So go on, treat yourself and your loved ones to this stunning, homemade vanilla cake. It’s worth every minute and bite. Happy baking!
FAQs
Can I make this three-tier vanilla celebration cake ahead of time?
Absolutely! You can bake the layers up to two days in advance and store them wrapped tightly in the fridge. Assemble and frost the cake on the day you plan to serve for the freshest look and taste.
What’s the best way to level the cake layers?
Use a serrated knife or a cake leveler to trim off the rounded tops, ensuring flat, even layers. This helps the tiers stack neatly without wobbling.
How do I prevent the cake from drying out?
Don’t overbake the layers, and make sure to cool them properly before frosting. Also, a good crumb coat seals moisture in, keeping the cake tender.
Can I use store-bought frosting instead of making my own?
You can, but homemade buttercream offers the best texture and flavor. Store-bought frostings often contain stabilizers and can be overly sweet or greasy for this type of cake.
How do I transport a three-tier cake safely?
Chill the fully assembled cake before travel to firm up the frosting. Use a sturdy cake box and keep the cake flat in your vehicle to avoid sliding. If possible, assemble the tiers on-site for less stress.
Pin This Recipe!
Decadent Three-Tier Vanilla Celebration Cake

A moist and tender three-tier vanilla cake with rich but balanced vanilla flavor, perfect for weddings, birthdays, and special occasions. Easy to make with basic ingredients and straightforward steps.
- Prep Time: 30 minutes
- Cook Time: 40 minutes
- Total Time: 1 hour 10 minutes
- Yield: 12 servings 1x
- Category: Dessert
- Cuisine: American
Ingredients
- 4 cups (480g) all-purpose flour, sifted
- 2 ½ teaspoons baking powder
- ½ teaspoon salt
- 1 cup (227g) unsalted butter, softened to room temperature
- 2 cups (400g) granulated sugar
- 6 large eggs, at room temperature
- 2 tablespoons pure vanilla extract
- 1 ½ cups (360ml) whole milk, warmed slightly
- 1 ½ cups (340g) unsalted butter, softened (for frosting)
- 5 cups (600g) powdered sugar, sifted (for frosting)
- 2 teaspoons pure vanilla extract (for frosting)
- 3–4 tablespoons heavy cream (for frosting)
- Pinch of salt (for frosting)
- Optional decorations: fresh flowers, edible gold leaf, sprinkles, pearl sugar
Instructions
- Preheat oven to 350°F (175°C). Grease and flour three cake pans (6-inch, 8-inch, and 10-inch) or line with parchment paper.
- In a medium bowl, whisk together sifted flour, baking powder, and salt. Set aside.
- In a mixer bowl, beat softened butter and granulated sugar on medium speed for about 5 minutes until pale and fluffy.
- Add eggs one at a time, beating well after each addition. Mix in vanilla extract until combined.
- On low speed, add dry ingredients in three additions alternating with warmed milk, starting and ending with flour. Mix just until blended.
- Divide batter evenly among the three pans (about 4 cups per pan). Smooth tops with a spatula.
- Bake layers: 25-30 minutes for 6-inch, 30-35 minutes for 8-inch, and 35-40 minutes for 10-inch. Test doneness with a toothpick; it should come out clean.
- Cool cakes in pans for 10 minutes, then turn out onto cooling racks to cool completely.
- For frosting, beat softened butter on medium speed until creamy (~3 minutes). Gradually add powdered sugar one cup at a time on low speed.
- Add vanilla extract, salt, and heavy cream. Beat on high speed until fluffy and spreadable. Adjust cream or sugar for desired consistency.
- Level cake layers by trimming domed tops with a serrated knife or cake leveler.
- Place largest cake layer on cake board or plate. Spread thick layer of buttercream on top, then add next size layer. Repeat with smallest layer on top.
- Apply a thin crumb coat over entire stacked cake to seal crumbs. Chill for 20 minutes.
- Apply a thicker, smooth final coat of buttercream using an offset spatula and bench scraper.
- Decorate as desired with fresh flowers, piped borders, sprinkles, or pearl sugar.
Notes
Use room temperature eggs and butter for better mixing. Sift flour and powdered sugar for smooth texture. Do not overmix batter to avoid toughness. Use a crumb coat to seal crumbs before final frosting. Chill frosting if too soft. Use a turntable for easier frosting application. Cake layers can be baked a day ahead and frozen.
Nutrition
- Serving Size: 1 slice (1/12 of cak
- Calories: 420
- Fat: 20
- Carbohydrates: 55
- Protein: 4
Keywords: vanilla cake, three-tier cake, celebration cake, birthday cake, homemade cake, buttercream frosting, easy cake recipe



