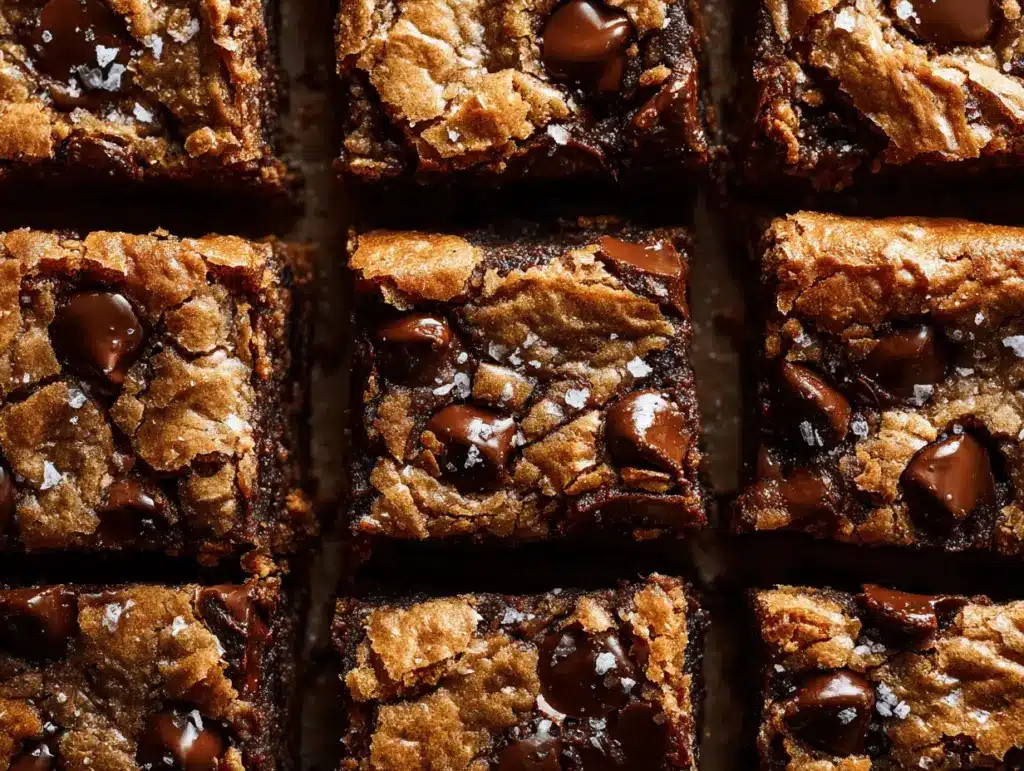
That nutty, toasty aroma of brown butter swirling in a pan—it’s pure magic, isn’t it? And when you pair that with the savory hit of miso and gooey pools of chocolate—well, you get these Brown Butter Miso Chocolate Chip Bars. I still remember the first time I made them; my kitchen was filled with the scent of caramelized butter, and honestly, I couldn’t wait to dig in. It all started when I stumbled upon a viral post about miso cookies, but I wanted something chunkier, richer, and easier to slice up for sharing (or hoarding, let’s face it). So, I tweaked my classic blondie recipe, and Brown Butter Miso Chocolate Chip Bars were born.
What makes this recipe stand out isn’t just the flavor—it’s the way the miso brings this deep, umami savoriness that balances the sweet chocolate. It’s perfect for anyone who loves a twist on traditional desserts, and especially great for those days when you want a treat that feels just a little more grown-up. I’ve baked these over a dozen times (and taste-tested plenty of batches), so trust me when I say they’re easy enough for beginners but impressive enough for any gathering.
Whether you’re a busy parent, a college student craving something special, or simply a cookie bar fanatic, these Brown Butter Miso Chocolate Chip Bars will win you over. They’re my go-to for potlucks and cozy weekends—plus, they freeze beautifully (if you manage to have leftovers). Ready to discover the ultimate flavor fusion? Let’s get baking!
Why You’ll Love This Recipe
After countless recipe tests, kitchen fails, and many taste-testers (my family, friends, and the occasional neighbor who heard the oven beep), I’m convinced these Brown Butter Miso Chocolate Chip Bars are a must-try. Here’s why you’ll love them as much as I do:
- Quick & Easy: You can whip these up in under 45 minutes, and there’s no need for fancy mixers. Perfect for last-minute cravings or busy weeknights.
- Simple Ingredients: Most items are pantry staples—you won’t be running around for obscure ingredients. Miso might be new, but it’s easy to find in most grocery stores now.
- Perfect for Any Occasion: These bars shine at brunch, potlucks, after-school snacks, or cozy movie nights. I even made them for a holiday cookie swap and they disappeared first!
- Crowd-Pleaser: Adults love the sophisticated flavor, but kids still go wild for the chocolate chips. You’ll get rave reviews from all ages.
- Unbelievably Delicious: The fusion of nutty brown butter, salty miso, and melty chocolate is next-level comfort food. Every bite is a little adventure.
What sets these apart? I blend the miso directly into the browned butter for a perfectly smooth, savory base, and use a generous amount of chocolate chips so every square is loaded. The bars are chewy at the edges, soft in the middle—my ideal texture. They taste like classic chocolate chip cookies but with a grown-up kick that makes people ask, “What’s your secret ingredient?”
Honestly, these bars have become a staple in my kitchen. They’re the kind of treat you’ll want to share… or keep all to yourself. Comfort food, but with a little twist that makes it memorable. If you’re ready to impress without stress, this recipe is for you!
What Ingredients You Will Need
This recipe uses simple, wholesome ingredients to deliver bold flavor and a satisfying texture—no complicated shopping lists required! Here’s everything you’ll need for your Brown Butter Miso Chocolate Chip Bars:
- For the batter:
- 1 cup (226g) unsalted butter – for that rich, nutty brown butter base
- 1/3 cup (80g) white miso paste – I like Hikari brand (adds deep, savory flavor)
- 1 1/2 cups (300g) light brown sugar – gives a soft, chewy texture with caramel notes
- 1/4 cup (50g) granulated sugar – for a hint of crispness
- 2 large eggs (room temperature) – helps bind and enrich the bars
- 2 teaspoons pure vanilla extract – rounds out the flavor
- 2 cups (250g) all-purpose flour – the classic base; swap with gluten-free blend if needed
- 1 teaspoon baking powder – for just a touch of lift
- 1/2 teaspoon baking soda – helps the bars rise and stay tender
- 1/2 teaspoon fine sea salt – balances sweetness
- 1 1/4 cups (200g) semi-sweet chocolate chips – I like Ghirardelli (use dark or milk chocolate if preferred)
- For extra flair (optional):
- Flaky sea salt, for topping – adds crunch and a burst of flavor
- Chopped toasted nuts (walnuts or pecans), 1/2 cup (50g) – for added texture
- White chocolate chips, 1/4 cup (40g) – for a sweeter touch
If you can’t find miso paste, try using tahini for a similar savory profile (though it’s not quite the same!). For gluten-free folks, swap the flour for a 1:1 gluten-free baking blend—I’ve tested this and it works well. You can use coconut sugar instead of brown sugar, but the bars will be a tad less chewy. And if you’re dairy-free, opt for a plant-based butter substitute (just know the browning step won’t be quite as aromatic).
These ingredients are easy to mix and match based on what’s in your pantry. Honestly, the only “must” is the miso—it’s what transforms these bars from good to unforgettable!
Equipment Needed
- Medium saucepan: For browning the butter. I use a heavy-bottomed pan to prevent burning (a stainless steel pan works well).
- Large mixing bowl: For combining the batter. Glass or sturdy plastic is best—easy cleanup and enough room for mixing.
- Whisk & spatula: A whisk helps blend the eggs and miso smoothly; a spatula is perfect for folding in flour and chocolate chips.
- 8×8-inch (20x20cm) baking pan: For thick, chewy bars. You can also use a 9×9-inch pan for slightly thinner bars.
- Parchment paper: For easy removal and cleaner slices. Grease the pan if you don’t have parchment, but trust me—parchment makes life easier!
- Measuring cups & spoons: Precision matters here. I’ve found that digital scales (for grams) give the best results.
If you don’t have a proper baking pan, a glass casserole dish or even a heavy-duty aluminum tray will work. Just watch the baking time—it might vary. Maintenance tip: Keep your whisk and spatula in good shape by hand-washing (they last longer). For budget-friendly tools, check out local discount stores; I got my favorite mixing bowl for under $5!
Preparation Method
- Browning the butter (8-10 minutes):
Place 1 cup (226g) unsalted butter in a medium saucepan over medium heat. Stir frequently as the butter melts and foams, then watch for golden brown specks and a nutty aroma. Remove from heat as soon as it turns amber—don’t let it burn!
Tip: If you see black specks, the butter’s gone too far. Strain out burnt bits if needed. - Mixing in miso (1 minute):
Whisk in 1/3 cup (80g) white miso paste directly into the hot brown butter. Blend until smooth and creamy.
Note: The mixture will smell intensely savory—this is normal! - Combining sugars and eggs (2-3 minutes):
Transfer the miso-butter mixture to a large mixing bowl. Add 1 1/2 cups (300g) light brown sugar and 1/4 cup (50g) granulated sugar. Whisk until well combined (it’ll look glossy). Beat in 2 large eggs and 2 teaspoons vanilla extract until smooth.
Warning: Don’t add eggs while the butter is piping hot—wait a minute to avoid scrambling. - Adding dry ingredients (2-3 minutes):
Sift together 2 cups (250g) all-purpose flour, 1 teaspoon baking powder, 1/2 teaspoon baking soda, and 1/2 teaspoon sea salt. Fold dry ingredients into the wet mixture using a spatula, just until you no longer see streaks of flour.
Sensory cue: The batter will be thick and slightly sticky, with a caramel color. - Stirring in chocolate chips (1 minute):
Fold in 1 1/4 cups (200g) chocolate chips (and optional white chocolate or nuts). Make sure they’re evenly distributed.
Tip: Reserve a handful of chips for sprinkling on top for picture-perfect bars. - Preparing the pan (2 minutes):
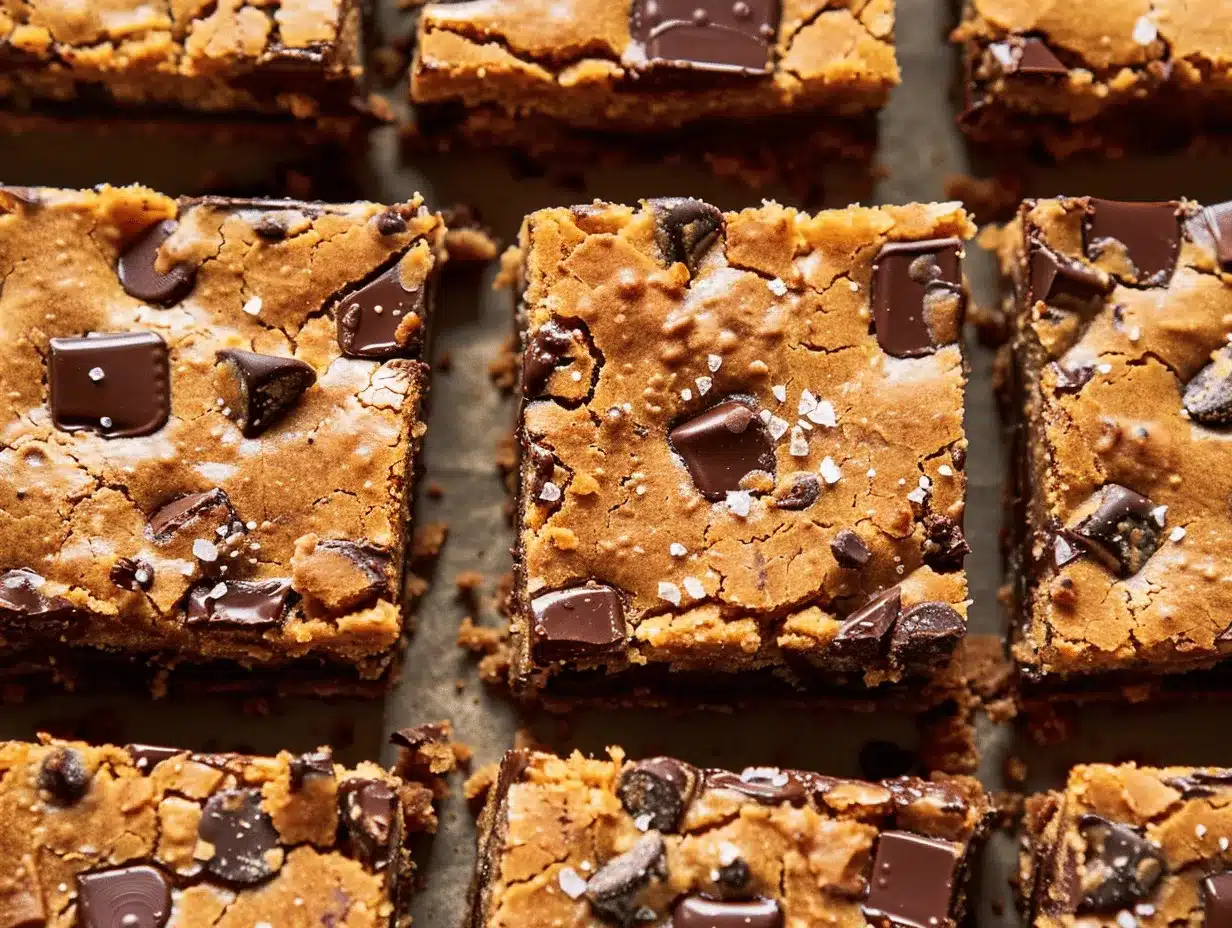
Line your 8×8-inch (20x20cm) pan with parchment paper, leaving an overhang for easy lifting. Pour in the batter and smooth the top. Sprinkle reserved chocolate chips and a pinch of flaky sea salt if desired. - Baking (25-30 minutes):
Bake in a preheated oven at 350°F (175°C) for 25-30 minutes. The bars should be golden at the edges and set in the center (a toothpick will come out with a few moist crumbs).
Note: Ovens vary—a few minutes more or less may be needed. - Cooling & slicing (20 minutes):
Let bars cool in the pan for at least 20 minutes before lifting out. Slice into squares once fully cool for clean edges.
Efficiency tip: Chill in the fridge for 10 minutes if you’re in a hurry—it firms up the bars for easier slicing.
Troubleshooting: If your bars seem greasy, the butter may not have been browned enough or the flour under-measured. If too dry, check oven temp and baking time. For gooey bars, err on the side of slightly underbaking—they’ll firm up as they cool!
Cooking Tips & Techniques
After many batches (and a few baking fails), I’ve learned some tricks for making these Brown Butter Miso Chocolate Chip Bars irresistible every time:
- Watch the butter: Browning butter can go from perfect to burnt in seconds. Stand by the stove, stir constantly, and rely on your nose—once it smells toasty and nutty, pull it off.
- Blend miso well: Lumpy miso leads to uneven flavor. Use a whisk or immersion blender if needed to get it ultra-smooth.
- Don’t overmix: After adding flour, mix just until combined. Overmixing makes bars tough instead of chewy.
- Reserve chocolate chips: Save some chips for the top—this makes your bars look Pinterest-worthy and guarantees chocolate in every bite.
- Bake until just set: The bars should be a little soft in the middle when you pull them out. They’ll finish setting as they cool.
- Multitasking: Brown the butter first, then gather and measure remaining ingredients while it cools a bit—saves time and keeps things moving.
- Don’t skip parchment: It makes removal and slicing so much easier. If you forget, don’t sweat—just grease your pan really well.
My first batch was a bit greasy and fell apart (rookie mistake—not enough flour). The next time, I measured everything precisely and used a digital scale—night and day difference! Consistency is all about not rushing and trusting your senses. If you’re ever unsure, err on the side of underbaking—gooey bars are better than dry ones!
Variations & Adaptations
Want to make these Brown Butter Miso Chocolate Chip Bars your own? Here are some fun ways to switch things up:
- Gluten-Free: Replace all-purpose flour with a 1:1 gluten-free baking blend. I’ve tried King Arthur’s brand with great results—bars stay chewy and flavorful.
- Vegan: Substitute butter with a vegan alternative and use flax eggs (2 tablespoons ground flaxseed + 5 tablespoons water). Swap chocolate chips for dairy-free versions.
- Seasonal Flavor: Fold in 1/2 cup (70g) dried cranberries or chopped dried apricots for a fruity twist. Sprinkle in cinnamon or pumpkin spice for autumn vibes.
- Nutty Crunch: Add toasted walnuts, pecans, or even chopped pistachios for extra texture and flavor.
- White Chocolate & Matcha: Use white chocolate chips and swirl in 1 tablespoon matcha powder for a fun, green-hued bar with earthy notes.
- Allergen Substitutions: If you’re nut-free, skip the nuts and check that your chocolate chips are processed in a nut-free facility. For soy allergies, use chickpea miso (yes, it exists!).
Personally, I love adding a handful of toasted pecans and a sprinkle of cinnamon—makes the bars taste like fall! These bars are ridiculously flexible, so don’t hesitate to experiment. Let me know what flavors you’ve tried!
Serving & Storage Suggestions
For serving, I like these bars slightly warm—pop them in the microwave for 10 seconds and the chocolate gets melty all over again. They look gorgeous sliced into squares and stacked on a platter, with a sprinkle of flaky sea salt for that trendy finish. Pair them with a cup of coffee, milk, or even green tea (the miso plays well with it!).
These bars also make a killer dessert alongside vanilla ice cream or fresh berries. For parties, cut them into mini squares for bite-sized treats that disappear fast. As for storage, keep bars in an airtight container at room temperature for up to 4 days. In the fridge, they’ll last a week (though the texture firms up a bit). To freeze, wrap individual bars tightly and store for up to 2 months—just thaw or reheat when the cravings hit.
Flavor tip: The miso melds with the brown butter over time, so day-two bars often taste even richer. If you like a softer texture, microwave briefly before serving. These bars are a true make-ahead hero!
Nutritional Information & Benefits
Here’s the nutritional breakdown (per bar, assuming 16 bars):
- Calories: ~210
- Fat: ~12g
- Carbohydrates: ~25g
- Protein: ~3g
- Sugar: ~16g
The star ingredients—brown butter and miso—each bring their own benefits. Brown butter, while rich, delivers vitamin A and healthy fats. Miso is packed with probiotics and adds trace minerals. If you use dark chocolate, you’ll get a hit of antioxidants, too.
For gluten-free and dairy-free swaps, these bars can suit a variety of dietary needs. Allergens to watch: dairy (butter, chocolate) and soy (miso). As a dessert lover who also watches nutrition, I appreciate that these bars offer a bit of protein and less sugar than some classic blondies. Just remember—these are a treat, so enjoy mindfully!
Conclusion
If you’re searching for a treat that delivers comfort, originality, and a whole lot of flavor, these Brown Butter Miso Chocolate Chip Bars are it. They’re easy to make, endlessly customizable, and always a hit with friends and family. I love how the miso adds a surprise savory twist that keeps you coming back for more.
Don’t be afraid to tweak the recipe—try a new mix-in, swap out the chocolate, or go gluten-free. It’s all about making these bars your own! I make them whenever I need a little pick-me-up, and they never disappoint.
Give them a try, and let me know how yours turn out. Drop a comment below, share your favorite adaptation, or tag me on social media with your batch. Bake a pan, share a square (or don’t!), and enjoy every bite!
Frequently Asked Questions
Can I use red miso instead of white miso?
You can, but red miso is much stronger and saltier. If you use it, reduce the amount to 2 tablespoons and expect a more pronounced savory flavor.
Do I need to brown the butter or can I use regular melted butter?
Browning the butter adds a nutty, caramel depth you just don’t get with regular melted butter. It’s worth the extra few minutes!
Can I make these bars gluten-free?
Absolutely! Just swap the all-purpose flour for a 1:1 gluten-free blend. I’ve tested it, and the bars come out chewy and delicious.
How do I store the bars for maximum freshness?
Keep them in an airtight container at room temperature for up to 4 days, or freeze for up to 2 months. They taste great even after thawing!
Can I double the recipe?
Yes! Use a 9×13-inch pan and double all ingredients. Baking time will be closer to 35-40 minutes—just check for doneness with a toothpick.
Pin This Recipe!

Brown Butter Miso Chocolate Chip Bars
These Brown Butter Miso Chocolate Chip Bars combine nutty brown butter, savory miso, and gooey chocolate chips for a sophisticated twist on classic blondies. Easy to make and perfect for sharing, they deliver a chewy, rich, and unforgettable flavor experience.
- Prep Time: 15 minutes
- Cook Time: 30 minutes
- Total Time: 45 minutes
- Yield: 16 bars 1x
- Category: Dessert
- Cuisine: American
Ingredients
- 1 cup (226g) unsalted butter
- 1/3 cup (80g) white miso paste
- 1 1/2 cups (300g) light brown sugar
- 1/4 cup (50g) granulated sugar
- 2 large eggs, room temperature
- 2 teaspoons pure vanilla extract
- 2 cups (250g) all-purpose flour
- 1 teaspoon baking powder
- 1/2 teaspoon baking soda
- 1/2 teaspoon fine sea salt
- 1 1/4 cups (200g) semi-sweet chocolate chips
- Flaky sea salt, for topping (optional)
- 1/2 cup (50g) chopped toasted nuts (walnuts or pecans, optional)
- 1/4 cup (40g) white chocolate chips (optional)
Instructions
- Place 1 cup unsalted butter in a medium saucepan over medium heat. Stir frequently as the butter melts and foams, watching for golden brown specks and a nutty aroma. Remove from heat as soon as it turns amber.
- Whisk in 1/3 cup white miso paste directly into the hot brown butter until smooth and creamy.
- Transfer the miso-butter mixture to a large mixing bowl. Add 1 1/2 cups light brown sugar and 1/4 cup granulated sugar. Whisk until well combined and glossy. Beat in 2 large eggs and 2 teaspoons vanilla extract until smooth.
- Sift together 2 cups all-purpose flour, 1 teaspoon baking powder, 1/2 teaspoon baking soda, and 1/2 teaspoon sea salt. Fold dry ingredients into the wet mixture using a spatula, just until no streaks of flour remain.
- Fold in 1 1/4 cups chocolate chips (and optional white chocolate or nuts) until evenly distributed. Reserve a handful of chips for topping.
- Line an 8×8-inch baking pan with parchment paper, leaving an overhang. Pour in the batter and smooth the top. Sprinkle reserved chocolate chips and flaky sea salt if desired.
- Bake in a preheated oven at 350°F (175°C) for 25-30 minutes, until golden at the edges and set in the center (a toothpick should come out with a few moist crumbs).
- Let bars cool in the pan for at least 20 minutes before lifting out. Slice into squares once fully cool for clean edges.
Notes
For best results, brown the butter carefully and blend the miso thoroughly for a smooth base. Don’t overmix after adding flour to keep bars chewy. Reserve some chocolate chips for topping. Bars can be made gluten-free with a 1:1 gluten-free flour blend. Store in an airtight container at room temperature for up to 4 days or freeze for up to 2 months.
Nutrition
- Serving Size: 1 bar (1/16 of recipe)
- Calories: 210
- Sugar: 16
- Sodium: 180
- Fat: 12
- Saturated Fat: 7
- Carbohydrates: 25
- Fiber: 1
- Protein: 3
Keywords: brown butter, miso, chocolate chip bars, blondies, dessert, easy, chewy, umami, potluck, baking, sweet and salty, chocolate, snack, comfort food