Introduction
The moment the sizzling scent of kimchi hits a hot pan, you know dinner is about to get exciting. There’s a tangy kick in the air, a little smoky garlic waft, and, honestly, nothing pulls me into the kitchen faster. I remember the first time I tried making kimchi fried rice—it was a hectic Tuesday, and my fridge was nearly empty except for leftover rice and half a jar of kimchi. Fast-forward, and now this one-pot kimchi fried rice recipe is my go-to answer for busy nights or when cravings strike for something bold and comforting.
Kimchi fried rice isn’t just a dish; it’s a flavor bomb with roots in Korean home cooking, and it’s perfect for anyone who loves easy meals with epic taste. This version is all about simplicity but delivers restaurant-worthy flavor. Whether you’re juggling work and kids, trying to eat more veggies, or just want something quick after a long day, you’ll find this kimchi fried rice fits the bill. It’s packed with umami, a little heat, and that satisfying crunch, all in one pan.
I’ve made this recipe countless times, tweaking the spice, swapping proteins, and even sneaking in extra veggies. The best part? You don’t need fancy skills or specialty tools—just a love for bold flavors and a willingness to dig in. As someone who’s spent years testing recipes and chasing that “perfect balance” of taste and convenience, I can honestly say this kimchi fried rice recipe is a winner. Ready for an effortless dinner that will make you smile with every bite? Let’s get started!
Why You’ll Love This Recipe
- Quick & Easy: Everything cooks in one pan—dinner’s ready in about 20 minutes, start to finish! Perfect for those nights when you barely have time to breathe.
- Simple Ingredients: Most of what you need is probably in your fridge or pantry already. No fancy shopping list required.
- Perfect for Any Occasion: This kimchi fried rice recipe is a lifesaver for weeknight dinners, cozy lunches, or even as a midnight snack. I’ve served it at casual get-togethers, and it always disappears fast.
- Crowd-Pleaser: Even picky eaters have been known to ask for seconds. The magic combo of tangy kimchi, savory rice, and just a hint of spice is hard to beat.
- Unbelievably Delicious: The texture’s got just the right amount of chew and crunch. That hit of umami from the kimchi, combined with the richness of a fried egg on top, is pure comfort.
What sets this one-pot kimchi fried rice apart? For starters, I use slightly aged kimchi for extra depth (trust me, it makes a difference). I also add a splash of toasted sesame oil at the end, which brings everything together in the most mouthwatering way. No clumpy rice or bland bites here—just layers of flavor in every forkful.
I’ve messed up a few batches over the years (burnt rice, too much heat, you name it), but every misstep taught me something. Now, this recipe has all those hard-earned secrets built in. It’s reliable, flexible, and honestly, it’s the kind of meal that makes you close your eyes and savor every mouthful. Whether you need a quick fix or want to impress your friends without breaking a sweat, this kimchi fried rice is a must-try.
What Ingredients You Will Need
This kimchi fried rice recipe comes together with a handful of everyday ingredients—each one plays a role in building flavor and texture. I like that you can swap things based on what’s hanging out in your fridge. Here’s what you’ll need:
- Cooked White Rice (3 cups/450g): Preferably day-old rice for extra chew (fresh works, but it’s a bit softer).
- Kimchi (1 cup/180g), chopped: The heart of the dish! Older kimchi brings deeper flavor and more punch.
- Kimchi Juice (2 tablespoons/30ml): Adds tang and moisture—don’t skip this if you want the real deal.
- Eggs (2 large): Fried or scrambled on top; optional but highly recommended for richness.
- Scallions (2, thinly sliced): For freshness and crunch; swap with chives if you prefer.
- Garlic (2 cloves, minced): Adds that essential depth.
- Onion (½ medium, diced): Sweetens the mix and bulks up the rice.
- Carrot (½ cup/60g, finely diced): Optional—adds color and crunch.
- Cooked Protein (½ cup/75g, diced): Chicken, pork belly, tofu, or even leftover rotisserie chicken. I often use pan-fried tofu for a vegetarian twist.
- Gochujang (1 tablespoon/15g): Korean chili paste for heat and depth; use sriracha or chili flakes if you need a substitute.
- Soy Sauce (1½ tablespoons/22ml): For salty umami goodness. I like to use low-sodium to control the salt.
- Sesame Oil (1 tablespoon/15ml): Add at the end for that irresistible aroma.
- Vegetable Oil (1 tablespoon/15ml): For frying. Any neutral oil works.
- Salt & Black Pepper: To taste. Remember, kimchi and soy sauce are salty, so go easy at first.
- Optional Garnishes: Roasted seaweed strips, sesame seeds, extra scallions, or a drizzle of sriracha.
If you’re missing an ingredient, don’t panic! Swap in brown rice for white, use vegan kimchi, or toss in whatever veggies are on hand (bell peppers, peas, even zucchini). For gluten-free needs, make sure your soy sauce is certified GF. I love using Mother-in-Law’s or Chongga brand kimchi for consistent flavor, but homemade kimchi is always a treat if you have it.
Equipment Needed
- Large Nonstick Skillet or Wok: Essential for a good sear and easy mixing. A heavy-bottomed skillet works if you don’t have a wok.
- Spatula: A wide, sturdy spatula helps to stir and toss the rice without breaking it up too much. I’ve used wooden and silicone—both work fine.
- Cutting Board and Knife: For prepping veggies and proteins. If you’re in a rush, a food processor can speed up chopping carrots and onions.
- Small Bowl: For whisking eggs or mixing sauces.
- Measuring Cups and Spoons: For accuracy, especially with gochujang and kimchi juice (trust me, eyeballing can lead to some fiery surprises!).
You don’t need anything fancy—honestly, I’ve made this in a basic frying pan and it still turned out great. If you have a rice paddle (those wide plastic stirrers), it’s handy for fluffing and serving. Maintenance tip: Nonstick pans last longer if you avoid metal utensils. For budget cooks, a cast iron pan is a solid alternative—just preheat well and keep your oil handy.
Preparation Method
- Prep Your Ingredients (5 minutes): Chop the kimchi, onion, carrot, protein, and scallions. Mince the garlic. Crack the eggs into a bowl and whisk lightly. If your rice is cold, break up any clumps with your hands or a fork.
- Heat the Pan (1 minute): Place your skillet or wok over medium-high heat. Add vegetable oil and let it shimmer.
- Sauté Aromatics (2 minutes): Add onion and carrot; stir-fry until just softened and fragrant. Toss in the garlic and cook for another 30 seconds (don’t let it burn—it gets bitter fast!).
- Add Kimchi and Protein (2 minutes): Stir in chopped kimchi and protein of choice. Cook until kimchi is sizzling and the protein is warmed through. If using tofu, let it brown a bit for extra flavor.
- Mix in Rice (2 minutes): Add cooked rice. Spread it out in the pan and let it heat up. Stir gently to combine, breaking up any clumps. You want the rice to soak up all those kimchi juices.
- Season and Sauce (2 minutes): Add kimchi juice, gochujang, and soy sauce. Toss everything together until evenly coated. If the rice looks dry, add a splash of water or extra kimchi juice.
- Push Rice Aside, Cook Eggs (2 minutes): Make a little well in the center of the pan. Pour in the eggs and scramble until just set, then fold them into the rice. Alternatively, fry eggs separately and serve on top.
- Finish and Garnish (1 minute): Drizzle sesame oil over everything. Add sliced scallions and any garnishes like sesame seeds or seaweed strips. Taste and adjust salt/pepper as needed.
- Serve Hot: Spoon into bowls and dig in while it’s steaming! If you like, add extra hot sauce or a sprinkle of nori on top.
Troubleshooting: If your rice starts sticking, lower the heat and add a bit more oil. Too spicy? Stir in a handful of frozen peas or extra rice. If it’s bland, add a splash more soy sauce or kimchi juice. I always listen for that sizzling sound—it means the rice is getting that classic fried edge.
Efficiency tip: Use pre-chopped veggies and leftover rotisserie chicken to save even more time. You can prep everything while the pan heats, making this truly a one-pot, one-cutting-board kind of meal.
Cooking Tips & Techniques
After many batches, I’ve picked up a few tricks for perfect kimchi fried rice every time.
- Use Day-Old Rice: Freshly cooked rice is softer and can get mushy. If you only have fresh, spread it out on a tray for 10 minutes to dry out a bit.
- High Heat, Quick Stirring: Don’t be shy with the heat—you want everything to fry, not steam. Keep ingredients moving to avoid burning.
- Don’t Overcrowd the Pan: If you double the recipe, work in batches. Overcrowding leads to soggy rice and uneven cooking.
- Taste As You Go: Kimchi varies in saltiness and spice. Start light, then adjust soy sauce and gochujang to your liking.
- Add Sesame Oil Last: It can lose its aroma if cooked too long. Drizzle at the end for max flavor.
Common mistakes? I’ve burned the garlic more times than I can count—it goes from fragrant to acrid in seconds. Fix: Add garlic after onion is mostly cooked. Another lesson: If your rice looks pale, it’s probably missing kimchi juice or gochujang. Don’t be afraid to add an extra splash!
Timing tip: While the rice is frying, use those couple minutes to slice scallions or prep garnishes. Multitasking makes this meal even faster. For consistency, I always measure my key sauces—too much soy or gochujang can overpower the dish.
If your kimchi fried rice is ever bland or “flat,” try a squeeze of lime or a pinch of sugar—it brightens things right up. Cooking isn’t just about following a recipe; it’s about feeling, tasting, and a little bit of improvising along the way.
Variations & Adaptations
- Vegetarian/Vegan: Use vegan kimchi (no fish sauce or shrimp), swap eggs for scrambled tofu, and choose plant-based protein.
- Low-Carb: Replace rice with cauliflower rice—just reduce cooking time so it doesn’t get mushy. I’ve tried this and it’s surprisingly satisfying.
- Spicy Lovers: Add extra gochujang or sprinkle in chili flakes. For mild eaters, start with half the amount and build up.
- Seasonal Swaps: Toss in fresh peas, corn, or zucchini in summer. In winter, shredded cabbage or kale bulks up the dish and adds nutrition.
- Protein Choices: Try shrimp, bacon, or leftover steak. If you’re feeling adventurous, a bit of diced spam or sausage is classic in Korean home cooking.
- Gluten-Free: Use tamari or certified gluten-free soy sauce. Always check your kimchi label for hidden gluten.
Personally, I love adding a handful of baby spinach right at the end—wilting in the greens gives an extra pop of color and nutrition. If you’re cooking for a crowd, set out a “topping bar” with seaweed, sesame seeds, and hot sauce so everyone can customize their bowl.
Honestly, this kimchi fried rice recipe is all about making it yours. Don’t be afraid to experiment—you might stumble onto your new favorite combo!
Serving & Storage Suggestions
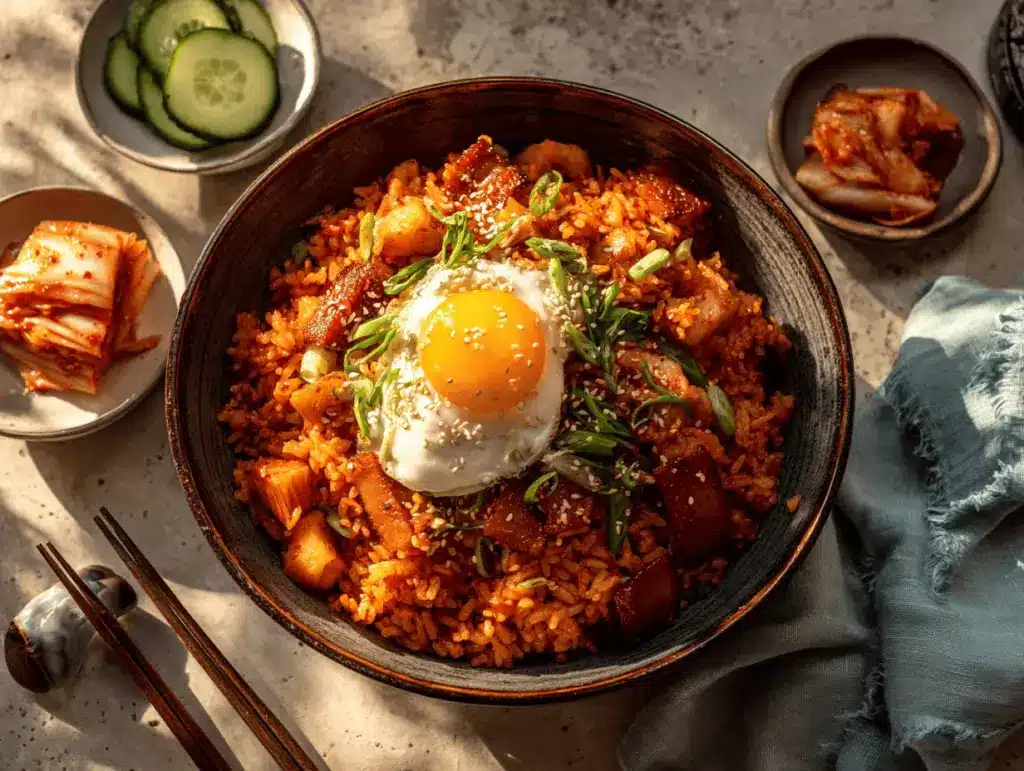
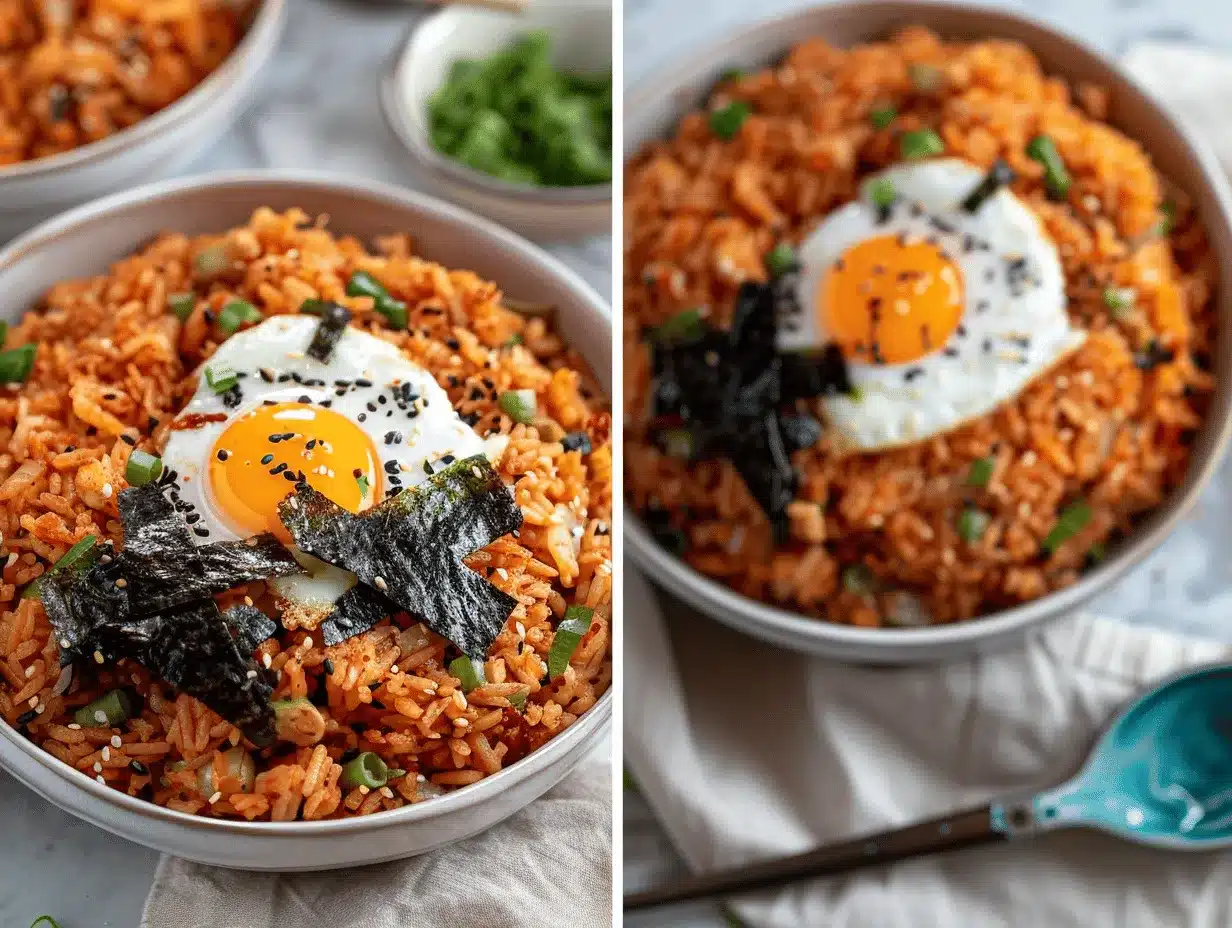
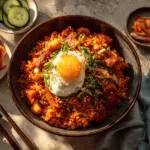
This kimchi fried rice is best served steaming hot, straight from the pan. I like to scoop it into deep bowls and top each serving with a fried egg (runny yolk is a must for me!). Sprinkle some roasted seaweed and sesame seeds for crunch and a burst of flavor.
Pair it with a simple cucumber salad or miso soup for a complete meal. If you’re feeling festive, serve alongside Korean BBQ or grilled tofu. For drinks, chilled barley tea or a crisp lager work well.
Leftovers? Store in an airtight container in the fridge for up to 3 days. The flavors deepen overnight, making it even tastier for lunch the next day. To reheat, use a skillet over medium heat with a splash of water or oil—microwaving works, but the texture is best from the pan.
Kimchi fried rice also freezes well for up to a month. Portion into freezer bags, press flat, and thaw overnight in the fridge before reheating. Just note: the rice may soften a bit after freezing, but the flavor stays strong.
If you plan to eat this over several days, hold off on adding eggs until serving. The rice soaks up all the good stuff and just needs a quick refresh in the pan!
Nutritional Information & Benefits
A typical serving of this kimchi fried rice recipe (about 1½ cups) provides approximately 350-400 calories, 9g protein, 55g carbs, and 11g fat. If you add a fried egg, bump up the protein and healthy fats!
Kimchi is packed with probiotics, which support gut health. The dish is high in vitamins A and C from the carrots and scallions. Using brown rice or adding extra veggies boosts fiber. For gluten-free or low-carb diets, make the suggested swaps above.
Allergens: Check your kimchi, soy sauce, and protein choices for gluten, eggs, and shellfish if needed. For a plant-based version, choose vegan kimchi and skip eggs.
I love this kimchi fried rice because it fits nicely into a balanced meal plan—lots of veggies, customizable protein, and great for days when you want comfort and nutrition in one bowl.
Conclusion
Kimchi fried rice is more than just a quick meal—it’s comfort in a bowl, packed with flavor and ready in minutes. Whether you’re new to Korean cooking or a longtime fan, this one-pot recipe is easy to master and hard to forget. I keep coming back to it, tweaking toppings and swapping veggies, but the basics never fail.
Make it your own: add extra spice, change up the protein, or toss in whatever’s in your fridge. The real joy comes from sitting down to something homemade that’s both satisfying and totally fuss-free.
If you try this kimchi fried rice recipe, leave a comment below—share your tweaks, ask a question, or tag me on Pinterest with your creation! Cooking is all about connecting, so let’s keep the conversation going. Happy eating!
Frequently Asked Questions
Can I use fresh rice instead of day-old rice?
Yes, you can! If using fresh rice, let it cool and dry for 10-15 minutes before cooking. This helps prevent mushiness.
Is kimchi fried rice spicy?
It usually has a mild to medium spice level, depending on your kimchi and gochujang. Adjust the amount of chili paste to suit your taste.
Can I make this recipe vegetarian or vegan?
Absolutely. Use vegan kimchi (no fish sauce), plant-based protein, and skip the eggs or use scrambled tofu instead.
How do I store leftovers?
Cool leftovers and store in airtight containers in the fridge for up to 3 days. Reheat in a skillet with a splash of water or oil for best results.
What’s the best protein to add?
You can use chicken, pork, tofu, shrimp, or even leftover steak. For a classic touch, diced spam or bacon works well too!
Pin This Recipe!

Kimchi Fried Rice Recipe: Easy One-Pot Dinner for Busy Nights
This quick and easy kimchi fried rice is a bold, comforting one-pot meal packed with tangy kimchi, savory rice, and your choice of protein. Perfect for busy nights, it’s customizable, delicious, and ready in about 20 minutes.
- Prep Time: 5 minutes
- Cook Time: 15 minutes
- Total Time: 20 minutes
- Yield: 3-4 servings 1x
- Category: Main Course
- Cuisine: Korean
Ingredients
- 3 cups cooked white rice (preferably day-old)
- 1 cup kimchi, chopped
- 2 tablespoons kimchi juice
- 2 large eggs
- 2 scallions, thinly sliced
- 2 cloves garlic, minced
- 1/2 medium onion, diced
- 1/2 cup carrot, finely diced (optional)
- 1/2 cup cooked protein (chicken, pork belly, tofu, or rotisserie chicken), diced
- 1 tablespoon gochujang (Korean chili paste)
- 1 1/2 tablespoons soy sauce (low-sodium preferred)
- 1 tablespoon sesame oil
- 1 tablespoon vegetable oil
- Salt and black pepper, to taste
- Optional garnishes: roasted seaweed strips, sesame seeds, extra scallions, sriracha
Instructions
- Prep all ingredients: chop kimchi, onion, carrot, protein, and scallions; mince garlic; whisk eggs in a bowl; break up any clumps in cold rice.
- Heat a large nonstick skillet or wok over medium-high heat. Add vegetable oil and let it shimmer.
- Add onion and carrot; stir-fry for about 2 minutes until just softened. Add garlic and cook for another 30 seconds.
- Stir in chopped kimchi and protein. Cook for 2 minutes until kimchi is sizzling and protein is warmed through (let tofu brown if using).
- Add cooked rice, spreading it out in the pan. Stir gently to combine and heat through, breaking up any clumps.
- Add kimchi juice, gochujang, and soy sauce. Toss everything together until evenly coated. Add a splash of water or extra kimchi juice if rice looks dry.
- Push rice to the side and pour eggs into the center. Scramble until just set, then fold into the rice. Alternatively, fry eggs separately and serve on top.
- Drizzle sesame oil over the rice. Add sliced scallions and any desired garnishes. Taste and adjust salt and pepper as needed.
- Serve hot in bowls, topped with optional garnishes and extra hot sauce if desired.
Notes
Use day-old rice for best texture. Adjust spice level by varying gochujang. For vegetarian/vegan, use plant-based protein and vegan kimchi, and skip eggs or use scrambled tofu. For gluten-free, use tamari and check kimchi labels. Add sesame oil at the end for maximum aroma. Leftovers keep well for up to 3 days in the fridge or 1 month in the freezer.
Nutrition
- Serving Size: About 1 1/2 cups
- Calories: 375
- Sugar: 5
- Sodium: 900
- Fat: 11
- Saturated Fat: 2
- Carbohydrates: 55
- Fiber: 3
- Protein: 9
Keywords: kimchi fried rice, Korean fried rice, easy dinner, one-pot meal, spicy rice, vegetarian option, gluten-free option, quick weeknight dinner