Introduction
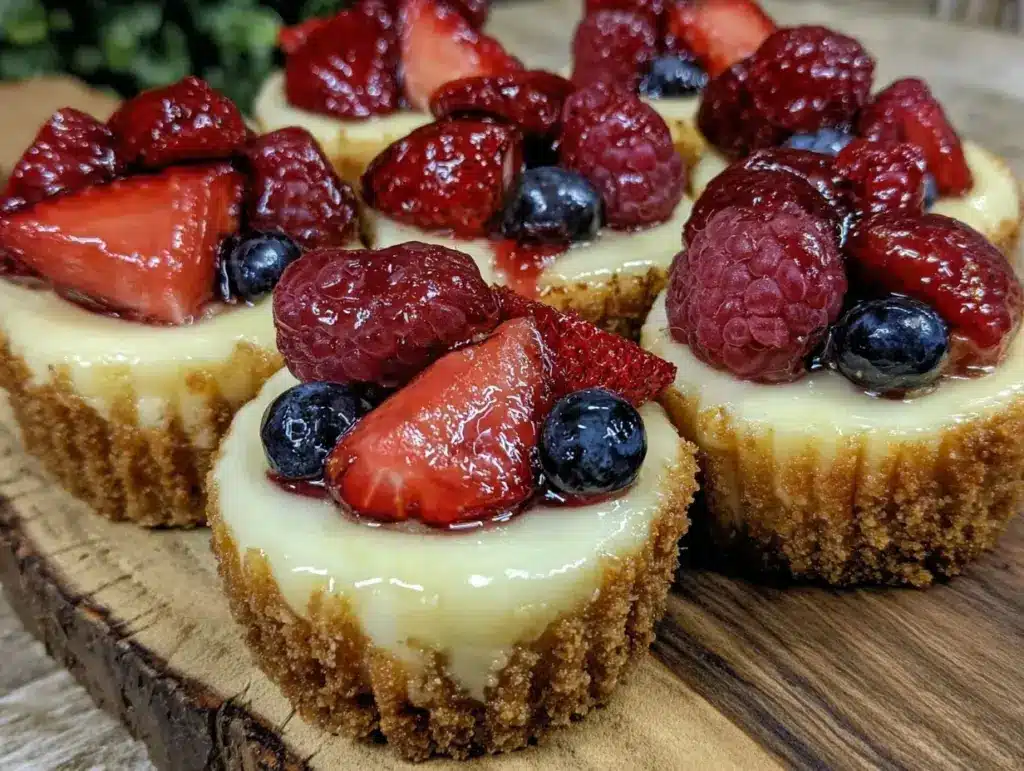
I remember the first time I stumbled upon this creamy mini cheesecakes recipe—it wasn’t during some fancy dinner party or a planned baking day. Honestly, it happened on a lazy Sunday afternoon when I had a spontaneous craving for something sweet but didn’t want to commit to a huge cake. I was poking around my kitchen, half-expecting to make a mess, when I realized I had all the ingredients for cheesecake, but in smaller portions. So, I decided to try making mini versions, topped with whatever berries were left in the fridge. It felt like a fun experiment more than anything.
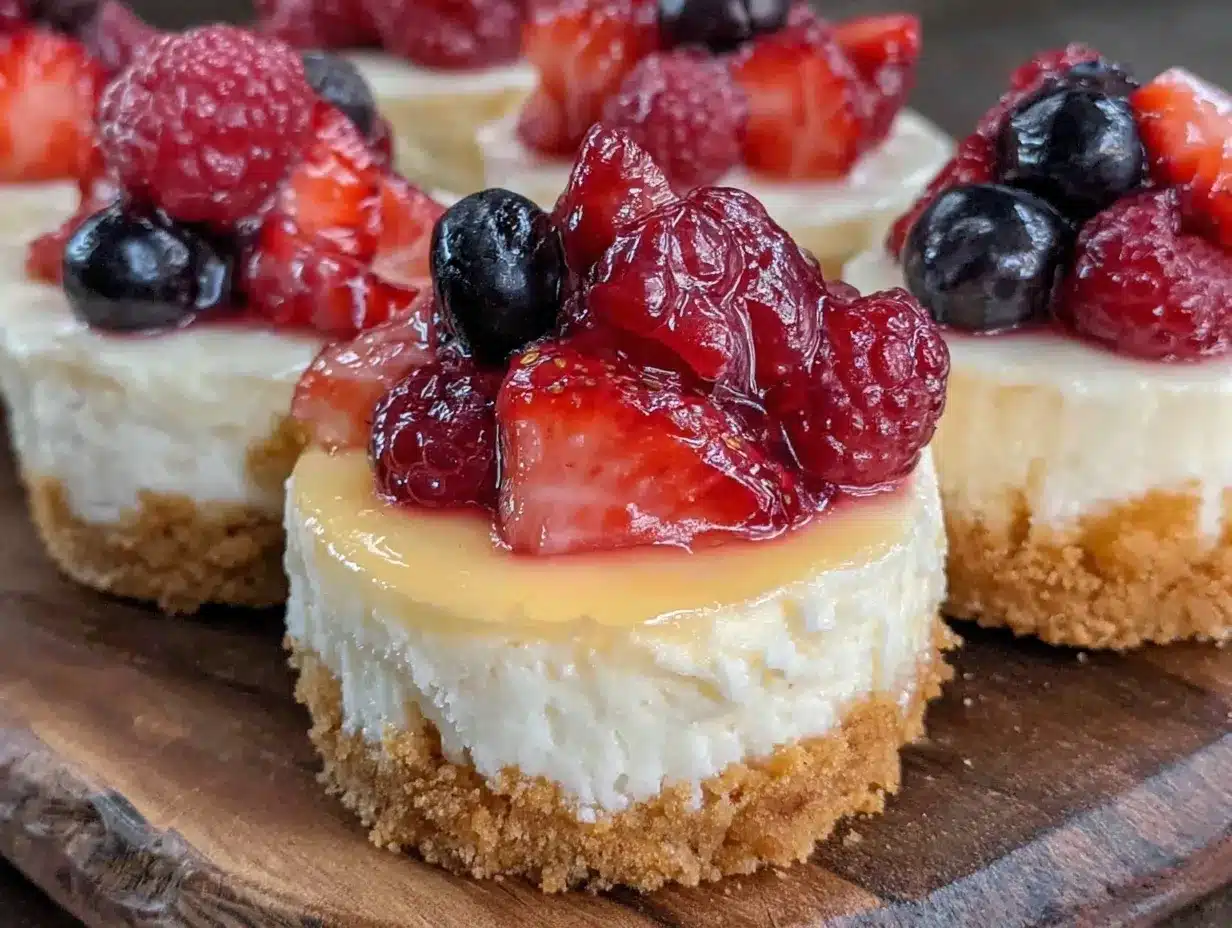
What surprised me was how these little treats turned out—rich, smooth, and perfectly creamy, with that bright fresh berry topping cutting through the richness just right. My skeptical self thought these mini cheesecakes would be too fiddly or dry, but nope. They came out just right, with a delicate crumbly crust and a velvety filling. Ever since, I’ve found myself making these mini cheesecakes almost every week, especially because they’re just the right size for a quick indulgence without overdoing it.
They’re deceptively simple, you know? But there’s something about that mix of creamy texture and fresh berries that feels like a little moment of joy in the middle of a busy day. These mini cheesecakes stuck with me because they’re easy enough to whip up without stress but special enough to impress without trying. And honestly, that’s what comfort food should be all about.
Why You’ll Love This Recipe
- Quick & Easy: Comes together in under 45 minutes, perfect for last-minute dessert needs or casual get-togethers.
- Simple Ingredients: Uses everyday pantry staples and fresh berries, no complicated shopping required.
- Perfect for Any Occasion: Ideal for brunch, potlucks, or even a cozy dinner dessert that feels fancy without fuss.
- Crowd-Pleaser: Both kids and adults can’t get enough of the creamy texture combined with the tartness of fresh berries.
- Unbelievably Delicious: The balance between the buttery crust, smooth cheesecake filling, and juicy berry topping is incredibly satisfying.
- This recipe stands out because of its luscious cream cheese blend, whipped just right to avoid cracks, and the fresh berry topping that adds a pop of color and flavor.
- It’s not just another cheesecake—it’s the kind that makes you pause, close your eyes, and savor every bite.
What Ingredients You Will Need
This recipe uses simple, wholesome ingredients to deliver bold flavor and satisfying texture without the fuss. Most of these are pantry basics, and the fresh berries can be swapped depending on the season or your preferences.
- For the crust:
- 1 cup graham cracker crumbs (about 100g) – I prefer using Nabisco for that perfect crunch
- 3 tablespoons unsalted butter, melted (adds richness and binds the crust)
- 2 tablespoons granulated sugar (balances the buttery crust)
- For the cheesecake filling:
- 16 oz (450g) cream cheese, softened (use full-fat for the creamiest texture)
- 1/2 cup granulated sugar (adds sweetness without overpowering)
- 2 large eggs, room temperature (helps with smooth texture)
- 1 teaspoon vanilla extract (real vanilla extract makes a big difference)
- 1/4 cup sour cream (60ml) (adds tang and silkiness to the filling)
- For the fresh berry topping:
- 1 cup mixed fresh berries (blueberries, raspberries, strawberries), washed and patted dry
- 1 tablespoon powdered sugar (optional, to dust over berries for extra sweetness)
- Optional: fresh mint leaves for garnish
If you want a gluten-free option, swap the graham cracker crumbs with almond flour or gluten-free cookie crumbs. For a dairy-free twist, you can use a plant-based cream cheese and coconut yogurt instead of sour cream—though the texture will shift slightly.
Equipment Needed
- Mini muffin tin (12-cup size) – essential for making these mini cheesecakes perfectly uniform
- Paper or silicone cupcake liners (makes removal easier and cleanup faster)
- Electric mixer or stand mixer – helps achieve that super smooth, creamy filling
- Mixing bowls – a couple of medium-sized ones for crust and filling
- Measuring cups and spoons – accuracy matters for cheesecake texture
- Rubber spatula – for scraping batter cleanly
- Cooling rack – to cool cheesecakes evenly
Don’t have a mini muffin tin? You can use regular muffin tins, but the baking time will be longer. I’ve tried silicone liners in a regular pan, and while they work, the crust doesn’t get quite as crisp. For budget-friendly options, a basic metal mini muffin pan works just fine, and liners are affordable and reusable.
Preparation Method
- Prepare the crust: Preheat your oven to 325°F (163°C). Line the mini muffin tin with paper liners. In a medium bowl, combine 1 cup graham cracker crumbs, 3 tablespoons melted butter, and 2 tablespoons sugar. Mix until the crumbs are evenly coated and feel like wet sand. Press about 1 tablespoon of this mixture firmly into the bottom of each liner to form an even crust layer. This usually takes about 10 minutes.
Tip: Press the crust down firmly with the back of a spoon or your fingers for a compact base that won’t crumble apart. - Make the filling: Using an electric mixer, beat 16 oz (450g) softened cream cheese until smooth and creamy, about 2-3 minutes. Gradually add 1/2 cup sugar and continue beating until fully combined. Add 2 room temperature eggs one at a time, mixing well after each addition. Stir in 1 teaspoon vanilla extract and 1/4 cup sour cream until just blended. Avoid overmixing here to keep the texture silky.
Watch out: If you overbeat, air bubbles can cause cracks in cheesecakes. - Assemble and bake: Spoon the filling evenly over the crusts, filling each about 3/4 full. Tap the pan gently on the counter to release air bubbles. Bake in the preheated oven for 18-22 minutes, or until the edges look set but the centers still jiggle slightly when you gently shake the pan.
Check: Don’t overbake! The slight jiggle in the center means they’ll firm up perfectly as they cool. - Cool and chill: Remove the pan from the oven and let the mini cheesecakes cool completely at room temperature, about 1 hour. Then, transfer to the fridge and chill for at least 3 hours, preferably overnight. This resting time allows the flavors to meld and the texture to firm up beautifully.
- Add the berry topping: Just before serving, top each mini cheesecake with a spoonful of fresh mixed berries. Dust lightly with powdered sugar if desired and garnish with a fresh mint leaf for a pop of color.
Pro tip: Pat berries dry before topping to prevent soggy cheesecakes.
Cooking Tips & Techniques
One of the trickiest parts is getting that perfectly smooth, creamy filling without cracks. I learned that beating the cream cheese thoroughly at the start is key—no lumps allowed! Also, make sure your eggs are at room temperature; cold eggs can cause the filling to curdle or bake unevenly.
When baking, resist the urge to open the oven door frequently—that sudden temperature drop can make cheesecakes sink or crack. Instead, watch for the telltale gentle jiggle in the center; that’s your green light to pull them out.
Another tip: using paper liners makes cleanup a breeze and helps you pop out the mini cheesecakes without sticking or breaking. If you want a glossier finish, a light glaze made from warmed preserves works great, but honestly, the fresh berry topping steals the show.
Lastly, patience is your friend here. Letting the cheesecakes chill overnight in the fridge really settles the flavors and texture, so don’t rush the cooling process. I’ve tried eating them too soon, and the texture just isn’t the same.
Variations & Adaptations
- Seasonal Berry Swap: In summer, use fresh peaches or nectarines instead of berries for a juicy twist. In winter, consider topping with spiced cranberry compote.
- Chocolate Lover’s Version: Mix 1/4 cup cocoa powder into the crust and swirl melted dark chocolate into the filling before baking.
- Vegan Adaptation: Use dairy-free cream cheese and yogurt alternatives, and replace eggs with flax eggs (1 tbsp ground flaxseed + 3 tbsp water per egg). Expect a slightly different texture but still delicious.
- Gluten-Free: Swap graham cracker crumbs for almond flour or gluten-free cookie crumbs to keep the crust crumbly and tasty.
- Personally, I once added a splash of lemon zest to the filling for a subtle citrus brightness that paired beautifully with the berries—it’s a simple tweak but really freshens things up.
Serving & Storage Suggestions
Serve these mini cheesecakes chilled right from the fridge. The creamy texture and cold temperature make each bite feel like a little luxury. For presentation, arrange them on a pretty platter with extra fresh berries and mint sprigs scattered around.
They pair wonderfully with a cup of hot coffee or a glass of sparkling rosé, especially when enjoyed as a light dessert after dinner.
Store leftovers tightly covered in the fridge for up to 4 days. You can also freeze them—wrap each cheesecake individually in plastic wrap, then place in an airtight container or freezer bag for up to 2 months. To serve, thaw overnight in the fridge.
Flavors tend to deepen after a day or two in the fridge, so if you can wait, they taste even better the next day. Just remember to add fresh berries right before serving to keep things bright and fresh.
Nutritional Information & Benefits
Each mini cheesecake (assuming 12 servings) contains roughly:
| Nutrient | Amount |
|---|---|
| Calories | 220 kcal |
| Fat | 15g |
| Carbohydrates | 18g |
| Protein | 4g |
| Sugar | 12g |
The cream cheese and sour cream provide a good source of calcium and protein, while fresh berries add antioxidants and vitamins. Using fresh berries also keeps the sugar content moderate compared to heavy syrups or jams.
For those watching carbs or dairy, swapping ingredients as mentioned earlier can help fit this recipe into gluten-free, low-carb, or vegan diets. Just keep in mind texture and flavor may vary.
Conclusion
Creamy mini cheesecakes with fresh berry topping are one of those recipes that feel both indulgent and approachable. They’re perfect for when you want a little something sweet without the commitment of a full-sized cake. What I love most is how easily they come together and how versatile they are—whether you’re serving them at a brunch, a party, or just treating yourself on a quiet evening.
Feel free to tweak the berry mix, try different crusts, or add your own spin. It’s a recipe that welcomes creativity and personal touches. Honestly, they’ve become a staple in my kitchen because they always bring smiles around the table (or during solo dessert moments).
If you try this recipe, I’d love to hear how it worked out for you—any twists, favorite berry combos, or little hacks you discovered. After all, food tastes better when shared!
FAQs
Can I make these mini cheesecakes ahead of time?
Absolutely! They actually taste better after chilling overnight. Just keep them covered in the fridge and add the fresh berry topping right before serving.
What can I use if I don’t have graham crackers?
You can substitute with digestive biscuits, crushed vanilla wafers, or gluten-free cookie crumbs for the crust.
How do I prevent cracks in my cheesecake filling?
Make sure all ingredients are at room temperature and avoid overmixing. Also, don’t overbake—look for a slight jiggle in the center before removing from the oven.
Can I freeze these mini cheesecakes?
Yes, wrap each cheesecake tightly in plastic wrap and store in an airtight container for up to 2 months. Thaw overnight in the fridge before serving.
What berries work best for the topping?
Mixed berries like blueberries, raspberries, and sliced strawberries work great. You can also use blackberries or seasonal fruits like peaches or cherries.
Pin This Recipe!
Creamy Mini Cheesecakes Recipe Easy Homemade with Fresh Berry Topping

These creamy mini cheesecakes are rich, smooth, and perfectly sized for a quick indulgence, topped with fresh berries for a bright, tart contrast. They are easy to make and ideal for any occasion.
- Prep Time: 15 minutes
- Cook Time: 22 minutes
- Total Time: 4 hours 15 minutes
- Yield: 12 servings 1x
- Category: Dessert
- Cuisine: American
Ingredients
- 1 cup graham cracker crumbs (about 100g)
- 3 tablespoons unsalted butter, melted
- 2 tablespoons granulated sugar
- 16 oz (450g) cream cheese, softened
- 1/2 cup granulated sugar
- 2 large eggs, room temperature
- 1 teaspoon vanilla extract
- 1/4 cup sour cream (60ml)
- 1 cup mixed fresh berries (blueberries, raspberries, strawberries), washed and patted dry
- 1 tablespoon powdered sugar (optional)
- Optional: fresh mint leaves for garnish
Instructions
- Preheat your oven to 325°F (163°C). Line the mini muffin tin with paper liners. In a medium bowl, combine 1 cup graham cracker crumbs, 3 tablespoons melted butter, and 2 tablespoons sugar. Mix until the crumbs are evenly coated and feel like wet sand. Press about 1 tablespoon of this mixture firmly into the bottom of each liner to form an even crust layer. This usually takes about 10 minutes.
- Using an electric mixer, beat 16 oz (450g) softened cream cheese until smooth and creamy, about 2-3 minutes. Gradually add 1/2 cup sugar and continue beating until fully combined. Add 2 room temperature eggs one at a time, mixing well after each addition. Stir in 1 teaspoon vanilla extract and 1/4 cup sour cream until just blended. Avoid overmixing here to keep the texture silky.
- Spoon the filling evenly over the crusts, filling each about 3/4 full. Tap the pan gently on the counter to release air bubbles. Bake in the preheated oven for 18-22 minutes, or until the edges look set but the centers still jiggle slightly when you gently shake the pan.
- Remove the pan from the oven and let the mini cheesecakes cool completely at room temperature, about 1 hour. Then, transfer to the fridge and chill for at least 3 hours, preferably overnight.
- Just before serving, top each mini cheesecake with a spoonful of fresh mixed berries. Dust lightly with powdered sugar if desired and garnish with a fresh mint leaf.
Notes
Press the crust firmly to avoid crumbling. Use room temperature eggs to prevent curdling. Avoid overmixing the filling to prevent cracks. Watch for a slight jiggle in the center to avoid overbaking. Chill overnight for best texture and flavor. Pat berries dry before topping to prevent sogginess. Paper liners make removal easier.
Nutrition
- Serving Size: 1 mini cheesecake
- Calories: 220
- Sugar: 12
- Fat: 15
- Carbohydrates: 18
- Protein: 4
Keywords: mini cheesecakes, creamy cheesecake, fresh berry topping, easy dessert, homemade cheesecake, mini desserts, quick cheesecake



