
The smell of peppermint and chocolate wafting through the air instantly takes me back to cozy December evenings, surrounded by twinkling lights and holiday cheer. There’s something magical about crafting homemade treats during the holidays, and this irresistible peppermint swirl fudge is no exception. It’s creamy, dreamy, and packed with festive flavors that scream Christmas. Whether you’re making this for a holiday party, giving it as a gift, or just indulging in a sweet moment for yourself, this recipe is sure to become a seasonal favorite!
I first stumbled upon the idea of peppermint fudge when I was experimenting with flavors for holiday desserts for my family. The result? A decadent fudge with a swirl of vibrant red and white, reminiscent of candy canes dancing in a winter wonderland. Trust me, one bite of this, and you’ll feel the holiday spirit take over. Plus, it’s an absolute breeze to whip up – minimal effort and maximum payoff!
Why You’ll Love This Recipe
- Quick & Easy: You can have this peppermint swirl fudge ready in less than 30 minutes, making it ideal for last-minute holiday prep.
- Festively Beautiful: The candy cane-inspired swirls make this treat almost too pretty to eat – but trust me, you won’t be able to resist!
- Perfect for Gifting: Wrap these up in a cute box or jar, and you’ve got a thoughtful gift for friends, family, or neighbors that’ll leave them smiling.
- Kid-Friendly: This recipe is perfect for little helpers who love to swirl and sprinkle toppings. Plus, no baking required!
- Ultra Creamy Texture: Every bite is melt-in-your-mouth delicious, with the perfect balance of peppermint and chocolate.
This peppermint swirl fudge is different from other holiday treats because it combines the classic flavors of the season with a modern twist. The swirled design makes it Instagram-worthy, while the flavor will have everyone reaching for seconds. It’s festive, fun, and guaranteed to be a crowd-pleaser. Plus, it’s a great way to add a little holiday sparkle to your dessert table without the stress of complicated recipes.
What Ingredients You Will Need
This recipe uses simple ingredients that come together to create a show-stopping dessert. Most of these are pantry staples, but feel free to get creative and make substitutions if needed!
- Sweetened Condensed Milk: The base for that creamy, rich texture.
- White Chocolate Chips: Melted down for a smooth and sweet fudge base.
- Peppermint Extract: Adds that signature holiday flavor. Don’t go overboard – a little goes a long way!
- Red Food Coloring: For the festive swirl design.
- Candy Canes: Crushed for a delightful crunch and extra peppermint flavor.
- Butter: A small amount helps the fudge stay silky and smooth.
- Salt: Just a pinch to balance the sweetness.
If you’re out of candy canes, you can use peppermint candies instead. For a softer fudge, add a splash of heavy cream when melting the chocolate. You can also swap white chocolate chips for dark chocolate chips if you prefer a richer flavor!
Equipment Needed
You don’t need fancy tools for this recipe, which makes it even better! Here’s what you’ll need:
- Microwave-Safe Bowl: Perfect for melting the chocolate and condensed milk together.
- Spatula: For stirring and smoothing out the fudge.
- 8×8-inch Baking Pan: Line it with parchment paper for easy removal.
- Toothpick or Skewer: Essential for creating those gorgeous swirls.
- Plastic Bag: Use this to crush the candy canes without making a mess.
If you don’t have a microwave-safe bowl, a double boiler works just as well for melting the chocolate. And if you don’t have a baking pan, you can use a pie dish or even a muffin tin for individual servings!
Preparation Method

- Line an 8×8-inch baking pan with parchment paper, leaving some overhang on the sides for easy removal.
- In a microwave-safe bowl, combine white chocolate chips (2 cups), sweetened condensed milk (1 can or 14 oz), and butter (2 tablespoons). Microwave in 30-second intervals, stirring well after each, until smooth and fully melted. This should take about 1-2 minutes.
- Once the mixture is smooth, stir in peppermint extract (1 teaspoon) and a pinch of salt.
- Pour half of the mixture into your prepared pan and spread it evenly using a spatula.
- Add a few drops of red food coloring to the remaining mixture and stir until it turns a vibrant red. If you want a lighter color, go easy on the food coloring.
- Pour the red mixture over the white layer in the pan. Use a toothpick or skewer to create swirls – this is the fun part! Drag the toothpick through the fudge to make a beautiful marbled pattern.
- Sprinkle the top with crushed candy canes for texture and visual appeal. Press them lightly to ensure they stick.
- Chill the fudge in the refrigerator for at least 2 hours, or until firm.
- Once set, lift the fudge out using the parchment paper overhang. Cut into squares and enjoy!
Pro tip: If you notice the fudge isn’t setting properly, pop it in the freezer for 30 minutes. It’ll firm up beautifully!
Cooking Tips & Techniques
- Don’t Overheat the Chocolate: Melt it slowly in the microwave to avoid scorching. Stir frequently for a smooth texture.
- Use Room Temperature Ingredients: Cold butter or condensed milk can cause clumping, so let them warm up slightly before using.
- Perfect Swirls: Don’t over-mix when creating the swirls. A few gentle drags with a toothpick will yield the best marbled effect.
- Crush Candy Canes with Care: Place them in a plastic bag and use a rolling pin or mallet. This keeps your countertops clean and your candy canes evenly crushed.
- Experiment with Colors: If red isn’t your thing, try green or even a combination of red and green for an extra festive look!
Variations & Adaptations
- Dairy-Free Option: Use dairy-free white chocolate chips and coconut condensed milk. Skip the butter or use a plant-based alternative.
- Chocolate Peppermint Fudge: Swap out half the white chocolate chips for dark or milk chocolate chips for a richer flavor.
- Seasonal Twist: Add crushed holiday sprinkles or edible glitter on top for a unique festive look.
- Nutty Fudge: Mix in chopped nuts like almonds or pistachios for extra crunch.
I once tried adding a layer of crushed Oreos between the white and red fudge layers – it was a huge hit with my family! Feel free to experiment and make this recipe your own.
Serving & Storage Suggestions
Serve this peppermint swirl fudge chilled or at room temperature for the best texture. Arrange the squares on a festive platter or package them in decorative holiday boxes for gifting! Pair with hot cocoa or coffee for the ultimate holiday indulgence.
To store, place the fudge in an airtight container and keep it in the refrigerator for up to 2 weeks. For longer storage, freeze the fudge for up to 3 months. To thaw, let it sit at room temperature for about 20 minutes before serving.
Tip: The flavors of the fudge deepen over time, so it’s even better the day after it’s made!
Nutritional Information & Benefits
This peppermint swirl fudge is a treat to savor, but it’s worth noting it’s a rich indulgence. Here’s the approximate nutritional breakdown per square (based on 16 pieces):
- Calories: 120
- Fat: 6g
- Sugar: 14g
- Protein: 1g
The peppermint extract aids in digestion and can provide a refreshing lift, while the candy canes add a festive crunch that’s impossible to resist. Remember to enjoy this holiday treat in moderation!
Conclusion
If you’re looking for a holiday recipe that’s fun, festive, and downright delicious, this peppermint swirl fudge has your name on it. It’s easy to make, visually stunning, and brings the classic Christmas flavors to life. Plus, you can customize it to suit your taste and dietary needs.
This recipe has become a staple in my holiday baking, and I hope it does for you too! I’d love to hear how you personalize your fudge or any creative twists you try. Feel free to leave a comment below or share your creations – let’s spread the holiday cheer together!
So grab your mixing bowl, get your candy canes ready, and let’s make some magic. Happy holidays!
FAQs
Can I use milk chocolate instead of white chocolate?
Absolutely! Milk chocolate will give the fudge a richer, creamier taste, but it will change the color of the swirls. For the classic peppermint swirl look, stick to white chocolate.
What’s the best way to crush candy canes?
Place them in a resealable plastic bag and use a rolling pin or mallet to crush them. This keeps everything contained and mess-free!
How long does the fudge need to chill?
The fudge needs at least 2 hours in the refrigerator to set properly. For best results, let it chill overnight.
Can I make this fudge ahead of time?
Yes! This fudge stores beautifully and can be made up to two weeks in advance. Just keep it in an airtight container in the fridge.
Can I use natural food coloring?
Yes, natural food coloring works well, but the color might not be as vibrant as traditional food coloring. It’s a great option for a more natural treat!
Pin This Recipe!
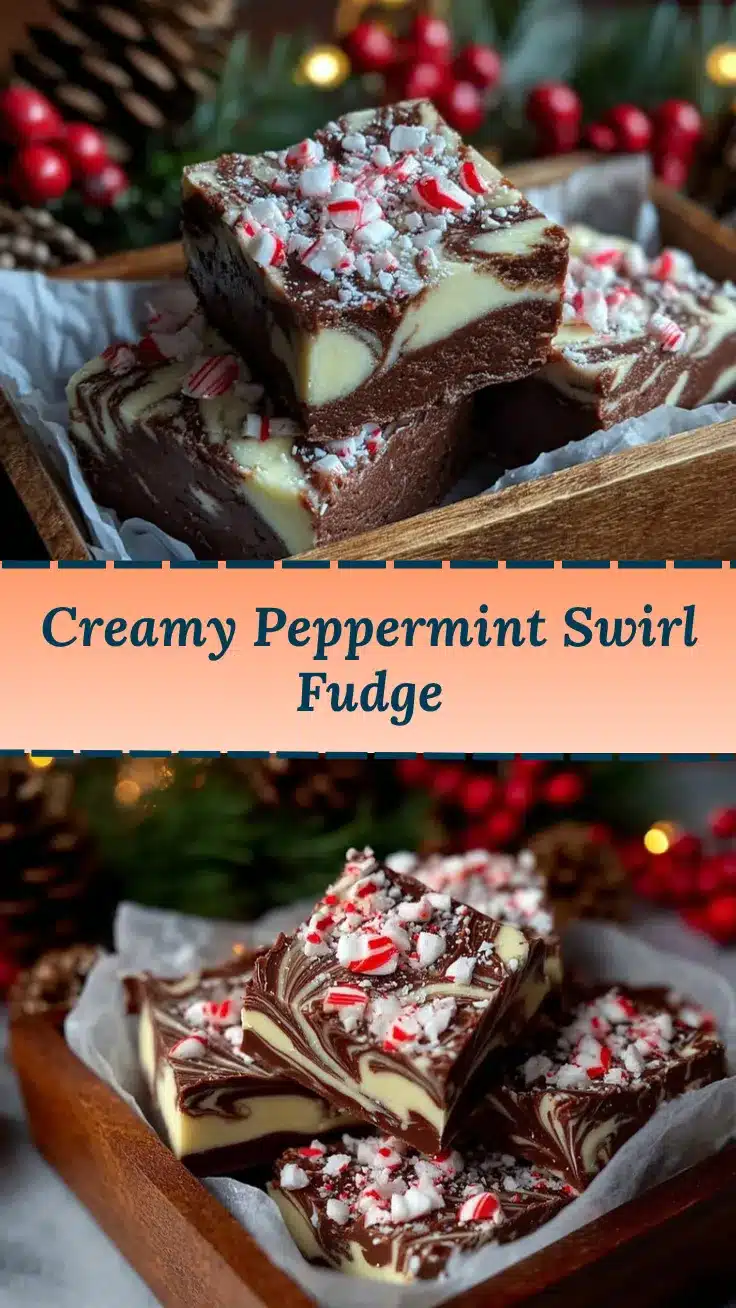
Irresistible Peppermint Swirl Fudge Recipe Perfect for Christmas

This creamy, dreamy peppermint swirl fudge is packed with festive flavors and is perfect for holiday parties, gifting, or indulging in a sweet treat.
- Prep Time: 10 minutes
- Cook Time: 2 minutes
- Total Time: 2 hours 12 minutes
- Yield: 16 servings 1x
- Category: Dessert
- Cuisine: American
Ingredients
- 1 can (14 oz) sweetened condensed milk
- 2 cups white chocolate chips
- 1 teaspoon peppermint extract
- A few drops red food coloring
- 2 tablespoons butter
- Pinch of salt
- Crushed candy canes for topping
Instructions
- Line an 8×8-inch baking pan with parchment paper, leaving some overhang on the sides for easy removal.
- In a microwave-safe bowl, combine white chocolate chips, sweetened condensed milk, and butter. Microwave in 30-second intervals, stirring well after each, until smooth and fully melted (about 1-2 minutes).
- Once the mixture is smooth, stir in peppermint extract and a pinch of salt.
- Pour half of the mixture into the prepared pan and spread it evenly using a spatula.
- Add a few drops of red food coloring to the remaining mixture and stir until it turns a vibrant red.
- Pour the red mixture over the white layer in the pan. Use a toothpick or skewer to create swirls by dragging it through the fudge to make a marbled pattern.
- Sprinkle the top with crushed candy canes for texture and visual appeal. Press them lightly to ensure they stick.
- Chill the fudge in the refrigerator for at least 2 hours, or until firm.
- Once set, lift the fudge out using the parchment paper overhang. Cut into squares and enjoy!
Notes
[‘Don’t overheat the chocolate to avoid scorching.’, ‘Use room temperature ingredients to prevent clumping.’, ‘Experiment with colors like green or a combination of red and green for extra festive swirls.’, ‘If the fudge doesn’t set properly, pop it in the freezer for 30 minutes.’]
Nutrition
- Serving Size: 1 square
- Calories: 120
- Sugar: 14
- Fat: 6
- Protein: 1
Keywords: peppermint fudge, holiday dessert, Christmas treat, easy fudge recipe, no-bake dessert



