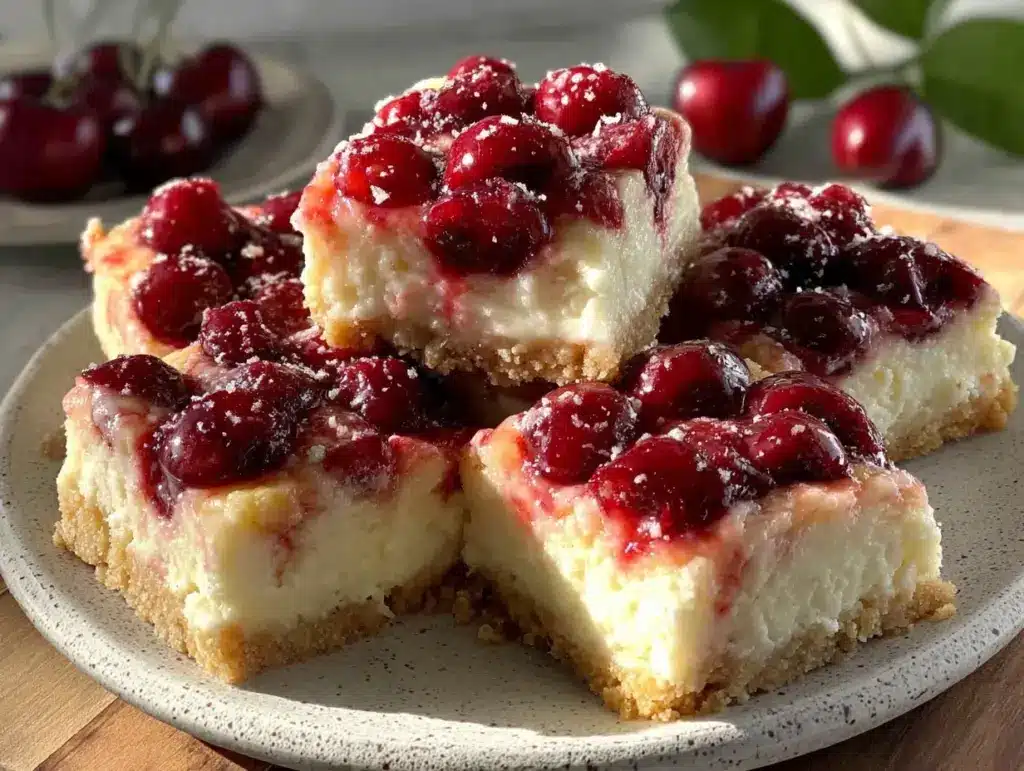
Let me tell you, the scent of buttery crust mingling with tangy cream cheese and luscious cherries wafting from my oven is enough to make anyone’s mouth water. The first time I baked these creamy cherry cheesecake bars with glazed cherry topping, I was instantly hooked. It was one of those rare moments where you pause, take a deep breath, and just smile because you know you’re onto something truly special. Honestly, the way the smooth cheesecake layer melts into the crisp crust, topped with that jewel-like cherry glaze, feels like a warm hug on a chilly afternoon.
Years ago, when I was knee-high to a grasshopper, my grandma used to make cherry desserts that everyone in the family raved about. Somehow, this recipe rekindles that cozy memory but with a fresh, homemade twist that’s dangerously easy to whip up. I stumbled upon this gem during a rainy weekend baking binge, trying to recreate that nostalgic cherry flavor without the fuss, and boy, did it deliver. My family couldn’t stop sneaking these bars off the cooling rack (and I can’t really blame them).
You know what makes these cherry cheesecake bars perfect? They’re the kind of treat you want to bring to potlucks, share with friends over coffee, or tuck away for a sweet moment to yourself. Brighten up your Pinterest cookie board with these—because trust me, you’re going to want to bookmark this one. After testing the recipe multiple times (in the name of research, of course), it’s become a staple for family gatherings, gifting, and all those moments that call for pure, nostalgic comfort.
Why You’ll Love This Creamy Cherry Cheesecake Bars Recipe
Let’s face it: not all cheesecake bars are created equal. After countless trials, tweaks, and taste tests, I can honestly say this recipe stands out for a bunch of reasons you’ll appreciate:
- Quick & Easy: Comes together in under an hour, perfect for busy weeknights or last-minute cravings.
- Simple Ingredients: No fancy grocery trips needed; you likely already have everything in your kitchen pantry.
- Perfect for Any Occasion: Whether it’s brunch, potlucks, or cozy dinners, these bars fit right in.
- Crowd-Pleaser: Always gets rave reviews from kids and adults alike—people can’t get enough.
- Unbelievably Delicious: The creamy texture paired with the bright cherry topping is next-level comfort food.
What makes these bars different? The secret’s in the silky cream cheese filling, whipped just enough to be smooth but still rich, and the perfectly balanced cherry glaze that isn’t overly sweet or sticky. You know those cheesecakes that feel too dense or dry? Not this one. Plus, the buttery, crumbly crust adds just the right amount of crunch to every bite.
This recipe is the kind that makes you close your eyes after the first bite, savoring every nuance of flavor. It’s comfort food reimagined—lighter, faster, but still with that soul-soothing satisfaction. Perfect for impressing guests without stress or turning a simple meal into something memorable.
What Ingredients You Will Need for Creamy Cherry Cheesecake Bars
This recipe uses simple, wholesome ingredients to deliver bold flavor and satisfying texture without the fuss. Most are pantry staples, with a few fresh touches for that authentic cherry pop.
- For the Crust:
- 1 ½ cups (150g) graham cracker crumbs (I prefer Honey Maid for best texture)
- ⅓ cup (75g) unsalted butter, melted (adds richness and helps bind)
- 2 tablespoons granulated sugar
- For the Cream Cheese Filling:
- 16 oz (450g) cream cheese, softened (room temperature is key for smoothness)
- ⅔ cup (135g) granulated sugar
- 2 large eggs, room temperature
- 1 teaspoon vanilla extract (pure extract makes a difference!)
- 2 tablespoons all-purpose flour (helps with firmness without heaviness)
- ½ cup (120ml) sour cream (adds tanginess and creamy texture)
- For the Glazed Cherry Topping:
- 1 ½ cups (240g) fresh or frozen cherries, pitted
- ⅓ cup (65g) granulated sugar
- 1 tablespoon lemon juice (brightens up the cherry flavor)
- 1 tablespoon cornstarch mixed with 2 tablespoons water (for thickening)
- Optional: ½ teaspoon almond extract for a subtle twist
Substitution tips: Use gluten-free graham cracker crumbs or almond flour for a gluten-free crust. Swap sour cream with dairy-free coconut yogurt if needed. For a low-sugar option, try using a natural sweetener like erythritol, but adjust sweetness to taste.
Equipment Needed
- 9×9 inch (23×23 cm) baking pan – I like using an aluminum foil-lined pan for easy removal and cleanup.
- Mixing bowls – one large for the cream cheese filling and a smaller one for the cherry glaze.
- Electric mixer or stand mixer – helps achieve that silky smooth cheesecake texture without lumps.
- Measuring cups and spoons – precision is your friend here.
- Spatula – for scraping down the sides and folding ingredients gently.
- Saucepan – to cook and thicken the cherry glaze.
- Wire rack – to cool the bars evenly after baking.
If you don’t have a stand mixer, a handheld electric mixer works just fine. For budget-friendly options, basic silicone spatulas and metal pans from your local store will do wonders. Just make sure to grease or line your pan well to prevent sticking. Keeping your cream cheese softened ahead of time makes mixing much easier, so plan for that!
Preparation Method for Creamy Cherry Cheesecake Bars
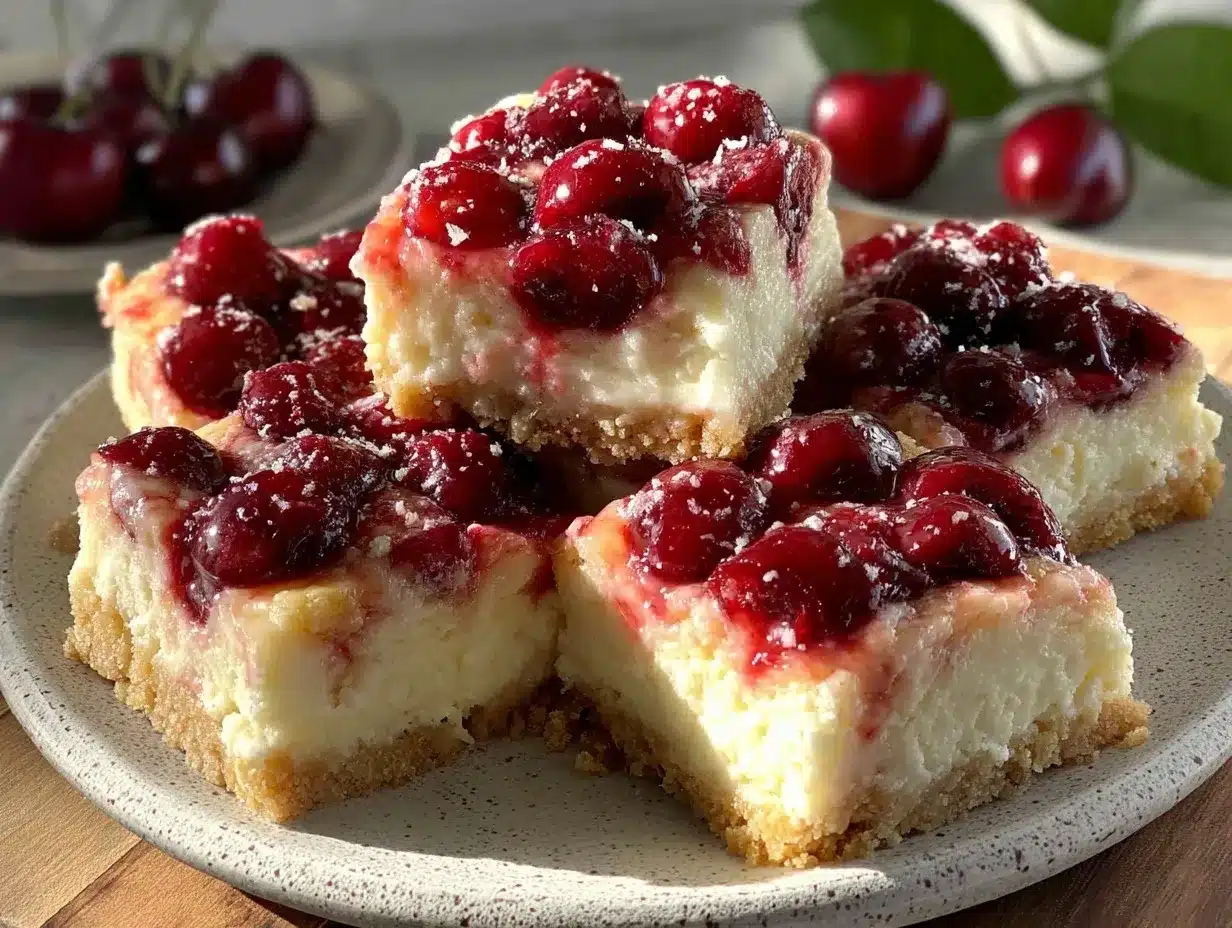
- Preheat your oven to 325°F (163°C). Line a 9×9 inch baking pan with foil, leaving an overhang on two sides for easy removal later. Lightly grease the foil.
- Prepare the crust: In a medium bowl, combine 1 ½ cups graham cracker crumbs, ⅓ cup melted unsalted butter, and 2 tablespoons sugar. Mix until the crumbs are evenly coated and resemble wet sand.
- Press the crust into the bottom of the prepared pan, creating an even layer. Use the bottom of a measuring cup to pack it tightly. Bake for 10 minutes to set, then remove from the oven and let it cool slightly.
- Make the cream cheese filling: In a large bowl, beat 16 oz softened cream cheese with ⅔ cup sugar until smooth and creamy, about 2-3 minutes. Avoid overbeating to prevent cracks.
- Add eggs one at a time, mixing on low speed after each addition. Stir in 1 teaspoon vanilla extract and 2 tablespoons flour until just combined.
- Fold in ½ cup sour cream gently with a spatula until smooth. This keeps the filling luscious and prevents it from drying out.
- Pour filling over the cooled crust and smooth the top with an offset spatula.
- Bake the cheesecake bars, or until the edges are set but the center still jiggles slightly when you gently shake the pan. This ensures a creamy center rather than a dry one.
- Prepare the cherry glaze: While the cheesecake bakes, combine 1 ½ cups cherries, ⅓ cup sugar, and 1 tablespoon lemon juice in a small saucepan over medium heat. Cook until the cherries release juice and the sugar dissolves, about 5 minutes.
- Mix the cornstarch slurry and stir into the cherry mixture. Cook for another 1-2 minutes until thickened. Remove from heat and stir in almond extract if using.
- Cool the cherry glaze before spreading it evenly over the warm cheesecake bars.
- Chill the bars to set completely.
- Use the foil overhang Serve chilled for best texture and flavor.
Pro tip: To avoid cracks in your cheesecake layer, don’t open the oven door during baking and cool the bars gradually. If you want a smoother cherry glaze, gently mash the cherries before cooking for a jam-like texture.
Cooking Tips & Techniques for Perfect Creamy Cherry Cheesecake Bars
Getting that creamy texture just right can be tricky, but here are some lessons learned from my kitchen mishaps and happy accidents:
- Softened cream cheese is non-negotiable. Cold cream cheese lumps up and ruins the smoothness. Let it sit at room temp for at least 30 minutes before mixing.
- Don’t overbeat the filling. Too much air causes cracks and a spongy texture. Beat just until smooth and combine ingredients gently.
- Use room temperature eggs. They incorporate better, preventing curdling or lumps in the batter.
- Press the crust firmly. A dense base keeps bars from crumbling when cut and adds satisfying crunch.
- Don’t skip the sour cream. It balances the sweetness and keeps the filling moist for days.
- Cook the cherry glaze on medium heat. Too hot, and the cherries break down too much; too low, and it won’t thicken properly.
- Chill the bars overnight. This step is key for clean slices and flavor melding. Patience pays off!
Trust me, these tips come from several kitchen experiments where I learned what works (and what doesn’t). Timing is everything—multitask by prepping the cherry glaze while the bars bake to save time.
Variations & Adaptations for Your Cherry Cheesecake Bars
Feeling adventurous or need to tweak for dietary needs? Here are some tried-and-true variations I’ve played with:
- Seasonal Swap: Substitute cherries with fresh blueberries, raspberries, or sliced strawberries for a fresh twist in summer.
- Gluten-Free: Use almond flour or gluten-free graham cracker crumbs for a crust that everyone can enjoy.
- Dairy-Free Version: Replace cream cheese and sour cream with dairy-free cream cheese alternatives and coconut yogurt. The texture changes slightly but still delicious.
- Chocolate Cherry: Mix ¼ cup cocoa powder into the crust for a rich chocolate base that pairs beautifully with cherries.
- Spiced Cherry: Add a pinch of cinnamon or cardamom to the cherry glaze for warm, cozy flavors.
One personal favorite is swirling a bit of homemade cherry jam into the cream cheese layer before baking—it creates a surprise burst of flavor inside each bar. Feel free to get creative with your toppings or crust—this recipe welcomes your personal touch!
Serving & Storage Suggestions for Creamy Cherry Cheesecake Bars
These bars are best served chilled, right from the fridge, to keep that creamy texture intact. Cut them into neat squares and serve on a pretty platter to impress your guests. Pair with a cup of strong coffee or a glass of dessert wine for an indulgent treat.
If you want to get fancy, add a dollop of whipped cream or a sprinkle of toasted almonds for extra crunch. These bars also make a fantastic addition to brunch spreads or afternoon tea.
Store leftover bars in an airtight container in the refrigerator for up to 5 days. They actually taste better the next day as the flavors meld beautifully. For longer storage, freeze the bars individually wrapped for up to 3 months. Thaw in the fridge overnight before serving.
Reheat is not recommended as it changes the texture, but if you must, let them sit at room temperature for 20 minutes to soften slightly. The cherry glaze keeps its shine and flavor for days, making these bars a convenient make-ahead dessert.
Nutritional Information & Benefits
Each creamy cherry cheesecake bar (based on 12 servings) provides approximately:
| Calories | Fat | Carbohydrates | Protein |
|---|---|---|---|
| 280 kcal | 18g | 25g | 5g |
Key ingredients like cream cheese and sour cream offer protein and calcium, while cherries bring antioxidants and vitamin C to the party. This recipe isn’t low-calorie, but it balances indulgence with wholesome ingredients and no artificial additives.
For those watching carbs, swapping the crust for almond flour reduces sugar and gluten content. The cherries add natural sweetness, making it a healthier option compared to overly processed desserts. Always consider portion control, but honestly, a small bar feels like a well-deserved treat!
Conclusion
These creamy cherry cheesecake bars with glazed cherry topping are more than just a dessert—they’re a slice of joy, nostalgia, and homemade love. Whether you’re a seasoned baker or a kitchen newbie, this recipe is approachable, rewarding, and downright delicious. You can easily customize it to suit your taste buds or dietary needs, making it a versatile addition to your recipe box.
I love how these bars bring people together, sparking smiles and happy memories with every bite. Don’t be shy—try them out, share your tweaks in the comments, and spread the cherry cheesecake happiness. You’re going to want to make these again and again!
FAQs about Creamy Cherry Cheesecake Bars with Glazed Cherry Topping
Can I use canned cherries instead of fresh or frozen?
Yes, but drain them well to avoid a watery topping. You might want to reduce added sugar since canned cherries can be sweetened.
How do I prevent cracks in the cheesecake layer?
Use room temperature ingredients, don’t overbeat, and avoid sudden temperature changes by not opening the oven door during baking.
Can I make these bars ahead of time?
Absolutely! They actually taste better after chilling overnight. Just keep them refrigerated until ready to serve.
What’s the best way to cut cheesecake bars cleanly?
Run a sharp knife under hot water, dry it, and slice with a smooth motion. Wipe the knife between cuts for neat edges.
Are these bars freezer-friendly?
Yes, wrap individual bars tightly and freeze for up to 3 months. Thaw overnight in the fridge before serving.
Pin This Recipe!
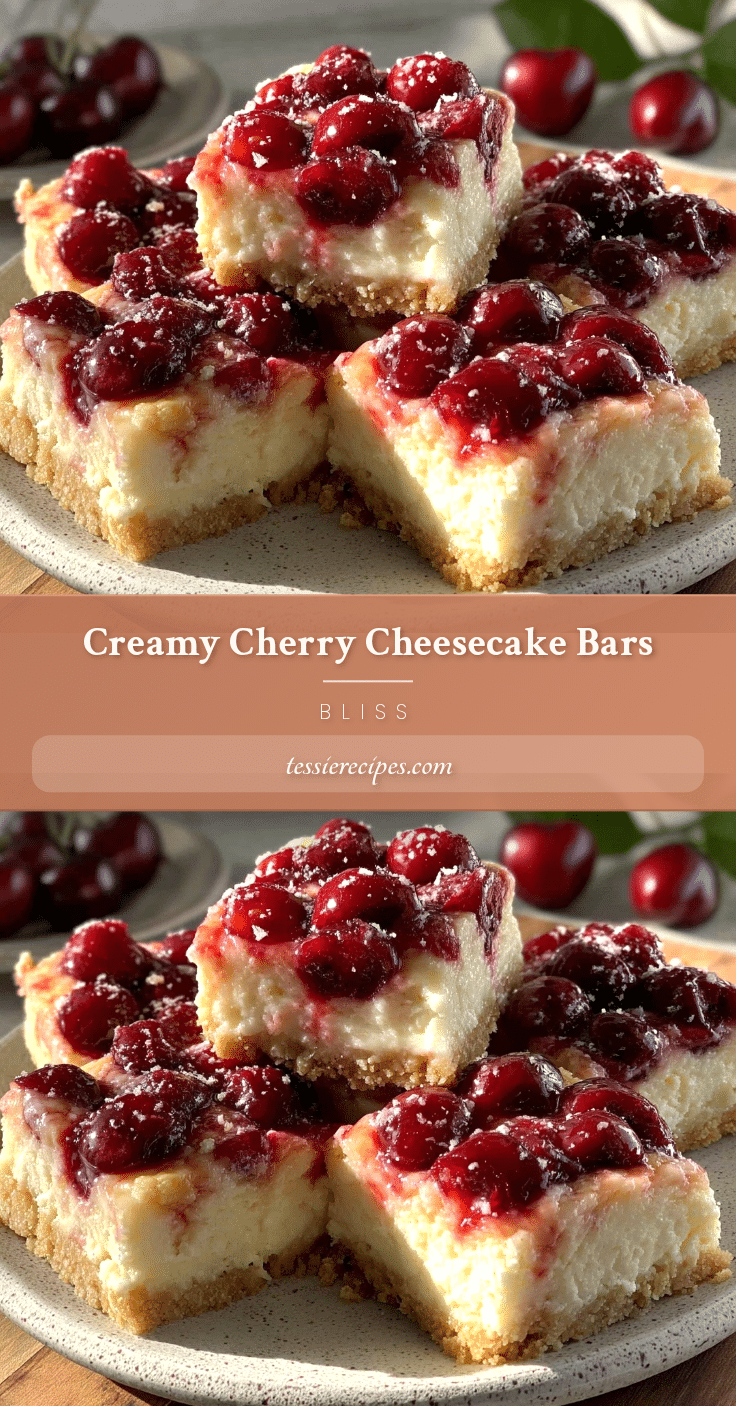
Creamy Cherry Cheesecake Bars Easy Homemade Recipe with Glazed Topping

These creamy cherry cheesecake bars feature a buttery graham cracker crust, a smooth cream cheese filling, and a bright glazed cherry topping, perfect for any occasion and easy to make.
- Prep Time: 15 minutes
- Cook Time: 50 minutes
- Total Time: 3 hours 5 minutes
- Yield: 9 to 12 servings 1x
- Category: Dessert
- Cuisine: American
Ingredients
- 1 ½ cups (150g) graham cracker crumbs
- ⅓ cup (75g) unsalted butter, melted
- 2 tablespoons granulated sugar
- 16 oz (450g) cream cheese, softened
- ⅔ cup (135g) granulated sugar
- 2 large eggs, room temperature
- 1 teaspoon vanilla extract
- 2 tablespoons all-purpose flour
- ½ cup (120ml) sour cream
- 1 ½ cups (240g) fresh or frozen cherries, pitted
- ⅓ cup (65g) granulated sugar
- 1 tablespoon lemon juice
- 1 tablespoon cornstarch mixed with 2 tablespoons water
- Optional: ½ teaspoon almond extract
Instructions
- Preheat your oven to 325°F (163°C). Line a 9×9 inch baking pan with foil, leaving an overhang on two sides for easy removal later. Lightly grease the foil.
- In a medium bowl, combine graham cracker crumbs, melted unsalted butter, and sugar. Mix until the crumbs are evenly coated and resemble wet sand.
- Press the crust firmly into the bottom of the prepared pan, creating an even layer. Use the bottom of a measuring cup to pack it tightly. Bake for 10 minutes to set, then remove from the oven and let it cool slightly.
- In a large bowl, beat softened cream cheese with sugar until smooth and creamy, about 2-3 minutes. Avoid overbeating to prevent cracks.
- Add eggs one at a time, mixing on low speed after each addition. Stir in vanilla extract and flour until just combined.
- Fold in sour cream gently with a spatula until smooth.
- Pour filling over the cooled crust and smooth the top with an offset spatula.
- Bake the cheesecake bars for 35-40 minutes, or until the edges are set but the center still jiggles slightly when you gently shake the pan.
- While the cheesecake bakes, combine cherries, sugar, and lemon juice in a small saucepan over medium heat. Cook until the cherries release juice and the sugar dissolves, about 5 minutes.
- Mix the cornstarch slurry and stir into the cherry mixture. Cook for another 1-2 minutes until thickened. Remove from heat and stir in almond extract if using.
- Cool the cherry glaze slightly before spreading it evenly over the warm cheesecake bars.
- Chill the bars in the refrigerator for at least 3 hours or overnight to set completely.
- Use the foil overhang to lift the bars from the pan, then cut into 9 or 12 squares. Serve chilled for best texture and flavor.
Notes
Use softened cream cheese and room temperature eggs to avoid cracks. Do not overbeat the filling. Press crust firmly for a crunchy base. Chill bars overnight for best texture and flavor. For a smoother cherry glaze, mash cherries before cooking. Substitute gluten-free or dairy-free ingredients as needed.
Nutrition
- Serving Size: 1 bar (if cut into 1
- Calories: 280
- Fat: 18
- Carbohydrates: 25
- Protein: 5
Keywords: cherry cheesecake bars, creamy cheesecake bars, cherry dessert, glazed cherry topping, easy cheesecake bars, homemade cheesecake bars



