
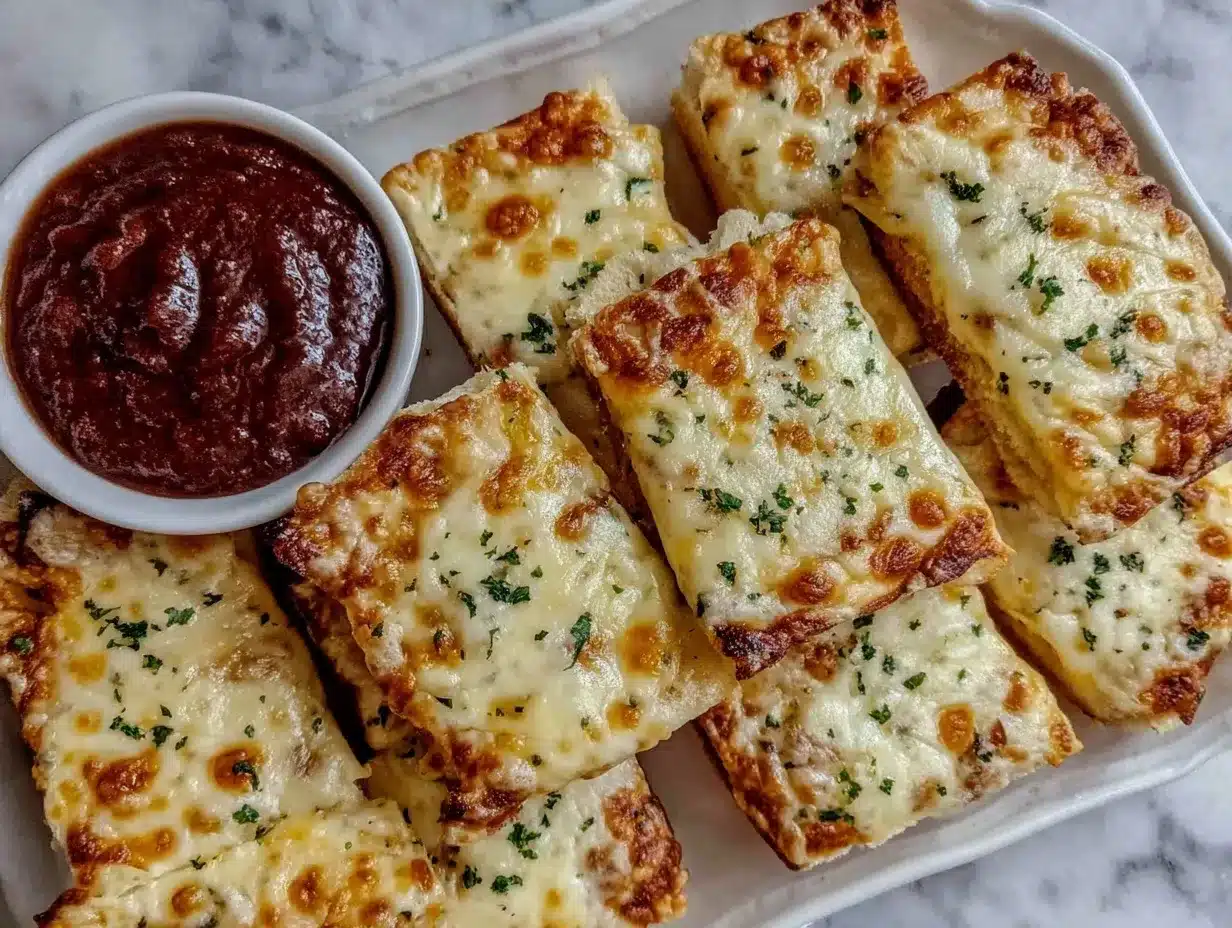
There’s nothing quite like the irresistible crunch of crispy cheese sticks paired with a gooey, melted topping that pulls apart with every bite. These cheese sticks are the ultimate snack for any occasion—whether you’re hosting game night, treating yourself to a lazy weekend, or whipping up something special for friends and family. Trust me, once you try this recipe, there’s no going back to store-bought versions!
I first made these crispy cheese sticks by accident during a movie night when I was craving something cheesy and comforting but didn’t want the usual nachos. With just a few pantry staples and a sprinkle of creativity, I ended up with these golden-brown beauties that disappeared before the popcorn even had a chance. They’ve been a favorite ever since, and I guarantee they’ll be yours too!
So grab your ingredients, preheat the oven, and let’s make some magic happen in the kitchen. These crispy cheese sticks with gooey melted topping are about to become your favorite snack!
Why You’ll Love This Recipe
- Quick & Easy: These cheese sticks come together in just 30 minutes, making them perfect for last-minute cravings.
- Simple Ingredients: You likely have everything you need already in your fridge and pantry—no fancy shopping required.
- Perfect for Any Occasion: Whether it’s a party, a Netflix binge, or a cozy night in, these cheese sticks fit the bill.
- Crowd-Pleaser: Kids, adults, picky eaters—everyone loves these cheesy, crispy snacks.
- Unbelievably Delicious: The contrast between the crunchy coating and the gooey melted cheese is absolute heaven.
What makes these crispy cheese sticks stand out is the extra touch of a gooey melted topping. Instead of the cheese being completely encased inside, it oozes out a little, adding that extra layer of indulgence that makes them irresistible. Plus, they’re baked, not fried, so you can enjoy all the flavor without the grease!
What Ingredients You Will Need
This recipe uses simple, wholesome ingredients that deliver bold flavors and a satisfying texture. Don’t worry—you won’t need anything complicated!
- Cheese: Mozzarella sticks work best for that gooey stretch, but you can also use cheddar, pepper jack, or a mix for added flavor.
- Eggs: Two large eggs, beaten to help the breadcrumbs stick.
- All-purpose flour: Ensures the coating adheres to the cheese sticks.
- Bread crumbs: Use panko for extra crunch, or classic breadcrumbs for a smoother finish.
- Parmesan cheese: Finely grated for that savory kick in the coating.
- Garlic powder: Adds a subtle touch of flavor to the breadcrumbs.
- Paprika: For a hint of smoky spice.
- Salt and pepper: Seasoning is the key to making these sticks shine!
- Cooking spray: Helps achieve that golden-brown crust without frying.
Feel free to experiment with the cheese selection or add your favorite spices to the breadcrumb mix for a personalized twist. For a gluten-free version, substitute the breadcrumbs with crushed gluten-free crackers or almond flour.
Equipment Needed
You don’t need a fancy kitchen setup to make these crispy cheese sticks. Here’s what you’ll need:
- Baking sheet: A standard baking sheet works great, but a nonstick or silicone-lined one ensures easy cleanup.
- Three bowls: For flour, eggs, and breadcrumbs—keep them separate for a clean coating process.
- Wire rack: Optional, but a wire rack on top of the baking sheet ensures even crispiness all around.
- Tongs: Perfect for dipping the cheese sticks without getting messy.
If you don’t have a wire rack, you can flip the cheese sticks halfway through baking to ensure that both sides get crispy. Trust me, it’s worth the effort!
How to Make Crispy Cheese Sticks with Gooey Melted Topping
- Preheat your oven: Set your oven to 400°F (200°C) and line a baking sheet with parchment paper or a silicone baking mat.
- Prepare the cheese sticks: Cut your mozzarella or cheese into sticks, about 3-4 inches long and ½-inch thick.
- Set up your coating station: In one bowl, place the flour. In the second bowl, beat the eggs until fully mixed. In the third bowl, combine breadcrumbs, grated Parmesan, garlic powder, paprika, salt, and pepper.
- Coat the cheese sticks: Dip each cheese stick into the flour, making sure it’s fully coated. Shake off excess flour, then dip into the beaten egg. Finally, roll it in the breadcrumb mixture, pressing gently to ensure the coating sticks.
- Double coat for extra crunch: Repeat the egg and breadcrumb step for an extra-thick, crispy layer.
- Arrange on the baking sheet: Place the coated cheese sticks on the prepared baking sheet, leaving space between each to ensure even baking.
- Spray with cooking oil: Lightly spray the cheese sticks with cooking oil to help them crisp up in the oven.
- Bake: Bake in the preheated oven for 10-12 minutes, or until the cheese sticks are golden-brown and the cheese starts to ooze out slightly.
- Cool slightly: Let the cheese sticks cool for 2-3 minutes before serving—they’ll be hot!
Pro tip: If you notice the cheese sticks melting too much, pop them in the freezer for 10-15 minutes before baking to help them hold their shape better.
Cooking Tips & Techniques
To make sure your crispy cheese sticks turn out perfectly every time, keep these tips in mind:
- Freeze before baking: For optimal results, freeze your coated cheese sticks for about 20 minutes. This helps them hold their shape and prevents the cheese from spilling out too much while baking.
- Don’t skip the double coating: The extra layer of egg and breadcrumbs ensures the sticks are extra crispy and gives a satisfying crunch.
- Use panko breadcrumbs: For that unbeatable crunch, panko breadcrumbs are the way to go.
- Season generously: Cheese sticks can be bland without seasoning—don’t be shy with the garlic powder, paprika, and Parmesan!
- Serve immediately: These sticks are best enjoyed hot and fresh, so plan to serve them right out of the oven.
One time, I tried skipping the freezing step and ended up with cheese puddles instead of sticks. Learn from my mistake—it’s worth the extra time!
Variations & Adaptations
One of the best things about this recipe is how customizable it is. Here are a few ideas to make it your own:
- Spicy Kick: Add cayenne pepper or chili flakes to the breadcrumb mixture for a fiery twist.
- Herb Infused: Mix dried basil, oregano, or parsley into the breadcrumbs for an herby flavor profile.
- Gluten-Free Option: Swap regular breadcrumbs for crushed gluten-free crackers or almond flour.
- Cheese Variety: Try using cheeses like gouda, brie, or Havarti for a unique flavor and texture.
If you’re feeling adventurous, try adding a little truffle oil to the breadcrumb mix—trust me, it’s a game-changer!
Serving & Storage Suggestions
These crispy cheese sticks are best served warm while the cheese is still gooey and melty. Arrange them on a platter with a few small bowls of dipping sauces like marinara, ranch, or honey mustard for extra flavor.
If you have leftovers (which is rare!), store them in an airtight container in the refrigerator for up to 3 days. To reheat, place them on a baking sheet in a preheated 375°F (190°C) oven for 5-7 minutes. Avoid microwaving, as it can make the coating soggy.
For a complete snack experience, pair these cheese sticks with a light salad or a refreshing glass of iced tea. They also make a great appetizer for larger meals or gatherings!
Nutritional Information & Benefits
Here’s a quick breakdown of the nutritional value for these crispy cheese sticks (per serving):
- Calories: Approximately 180-200
- Protein: 7-9g (thanks to the cheese!)
- Carbohydrates: 10-12g
- Fat: 12-15g
Cheese is a great source of calcium, which is essential for bone health, while the eggs provide an excellent dose of protein. For those following a low-carb diet, using almond flour and skipping the breadcrumbs can make this snack even more diet-friendly.
Conclusion
If you’re craving a snack that’s easy to prepare, deliciously cheesy, and perfect for sharing with friends, these crispy cheese sticks with gooey melted topping are just what you need. They’re a testament to how simple ingredients can create something truly special.
If you try this recipe, let me know how it turned out! Share your thoughts, your twists, or even your dipping sauce discoveries in the comments below. I’d love to hear your feedback and see how you make these cheese sticks shine!
Now, grab your ingredients, preheat your oven, and get ready to make a snack that’ll have everyone coming back for seconds!
FAQs
Can I use a different type of cheese?
Absolutely! Mozzarella is ideal for its stretchy texture, but you can experiment with cheddar, pepper jack, or even gouda for different flavors.
Can I fry these instead of baking them?
Yes, if you prefer a more traditional fried cheese stick, you can fry them in hot oil until golden brown. Just make sure the oil temperature is around 350°F (175°C).
What dipping sauces go best with these cheese sticks?
Marinara and ranch are classic choices, but honey mustard, barbecue sauce, or even a spicy sriracha mayo work wonderfully too!
Can I make these ahead of time?
Yes, you can prepare and freeze the coated cheese sticks ahead of time. Bake them straight from frozen, adding an extra 3-5 minutes to the cooking time.
How do I keep the cheese sticks from melting too much?
Freezing the cheese sticks for 20 minutes before baking helps them hold their shape and minimizes cheese leakage.
Pin This Recipe!

Crispy Cheese Sticks Recipe: Perfect Gooey Snack

These crispy cheese sticks with gooey melted topping are the ultimate snack for any occasion—perfect for game nights, lazy weekends, or gatherings with friends and family.
- Prep Time: 15 minutes
- Cook Time: 12 minutes
- Total Time: 27 minutes
- Yield: 4 servings 1x
- Category: Snack
- Cuisine: American
Ingredients
- Mozzarella sticks (or cheddar, pepper jack, or a mix)
- 2 large eggs, beaten
- All-purpose flour
- Panko breadcrumbs (or classic breadcrumbs)
- Parmesan cheese, finely grated
- Garlic powder
- Paprika
- Salt
- Pepper
- Cooking spray
Instructions
- Preheat your oven to 400°F (200°C) and line a baking sheet with parchment paper or a silicone baking mat.
- Cut your mozzarella or cheese into sticks, about 3-4 inches long and ½-inch thick.
- Set up your coating station: In one bowl, place the flour. In the second bowl, beat the eggs until fully mixed. In the third bowl, combine breadcrumbs, grated Parmesan, garlic powder, paprika, salt, and pepper.
- Dip each cheese stick into the flour, making sure it’s fully coated. Shake off excess flour, then dip into the beaten egg. Finally, roll it in the breadcrumb mixture, pressing gently to ensure the coating sticks.
- Repeat the egg and breadcrumb step for an extra-thick, crispy layer.
- Place the coated cheese sticks on the prepared baking sheet, leaving space between each to ensure even baking.
- Lightly spray the cheese sticks with cooking oil to help them crisp up in the oven.
- Bake in the preheated oven for 10-12 minutes, or until the cheese sticks are golden-brown and the cheese starts to ooze out slightly.
- Let the cheese sticks cool for 2-3 minutes before serving.
Notes
Freeze the coated cheese sticks for 20 minutes before baking to prevent excessive melting. Double coat the cheese sticks for extra crunch and use panko breadcrumbs for the best texture.
Nutrition
- Serving Size: 3-4 cheese sticks
- Calories: 190
- Sugar: 1
- Sodium: 300
- Fat: 13
- Saturated Fat: 7
- Carbohydrates: 11
- Fiber: 1
- Protein: 8
Keywords: cheese sticks, crispy cheese sticks, gooey snack, baked cheese sticks, easy snack recipe



