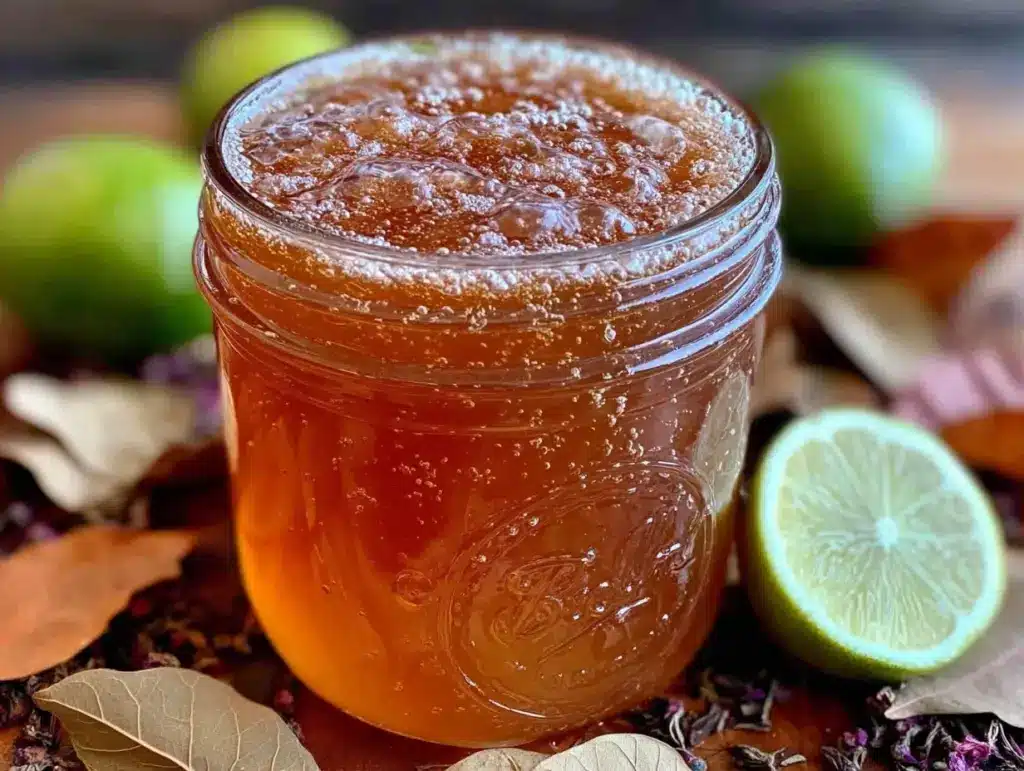
“You really need to try this kombucha,” my friend said over the phone, sounding more excited than I expected. Honestly, I was skeptical—fermenting tea at home felt like something only the super-patient or super-nerdy would do. But that tangy fizz she described kept ringing in my ears, especially on those sluggish afternoons when I crave something refreshing but healthier than soda.
So one evening, after a long day juggling work and dinner plans (and not much patience left), I pulled out some basic ingredients and gave it a shot. The first fermentation was a bit of a guessing game, with bubbles forming slower than I hoped and that telltale vinegar smell making me question my life choices. But as days passed, the sweet-sour magic kicked in — and honestly, I couldn’t stop tinkering with it for almost a whole week. What stuck with me most was how this simple process turned plain tea and sugar into a living, bubbling probiotic elixir. It was like tiny kitchen alchemy.
That first batch wasn’t perfect, but it was enough to make me realize kombucha brewing doesn’t have to be intimidating. This Easy Homemade Kombucha First Fermentation Guide breaks down all the fuss and mystery, helping you get those perfect results without the stress. You’ll find the rhythm, the smell, and the fizz that makes it all worth it—just as it did for me.
No need for fancy gadgets or exotic ingredients. Just a few simple steps, a little patience, and you’ll have your own fizzy, tangy kombucha that’s ready for flavoring or enjoying as is. It’s one of those little kitchen projects that feels grounding in a busy world, and who knows? It might just become your new favorite ritual.
Why You’ll Love This Recipe
Making your own kombucha at home is a game-changer, and this guide will have you brewing with confidence in no time. From personal experience and countless trials (and a few spills), I can say this recipe works whether you’re a total newbie or just looking for a straightforward refresher.
- Quick & Easy: The first fermentation takes about 7-10 days but requires minimal hands-on time, perfect for busy folks wanting a rewarding project.
- Simple Ingredients: Black or green tea, sugar, water, and a SCOBY—no complicated or hard-to-find items here.
- Perfect for Health Boosts: Kombucha is loaded with probiotics and antioxidants, making it a refreshing, gut-friendly drink.
- Crowd-Pleaser: This kombucha’s balance of sweet and tangy flavors is loved by both kombucha fans and newcomers alike.
- Unbelievably Delicious: The natural fizz and lightly vinegary bite will make you pause, close your eyes, and savor the complexity.
What sets this recipe apart is the focus on mastering the first fermentation stage—the foundation for all great kombucha. You’ll learn how to read the subtle signs that tell you when it’s ready and how to avoid common pitfalls like over-fermenting or mold. No fluff, just practical tips from someone who’s brewed enough batches to know what works.
This isn’t just kombucha—it’s your well-crafted, kitchen-made tonic that’s both comforting and invigorating. It’s like having a little bottled sunshine in your fridge, ready to brighten up any moment.
What Ingredients You Will Need
This recipe uses simple, wholesome ingredients to deliver bold flavor and that satisfying kombucha texture without any fuss. Most are pantry staples or easy to find at any grocery store.
- Water: 1 gallon (3.8 liters) of filtered or non-chlorinated water (chlorine can inhibit fermentation, so avoid tap if heavily chlorinated)
- Tea: 6-8 black tea bags or 2 tablespoons loose leaf black tea (you can swap green tea for a lighter flavor)
- Sugar: 1 cup (200 grams) granulated white sugar (this feeds the SCOBY and should not be substituted with honey or sugar alternatives during the first fermentation)
- SCOBY (Symbiotic Culture Of Bacteria and Yeast): 1 healthy SCOBY (look for a firm, gelatinous texture without discoloration—mine came from a friend who swore by Happy Kombucha cultures)
- Starter Tea: 2 cups (475 ml) unpasteurized, unflavored kombucha from a previous batch or store-bought raw kombucha (this lowers the pH and kick-starts fermentation)
Optional: For the tea, avoid flavored or herbal blends during the first fermentation; those can disrupt the SCOBY’s growth. Once you have your base, you can get creative in the second fermentation phase.
Equipment Needed
- 1-Gallon Glass Jar: For fermenting kombucha, glass is best to avoid unwanted chemical reactions. Avoid plastic or metal containers (except stainless steel lids)
- Coffee Filter or Clean Cloth: To cover the jar, allowing airflow while keeping dust and insects out
- Rubber Band: To secure the cover over the jar’s opening
- Measuring Cups and Spoons: For accuracy in sugar and tea measurements
- Non-metal Stirring Spoon: Wood or plastic to avoid reacting with the kombucha
- Funnel and Bottles: For transferring kombucha after fermentation (if you plan to flavor or bottle for carbonation)
If you don’t have a large glass jar, a food-grade ceramic crock can work too. I once improvised with a big mason jar when my usual fermenter was in the dishwasher—worked just fine! Just be sure your cover allows airflow but keeps debris out. And yes, a cheap rubber band from the dollar store is your kombucha’s best friend.
Preparation Method
- Boil the Water: Bring 1 gallon (3.8 liters) of filtered water to a rolling boil. This usually takes about 10 minutes on the stove. Boiling ensures any unwanted microbes are killed, giving your SCOBY the best chance to thrive.
- Steep the Tea: Remove from heat and add 6-8 black tea bags (or 2 tablespoons loose leaf). Let steep for 10-15 minutes until the tea is strong and dark. The tea’s tannins not only flavor the kombucha but also help nourish the SCOBY.
- Remove Tea Bags and Dissolve Sugar: Pull out the tea bags or strain loose leaves, then stir in 1 cup (200 grams) granulated white sugar until fully dissolved. This sweet tea is the SCOBY’s fuel, so don’t skip or reduce sugar in this step.
- Cool the Tea: Let the sweet tea cool to room temperature (around 70-75°F / 21-24°C). Hot tea can kill your SCOBY, so be patient—this step usually takes 1-2 hours.
- Transfer to Fermentation Jar: Pour the cooled sweet tea into your 1-gallon glass jar.
- Add Starter Tea and SCOBY: Gently add 2 cups (475 ml) of starter tea and carefully place your SCOBY on top. It may sink initially but usually floats back up within a day or two.
- Cover and Secure: Cover the jar with a coffee filter or clean cloth and secure it with a rubber band. This keeps the environment breathable but protected.
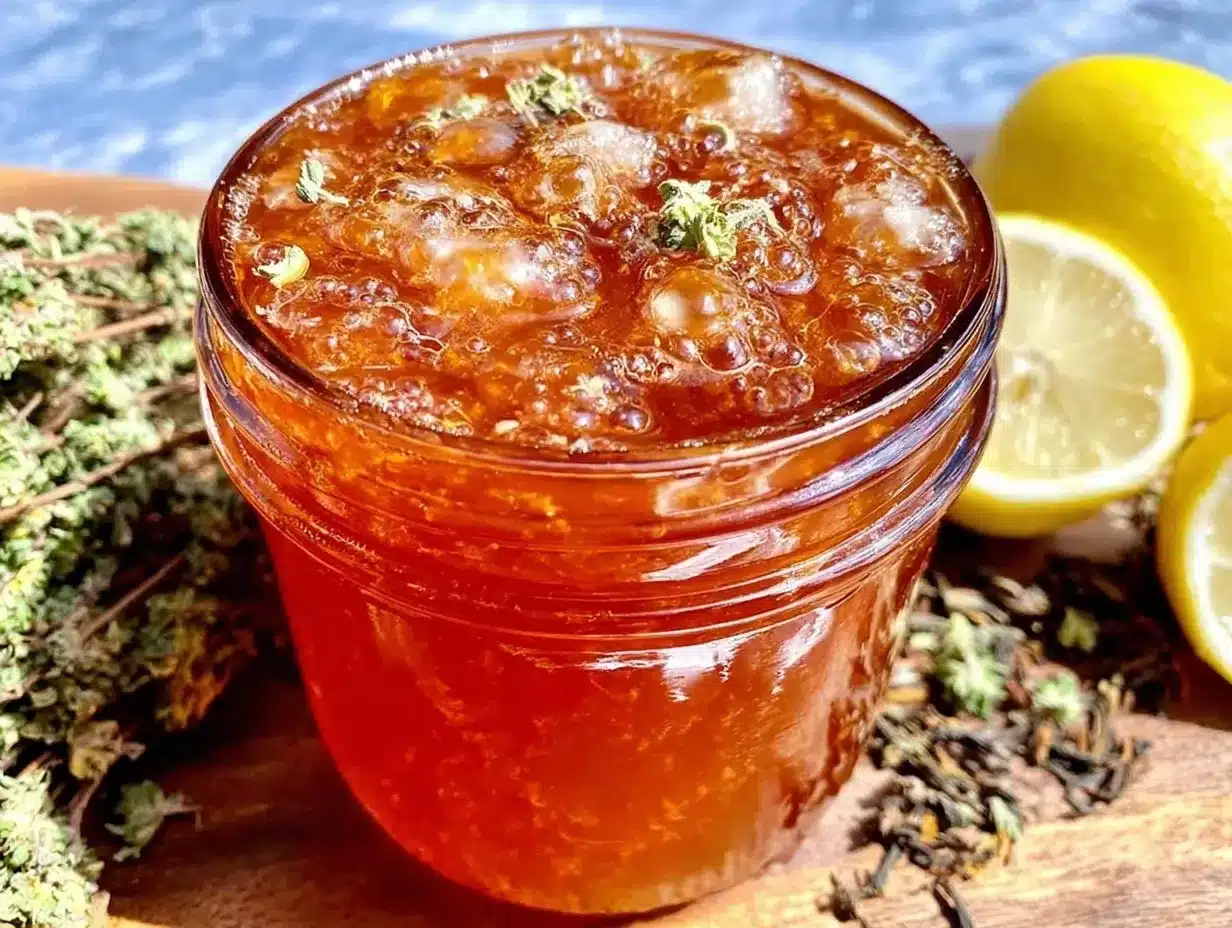
- Ferment: Place the jar in a warm, dark spot with good airflow, ideally between 70-85°F (21-29°C). Let it ferment for 7-10 days—start tasting around day 7. You’re looking for a balance of slight sweetness and tangy sharpness with bubbles forming.
- Check for Readiness: Your kombucha is done when it’s pleasantly tart but not overly vinegary. The SCOBY will have grown a new layer on top, which is a good sign. If it smells off or mold appears (fuzzy, colored spots), discard and start fresh.
Pro tip: Keep a clean journal or log with dates and tasting notes. After a few batches, you’ll get a feel for your ideal fermentation time and flavor.
Cooking Tips & Techniques
Brewing kombucha is a bit like watching a slow-moving science experiment, but with delicious rewards. Here’s what I’ve learned through trial, error, and, yes, a few batches that didn’t quite make the cut.
- Temperature Matters: Kombucha loves warmth, but not too hot. Anything below 70°F (21°C) slows fermentation to a crawl, while above 85°F (29°C) risks killing the SCOBY or creating off-flavors. I keep mine in a kitchen corner away from direct sunlight.
- Patience is Key: Resist the urge to rush. Taste-testing from day 7 helps you catch that perfect balance before it turns too vinegary. Remember, you can always ferment longer but can’t reverse over-fermentation.
- Cleanliness Counts: Always wash your hands and utensils before handling the SCOBY or kombucha. I once forgot and got a funky batch that smelled more like a science lab than a refreshing drink.
- Watch for Mold: Mold is rare but can happen with poor airflow or contaminated equipment. It looks fuzzy and colored, unlike the smooth, shiny SCOBY surface. If you spot it, toss the batch and start over.
- Use the Right Sweetener: Stick to plain granulated white sugar during first fermentation. Natural sweeteners like honey or agave can interfere with the SCOBY’s food source.
- Multitask Smartly: While your kombucha ferments, it’s a great time to prep easy meals or snacks like the spicy avocado chicken wrap for a quick bite once your brew is ready.
Variations & Adaptations
Once you’ve nailed the first fermentation, you can get creative with flavors and tweaks. Here are some ideas to make this kombucha recipe your own:
- Tea Variations: Swap black tea with green, white, or oolong tea for subtle flavor shifts. Just avoid herbal blends during first fermentation to keep your SCOBY happy.
- Flavor Boosters for Second Fermentation: Try adding fresh ginger, berries, or citrus slices after the initial brew for a sparkling twist. I love how ginger adds a spicy kick that pairs well with kombucha’s natural tang.
- Dietary Adaptations: For those avoiding sugar, keep in mind the SCOBY needs sugar to ferment properly. However, you can reduce sugar slightly or use organic cane sugar for a cleaner profile.
- Alternative Sweeteners: During the first fermentation, sugar alternatives aren’t recommended, but you can explore honey or maple syrup in the second fermentation for flavor notes.
- Fermentation Time Adjustments: In cooler climates, kombucha might take longer (up to 14 days). Use a heating mat or a warm spot to speed things up if you’re impatient like me.
One personal favorite is mixing in a splash of the kombucha from a previous batch to kick-start the next one and deepen the flavor complexity over time. It feels like passing down a little kitchen heirloom.
Serving & Storage Suggestions
Once your first fermentation kombucha is ready, it’s time to enjoy or prepare for the next steps. Here’s how I handle serving and storing:
- Serving Temperature: Kombucha tastes best chilled. Pour over ice or keep in the fridge for a refreshing fizz.
- Presentation: Serve in clear glasses to show off the bubbles and light amber color. Adding a slice of lemon or fresh mint leaves makes it extra inviting.
- Complementary Foods: Kombucha’s tangy brightness pairs beautifully with rich dishes like cream cheese stuffed mushrooms with bacon or even alongside light snacks like nuts and cheeses.
- Storage: Keep finished kombucha refrigerated in airtight bottles. It stays fresh for up to 3 weeks but tastes best within the first week for optimal fizz.
- Reheating: Avoid heating kombucha—it kills the probiotics. If you want a warm treat, try drinking it at room temperature.
- Flavor Development: Kombucha’s flavor evolves over time, so if you leave it longer, expect a sharper, more vinegar-like taste. Some people love it that way, but I prefer mine balanced and bubbly.
Nutritional Information & Benefits
A typical 8-ounce (240 ml) serving of homemade kombucha contains roughly 30-50 calories with minimal sugar left after fermentation. It’s naturally low in carbs and fat-free, making it a light, guilt-free refreshment.
Kombucha is prized for its probiotics—friendly bacteria that support digestion and gut health. The antioxidants from tea contribute to overall wellness, while small amounts of B vitamins and organic acids offer energy and detox support.
This recipe is naturally gluten-free and vegan, with no artificial additives or preservatives. If you have sensitivities, note it contains trace alcohol (usually under 0.5%) from fermentation, which is minimal but worth considering.
From my wellness perspective, having a glass of homemade kombucha feels like a small daily ritual that supports digestion and mood, especially on busy days when I need a little extra balance.
Conclusion
This Easy Homemade Kombucha First Fermentation Guide isn’t just a recipe—it’s the start of a fun, rewarding journey into fermentation. With simple ingredients and some patience, you can brew your own gut-friendly, tangy kombucha that’s ready for endless flavor twists.
Feel free to tweak fermentation times, tea types, and flavors to suit your tastes. I love how this process invites creativity without fuss, much like the comforting feel of a slow cooker meal (like the slow cooker creamy chicken taco soup)—it’s hands-off but satisfying.
Give it a try, and soon you’ll find yourself checking the jar daily, excited to taste your bubbling creation. Share your kombucha adventures or questions—I’m always eager to hear how your batches turn out.
Here’s to your first perfect fermentation and many fizzy sips ahead!
FAQs About Easy Homemade Kombucha First Fermentation
How long does the first fermentation take?
Typically 7-10 days at room temperature (70-85°F / 21-29°C). Start tasting around day 7 to find your preferred balance of sweetness and tang.
What if I see mold on my kombucha?
Mold looks fuzzy and colored (green, black, or white spots). If you spot mold, discard the batch and start over with fresh ingredients and a clean jar.
Can I use any type of tea for kombucha?
Stick to black, green, white, or oolong tea for the first fermentation. Herbal or flavored teas can disrupt the SCOBY’s growth and are better for second fermentation flavoring.
How do I store my SCOBY when not brewing?
Keep it in a jar with some starter tea at room temperature, covered with a breathable cloth. For longer storage, refrigerate in starter tea for up to a few weeks.
Can I reduce the sugar in kombucha?
Sugar is essential for fermentation. You can’t reduce it much during the first fermentation, but some sugar is consumed by the SCOBY, resulting in less sweetness in the final drink.
Pin This Recipe!
Easy Homemade Kombucha First Fermentation Guide for Perfect Results
This guide breaks down the first fermentation of homemade kombucha, helping you brew a tangy, fizzy probiotic drink with simple ingredients and minimal fuss.
- Prep Time: 15 minutes
- Cook Time: 10 minutes (boiling water) plus 7-10 days fermentation
- Total Time: 7-10 days
- Yield: Approximately 1 gallon (about 16 servings of 8 oz each) 1x
- Category: Beverage
- Cuisine: Fermented Drink
Ingredients
- 1 gallon (3.8 liters) filtered or non-chlorinated water
- 6–8 black tea bags or 2 tablespoons loose leaf black tea (green tea can be substituted)
- 1 cup (200 grams) granulated white sugar
- 1 healthy SCOBY (Symbiotic Culture Of Bacteria and Yeast)
- 2 cups (475 ml) unpasteurized, unflavored starter kombucha
Instructions
- Bring 1 gallon (3.8 liters) of filtered water to a rolling boil (about 10 minutes).
- Remove from heat and steep 6-8 black tea bags or 2 tablespoons loose leaf tea for 10-15 minutes until strong and dark.
- Remove tea bags or strain loose leaves, then stir in 1 cup (200 grams) granulated white sugar until fully dissolved.
- Let the sweet tea cool to room temperature (70-75°F / 21-24°C), which takes about 1-2 hours.
- Pour the cooled sweet tea into a 1-gallon glass fermentation jar.
- Add 2 cups (475 ml) of starter tea and gently place the SCOBY on top.
- Cover the jar with a coffee filter or clean cloth and secure with a rubber band.
- Place the jar in a warm, dark spot with good airflow (70-85°F / 21-29°C) and ferment for 7-10 days, tasting from day 7 for desired balance.
- Check for readiness when kombucha is pleasantly tart with bubbles and a new SCOBY layer forms. Discard if mold appears.
Notes
Avoid using flavored or herbal teas during the first fermentation as they can disrupt SCOBY growth. Maintain fermentation temperature between 70-85°F for best results. Taste starting day 7 to avoid over-fermentation. Discard batch if mold appears. Use only granulated white sugar during first fermentation. Keep equipment and hands clean to prevent contamination.
Nutrition
- Serving Size: 8 ounces (240 ml)
- Calories: 30508
- Sugar: 14
- Carbohydrates: 25
Keywords: kombucha, homemade kombucha, fermentation, probiotic drink, first fermentation, easy kombucha recipe, gut health, fermented tea



