
There I was, late one evening, fiddling with cookie dough while the house was quiet except for the soft hum of the fridge. It was graduation week, and honestly, I wasn’t feeling the usual excitement—more like the pressure of needing something special yet simple enough to whip up last-minute. The idea of making elegant chocolate-dipped diploma sugar cookies popped into my head after a quick glance at a stash of white chocolate and some leftover royal icing. I wasn’t convinced at first—how could these humble ingredients come together to make a treat that felt as important as the day itself?
But as the dough rolled out and those tiny diploma shapes took form, something clicked. The smell of vanilla and butter filled the kitchen, and dipping those delicate cookies into glossy melted chocolate felt oddly satisfying—like a little celebration in my hands. When the cookies cooled and hardened, I found myself staring at them, realizing they looked just right: elegant, festive, and packed with subtle sweetness that anyone would appreciate. It turned out these chocolate-dipped diploma sugar cookies weren’t just a quick fix; they became the star of the party, a little symbol of accomplishment you could actually bite into.
It’s funny how sometimes the best recipes come from those quiet, unplanned moments—when you’re just making something because you have to, not because you’re sure it’ll work. But these cookies stuck with me, and I keep coming back to this recipe every graduation season. They’re simple, classy, and honestly, a bit of comfort wrapped up in chocolate and sugar. If you’re looking for a homemade treat that feels both festive and personal, these elegant chocolate-dipped diploma sugar cookies might just be the answer.
Why You’ll Love This Recipe
- Quick & Easy: Comes together in about 45 minutes, so you’re not stuck in the kitchen all day before the celebration.
- Simple Ingredients: Uses pantry staples like butter, sugar, and flour—with just a touch of white chocolate and royal icing for that classy finish.
- Perfect for Graduation Parties: These diploma-shaped cookies add a charming touch to any grad event or even a congratulatory brunch.
- Crowd-Pleaser: Kids and adults alike love how the crisp cookie balances with the sweet, smooth chocolate dip.
- Unbelievably Delicious: The buttery sugar cookie base is tender but holds its shape, while the chocolate adds a silky contrast.
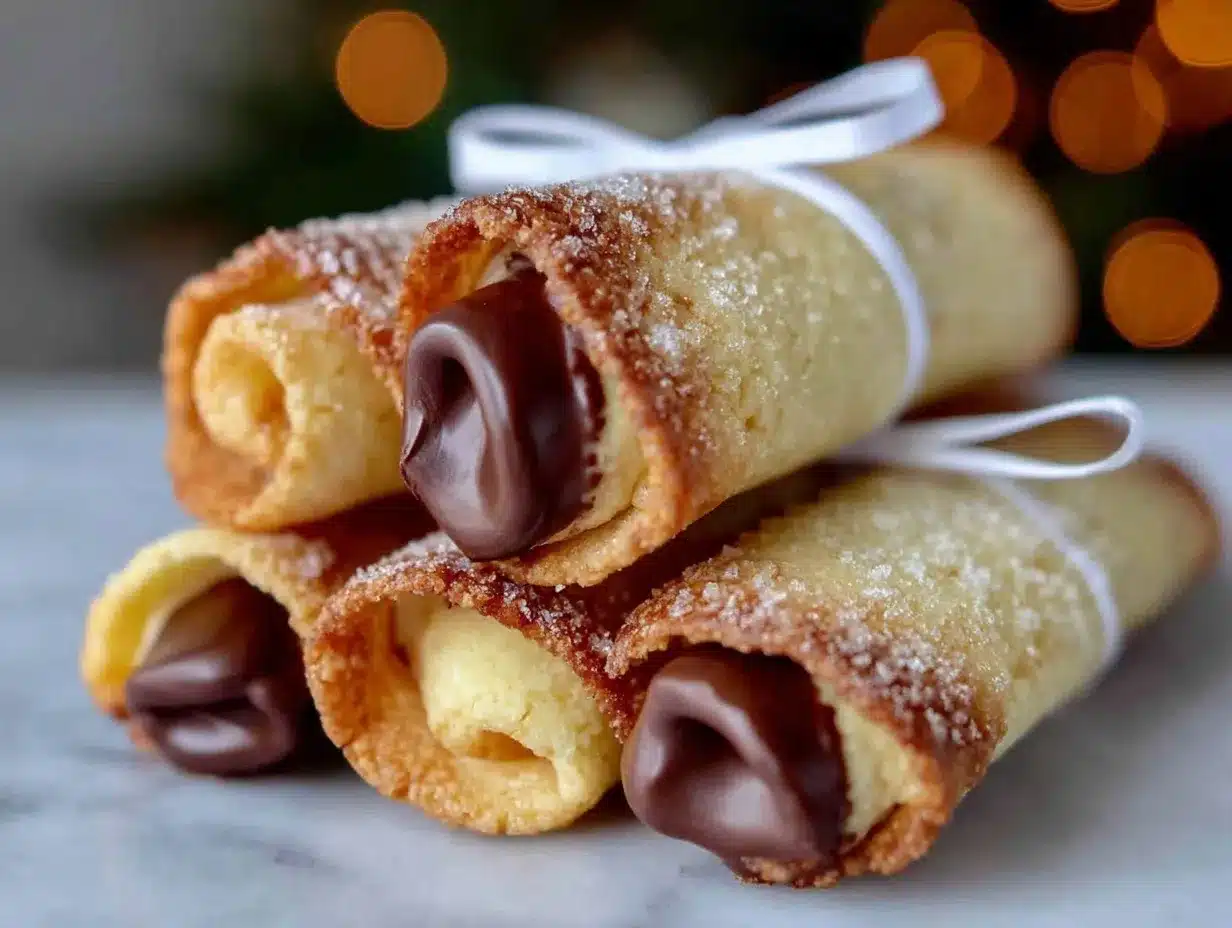
- Unique Design: The diploma shape with chocolate-dipped ends and icing details make them stand out from ordinary sugar cookies.
This recipe isn’t your run-of-the-mill sugar cookie. The trick lies in rolling the dough just right for crisp edges without toughness, and the chocolate dip adds that touch of sophistication. Plus, decorating with simple royal icing lines turns each cookie into a tiny diploma that’s both fun to make and impressive to serve. Honestly, it’s one of those recipes that feels like a celebration itself—no stress, just sweetness with style.
What Ingredients You Will Need
This recipe uses simple, wholesome ingredients to deliver bold flavor and satisfying texture without the fuss. Most of these are pantry staples, and you might even have them on hand already.
- All-purpose flour (2 ¾ cups / 345 grams) – Provides structure; sift for lighter dough.
- Baking powder (1 teaspoon) – Helps cookies rise just enough for a tender crumb.
- Salt (½ teaspoon) – Balances sweetness and enhances flavor.
- Unsalted butter (1 cup / 227 grams, softened) – For richness; I prefer Kerrygold for its creamy taste.
- Granulated sugar (1 ¼ cups / 250 grams) – Sweetens and helps with crisp edges.
- Large eggs (2, room temperature) – Binds the dough and adds moisture.
- Pure vanilla extract (1 ½ teaspoons) – Adds warmth and depth.
- White chocolate chips (1 cup / 175 grams) – For melting and dipping; Ghirardelli melts smoothly.
- Royal icing mix (or homemade with powdered sugar, meringue powder, and water) – For decorating the diplomas.
- Milk or cream (1-2 tablespoons) – To thin the royal icing if needed.
Substitution tips: You can swap all-purpose flour for a gluten-free blend in equal parts if needed. For a dairy-free version, use plant-based butter and coconut milk in place of cream. If you want to skip royal icing, a simple drizzle of melted white chocolate can work, but royal icing lets you add those classic diploma details.
Equipment Needed
- Mixing bowls: One large for dough, and a smaller one for icing.
- Electric mixer: Helpful but you can mix by hand if you’re patient.
- Rolling pin: Essential for evenly rolling out dough; I like adjustable rings for consistent thickness.
- Diploma-shaped cookie cutter: If unavailable, a rectangular cutter plus a small circle cutter for the seal works fine.
- Baking sheets: Preferably non-stick or lined with parchment paper to avoid sticking.
- Cooling racks: To let cookies cool evenly and prevent sogginess.
- Small piping bag or zip-top bag: For piping royal icing details.
If you don’t have a diploma cookie cutter, no worries! A sharp knife and a ruler can help you cut rectangles and roll the edges for that classic diploma look. I’ve also used silicone baking mats instead of parchment paper with good results, plus they’re eco-friendly and easy to clean. Keeping your rolling pin and cookie cutters dusted with flour makes the dough less sticky and easier to handle.
Preparation Method
- Mix dry ingredients: In a medium bowl, whisk together 2 ¾ cups (345 grams) of all-purpose flour, 1 teaspoon baking powder, and ½ teaspoon salt. Set aside. (About 5 minutes)
- Cream butter and sugar: Using an electric mixer, beat 1 cup (227 grams) softened unsalted butter with 1 ¼ cups (250 grams) granulated sugar on medium speed until light and fluffy, about 3-4 minutes. The texture should be pale and airy—this traps air for tender cookies.
- Add eggs and vanilla: Beat in 2 large eggs, one at a time, then mix in 1 ½ teaspoons pure vanilla extract. Scrape down the sides to keep everything well combined. (2 minutes)
- Combine wet and dry: Gradually add the dry ingredients to the butter mixture on low speed. Mix just until the dough comes together—overmixing can make cookies tough. The dough will be soft but manageable. (3 minutes)
- Chill the dough: Flatten the dough into a disk, wrap tightly in plastic wrap, and refrigerate for at least 1 hour. Chilling firms the dough, making it easier to roll and helps the cookies keep their shape during baking.
- Preheat oven and prepare pans: Heat oven to 350°F (175°C). Line baking sheets with parchment paper or silicone mats.
- Roll and cut: Lightly flour your surface and rolling pin. Roll dough to about ¼ inch (6 mm) thickness. Cut out diploma shapes using your cookie cutter. Transfer carefully to baking sheets using a thin spatula if needed. (15 minutes)
- Bake cookies: Bake for 10-12 minutes, or until edges are just turning golden. Be careful not to overbake—cookies should be firm but still slightly soft in the center. (Watch closely from 9 minutes onward)
- Cool: Let cookies cool on the baking sheets for 5 minutes, then transfer to cooling racks until completely cool. This prevents sogginess.
- Melt chocolate: In a microwave-safe bowl, melt 1 cup (175 grams) white chocolate chips in 20-second intervals, stirring well between each until smooth.
- Dip cookies: Hold each cookie by one end and dip the opposite end into the melted white chocolate, covering about one-third of the cookie. Place cookie on parchment to set. (Tip: Slightly warm the chocolate again if it thickens.)
- Prepare royal icing: Mix royal icing according to package or recipe instructions. Thin with milk or cream to piping consistency.
- Decorate: Using a piping bag, draw the diploma lines and seal detail on the non-chocolate part once the chocolate is set—this adds that elegant diploma effect. Let icing dry completely (about 1-2 hours).
Pro tip: If you want perfectly smooth edges, chill the cut cookies on the baking sheet for 10 minutes before baking. It helps them hold shape better. Also, always test one cookie first to check baking time since ovens vary.
Cooking Tips & Techniques
Making these elegant chocolate-dipped diploma sugar cookies is easier when you keep a few tricks in mind. First, don’t skip chilling the dough—it’s key to avoid spreading and keeps your cookies crisp and defined. I learned this the hard way after a batch turned out flat and sad!
When melting white chocolate, patience is your friend. Low heat and stirring between intervals prevent burning and clumping. If your chocolate gets too thick, adding a tiny bit of vegetable oil can smooth it out without affecting flavor.
For decorating, royal icing consistency matters. Too thick and it won’t pipe nicely; too thin and it will run. I usually start thicker and add a drop of milk at a time. Using a fine-tipped piping bag or even a zip-top bag with a tiny corner snipped gives you control for those diploma lines.
Timing is everything—work in stages. Bake all cookies first, then chocolate dip a batch, and finally decorate once the chocolate has set. This way, you avoid smudging and keep everything neat. And don’t rush drying royal icing; it needs that time to harden properly.
Variations & Adaptations
- Flavor twists: Add lemon zest or almond extract instead of vanilla for a different but elegant flavor profile.
- Chocolate options: Use dark or milk chocolate for dipping if you prefer less sweetness—just melt carefully with a little coconut oil for smoothness.
- Dietary swaps: Use gluten-free flour blend and dairy-free butter for allergy-friendly cookies; swap royal icing with vegan-friendly glaze made from powdered sugar and aquafaba.
- Seasonal touches: In spring, decorate with pastel-colored royal icing accents; for winter graduations, add tiny edible silver pearls for sparkle.
- Shape alternatives: If diplomas aren’t your thing, try caps or stars using the same dough and decoration method.
Personally, I once swapped the white chocolate dip for a thin layer of dark chocolate and sprinkled sea salt on top before it set. It was surprisingly addictive and added a grown-up flavor that guests loved.
Serving & Storage Suggestions
Serve these cookies at room temperature for the best texture—cold chocolate can hide the delicate flavors. They make a beautiful addition to any dessert table, especially paired with a light fruit punch or sparkling cider. For a brunch, they complement coffee and tea perfectly.
Store leftover cookies in an airtight container at room temperature for up to 5 days. If you want to keep them longer, freeze un-iced cookies wrapped tightly in plastic wrap and foil—freeze chocolate-dipped and decorated cookies only after icing has fully dried. To thaw, leave at room temperature for a few hours.
When reheating, avoid the microwave or oven directly since the chocolate and icing can melt or crack. Instead, let them come to room temp naturally. Over time, the chocolate dip may develop a slight bloom (white film), but it’s harmless and doesn’t affect taste.
Nutritional Information & Benefits
Each elegant chocolate-dipped diploma sugar cookie contains approximately:
| Nutrient | Amount per cookie |
|---|---|
| Calories | 150 |
| Fat | 8g |
| Saturated Fat | 5g |
| Carbohydrates | 18g |
| Sugar | 12g |
| Protein | 2g |
These cookies are a treat, so moderation is key. The butter offers some vitamin A, and the white chocolate provides a bit of calcium. Using real vanilla extract adds flavor without extra calories. For those watching gluten or dairy, the substitutions suggested keep the cookies enjoyable without sacrificing taste.
Personally, I appreciate how these cookies bring a moment of joy and celebration—sometimes that counts as part of wellness too.
Conclusion
Elegant chocolate-dipped diploma sugar cookies are a delightful way to mark big milestones with something homemade and heartfelt. They balance simplicity with style, making them a standout at any graduation celebration or congratulatory gathering. The recipe’s charm is in how approachable it is—no fancy ingredients or techniques, just classic flavors dressed up with thoughtful details.
Feel free to tweak the decorations or try different chocolate dips to make these cookies truly yours. I love this recipe because it turns a sweet bite into a keepsake, a tiny diploma that honors achievement with every crunch. If you bake them, I hope they bring you as much satisfaction as they’ve brought me through many graduations past.
Go ahead, try your hand at these cookies, and share your own spin—after all, that’s what makes cooking fun and memorable!
FAQs
Can I make the dough ahead of time?
Absolutely! The dough can be refrigerated for up to 3 days or frozen for up to 1 month. Just thaw before rolling and cutting.
What if I don’t have a diploma-shaped cookie cutter?
You can use a rectangular cutter or a knife to cut rectangles about 3 inches long and 1 ½ inches wide, then add a small circle of icing for the seal.
How do I prevent the chocolate from cracking after dipping?
Make sure to temper the chocolate properly by melting it gently and letting it cool slightly before dipping. Also, avoid storing cookies in very cold places.
Can I substitute royal icing with something else?
Yes, a simple glaze made from powdered sugar and milk or a thin drizzle of chocolate works, but royal icing gives the best decorative detail and dries hard.
How long do these cookies stay fresh?
Stored in an airtight container at room temperature, they stay fresh for about 5 days. You can freeze un-iced cookies for longer storage.
Pin This Recipe!
Elegant Chocolate-Dipped Diploma Sugar Cookies

These elegant chocolate-dipped diploma sugar cookies are a perfect homemade treat for graduation celebrations, combining a tender buttery sugar cookie with a silky white chocolate dip and delicate royal icing decoration.
- Prep Time: 20 minutes
- Cook Time: 12 minutes
- Total Time: 1 hour 45 minutes
- Yield: 24 cookies 1x
- Category: Dessert
- Cuisine: American
Ingredients
- 2 ¾ cups (345 grams) all-purpose flour
- 1 teaspoon baking powder
- ½ teaspoon salt
- 1 cup (227 grams) unsalted butter, softened
- 1 ¼ cups (250 grams) granulated sugar
- 2 large eggs, room temperature
- 1 ½ teaspoons pure vanilla extract
- 1 cup (175 grams) white chocolate chips
- Royal icing mix (or homemade with powdered sugar, meringue powder, and water)
- 1–2 tablespoons milk or cream (to thin royal icing if needed)
Instructions
- In a medium bowl, whisk together flour, baking powder, and salt. Set aside.
- Using an electric mixer, beat softened butter with granulated sugar on medium speed until light and fluffy, about 3-4 minutes.
- Beat in eggs one at a time, then mix in vanilla extract. Scrape down sides to combine.
- Gradually add dry ingredients to the butter mixture on low speed. Mix just until dough comes together.
- Flatten dough into a disk, wrap in plastic wrap, and refrigerate for at least 1 hour.
- Preheat oven to 350°F (175°C). Line baking sheets with parchment paper or silicone mats.
- Lightly flour surface and rolling pin. Roll dough to about ¼ inch (6 mm) thickness. Cut out diploma shapes with cookie cutter.
- Transfer cookies to baking sheets and bake for 10-12 minutes until edges are just golden.
- Cool cookies on baking sheets for 5 minutes, then transfer to cooling racks until completely cool.
- Melt white chocolate chips in microwave-safe bowl in 20-second intervals, stirring until smooth.
- Dip one end of each cookie into melted white chocolate covering about one-third of the cookie. Place on parchment to set.
- Prepare royal icing according to instructions and thin with milk or cream to piping consistency.
- Pipe diploma lines and seal details on non-chocolate part of cookies once chocolate is set. Let icing dry completely (1-2 hours).
Notes
Chill dough for at least 1 hour to prevent spreading and keep cookies crisp. Melt white chocolate gently and stir frequently to avoid burning. Use a fine-tipped piping bag for royal icing details. Work in stages: bake, then dip, then decorate. Let royal icing dry fully before storing.
Nutrition
- Serving Size: 1 cookie
- Calories: 150
- Sugar: 12
- Fat: 8
- Saturated Fat: 5
- Carbohydrates: 18
- Protein: 2
Keywords: graduation cookies, sugar cookies, chocolate dipped cookies, diploma cookies, royal icing cookies, homemade graduation treats



