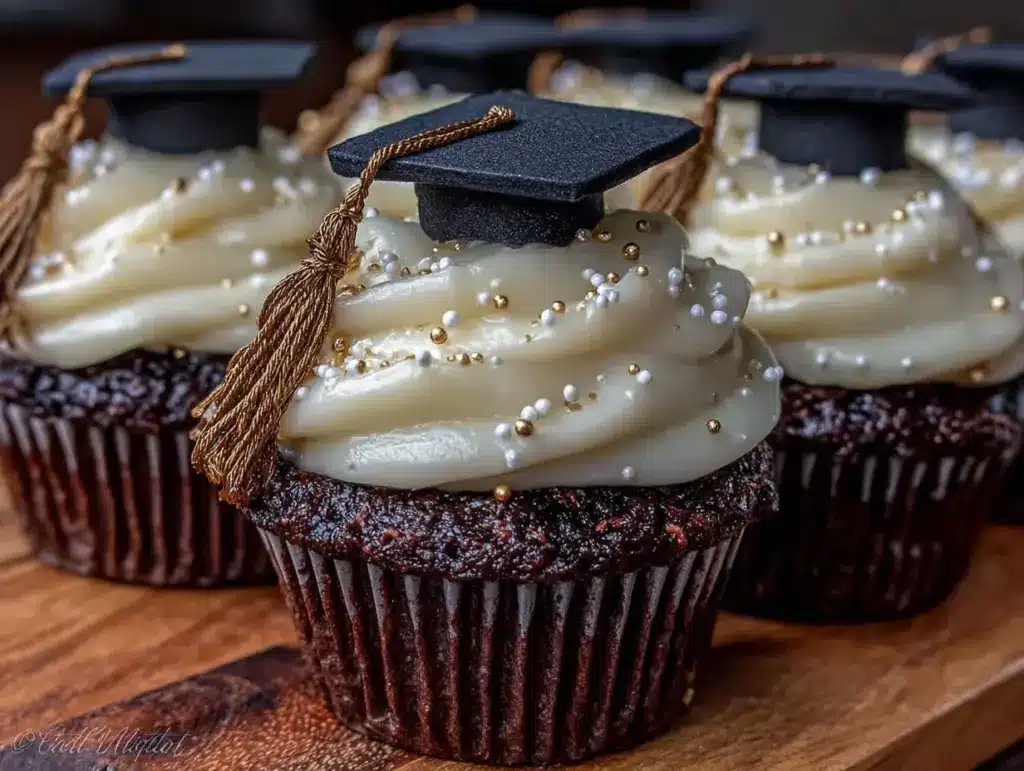
The first time I baked these elegant graduation cap cupcakes, the smell of vanilla and chocolate mingled with the subtle scent of fondant instantly took me back to my own graduation day. Honestly, there’s something about celebrating milestones with food that feels extra special—and these cupcakes? They nail that vibe perfectly. I’ve made these cupcakes several times now, tweaking the fondant toppers until they looked just right—sleek, sharp, and totally Instagram-worthy. If you’re looking for a way to add a classy yet playful touch to your graduation party, these easy homemade fondant toppers are your secret weapon.
Whether you’re a seasoned baker or just someone who loves a good DIY project, crafting these graduation cap cupcakes is surprisingly doable. The recipe balances simple ingredients with a creative twist, making it a memorable treat for graduates and guests alike. Plus, they’re perfect for families juggling busy schedules but still wanting that wow factor. Let me walk you through how to create these mini masterpieces that taste just as good as they look!
After baking these cupcakes over a dozen times for friends, family, and even school events, I can say with confidence this recipe delivers consistent results. The fondant toppers add that polished finish that makes these cupcakes stand out. So, if you want a dessert that’s both delicious and visually stunning, this recipe for elegant graduation cap cupcakes with fondant toppers is a must-try!
Why You’ll Love This Recipe
- Quick & Easy: Comes together in under 90 minutes, perfect for last-minute party prep or weekend baking sessions.
- Simple Ingredients: Uses pantry staples and basic fondant supplies you can find at any craft or baking store.
- Perfect for Graduations: Ideal for parties, ceremonies, or gifting to the graduate as a sweet surprise.
- Crowd-Pleaser: Kids and adults alike rave about the moist cupcakes paired with the charming fondant caps.
- Unbelievably Delicious: The vanilla cupcake base melts in your mouth, balanced perfectly with buttercream and smooth fondant.
This isn’t just another cupcake recipe—the secret lies in the fondant topper technique. I’ve spent countless afternoons perfecting the shape and size of the caps so that they look crisp and professional, yet remain easy enough to make at home. The balance of soft cake and firm fondant topping gives each bite a delightful texture contrast that really sets these cupcakes apart.
Honestly, there’s something heartwarming about seeing those tiny graduation caps on each cupcake—it makes guests pause and smile. It’s the kind of comfort food that feels fancy but isn’t intimidating to make, which is why I keep coming back to this recipe for every graduation season.
What Ingredients You Will Need
This recipe uses simple, wholesome ingredients to deliver a moist, flavorful cupcake with a stunning fondant topper that’s surprisingly easy to make. Most of these are pantry staples, with a few specialized items for the fondant decoration.
- For the Cupcakes:
- All-purpose flour, 1 ½ cups (190g) – for a soft crumb
- Baking powder, 1 ½ teaspoons – helps the cupcakes rise nicely
- Salt, ¼ teaspoon – balances the sweetness
- Unsalted butter, ½ cup (115g), softened – adds richness (I prefer Kerrygold for creaminess)
- Granulated sugar, 1 cup (200g) – for sweetness
- Large eggs, 2, room temperature – for structure and moisture
- Pure vanilla extract, 2 teaspoons – key for that classic flavor
- Whole milk, ½ cup (120ml), room temperature – keeps the batter tender (can swap with almond milk if dairy-free)
- For the Buttercream Frosting:
- Unsalted butter, 1 cup (230g), softened
- Powdered sugar, 3 cups (360g), sifted
- Vanilla extract, 1 teaspoon
- Heavy cream or milk, 2-3 tablespoons – to adjust consistency
- Pinch of salt – to cut sweetness
- For the Fondant Graduation Caps:
- Pre-made white or black fondant, about 8 ounces (225g) – Wilton brand works great and rolls smoothly
- Black gel food coloring (if coloring fondant yourself)
- Edible glue or water – to attach parts
- Toothpicks or small skewers – for tassels
- Optional: gold or silver edible paint for tassel details
Look for firm, pliable fondant that’s not too sticky. If you prefer, you can make your own fondant from scratch, but the store-bought stuff saves serious time. And if you want to customize colors, feel free to swap black for your school colors—just knead in some gel food coloring until even.
Equipment Needed
- Standard 12-cup muffin tin – essential for cupcake shaping
- Cupcake liners – I like plain white or black for a sleek look
- Electric mixer or stand mixer – makes batter and frosting smooth and fluffy
- Rolling pin – for shaping the fondant caps
- Sharp knife or pizza cutter – to cut fondant squares
- Small offset spatula or butter knife – for spreading frosting
- Small paintbrush – perfect for edible glue or painting tassel details
- Measuring cups and spoons – accuracy matters in baking
If you don’t have a rolling pin, a smooth wine bottle works fine for rolling out fondant. For cutting fondant, a pizza cutter is surprisingly handy and gives clean edges. I’ve found that using toothpicks to assemble the tassels helps keep them sturdy but be careful not to poke through the cupcake!
Detailed Preparation Method
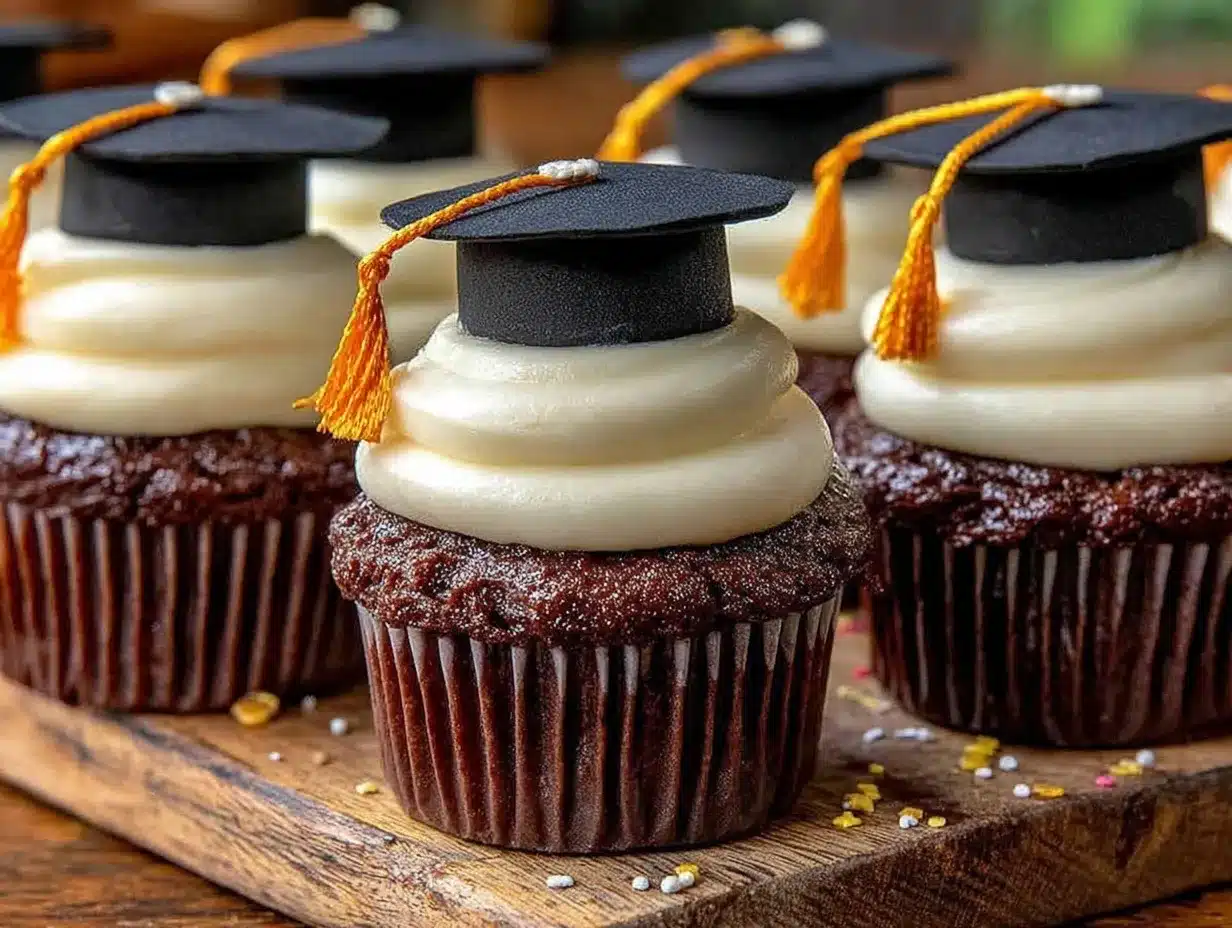
- Preheat and Prepare: Set your oven to 350°F (175°C). Line a 12-cup muffin tin with cupcake liners. This step ensures your cupcakes bake evenly and don’t stick.
- Mix Dry Ingredients: In a medium bowl, whisk together 1 ½ cups (190g) all-purpose flour, 1 ½ teaspoons baking powder, and ¼ teaspoon salt. This keeps the leavening agents evenly distributed.
- Cream Butter and Sugar: In a large bowl, use an electric mixer to beat ½ cup (115g) softened unsalted butter and 1 cup (200g) granulated sugar until light and fluffy—about 3-4 minutes. The texture should look pale and airy; this traps air for a tender crumb.
- Add Eggs and Vanilla: Beat in 2 large eggs, one at a time, then stir in 2 teaspoons of pure vanilla extract. Scrape down the sides to mix everything evenly.
- Alternate Adding Dry Ingredients and Milk: Add the flour mixture in three batches, alternating with ½ cup (120ml) whole milk, beginning and ending with flour. Mix gently after each addition; overmixing can make cupcakes tough.
- Fill Cupcake Liners: Divide batter evenly among the 12 liners, filling each about ⅔ full. This prevents overflow and gives a nice domed top.
- Bake: Bake for 18-22 minutes or until a toothpick inserted into the center comes out clean. The tops should spring back lightly when touched.
- Cool Completely: Let cupcakes cool in the pan for 5 minutes, then transfer to a wire rack. Fondant won’t stick well to warm cupcakes, so patience here pays off.
- Make Buttercream: Beat 1 cup (230g) softened butter until creamy. Gradually add 3 cups (360g) powdered sugar, mixing on low speed. Add 1 teaspoon vanilla, 2-3 tablespoons cream, and a pinch of salt. Beat until fluffy and spreadable.
- Frost Cupcakes: Use a small offset spatula to spread a smooth layer of buttercream on each cupcake, creating a flat surface for the fondant caps.
- Prepare Fondant Caps: Knead fondant until pliable. Roll out to about ⅛-inch (3mm) thickness. Cut 12 squares approximately 2 inches (5cm) on each side for the top of the caps.
- Create Cap Base: Roll small balls of fondant (about ½ inch/1.25cm diameter) for the base. Flatten slightly and attach under each square with edible glue or a dab of water.
- Make Tassels: Form thin strips of fondant or use thin black licorice pieces. Attach a small tassel to each cap with edible glue. For a final touch, paint tassels with edible gold or silver paint if you like.
- Assemble: Place each fondant cap on top of the frosted cupcakes gently. Press lightly to set but be careful not to dent the frosting.
If your fondant gets sticky, dust your surface and rolling pin with a bit of cornstarch. And if cupcakes sink slightly after baking, it’s usually from underbaking—try adding a minute or two next time. The fondant caps should be sturdy but not heavy; if they droop, roll them slightly thicker.
Cooking Tips & Techniques
When making these elegant graduation cap cupcakes, timing is everything. I’ve learned that cooling cupcakes completely before frosting helps the buttercream stay firm and smooth under the fondant caps. You know, nothing kills the look faster than melted frosting sliding off.
For the fondant, kneading is key. If it’s too stiff, warm it slightly in your hands; too sticky, add a little powdered sugar or cornstarch. Rolling it evenly to about ⅛ inch thickness ensures the caps aren’t too flimsy or too bulky.
One rookie mistake I made was cutting the fondant squares too small. They need to be just right—about 2 inches (5cm)—to sit nicely on the cupcakes without overwhelming them. Also, using edible glue rather than water keeps the pieces bonded better.
Multitasking tip: While cupcakes bake, prep the fondant and whip the buttercream. This way, you’re not scrambling to finish all parts last-minute. Trust me, it cuts down on stress and you won’t have to rush your decorating.
Lastly, a light dusting of cornstarch on your work surface prevents fondant from sticking—avoids that frustrating tearing or uneven edges.
Variations & Adaptations
- Flavor Variations: Swap vanilla for chocolate or lemon cupcakes for different flavor profiles. Adding a touch of almond extract is a nice twist too.
- Dietary Adaptations: Use gluten-free flour blends to make the cupcakes gluten-free. For dairy-free, substitute butter and milk with plant-based alternatives like coconut oil and oat milk.
- Fondant Colors: Customize the graduation caps with your school’s colors by tinting fondant with gel food coloring. You can also add edible glitter or paint for extra flair.
- Alternative Toppers: If fondant feels intimidating, try using pre-made candy graduation caps or edible wafer paper cutouts for a simpler approach.
- Personal Touch: I once added mini edible diploma scrolls made from fondant rolled with a thin ribbon of colored icing on the side of the cupcakes—super cute and thematic!
Serving & Storage Suggestions
Serve these cupcakes at room temperature for the best flavor and texture. The fondant toppers hold up well out of the fridge, but if you need to store them longer, place cupcakes in an airtight container in the refrigerator for up to 3 days.
Before serving refrigerated cupcakes, let them sit at room temperature for about 30 minutes to soften the frosting and cake. For longer storage, these cupcakes freeze nicely without damage to the fondant; just wrap individually and thaw gently before serving.
Pair with a light beverage like iced tea, sparkling lemonade, or coffee to balance the sweetness. They make a beautiful centerpiece on any graduation table, adding both elegance and fun.
Over time, the fondant can dry out slightly but it won’t affect flavor. If you’re prepping ahead, assemble fondant toppers separately and add on the day of the event for freshest presentation.
Nutritional Information & Benefits
Each cupcake (including fondant topper) is approximately 300-350 calories, with about 15 grams of fat and 40 grams of carbohydrates. These treats are indulgent but portion-controlled, perfect for celebrations.
The cupcakes provide a good source of energy, and by using real butter and whole milk, you get a richer flavor and some fat-soluble vitamins. The fondant is mostly sugar, so enjoy in moderation.
For dietary restrictions, this recipe can be adapted to gluten-free or dairy-free versions as noted, making it accessible to various guests. Always check for potential nut or other allergens if serving a crowd.
From my experience as a home baker, these cupcakes strike a fun balance between homemade charm and polished presentation, making them a feel-good treat for special occasions.
Conclusion
These elegant graduation cap cupcakes with fondant toppers are a celebration in every bite—combining simple ingredients with a dash of creativity to make your party unforgettable. I love how these cupcakes bring a personal, handmade touch to milestone moments, and I’m confident you’ll find the process rewarding too.
Feel free to customize the colors, flavors, or decorations to match your grad’s personality or school spirit. Baking these cupcakes became one of my favorite ways to mark achievements, and I hope they bring as much joy to your celebrations as they do to mine.
Give it a try, and don’t forget to share your photos and tweaks in the comments—I’m always excited to see how you make these cupcakes your own! Happy baking and congrats to all the grads out there!
FAQs
Can I make the fondant graduation caps ahead of time?
Yes! You can prepare the fondant caps 1-2 days in advance. Store them in an airtight container at room temperature, away from heat and humidity, to keep them firm and ready to place on cupcakes before serving.
What if I don’t have fondant—can I use something else?
If fondant isn’t your thing, try using modeling chocolate or even carefully shaped cookie toppers. Alternatively, edible wafer paper cutouts or candy caps can give a similar look with less effort.
How do I keep the cupcakes moist if I’m making them a day ahead?
Store cooled cupcakes in an airtight container at room temperature. You can also brush a light syrup (equal parts sugar and water) on them before frosting to lock in moisture.
Is there a way to make these cupcakes gluten-free?
Absolutely! Swap the all-purpose flour with a 1:1 gluten-free baking flour blend. Make sure your baking powder is gluten-free, and the rest of the ingredients are naturally gluten-free too.
Can I color the fondant to match school colors?
Yes, just knead in gel food coloring until the fondant reaches your desired shade. Black fondant is traditional for caps, but school colors make for a fun and personalized twist!
Pin This Recipe!
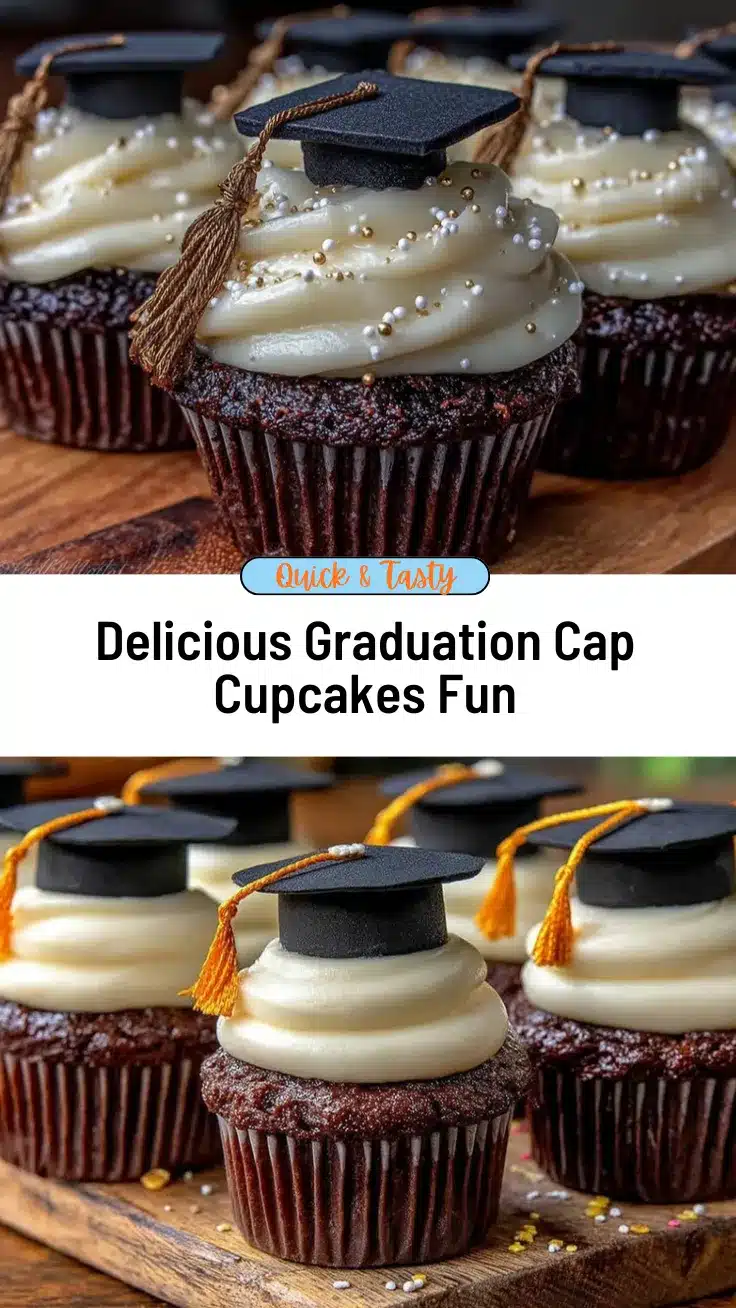
Elegant Graduation Cap Cupcakes Easy Homemade Fondant Toppers Tutorial

These elegant graduation cap cupcakes combine moist vanilla cupcakes with smooth buttercream and easy homemade fondant toppers, perfect for celebrating milestones with a classy and playful touch.
- Prep Time: 30 minutes
- Cook Time: 22 minutes
- Total Time: 52 minutes
- Yield: 12 servings 1x
- Category: Dessert
- Cuisine: American
Ingredients
- 1 ½ cups (190g) all-purpose flour
- 1 ½ teaspoons baking powder
- ¼ teaspoon salt
- ½ cup (115g) unsalted butter, softened
- 1 cup (200g) granulated sugar
- 2 large eggs, room temperature
- 2 teaspoons pure vanilla extract
- ½ cup (120ml) whole milk, room temperature (can substitute almond milk for dairy-free)
- 1 cup (230g) unsalted butter, softened (for buttercream)
- 3 cups (360g) powdered sugar, sifted
- 1 teaspoon vanilla extract (for buttercream)
- 2–3 tablespoons heavy cream or milk (for buttercream)
- Pinch of salt (for buttercream)
- About 8 ounces (225g) pre-made white or black fondant
- Black gel food coloring (optional)
- Edible glue or water
- Toothpicks or small skewers (for tassels)
- Optional: gold or silver edible paint for tassel details
Instructions
- Preheat oven to 350°F (175°C). Line a 12-cup muffin tin with cupcake liners.
- In a medium bowl, whisk together flour, baking powder, and salt.
- In a large bowl, beat softened butter and granulated sugar with an electric mixer until light and fluffy, about 3-4 minutes.
- Beat in eggs one at a time, then stir in vanilla extract.
- Add flour mixture in three batches, alternating with milk, beginning and ending with flour. Mix gently after each addition.
- Divide batter evenly among cupcake liners, filling each about ⅔ full.
- Bake for 18-22 minutes or until a toothpick inserted in the center comes out clean.
- Cool cupcakes in pan for 5 minutes, then transfer to wire rack to cool completely.
- For buttercream, beat softened butter until creamy. Gradually add powdered sugar on low speed. Add vanilla, cream, and salt. Beat until fluffy and spreadable.
- Spread a smooth layer of buttercream on each cooled cupcake using a small offset spatula.
- Knead fondant until pliable. Roll out to about ⅛-inch (3mm) thickness.
- Cut 12 squares approximately 2 inches (5cm) on each side for the tops of the caps.
- Roll small balls of fondant about ½ inch (1.25cm) diameter for the base. Flatten slightly and attach under each square with edible glue or water.
- Form thin strips of fondant or use thin black licorice pieces for tassels. Attach tassels to each cap with edible glue. Optionally paint tassels with edible gold or silver paint.
- Place each fondant cap gently on top of frosted cupcakes and press lightly to set.
Notes
Cool cupcakes completely before frosting to prevent melting. Dust rolling pin and surface with cornstarch to prevent fondant sticking. Use edible glue rather than water for better fondant adhesion. Fondant caps can be prepared 1-2 days ahead and stored airtight at room temperature. For gluten-free or dairy-free versions, substitute ingredients accordingly.
Nutrition
- Serving Size: 1 cupcake with fonda
- Calories: 325
- Sugar: 30
- Sodium: 150
- Fat: 15
- Saturated Fat: 9
- Carbohydrates: 40
- Fiber: 0.5
- Protein: 3
Keywords: graduation cupcakes, fondant toppers, vanilla cupcakes, buttercream frosting, party dessert, easy cupcakes, homemade fondant, celebration treats



