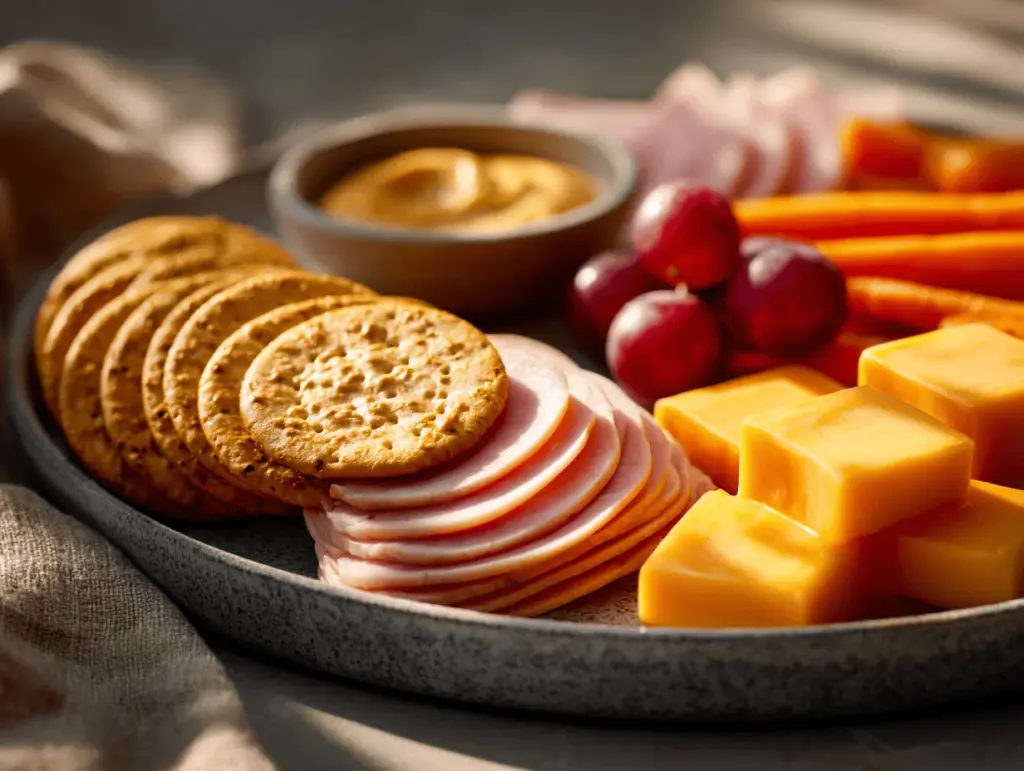
The snap of a cracker and that irresistible combo of cheese, deli meat, and a little treat on the side—honestly, it’s pure nostalgia. Homemade Lunchables are my answer to busy school mornings, picky eater dilemmas, and those times when you just want lunch to feel fun. I started making these DIY snack platters back when my youngest refused “real sandwiches,” and guess what? The whole family jumped on board. There’s something about building your own bite, stacking flavors together, and sneaking in some fruit or veggies that makes everyone happy.
When I first realized how easy homemade Lunchables could be, it was a total game changer. No more plastic trays or mystery ingredients—just wholesome, fresh snacks in a box. Whether you’re prepping for a week of lunches, need a quick picnic idea, or want a customizable after-school snack, these DIY snack platters deliver. I’ve tested countless combos, tweaked the portions, and even made gluten-free and vegetarian versions for friends. If you’re looking for a lunch that’s both fun and nourishing, you’re in the right spot.
These homemade Lunchables aren’t just for kids, either. My husband loves them on busy workdays, and I’ve packed them for road trips and cozy movie nights. As a mom and food blogger, I’m all about recipes that make life easier without sacrificing flavor or nutrition. This snack platter is a staple in our home, and I promise—it’ll win you over, too.
Why You’ll Love This Homemade Lunchables Recipe
- Quick & Easy: Assemble in under 15 minutes—no cooking required, just slicing and stacking.
- Simple Ingredients: You probably already have everything in your fridge and pantry (think cheese, crackers, deli meat, fruit).
- Perfect for Any Occasion: Great for lunchboxes, picnics, road trips, or even as a fun dinner.
- Crowd-Pleaser: Kids love building their own bites, and adults appreciate the variety and nostalgia.
- Unbelievably Delicious: The mix of textures—crisp crackers, creamy cheese, juicy fruit—makes every bite satisfying.
What sets this homemade Lunchables snack platter apart is how customizable it is. I’ve tried blending sharp cheddar and Swiss for a flavor punch, swapped out regular crackers for gluten-free ones, and even added hummus for extra protein. Unlike the store-bought kind, you control the portions, quality, and nutrition. It’s also a sneaky way to get kids to eat more fruits and veggies—my daughter will munch on snap peas if they’re part of her “Lunchable!”
This recipe isn’t just food—it’s an experience. Every time I pack these, I’m reminded of childhood lunches and that little thrill of opening a box of surprises. There’s something comforting about familiar flavors, especially when you know exactly what went into your snack. It’s the kind of meal that brings people together, sparks creativity, and makes lunchtime exciting again. So, if you’re tired of boring sandwiches, give this DIY snack platter a try—you’ll never look back.
What Ingredients You Will Need
This recipe uses everyday ingredients that blend flavor, texture, and nutrition. Most of them are pantry staples or fridge regulars, and you can swap items in and out depending on what you have (or what your crew likes).
- For the base:
- Whole grain crackers (choose your favorite brand; I like Triscuit or Ritz)
- Pita chips or pretzel crisps (for crunch and variety)
- Mini rice cakes (optional, great for gluten-free platters)
- Protein options:
- Sliced turkey, chicken, or ham (deli-style, nitrate-free if possible)
- Mini salami or pepperoni rounds (for a classic touch)
- Hard-boiled eggs (peeled and sliced, extra protein)
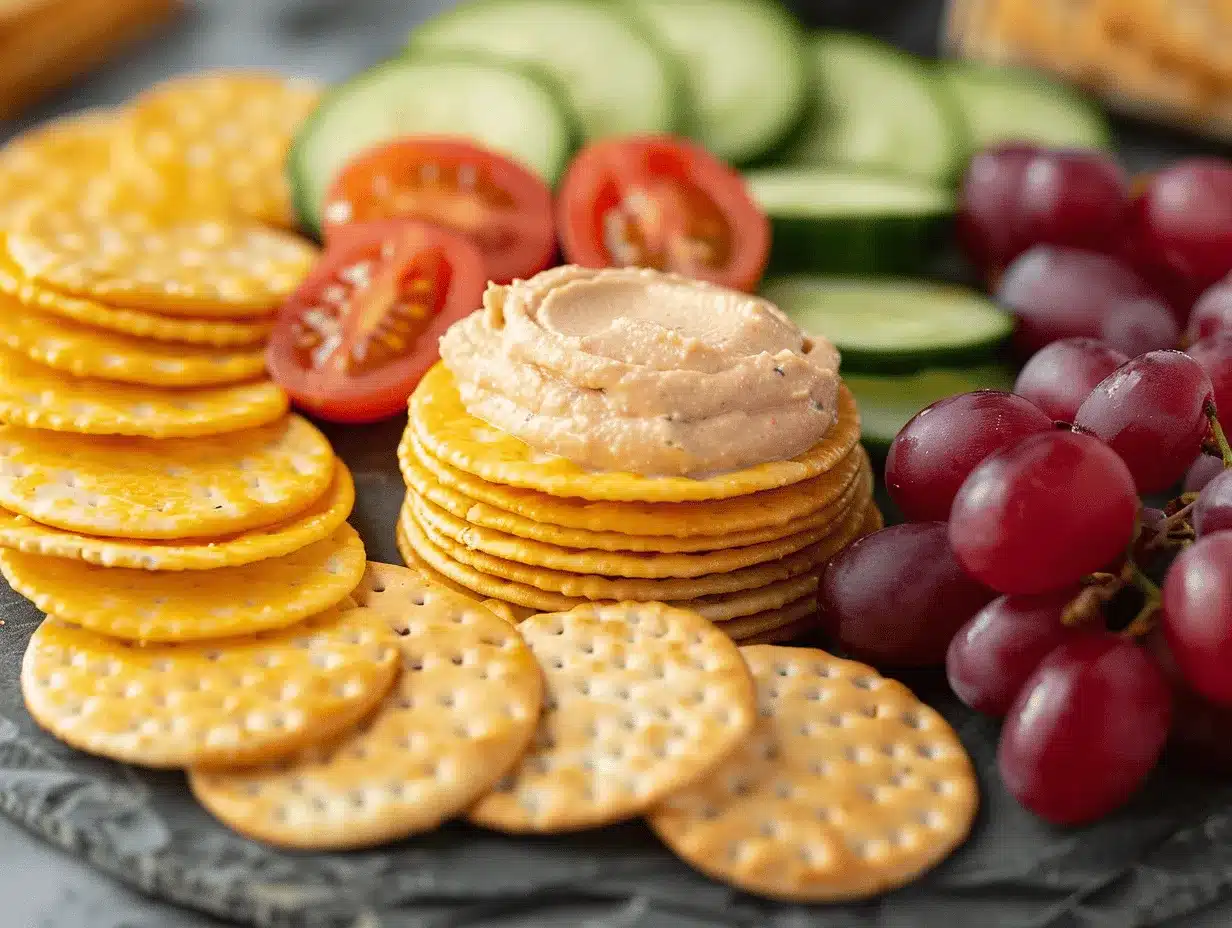
- Hummus or bean dip (vegetarian-friendly, add in a small cup)
- Cheese selections:
- Cheddar cheese, sliced or cubed (adds sharpness)
- Swiss, provolone, or mozzarella (switch it up for variety)
- String cheese (easy for little hands)
- Vegan cheese slices (for dairy-free diets)
- Fruit and veggie sides:
- Grapes, strawberries, or apple slices (fresh and sweet)
- Baby carrots, snap peas, or cucumber rounds (crisp and hydrating)
- Cherry tomatoes (colorful and juicy)
- Dried fruit (apricots, raisins, or cranberries—small handful)
- Fun extras:
- Mini chocolate chips or small cookie (for a treat)
- Trail mix or granola cluster (crunch and sweetness)
- Pickles or olives (for salty snackers)
- Nut butter cup or yogurt (if packing for home)
If you’re shopping, look for crackers with minimal additives and cheese from the deli counter for the best flavor. I’m partial to Applegate and Boar’s Head for deli meats, especially for their lower sodium and no added nitrates. In summer, swap berries for whatever is freshest. For gluten-free eaters, stick to rice cakes or GF crackers (like Simple Mills). You can also use vegan cheese and plant-based deli slices to make everything dairy- and meat-free.
One of my favorite things about homemade Lunchables is you can keep it seasonal—add peaches in July, roasted squash cubes in fall, or even a handful of dried cranberries in winter. If you’re out of something, just improvise! Honestly, the snack platter is all about what you love.
Equipment Needed
- Bento box or divided lunch container: Keeps everything separated and fresh; I’ve tried glass, stainless steel, and plastic—all work, but glass feels the most luxe.
- Small silicone cups or muffin liners: Great for corralling dips, fruit, or small treats.
- Sharp knife: For slicing cheese and veggies. If you’re prepping for little ones, a kid-safe knife is handy.
- Cutting board: Any sturdy board will do. I use a bamboo one for easy clean-up.
- Mini containers with lids: For hummus, nut butter, or yogurt. Reusable condiment cups work well and are easy to wash.
- Tongs or toothpicks: Optional, but fun for picking up pieces and building stacks.
If you don’t have a fancy bento box, honestly, any lidded container works. I’ve even used cupcake carriers when prepping for parties! Silicone cups are great, but paper liners do the trick in a pinch. For budget-friendly options, check out dollar stores for small containers and trays—they hold up surprisingly well.
Maintenance tip: If using stainless steel boxes, keep them dry to prevent water spots. For glass, watch for chips or cracks before packing. And if you’re sending Lunchables to school, make sure lids snap tight to avoid lunchtime messes!
Preparation Method
- Prep your workspace: Lay out all ingredients, containers, and utensils. Wash and dry all fruits and veggies. Set aside 10 minutes for assembly.
- Slice and portion cheese: Cut 2 oz (55 g) of cheddar and 2 oz (55 g) of Swiss into cubes or slices. If using string cheese, cut each stick into thirds.
- Slice deli meats: Lay out 3 oz (85 g) of turkey and 3 oz (85 g) of ham. Stack and slice into bite-sized squares or rounds. If using pepperoni or salami, count out 8–10 slices per Lunchable.
- Prep fruit and veggies: Halve grapes (about ½ cup/75 g), slice ½ apple (60 g), and pack ½ cup (60 g) baby carrots or snap peas. Portion into silicone cups or containers.
- Arrange crackers: Lay out 8–10 whole grain crackers (30 g) and 6 pita chips (20 g) in the largest compartment. If gluten-free, swap rice cakes (2–3 pieces, 30 g).
- Add extras: Pack 1 mini cookie (10 g), 1 tbsp (15 g) trail mix, and 3–4 olives or pickles into separate cups. For dips, spoon 2 tbsp (30 g) hummus or yogurt into a lidded mini container.
- Assemble the box: Place crackers in one section, cheese and meats in another, fruit and veggies in a third, and treats/dips in separate cups. Use tongs or toothpicks for stacking fun.
- Troubleshooting: If crackers get soggy, try packing them in a zip-top bag. For strong-smelling foods (like pickles), use airtight mini containers so flavors don’t mix.
- Final check: Snap container lid closed. If packing for later, refrigerate for up to 3 days. For best freshness, add fruit and veggies the morning of.
- Serving: Enjoy cold, straight from the box. If eating at home, arrange on a platter for a shareable snack board.
Notes: Sometimes cheese sweats if packed too early—let it air dry for a minute before boxing. If you’re prepping several Lunchables at once, line up containers and assembly-line everything for speed. If your kids love dipping, add a small spoon or spreader for hummus or yogurt.
Sensory cues: Cheese should feel firm, not sticky. Crackers stay crisp if kept dry. Fruit should smell fresh and sweet. If any ingredient looks wilted or dry, swap for something fresher. Trust your senses—they rarely steer you wrong!
Cooking Tips & Techniques
Homemade Lunchables don’t need “cooking,” but a little prep know-how makes all the difference. Here are my tried-and-true tricks for keeping snack platters tasty and fun:
- Keep textures separate: Always pack crackers away from moist items. I learned this the hard way after soggy cracker fiascos—use cupcake liners or mini bags.
- Slice cheese and meats evenly: Uniform pieces stack better and are easier for small hands to grab. Use a sharp knife and chill cheese first for clean cuts.
- Prep produce just before packing: Fruit and veggies taste best fresh. If prepping ahead, store separately and add to boxes in the morning for peak crunch.
- Mix up the flavors: Try bold cheeses with mild meats, or sweet fruit with tangy pickles. It keeps every box interesting.
- Avoid strong odors: If packing onions or garlicky hummus, consider an extra container. I once packed olives next to strawberries—let’s just say, not a winning combo!
- Multitask smart: Set out all boxes and ingredients before you start. Line up the containers, slice everything, and then assemble. It’s fast and saves cleanup.
- Consistency is key: Use measuring cups for dips and treats—kids love knowing exactly what they get!
If you ever find yourself rushing, don’t worry. These snack platters are forgiving. Just remember to check the fridge for rogue string cheese and don’t overthink combos. Sometimes, my best Lunchables come from what’s left after a busy grocery week—improvisation is half the fun!
Variations & Adaptations
The beauty of homemade Lunchables is how easily you can switch up ingredients. Here are my favorite ways to adapt the snack platter:
- Gluten-free version: Swap crackers for rice cakes, gluten-free pretzels, or seed crackers. Allergen-friendly and still crunchy!
- Vegetarian/vegan option: Use plant-based deli slices (like Tofurky), vegan cheese, and add a cup of hummus or bean dip. Load up on extra veggies for color.
- Seasonal variation: In summer, use fresh berries, sliced peaches, and cucumber rounds. In fall, swap in roasted butternut squash cubes and apple slices.
- Flavor customizations: Try spicy pepper-jack cheese, smoked turkey, or curry hummus. Add dried apricots or spiced trail mix for a unique twist.
- Different cooking methods: For a “hot Lunchable,” pack cheese and meats separately, and microwave for 20 seconds just before eating (in a microwave-safe container).
Allergen swaps: Use sunflower seed butter instead of nut butter for peanut-free lunches, or dairy-free cheese if needed. I’ve made nut-free versions for school lunches, and nobody ever misses the nuts—just add a bit more fruit or a crunchy veggie.
Personal favorite: I love adding roasted chickpeas for protein and crunch, especially when I want a little something extra. And sometimes, I sneak in a square of dark chocolate as a treat. The best part? You can make every box different, so lunch is never boring!
Serving & Storage Suggestions
Homemade Lunchables taste best cold, straight from the fridge. I like packing them in bento boxes for easy transport, but at home, arranging everything on a big platter turns it into a snack board—perfect for sharing.
- Serving temperature: Chilled is best; if you’re packing for a picnic, use an ice pack.
- Presentation tips: Stack cheese and meats in neat rows, group veggies by color, and tuck treats into silicone cups. Kids love making their own stacks!
- Complementary sides: Serve with a smoothie, fresh lemonade, or a cup of soup for a heartier meal.
- Storage: Refrigerate assembled boxes for up to 3 days. Crackers stay crisp if stored separately in a zip-top bag.
- Freezer tips: Cheese and deli meat can be frozen ahead, but thaw overnight before packing. Don’t freeze crackers—they lose crunch!
- Reheating: For warm Lunchables, microwave cheese and meat only (in a safe container), then add crackers and sides after.
- Flavor development: Cheese and meats meld flavors nicely after a day in the fridge, but fruit is best added fresh for juiciness.
If you’re prepping for a week, keep fruit and veggies separate and add each morning for crispness. And if you ever have leftovers, just toss everything on a salad or snack board—nothing goes to waste!
Nutritional Information & Benefits
Each homemade Lunchables box (average serving) provides approximately:
- Calories: 350–450
- Protein: 18–22g
- Carbohydrates: 30–35g
- Fat: 18–22g
Key benefits: Whole grain crackers give lasting energy, lean deli meats and cheese provide protein for fullness, and fresh fruit/veggies add fiber, vitamins, and antioxidants. If you use hummus or nut butter, there’s extra healthy fat and plant protein. These snack platters are naturally portion-controlled, making them great for balanced eating.
Dietary notes: Easily made gluten-free, nut-free, or vegetarian with simple swaps. Dairy and processed meat are common allergens, so check labels if sensitive. From a wellness angle, homemade Lunchables are my go-to for healthy snacking—fewer preservatives, more real food, and total control over ingredients. They’re a win-win for nutrition and taste!
Conclusion: Homemade Lunchables Are a Game Changer
If you’re searching for a lunch that’s as fun to make as it is to eat, homemade Lunchables are it. You get all the nostalgia and flavor of the classic snack box, but with wholesome, fresh ingredients and endless possibilities. Whether you’re feeding picky kids, busy teens, or yourself, these customizable snack platters never disappoint.
I love this recipe because it’s flexible, quick, and lets you get creative—no two boxes need to be the same. Plus, it’s a lifesaver for hectic mornings and makes lunch something to look forward to. If you try it, don’t forget to tweak the combos to suit your favorites. Share your version in the comments or pin your snack boards—let’s spread the lunchbox love!
Honestly, homemade Lunchables have changed how we do lunch around here. Give them a go and see for yourself—your taste buds (and your schedule) will thank you.
FAQs About Homemade Lunchables
Can I make homemade Lunchables ahead of time?
Absolutely! Prep boxes up to three days ahead. For best results, add fresh fruit and veggies the morning of so they stay crisp.
What can I use instead of crackers for gluten-free Lunchables?
Try rice cakes, gluten-free pretzels, seed crackers, or even tortilla chips. All work well and keep things crunchy.
How do I prevent crackers from getting soggy?
Keep crackers in a separate compartment or zip-top bag. Make sure moist foods (like fruit and pickles) are well sealed away from dry snacks.
Can I make vegetarian or vegan homemade Lunchables?
Yes! Use vegan cheese slices, plant-based deli meats, hummus, and extra veggies. Totally customizable for any diet.
What dips work well in homemade Lunchables?
Hummus, bean dip, yogurt, nut butter, or even a small cup of ranch dressing are all great. Just pack them in a mini container with a tight lid.
Pin This Recipe!
Homemade Lunchables: Easy DIY Snack Platter Kids Love

These Homemade Lunchables are a customizable, no-cook snack platter featuring crackers, cheese, deli meats, fruit, veggies, and fun extras. Perfect for busy mornings, picky eaters, or anyone craving a nostalgic, balanced lunch.
- Prep Time: 15 minutes
- Cook Time: 0 minutes
- Total Time: 15 minutes
- Yield: 1 snack platter (easily multiplied for more servings) 1x
- Category: Snack
- Cuisine: American
Ingredients
- 8–10 whole grain crackers (about 1 oz or 30 g)
- 6 pita chips or pretzel crisps (about 0.7 oz or 20 g)
- 2–3 mini rice cakes (optional, about 1 oz or 30 g, for gluten-free)
- 3 oz sliced turkey, chicken, or ham (deli-style, nitrate-free if possible)
- 8–10 mini salami or pepperoni rounds
- 1 hard-boiled egg, peeled and sliced (optional)
- 2 tbsp hummus or bean dip (about 1 oz or 30 g, vegetarian option)
- 2 oz cheddar cheese, sliced or cubed
- 2 oz Swiss, provolone, or mozzarella cheese, sliced or cubed
- 1 string cheese, cut into thirds (optional)
- Vegan cheese slices (optional, for dairy-free)
- 1/2 cup grapes, halved (about 2.6 oz or 75 g)
- 1/2 apple, sliced (about 2 oz or 60 g)
- 1/2 cup baby carrots or snap peas (about 2 oz or 60 g)
- Cherry tomatoes (about 1/2 cup)
- Dried fruit (apricots, raisins, or cranberries, small handful)
- 1 mini cookie (about 0.35 oz or 10 g)
- 1 tbsp trail mix or granola cluster (about 0.5 oz or 15 g)
- 3–4 olives or pickles
- 1 tbsp nut butter or yogurt (if packing for home)
Instructions
- Prep your workspace: Lay out all ingredients, containers, and utensils. Wash and dry all fruits and veggies.
- Slice and portion cheese: Cut cheddar and Swiss into cubes or slices. If using string cheese, cut each stick into thirds.
- Slice deli meats: Lay out turkey and ham, then slice into bite-sized squares or rounds. Count out salami or pepperoni slices.
- Prep fruit and veggies: Halve grapes, slice apple, and portion baby carrots or snap peas. Place into silicone cups or containers.
- Arrange crackers: Lay out whole grain crackers and pita chips in the largest compartment. For gluten-free, use rice cakes.
- Add extras: Pack mini cookie, trail mix, and olives or pickles into separate cups. Spoon hummus or yogurt into a lidded mini container.
- Assemble the box: Place crackers in one section, cheese and meats in another, fruit and veggies in a third, and treats/dips in separate cups. Use tongs or toothpicks for stacking.
- Troubleshooting: If crackers get soggy, pack them in a zip-top bag. For strong-smelling foods, use airtight mini containers.
- Final check: Snap container lid closed. Refrigerate for up to 3 days. For best freshness, add fruit and veggies the morning of.
- Serving: Enjoy cold, straight from the box, or arrange on a platter for a shareable snack board.
Notes
Keep crackers separate from moist items to prevent sogginess. Slice cheese and meats evenly for easy stacking. Prep produce just before packing for best freshness. Use airtight containers for strong-smelling foods. Easily adapted for gluten-free, vegetarian, or vegan diets. Refrigerate assembled boxes for up to 3 days; add fruit and veggies the morning of for crispness.
Nutrition
- Serving Size: 1 snack platter (approx. 12–14 oz total food)
- Calories: 400
- Sugar: 8
- Sodium: 800
- Fat: 20
- Saturated Fat: 8
- Carbohydrates: 33
- Fiber: 5
- Protein: 20
Keywords: homemade lunchables, DIY snack platter, kids lunch, bento box, healthy lunch, no-cook lunch, customizable lunch, gluten-free lunch, vegetarian lunch, meal prep, easy lunch, school lunch, snack box



