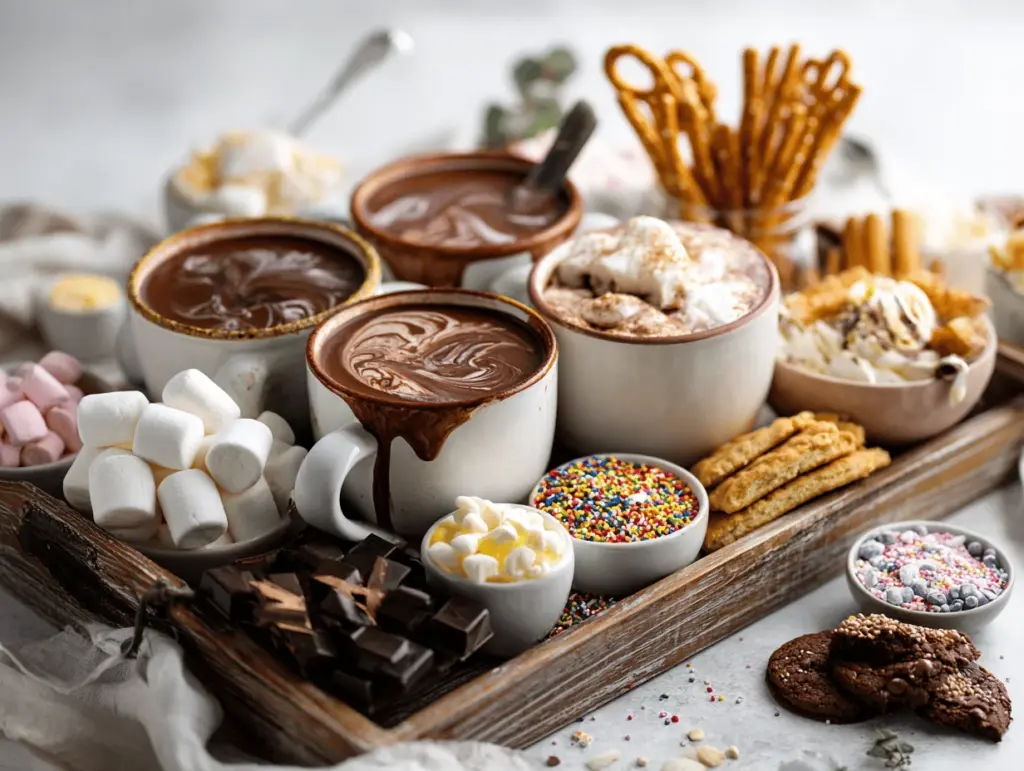
The first time I ever pulled together a hot chocolate board, my kitchen smelled like a winter wonderland—rich cocoa swirling in the air, marshmallows dotting every surface, and laughter bubbling from the next room. Honestly, there’s something magical about watching friends and family build their own perfect mug, each creation a little masterpiece of comfort. If you’ve never tried a DIY hot chocolate board, you’re in for a treat! Whether it’s a snow day, a holiday movie night, or just an excuse to indulge, this setup turns any gathering into a cozy, chocolate-filled celebration.
I first stumbled into the world of hot chocolate boards during a December get-together. We’d planned a simple cocoa night, but then I started laying out toppings—caramel bits, candy canes, whipped cream, you name it. Suddenly, everyone was crowded around, inventing wild combos and snapping photos for Pinterest. (Let’s face it, a hot chocolate board is pure Instagram bait.) Over time, I’ve tweaked my board using feedback from picky kids, food-loving adults, and even a few friends with special dietary needs. It’s one of my favorite party tricks—easy to customize, always a hit, and seriously fun to assemble.
This DIY hot chocolate board isn’t just about the chocolate, though. It’s about slowing down, savoring little moments, and letting everyone add their own splash of joy. Whether you’re baking up a storm or looking for a fuss-free dessert, this board fits right in. Perfect for busy families, creative hosts, or anyone craving a little warmth and nostalgia. Let’s get into the how-to, the tasty ideas, and all the ways you can make your hot chocolate board the centerpiece of your next cozy gathering!
Why You’ll Love This Recipe
I’ve tested and tweaked this hot chocolate board setup for everything from neighborhood winter parties to quiet evenings in. Trust me, once you try it, you’ll never go back to plain mugs of cocoa. Here’s why this DIY hot chocolate board stands out:
- Quick & Easy: You can set up the whole board in under 20 minutes—no baking, no fussy prep, just fun assembly!
- Simple Ingredients: Most toppings are pantry staples or supermarket finds—no need for specialty stores or complicated recipes.
- Perfect for Any Occasion: Whether it’s a holiday brunch, a birthday sleepover, or a spontaneous movie night, it brings everyone together.
- Crowd-Pleaser: Kids and adults go wild for the endless topping choices. You’ll see smiles, laughter, and lots of second helpings.
- Unbelievably Delicious: The combo of rich cocoa, gooey marshmallows, and fun mix-ins makes every mug a comfort food masterpiece.
What makes my hot chocolate board different? I use a mix of classic toppings and unexpected twists—think chocolate-dipped pretzels, fresh fruit, and flavored syrups. The real game-changer, though, is how interactive it is. Everyone gets to play barista, layering their favorite flavors and snapping pics of their creations. (You’ll want to keep your phone handy for those Pinterest-worthy shots!)
There’s an emotional connection, too. Sharing a hot chocolate board is about more than just dessert—it turns a chilly evening into a memorable event. I’ve watched shy guests light up, kids invent wacky combos, and friends swap topping ideas. It’s comfort food with personality, and it’s ridiculously easy to pull off. If you want a recipe that brings people together and leaves them raving, this is it.
What Ingredients You Will Need
This DIY hot chocolate board is all about options. You can stick with the classics or get creative—just don’t skip the essentials. Here’s everything you’ll need for a show-stopping setup:
For the Hot Chocolate
- Milk or Non-Dairy Milk (whole milk, oat milk, almond milk—whatever suits your crowd)
- High-Quality Hot Chocolate Mix (look for one with real cocoa; I love Ghirardelli or Godiva for rich flavor)
- Chocolate Chips or Chopped Chocolate (semi-sweet, milk, or dark; melts into the drink for extra decadence)
- Heavy Cream (optional, for ultra-creamy texture)
- Sweeteners (sugar, maple syrup, honey; adjust to taste)
Classic Toppings
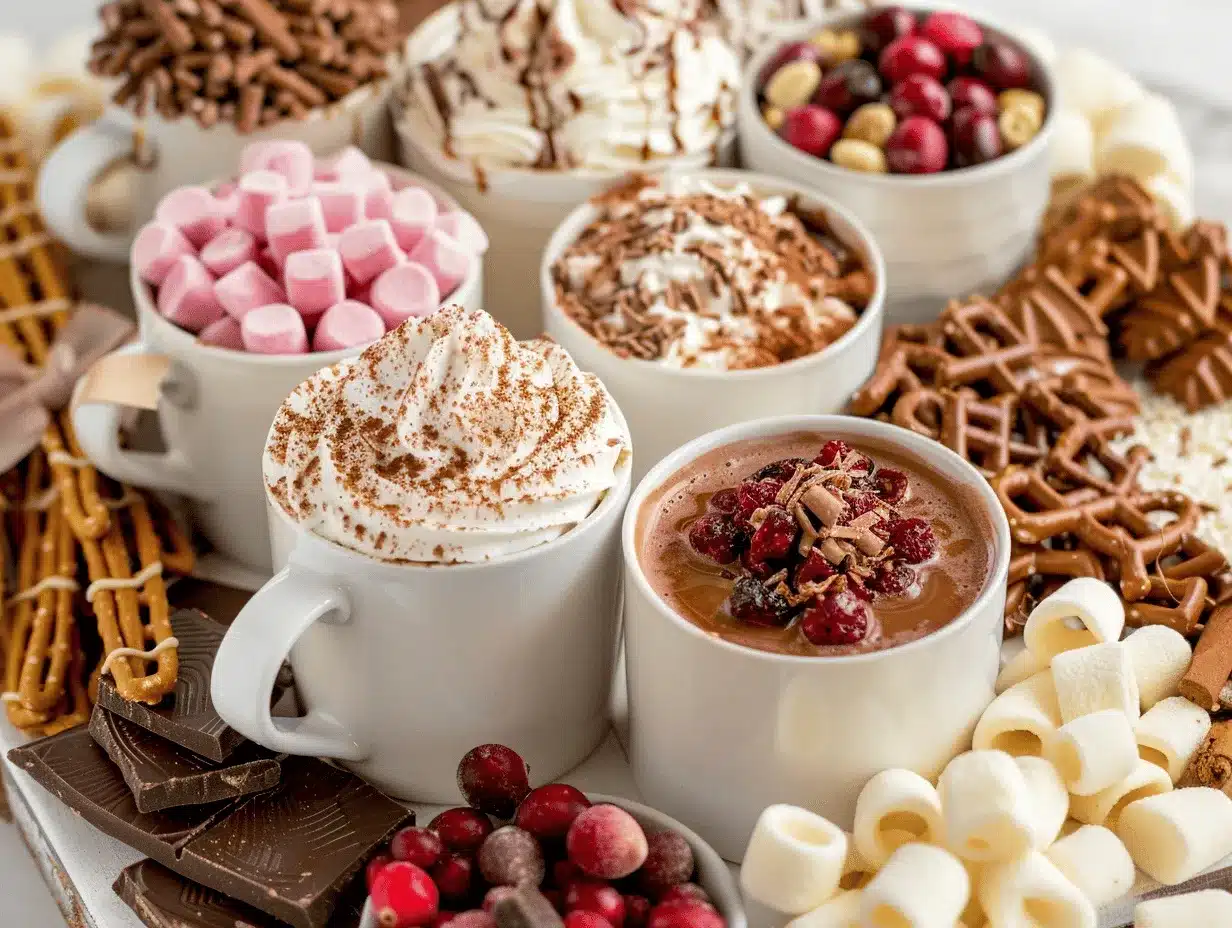
- Mini Marshmallows (the must-have, hands down)
- Whipped Cream (store-bought or homemade—try adding a splash of vanilla!)
- Chocolate Shavings (use a vegetable peeler on a chocolate bar for pretty curls)
- Cocoa Powder (for dusting)
- Crushed Candy Canes (adds a festive minty crunch)
- Caramel Sauce (drizzle for sweetness)
- Sprinkles (rainbow or chocolate, for a fun pop)
Flavor Boosters & Mix-Ins
- Cinnamon Sticks (stir for subtle spice)
- Nutmeg (freshly grated, if you want to get fancy)
- Flavored Syrups (hazelnut, vanilla, coconut; Torani is my go-to brand)
- Sea Salt (just a pinch—trust me, it makes the chocolate pop)
Crunchy & Fruity Additions
- Chocolate-Dipped Pretzels (salty-sweet perfection)
- Biscotti or Wafer Cookies (for dunking)
- Fresh Berries (raspberries, strawberries—adds freshness)
- Dried Fruit (cherries, cranberries, apricots)
Substitution Tips
- Use coconut milk or soy milk for a dairy-free base.
- Swap out regular whipped cream for coconut whipped cream if you need vegan options.
- Gluten-free cookies and pretzels keep the board inclusive for all.
- If you’re avoiding nuts, skip nut-based syrups and toppings.
I usually grab ingredients from my local grocery store or use what’s already in the pantry. Don’t sweat it if you’re missing a few items—just mix and match with what you love. The goal is variety, fun, and flavors that make your guests smile!
Equipment Needed
You don’t need fancy tools to set up a hot chocolate board—just a bit of creativity! Here’s what I use:
- Large Serving Board or Tray: Wooden boards work best for that Pinterest-worthy look, but any large platter will do.
- Small Bowls or Ramekins: For organizing toppings like marshmallows, sprinkles, and candy canes.
- Mugs: Sturdy, wide-mouthed mugs make it easy to pile on toppings.
- Spoons and Tongs: For scooping and serving mix-ins (I like mini spoons for sprinkles and syrups).
- Pitcher or Pot: To keep the hot chocolate warm; I’ve used everything from a slow cooker to a stovetop pot (a thermal carafe works too).
- Labels or Small Signs: Optional, but cute for identifying toppings—especially with kids or big groups.
If you don’t have a big board, use a baking sheet lined with parchment. Mini mason jars make great topping containers, and a regular soup ladle works for serving cocoa. Honestly, I’ve assembled boards with thrifted dishes and mismatched mugs—budget-friendly can be beautiful! Just keep an eye on safety (no glass near little ones) and make sure everything is easy to reach.
Preparation Method
-
Prepare the Hot Chocolate Base:
In a medium saucepan, pour 4 cups (960 ml) of milk (or dairy-free alternative). Heat over medium until steaming but not boiling—about 5 minutes. Add 1 cup (170 g) chocolate chips or chopped chocolate, stirring until melted and smooth. If you want extra creaminess, stir in 1/4 cup (60 ml) heavy cream. Sweeten to taste with 2–3 tablespoons (30–45 ml) maple syrup or sugar. (Watch for chocolate sticking to the bottom; stir frequently.) -
Keep Hot Chocolate Warm:
Transfer your hot chocolate to a slow cooker on “warm,” a thermal carafe, or just keep it on the lowest stove setting. (If you’re using a slow cooker, set to warm and leave the lid off for easy serving.) This keeps the cocoa ready for refills all night! -
Arrange the Board:
Choose your serving board or tray. Place small bowls around the board for toppings—group similar items together (sweet, crunchy, fruity). Use ramekins for sauces and syrups to keep things tidy. Lay out mugs at one end or in a circle around the board. -
Fill Bowls with Toppings:
Add marshmallows, whipped cream, chocolate shavings, crushed candy canes, sprinkles, and other mix-ins to bowls. Arrange cookies, pretzels, and fruit in clusters for visual appeal. (I stack marshmallows in tall jars for height, and place cinnamon sticks upright for easy grabbing.) -
Set Out Serving Tools:
Place spoons and tongs near each topping. Add mini scoops for sprinkles and labels if you want to get crafty. (I’ve made quick signs using toothpicks and sticky notes!) -
Invite Guests to Build Their Mug:
Pour hot chocolate into mugs. Let everyone add their favorite toppings—whipped cream first, then marshmallows, sprinkles, sauces, and cookies. Encourage combos like “peppermint mocha” (chocolate + candy canes + whipped cream) or “salty caramel crunch” (caramel sauce + pretzels + sea salt). -
Optional: Add a Creative Touch:
Provide fancy stir sticks, edible glitter, or flavored syrups. If you’re feeling extra, set up a mini torch for toasting marshmallows (just be careful—adult supervision needed!). -
Troubleshooting Tips:
If cocoa gets too thick, add a splash of warm milk. If toppings run low, refill bowls as needed. For spills, keep a damp cloth handy—it happens when the excitement kicks in!
When I’m prepping, I set everything out about 15 minutes before guests arrive. It’s a breeze to assemble, and the board looks more inviting when toppings are fresh and colorful. (Don’t stress if it’s a little messy—honestly, that’s part of the fun!)
Cooking Tips & Techniques
After hosting more cocoa nights than I can count, I’ve picked up some tricks for a smooth setup. Here are my favorite tips:
- Keep Cocoa at the Right Temperature: Use a slow cooker, insulated carafe, or warming tray. Too hot and it can scald; too cool and it loses its cozy vibe.
- Layer Toppings Thoughtfully: Start with whipped cream or marshmallows, then sprinkle dry toppings, then drizzle sauces. (If you do it backwards, you end up with a sticky mess!)
- Group Toppings for Easy Access: Place sweet items together, crunchy toppings on one side, and sauces in the center. This helps guests find their favorites quickly.
- Use Tall Bowls for Height: Stack marshmallows or cookies vertically for a Pinterest-worthy look. It adds dimension and makes the spread pop.
- Don’t Overfill Bowls: Smaller amounts let you swap out empty bowls for new toppings during the night. (I learned this the hard way—giant bowls of whipped cream get soggy fast.)
- Label Allergens Clearly: If you have nuts or gluten, mark them so nobody’s left guessing. I use simple paper signs or stickers.
- Embrace Imperfection: Boards will get messy. Chocolate dribbles, marshmallows go flying, and that’s part of the fun!
I’ve had a few fails (like leaving cocoa simmering too long—hello, burnt bottom), but with a little multitasking, you can refill toppings and keep everything fresh. Setting up in stages helps: prep cocoa, set out mugs, arrange toppings, and let guests serve themselves. The board turns into a focal point and conversation starter. Trust me, even if you forget a topping or two, nobody minds—they’re too busy building their dream mug!
Variations & Adaptations
One of the best things about a hot chocolate board is how flexible it is. You can tailor it for dietary needs, seasonal flavors, or just personal taste. Here are some ideas:
- Vegan Hot Chocolate Board: Use oat or almond milk, dairy-free whipped cream, and vegan marshmallows. Add coconut flakes for a tropical twist!
- Holiday Themed Board: Swap in gingerbread cookies, peppermint sticks, and red-and-green sprinkles. Orange zest or dried cranberries add a festive kick.
- Spicy Mexican Hot Chocolate Board: Stir in cinnamon, chili powder, and a dash of cayenne. Add cinnamon sticks and chocolate-dipped churros for dunking.
- Gluten-Free Adaptation: Use gluten-free cookies, pretzels, and check labels on marshmallows and syrups.
- Nut-Free Board: Skip nut-based toppings and syrups. Use sunflower seed butter or cookie butter for extra richness.
Personally, my favorite twist is adding a “grown-up” corner—think Irish cream liqueur, espresso shots, or salted caramel whisky for adults. During summer, I swap in fresh berries and lemon zest for a fruity, lighter spin. You can even set up a “DIY flavor station” with syrups and spices. The board is a blank canvas—let your imagination (and taste buds) run wild!
Serving & Storage Suggestions
For the best experience, serve your hot chocolate board while the cocoa is steaming and toppings are fresh. Here’s how I like to do it:
- Serving Temperature: Hot chocolate should be warm but not boiling. Pour into mugs just before guests arrive.
- Presentation: Arrange toppings in colorful bowls, stack cookies, and use tall jars for marshmallows. Add a few seasonal decorations (like pinecones or fairy lights) for extra charm.
- Pairings: Serve with mini donuts, cinnamon rolls, or a fruit platter. Hot cocoa goes great with savory snacks, too—try a cheese board on the side.
- Storage: Leftover cocoa can be refrigerated in an airtight container for up to three days. Reheat gently on the stove or in a microwave (add a splash of milk if needed).
- Freezing: You can freeze extra hot chocolate in ice cube trays—perfect for iced cocoa or quick reheating later.
- Reheating Tips: Warm leftovers slowly over low heat. Stir often to keep the texture smooth.
- Flavor Development: Some toppings (like marshmallows or cookies) soften over time—store them separately and refill the board as needed.
I always keep extra cocoa in the fridge for surprise cravings. (Let’s be real, there’s nothing better than late-night hot chocolate with leftover toppings!)
Nutritional Information & Benefits
A mug of classic hot chocolate (made with whole milk and real chocolate) clocks in at about 180–220 calories, depending on toppings. Using non-dairy milk or sugar-free mix can lower calories and carbs. These boards let everyone customize, which is great for dietary needs.
- Key Health Benefits: Dark chocolate is packed with antioxidants, magnesium, and mood-boosting compounds. Using fresh fruit or nuts adds fiber and healthy fats.
- Dietary Considerations: Easily adapted for vegan, gluten-free, or nut-free diets—just check labels and swap as needed.
- Allergens: Common allergens include dairy, nuts, gluten, and soy. Always label or separate toppings for safety.
I love that hot chocolate boards make it easy to cater to wellness goals without sacrificing flavor. You control the mix-ins, so everyone gets a treat that suits their lifestyle!
Conclusion
If you’re looking for a way to turn a regular night into something special, a DIY hot chocolate board is the answer. It’s easy, fun, and packed with possibilities—plus, you get to watch everyone create their own little mug of happiness. I keep coming back to this setup because it brings people together and sparks joy (even when the marshmallows spill everywhere!).
Don’t be afraid to mix up the toppings, swap ingredients, or add your own creative spin. The best boards reflect your personality and your guests’ favorites. Honestly, there’s nothing more comforting than a table full of friends, laughter, and chocolate. So grab your mugs, gather your crew, and let the hot chocolate magic begin!
If you try this recipe, I’d love to hear about your board—comment below with your favorite combos, share pics on Pinterest, or tell me your best topping twist. Cozy gatherings start here, and I can’t wait to see what you create!
Frequently Asked Questions
How do I keep hot chocolate warm during a party?
Use a slow cooker on “warm,” a thermal carafe, or keep the stove on low. This keeps the cocoa at sipping temperature without burning it.
Can I make the hot chocolate base ahead of time?
Absolutely! Prepare the cocoa, let it cool, then store in the fridge. Reheat gently before serving—add a splash of milk if it thickens too much.
What are some vegan topping options for a hot chocolate board?
Try coconut whipped cream, vegan marshmallows, dairy-free chocolate chips, and fruit. Oat or almond milk works great for the base.
How can I make my hot chocolate board look Pinterest-worthy?
Use a wooden board, colorful bowls, tall jars for marshmallows, and arrange toppings in groups. Add seasonal decorations like sprigs of pine, cinnamon sticks, or fairy lights for visual flair.
What’s the best way to serve a large crowd with a hot chocolate board?
Set up multiple serving stations, refill toppings often, and use disposable mugs if you’re short on dishes. Prep extra cocoa ahead of time so you’re ready for refills!
Pin This Recipe!
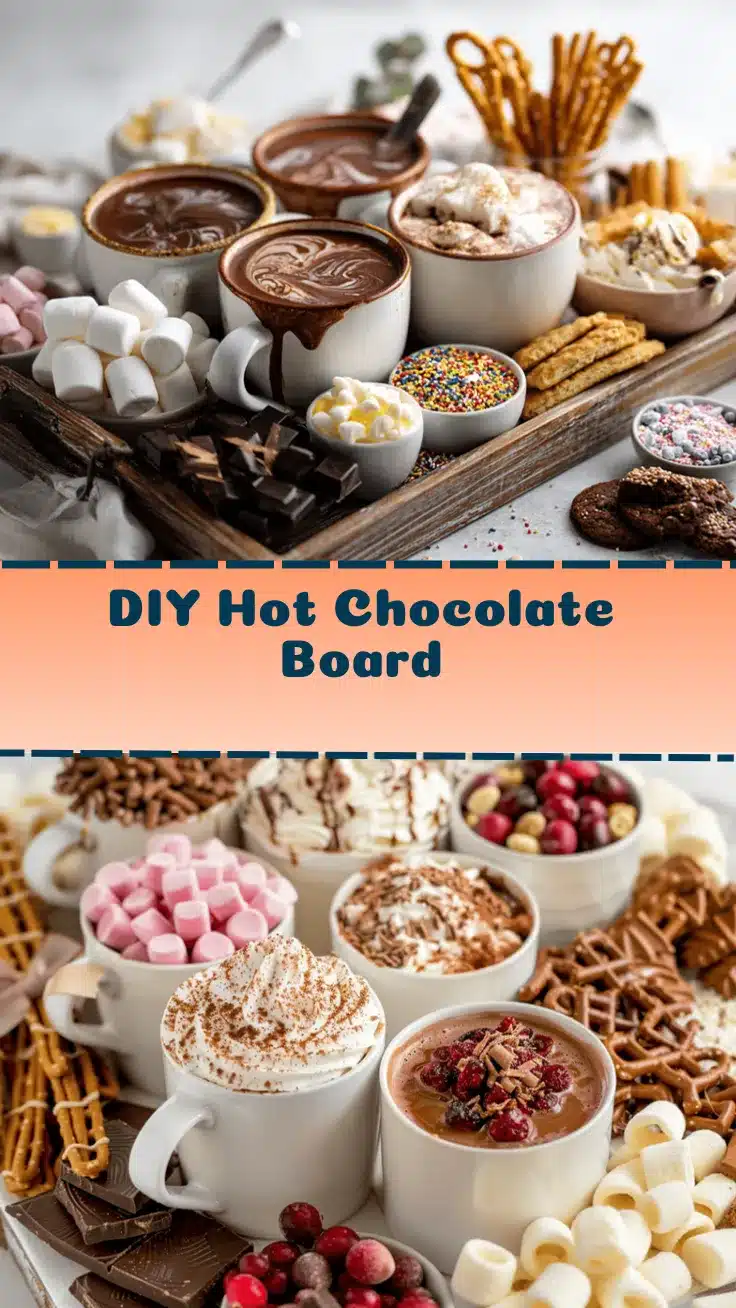
Hot Chocolate Board Ideas: Easy DIY Setup for Cozy Gatherings

This DIY hot chocolate board is a fun, interactive way to serve hot cocoa at gatherings, letting everyone customize their own mug with a variety of toppings and mix-ins. Perfect for cozy nights, parties, or holiday celebrations, it’s easy to assemble and endlessly adaptable for all ages and dietary needs.
- Prep Time: 15 minutes
- Cook Time: 5 minutes
- Total Time: 20 minutes
- Yield: 6 servings 1x
- Category: Dessert
- Cuisine: American
Ingredients
- 4 cups milk or non-dairy milk (whole, oat, almond, etc.)
- 1 cup high-quality hot chocolate mix or 1 cup chocolate chips/chopped chocolate (semi-sweet, milk, or dark)
- 1/4 cup heavy cream (optional)
- 2–3 tablespoons sugar, maple syrup, or honey (to taste)
- Mini marshmallows
- Whipped cream
- Chocolate shavings
- Cocoa powder
- Crushed candy canes
- Caramel sauce
- Sprinkles (rainbow or chocolate)
- Cinnamon sticks
- Nutmeg
- Flavored syrups (hazelnut, vanilla, coconut, etc.)
- Sea salt
- Chocolate-dipped pretzels
- Biscotti or wafer cookies
- Fresh berries (raspberries, strawberries, etc.)
- Dried fruit (cherries, cranberries, apricots)
Instructions
- Prepare the hot chocolate base: In a medium saucepan, heat 4 cups milk (or non-dairy alternative) over medium until steaming but not boiling (about 5 minutes). Add 1 cup chocolate chips or chopped chocolate, stirring until melted and smooth. For extra creaminess, stir in 1/4 cup heavy cream. Sweeten to taste with 2–3 tablespoons sugar or maple syrup, stirring frequently.
- Keep hot chocolate warm: Transfer to a slow cooker on ‘warm,’ a thermal carafe, or keep on the lowest stove setting. Leave the lid off for easy serving if using a slow cooker.
- Arrange the board: Place small bowls or ramekins on a large serving board or tray. Group similar toppings together (sweet, crunchy, fruity) and use ramekins for sauces and syrups. Lay out mugs at one end or around the board.
- Fill bowls with toppings: Add marshmallows, whipped cream, chocolate shavings, crushed candy canes, sprinkles, and other mix-ins to bowls. Arrange cookies, pretzels, and fruit in clusters for visual appeal.
- Set out serving tools: Place spoons and tongs near each topping. Add mini scoops for sprinkles and labels if desired.
- Invite guests to build their mug: Pour hot chocolate into mugs and let everyone add their favorite toppings in their preferred order.
- Optional: Add creative touches like fancy stir sticks, edible glitter, or flavored syrups. For toasted marshmallows, provide a mini torch with adult supervision.
- Troubleshooting: If cocoa gets too thick, add a splash of warm milk. Refill toppings as needed and keep a damp cloth handy for spills.
Notes
Customize your board with seasonal toppings, vegan or gluten-free options, and creative mix-ins. Use a slow cooker or insulated carafe to keep cocoa warm. Label allergens clearly for guests. Don’t stress about perfection—messy boards are part of the fun!
Nutrition
- Serving Size: 1 mug (about 8 oz hot chocolate with toppings)
- Calories: 200
- Sugar: 22
- Sodium: 80
- Fat: 8
- Saturated Fat: 5
- Carbohydrates: 28
- Fiber: 2
- Protein: 5
Keywords: hot chocolate board, DIY hot chocolate, hot cocoa bar, party dessert, winter drinks, cozy gatherings, holiday entertaining, customizable dessert, chocolate, toppings, family-friendly, gluten-free, vegan options



