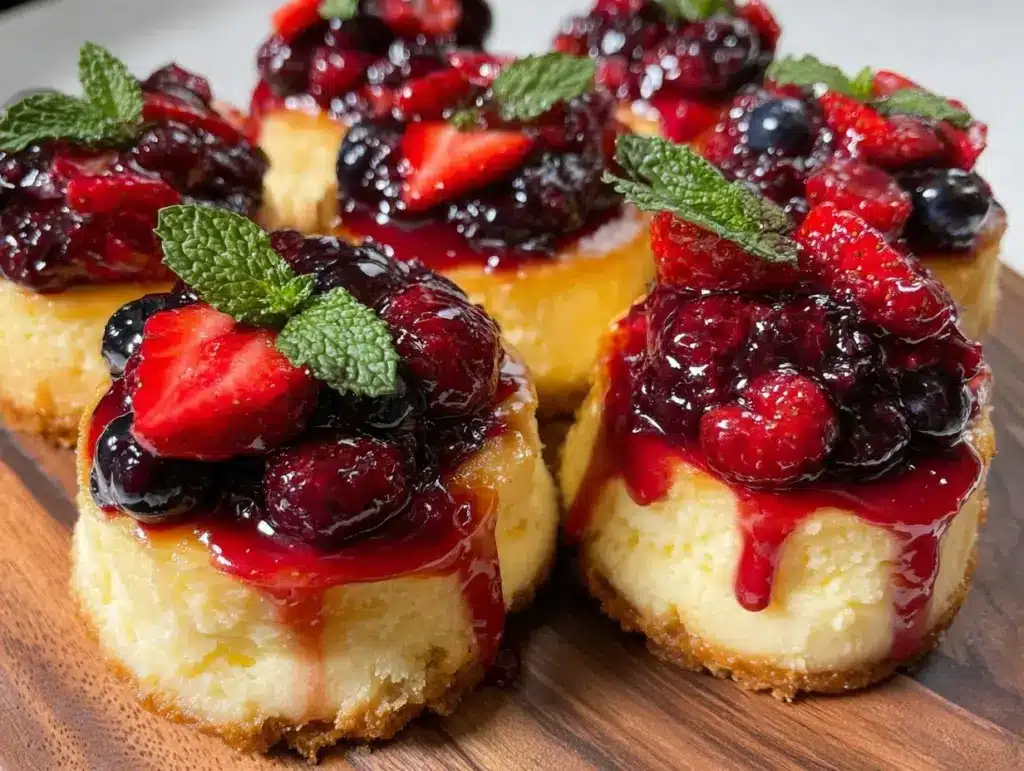
The sight of a berry-topped mini cheesecake board instantly sparks joy, doesn’t it? I remember the first time I whipped one up for a casual get-together—it was an absolute showstopper. The creamy cheesecakes nestled among piles of fresh berries, nuts, and little treats created this inviting spread that had everyone reaching for seconds. Honestly, there’s something so satisfying about making an easy homemade dessert that feels fancy but doesn’t stress you out in the kitchen.
This irresistible berry-topped mini cheesecake board has become my go-to whenever I want to impress guests or just treat myself after a long day. It’s not just about the flavors; it’s a whole experience of colors, textures, and tastes that come together beautifully. Plus, it’s perfect if you like variety without the hassle of baking multiple desserts.
Over the years, I’ve tested this recipe numerous times, tweaking the crust and perfecting the topping combos—trust me, it’s worth every minute. If you’re looking for a crowd-pleasing, visually stunning dessert that’s simple to assemble and packed with fresh flavors, this is your winner. It’s great for weekend brunches, birthday parties, or even a sweet treat to cozy up with on a chilly evening.
Why You’ll Love This Recipe
After making this mini cheesecake board countless times, I can say it’s pretty much foolproof and endlessly adaptable. Here’s why it’s become a staple in my dessert repertoire:
- Quick & Easy: The mini cheesecakes bake in about 20 minutes, and assembling the board takes no more than 15 minutes. Perfect when you’re short on time but still want to wow.
- Simple Ingredients: You probably have most of these in your pantry already—cream cheese, eggs, sugar, and fresh berries are all pretty common staples.
- Perfect for Entertaining: Whether it’s a brunch gathering, holiday feast, or casual dinner party, this board adds a touch of elegance without the fuss.
- Crowd-Pleaser: Kids love the mini size, and adults appreciate the fresh berries that balance the richness of the cheesecake.
- Unbelievably Delicious: The creamy texture of the cheesecakes combined with the tart-sweet berries is just next-level comfort food.
What sets this berry-topped mini cheesecake board apart? The crust is perfectly buttery with just the right crunch, and the berries are arranged to look almost too pretty to eat (but you’ll want to anyway). I’ve swapped in different nuts and drizzles depending on the season, and each time it feels like a brand-new dessert experience. Honestly, it’s my favorite way to impress guests without spending hours in the kitchen.
What Ingredients You Will Need
This recipe keeps things straightforward with ingredients that play well together to create a dessert that’s fresh, creamy, and colorful. A few pantry staples and seasonal berries make all the difference.
- For the Mini Cheesecakes:
- 8 oz (225 g) cream cheese, softened (I prefer full-fat for creaminess)
- 1/4 cup (50 g) granulated sugar
- 1 large egg, room temperature
- 1/2 teaspoon vanilla extract (pure vanilla is best)
- 2 tablespoons sour cream or Greek yogurt (adds a slight tang and silkiness)
- For the Crust:
- 1 cup (100 g) graham cracker crumbs (or digestive biscuits crushed finely)
- 3 tablespoons unsalted butter, melted (gives that rich, buttery crunch)
- 1 tablespoon sugar (optional, for extra sweetness)
- For the Toppings:
- 1 cup fresh strawberries, sliced
- 1 cup fresh blueberries
- 1 cup fresh raspberries
- 1/4 cup chopped toasted almonds or pecans (adds crunch)
- Fresh mint leaves for garnish (optional but adds a refreshing touch)
- Honey or fruit glaze for drizzling (optional, use lightly)
Tips for picking ingredients: I recommend using firm, fresh berries for that pop of color and flavor. For the crust, brands like Nabisco graham crackers work well, but any plain biscuit will do. If you want a gluten-free option, use gluten-free cookie crumbs or almond flour instead. Also, if you’re dairy-free, swapping cream cheese with a plant-based alternative is doable but expect a slightly different texture.
Equipment Needed
- Mini muffin tin or silicone mini cheesecake molds (these make the perfect bite-size cheesecakes)
- Mixing bowls (one large for batter, one small for crust)
- Electric mixer or hand whisk (electric mixer makes it smoother, but whisking by hand works too)
- Measuring cups and spoons
- Spatula or spoon for mixing and scraping
- Toothpicks or forks for testing doneness
- Serving board or platter for assembling the mini cheesecakes and toppings
If you don’t have a mini muffin tin, small silicone molds or even cupcake liners in a regular muffin tray can work as a substitute. When using silicone, it’s easier to pop the cheesecakes out without cracking. I find that a rubber spatula is great for scraping every bit of batter from the bowl—waste not, want not!
Detailed Preparation Method
- Preheat your oven to 325°F (163°C). Line your mini muffin tin with paper liners or lightly grease silicone molds to prevent sticking. This step ensures your cheesecakes come out clean and easy to remove.
- Make the crust: In a small bowl, combine the graham cracker crumbs, melted butter, and sugar. Stir until the mixture resembles wet sand. Spoon about 1 teaspoon (5 g) of this crust mixture into each muffin cup and press down firmly using the back of a spoon or your fingers. This forms a solid base that will hold together after baking.
- Prepare the cheesecake filling: In a large bowl, beat the softened cream cheese with an electric mixer on medium speed until smooth and creamy (about 2 minutes). Add sugar and beat again until combined. Then add the egg, vanilla extract, and sour cream or Greek yogurt. Mix just until smooth—avoid overmixing to prevent cracks.
- Fill the crusts: Using a small spoon or a piping bag, evenly distribute the cheesecake batter over each crust, filling about 3/4 full. This prevents overflow and allows room for the batter to rise slightly.
- Bake: Place the muffin tin on the center rack and bake for 18-22 minutes. The edges should be set, but the center will still jiggle slightly when you gently shake the pan. This guarantees a creamy texture once cooled.
- Cool: Remove from the oven and let the cheesecakes cool to room temperature in the tin. Then refrigerate for at least 2 hours or overnight for the best texture and flavor development.
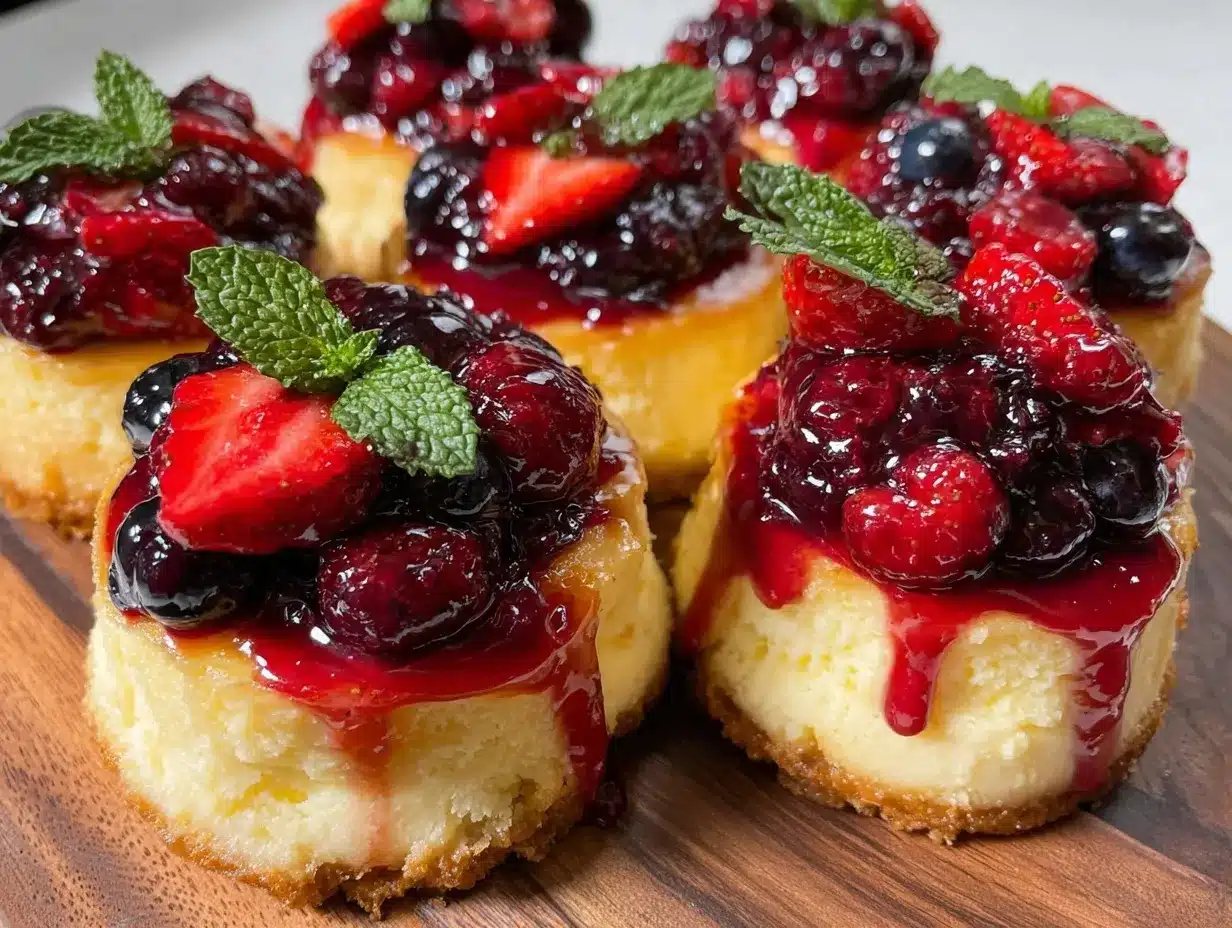
- Assemble the board: Once chilled, carefully remove the mini cheesecakes from the molds. Arrange them on your serving board. Artistically scatter the fresh berries around them, sprinkle chopped toasted nuts, and tuck in some fresh mint leaves for color and aroma. Drizzle lightly with honey or a fruit glaze if desired for a glossy finish.
Pro tip: To avoid cracks on your cheesecakes, don’t over-bake and allow them to cool slowly. Also, make sure your cream cheese is fully softened before mixing—it makes a world of difference in smoothness.
Cooking Tips & Techniques
Getting mini cheesecakes just right can be a bit tricky, but a few tricks have served me well:
- Room Temperature Ingredients: Always bring your cream cheese, egg, and sour cream to room temperature before mixing. It helps create a smooth batter without lumps.
- Don’t Overmix: Whisk until combined, but stop once the batter is smooth to avoid incorporating too much air, which can cause cracks.
- Press Crust Firmly: A well-packed crust stops the base from crumbling when you bite in.
- Use Water Bath (Optional): If you want ultra-silky cheesecakes, placing your muffin tin in a shallow pan of hot water during baking helps prevent cracking, but it’s not necessary for this mini version.
- Test Doneness: Centers should jiggle slightly but not be liquidy. Overbaking leads to dry texture, so keep a close eye in the last 5 minutes.
- Chill Thoroughly: Refrigeration firms up the texture and helps flavors meld.
One time, I rushed the cooling and my cheesecakes cracked—lesson learned! Leaving them to chill overnight always makes a huge difference. Also, when arranging the board, don’t be afraid to play with colors and textures; it makes the dessert that much more inviting.
Variations & Adaptations
This berry-topped mini cheesecake board is a canvas for creativity! Here are some fun twists I’ve tried or recommend:
- Chocolate Lover’s Version: Mix 2 tablespoons of cocoa powder into the cheesecake batter for a rich chocolate flavor. Top with dark chocolate shavings alongside berries.
- Gluten-Free Option: Swap the graham cracker crust for almond flour mixed with melted coconut oil. It’s nutty and works beautifully with the creamy filling.
- Seasonal Fruits: In summer, fresh peaches or mango slices work wonders. In fall, try pomegranate seeds and a sprinkle of cinnamon on top.
- Dairy-Free Adaptation: Use vegan cream cheese and coconut yogurt instead of dairy. The texture changes slightly but the flavors still shine.
- Nut-Free: Omit the nuts and add toasted coconut flakes or seeds for crunch.
I once added a splash of lemon zest to the batter for a bright, citrusy note that paired perfectly with the mixed berries. Feel free to experiment and make it your own!
Serving & Storage Suggestions
Serving this mini cheesecake board is as much about presentation as it is about flavor. Serve chilled or slightly chilled for the best texture. I love placing it on a wooden or marble board—something rustic or elegant depending on the occasion.
Pair the cheesecakes with a cup of herbal tea or a glass of sparkling wine for a festive touch. Fresh mint leaves not only add aroma but also make a pretty garnish.
To store, cover the cheesecakes tightly with plastic wrap or keep them in an airtight container in the fridge for up to 3 days. If you want to prepare in advance, you can freeze them individually wrapped for up to a month; just thaw in the fridge overnight before serving.
Reheating isn’t recommended as the texture is best enjoyed cold, but if you want to soften slightly, leave them at room temperature for 15 minutes. The flavors tend to deepen after resting, making every bite even more satisfying.
Nutritional Information & Benefits
Each mini cheesecake (makes about 12 servings) contains roughly:
| Calories | 180 kcal |
|---|---|
| Protein | 4 g |
| Fat | 12 g |
| Carbohydrates | 14 g |
| Fiber | 2 g |
The cream cheese provides a good source of calcium and protein, while the fresh berries bring antioxidants and vitamins to the table. Using Greek yogurt or sour cream adds a slight probiotic benefit and tang. This dessert fits well into a balanced diet when enjoyed in moderation and is gluten-free if you choose appropriate crusts.
Keep in mind that those with dairy or nut allergies should adapt the recipe accordingly, but otherwise, it’s a wholesome treat that feels indulgent without going overboard.
Conclusion
This irresistible berry-topped mini cheesecake board is more than just a dessert—it’s a celebration of flavor, texture, and colorful presentation that’s bound to impress. Whether you’re a seasoned baker or just starting out, you’ll find it simple to pull together and rewarding to share.
I love how customizable it is; you can switch up the fruit, nuts, and even the crust to suit your taste or dietary needs. Give it a try for your next gathering or a cozy night in—you might just find it becomes your favorite go-to dessert.
Be sure to leave a comment sharing your tweaks or experiences! And if you make this recipe, don’t hesitate to snap a pic and share it with friends—because good food deserves a little show-and-tell.
Happy baking and even happier tasting!
FAQs
Can I make the mini cheesecakes ahead of time?
Absolutely! You can bake them a day or two in advance and keep them refrigerated. Just add the fresh berries right before serving for the best look and taste.
What if I don’t have a mini muffin tin?
You can use silicone mini molds or regular muffin tins with cupcake liners. Just adjust the baking time slightly if the size differs.
How do I prevent cracks on my cheesecakes?
Don’t overbake and use room temperature ingredients. Slow cooling and chilling overnight also help keep the texture smooth and crack-free.
Can I use frozen berries instead of fresh?
Yes, but thaw and drain them well to avoid excess moisture, which can make the crust soggy or the topping watery.
Is there a dairy-free version of this recipe?
Definitely! Use plant-based cream cheese and yogurt alternatives. The texture will be slightly different but still delicious.
Pin This Recipe!

Irresistible Berry-Topped Mini Cheesecake Board

A visually stunning and easy-to-assemble dessert featuring mini cheesecakes topped with fresh berries, nuts, and optional drizzles. Perfect for entertaining or a cozy treat.
- Prep Time: 15 minutes
- Cook Time: 20 minutes
- Total Time: 2 hours 35 minutes
- Yield: 12 servings 1x
- Category: Dessert
- Cuisine: American
Ingredients
- 8 oz (225 g) cream cheese, softened
- 1/4 cup (50 g) granulated sugar
- 1 large egg, room temperature
- 1/2 teaspoon vanilla extract
- 2 tablespoons sour cream or Greek yogurt
- 1 cup (100 g) graham cracker crumbs or digestive biscuits, crushed finely
- 3 tablespoons unsalted butter, melted
- 1 tablespoon sugar (optional)
- 1 cup fresh strawberries, sliced
- 1 cup fresh blueberries
- 1 cup fresh raspberries
- 1/4 cup chopped toasted almonds or pecans
- Fresh mint leaves for garnish (optional)
- Honey or fruit glaze for drizzling (optional)
Instructions
- Preheat oven to 325°F (163°C). Line mini muffin tin with paper liners or lightly grease silicone molds.
- In a small bowl, combine graham cracker crumbs, melted butter, and sugar. Stir until mixture resembles wet sand.
- Spoon about 1 teaspoon of crust mixture into each muffin cup and press down firmly.
- In a large bowl, beat softened cream cheese with an electric mixer until smooth (about 2 minutes). Add sugar and beat again until combined.
- Add egg, vanilla extract, and sour cream or Greek yogurt. Mix just until smooth, avoiding overmixing.
- Fill each crust about 3/4 full with cheesecake batter using a spoon or piping bag.
- Bake for 18-22 minutes until edges are set but centers jiggle slightly.
- Cool cheesecakes to room temperature in the tin, then refrigerate at least 2 hours or overnight.
- Carefully remove mini cheesecakes from molds and arrange on serving board.
- Scatter fresh berries around cheesecakes, sprinkle chopped toasted nuts, add fresh mint leaves, and drizzle lightly with honey or fruit glaze if desired.
Notes
Use room temperature ingredients for smooth batter. Avoid overmixing to prevent cracks. Press crust firmly to avoid crumbling. Optional water bath can help prevent cracking but is not necessary. Chill cheesecakes thoroughly for best texture and flavor. Use fresh berries for best presentation and flavor. For gluten-free, substitute crust with almond flour and coconut oil. For dairy-free, use plant-based cream cheese and yogurt alternatives.
Nutrition
- Serving Size: 1 mini cheesecake
- Calories: 180
- Fat: 12
- Carbohydrates: 14
- Fiber: 2
- Protein: 4
Keywords: mini cheesecake, berry topped, easy dessert, homemade dessert, cheesecake board, fresh berries, party dessert, bite-size cheesecake



