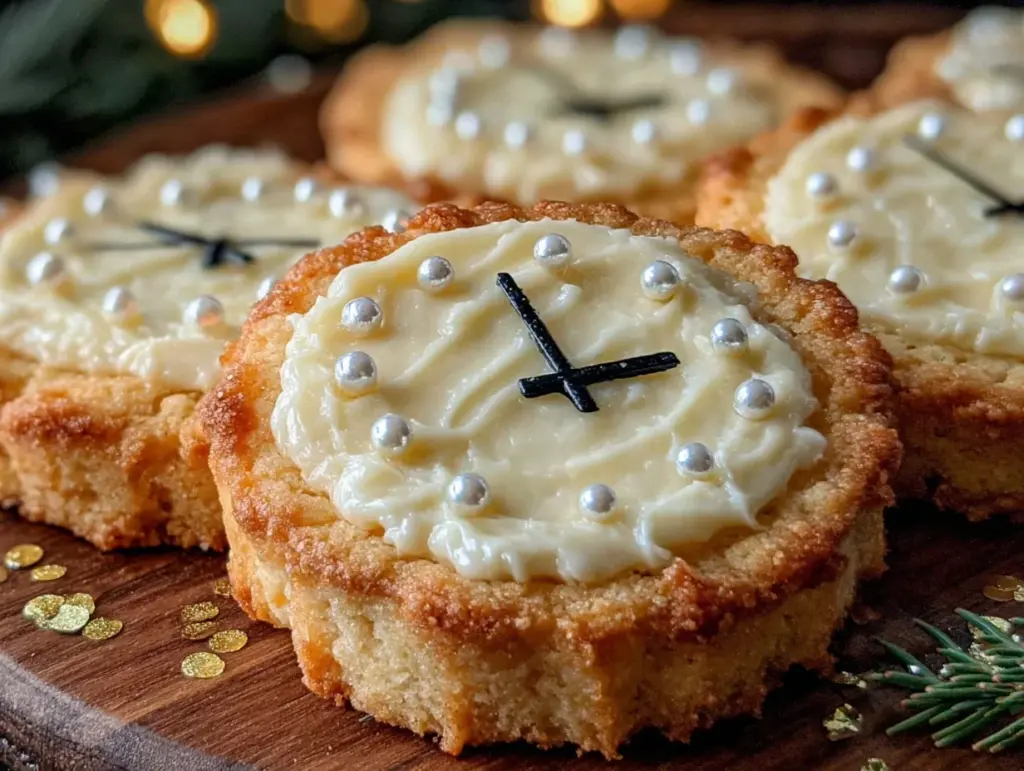
The moment you bite into one of these New Year’s clock cookies, you’re instantly transported to last-minute party prep and the joyful chaos of festive celebrations. Honestly, there’s something about a cookie shaped like a clock, ticking down to midnight, that just feels magical — like you’re savoring the last sweet seconds of the year. I first whipped up these irresistible New Year’s clock cookies a few seasons ago when I wanted something both fun and delicious to bring to my holiday gathering. They quickly became the star of the show, disappearing faster than I could count down from ten!
These cookies aren’t just pretty faces; they pack a buttery, melt-in-your-mouth texture and a hint of vanilla that keeps everyone coming back for more. Plus, decorating each clock with royal icing and edible glitter adds that festive sparkle, perfect for ringing in the new year with style. Whether you’re baking for a big party or a cozy family night, these New Year’s clock cookies make celebration time feel extra special. Trust me, after baking and tweaking this recipe multiple times, I’m convinced they’re the best way to countdown and snack simultaneously.
So if you want a sweet treat that doubles as a festive decoration and conversation starter, these New Year’s clock cookies are exactly what your holiday needs. Let’s get into why you’ll absolutely love baking and sharing these delightful time-telling treats!
Why You’ll Love This Recipe
- Quick & Easy: These cookies come together in about 45 minutes from start to finish — perfect for those last-minute party plans.
- Simple Ingredients: No fancy or hard-to-find items here. You probably already have the basics like flour, butter, and sugar sitting in your pantry.
- Perfect for Festive Occasions: Ideal for New Year’s Eve parties, family gatherings, or even a fun baking day with kids who love decorating.
- Crowd-Pleaser: The charming clock design is always a hit, and the buttery, soft texture keeps everyone reaching for seconds.
- Unbelievably Delicious: The subtle vanilla and melt-in-your-mouth crumb make these cookies the kind you want to savor slowly—if you can resist!
What sets this recipe apart? It’s the perfect balance of a tender cookie base with a royal icing that’s just the right consistency for detailed clock faces. I also add a pinch of almond extract for a subtle twist that amps up the flavor without overpowering the classic vanilla notes. Plus, after baking and decorating these for friends and family multiple times, I’ve perfected the timing and techniques so you get consistent results every time. Honestly, these aren’t just cookies—they’re little edible countdown clocks, bringing joy and sweetness to any celebration.
And let’s be real — there’s something so satisfying about seeing those clock faces come alive with icing hands pointing right to midnight. It’s a mini celebration on a cookie sheet, and I promise, it’s as fun to make as it is to eat!
What Ingredients You Will Need
This recipe uses simple, wholesome ingredients to create a buttery cookie that holds its shape well for decorating. Most of these are pantry staples, which means no last-minute runs to specialty stores.
- Unsalted butter, softened (I recommend using a good-quality European-style butter for extra richness)
- Granulated sugar (adds sweetness and helps with crisp edges)
- Large egg, room temperature (for binding and moisture)
- Pure vanilla extract (classic flavor enhancer)
- Almond extract (just a splash for a subtle, nutty undertone)
- All-purpose flour (provides structure; sifted for lightness)
- Baking powder (for a slight lift)
- Salt (balances sweetness and enhances flavor)
- Royal icing ingredients: powdered sugar, meringue powder, and water (for smooth, pipeable icing)
- Food coloring (black or dark brown gel for clock hands and numbers, optional gold or silver edible glitter for sparkle)
When choosing butter, go for one with a higher fat content if possible; it really makes the cookies tender and flavorful. For the flour, I stick to all-purpose, but you can swap in a gluten-free blend if you have dietary needs. The royal icing is straightforward but essential for those crisp, defined clock details. If you want to keep things simple, you can skip the glitter, but honestly, it adds such a festive touch that’s worth the tiny extra effort.
Equipment Needed
- Mixing bowls: One large for batter, one small for icing.
- Electric mixer: Handheld or stand mixer to cream butter and sugar smoothly.
- Measuring cups and spoons: For precise ingredient amounts.
- Rolling pin: To roll out the dough evenly—consider a rolling pin with thickness rings for consistent thickness.
- Clock-shaped cookie cutter: You can find these online or use a round cutter and pipe clock faces yourself.
- Baking sheets: Lined with parchment paper or silicone baking mats for easy cleanup.
- Piping bags and fine tips: Essential for decorating the clock hands and numbers.
If you don’t have a clock-shaped cutter, a simple round cutter works just fine—you just have to get creative with the icing to draw the clock face. I once used a small offset spatula when piping details got tricky, and it helped a ton. For a budget-friendly alternative, zip-top bags with the corner snipped off serve as makeshift piping bags. Just remember to wash and dry your tools well between uses, especially when working with royal icing to avoid clumps and maintain smooth flow.
Detailed Preparation Method
- Prepare the dough: In a large bowl, cream together 1 cup (227 g) softened unsalted butter and 1 cup (200 g) granulated sugar until light and fluffy, about 3-4 minutes using an electric mixer on medium speed.
- Add eggs and extracts: Beat in 1 large egg, 1 teaspoon pure vanilla extract, and ¼ teaspoon almond extract until fully combined. This adds that delicate flavor that makes these cookies stand out.
- Mix dry ingredients: In a separate bowl, whisk together 3 cups (375 g) all-purpose flour, 1 teaspoon baking powder, and ½ teaspoon salt. Gradually add this to the wet mixture, mixing on low speed until dough just comes together. Avoid overmixing to keep the cookies tender.
- Chill the dough: Wrap the dough in plastic wrap and refrigerate for at least 1 hour. This step is crucial to prevent spreading and helps with rolling out a smooth, firm dough.
- Preheat oven: Set your oven to 350°F (175°C) and line baking sheets with parchment paper or silicone mats.
- Roll out and cut shapes: On a lightly floured surface, roll dough to about ¼ inch (6 mm) thickness. Use the clock-shaped cutter (or a round one) to cut out cookies. Transfer to baking sheets, spacing about 2 inches (5 cm) apart.
- Bake: Bake for 10-12 minutes, or until edges are just beginning to turn golden. Cookies will be soft but firm up as they cool. Let cool on baking sheets for 5 minutes, then transfer to wire racks to cool completely.
- Prepare royal icing: In a small bowl, combine 3 cups (360 g) powdered sugar, 2 tablespoons meringue powder, and 5-6 tablespoons water. Mix until smooth, then divide into portions for color if desired.
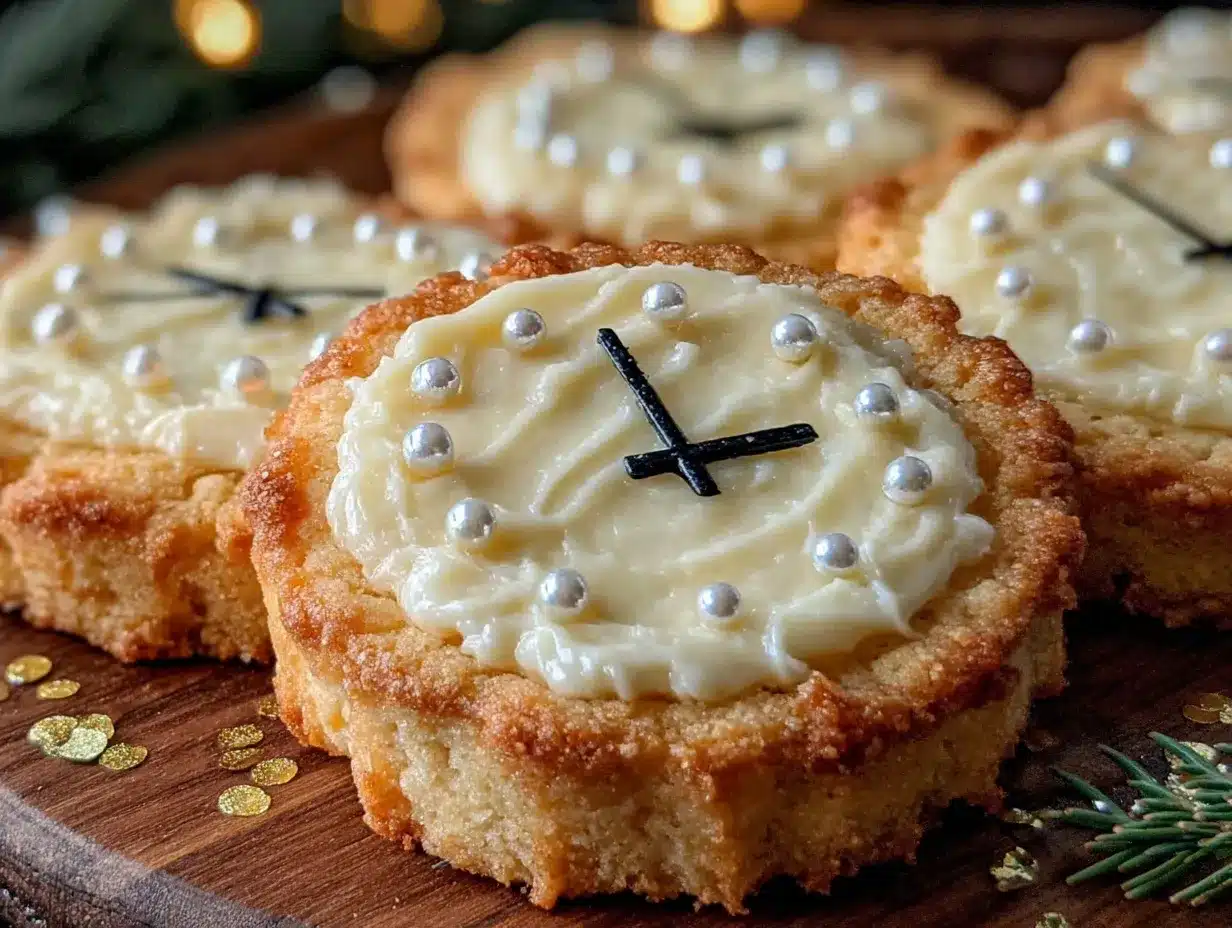
- Decorate: Use piping bags fitted with fine tips to outline the clock face with white icing. Once dry, pipe numbers and clock hands with black or dark brown icing. Add edible glitter or sprinkles for that festive shimmer. Allow icing to set for several hours or overnight before serving.
Pro tip: If your dough feels too sticky after chilling, pop it back in the fridge for 15 minutes before rolling. When piping, hold the bag steady and practice on parchment first to get a feel for the flow. And patience is key—let the icing dry fully to avoid smudging!
Cooking Tips & Techniques
One thing I learned the hard way is that dough temperature really affects cookie shape. If the dough’s too warm, cookies spread too much and lose that crisp clock look. So chilling is non-negotiable. Also, rolling your dough evenly is crucial for consistent baking—too thick and the cookies won’t bake through, too thin and they become brittle. Using thickness guide rings on your rolling pin can be a lifesaver here.
When it comes to royal icing, the consistency makes all the difference. Too thin and it runs, too thick and it’s hard to pipe. Aim for a slightly thicker “glue-like” texture for outlining, then thin it a bit with water for flooding large areas. I usually separate a small amount of icing for the fine details like clock numbers and hands, adding a bit more powdered sugar to keep it stiff.
Don’t rush the drying process! Icing needs time to harden to avoid smudges or cracks. I often leave decorated cookies on a cooling rack overnight. And if you’re multitasking, pipe the outlines first and flood the centers the next day for tidier results.
Variations & Adaptations
- Gluten-Free Version: Swap all-purpose flour for a 1:1 gluten-free baking blend. The dough will be a bit more delicate, so chill it longer and handle gently.
- Flavored Icing: Add a drop of lemon or orange extract to your royal icing for a zesty twist to complement the vanilla cookie base.
- Chocolate Clock Cookies: Substitute ¼ cup (22 g) of flour with unsweetened cocoa powder for a rich chocolate flavor—perfect for chocoholics celebrating the new year.
- Alternative Decorating: Instead of royal icing, try melted white chocolate for a creamy finish, or use edible markers to draw clock faces for a quick, less-fussy look.
One time, I made a batch using natural food colorings from beet juice and spirulina powder — the colors were softer but still festive, and my kids loved the natural twist. Feel free to customize the clock hands to represent your favorite midnight moment or even add initials for personalized party favors!
Serving & Storage Suggestions
These New Year’s clock cookies are best served at room temperature, letting their buttery texture shine. Arrange them on a festive platter or stack in a clear jar for a charming party centerpiece. Pair them with warm drinks like spiced cider or hot chocolate for a cozy celebration vibe.
For storage, keep cookies in an airtight container at room temperature for up to 5 days. If you want to save them longer, store in the freezer layered between parchment paper sheets for up to 3 months. When ready to enjoy, thaw at room temperature—decorations hold up surprisingly well!
Interestingly, the flavors tend to mellow and blend after a day or two, making the cookies taste even better after resting. If your icing softens a bit, you can gently re-crisp cookies in a 300°F (150°C) oven for 5 minutes, but watch closely to avoid browning.
Nutritional Information & Benefits
Each cookie (based on 24 servings) roughly contains:
| Calories | Carbohydrates | Fat | Protein | Sugar |
|---|---|---|---|---|
| 120 kcal | 18 g | 5 g | 1 g | 10 g |
While these cookies are a treat, they do provide some calcium from the butter and eggs, and the almond extract adds a trace of healthy fats. For those with dietary restrictions, this recipe can be adapted to gluten-free and dairy-free with simple swaps, making it accessible to many guests. Just a heads up if you have nut allergies—avoid almond extract or replace with vanilla only.
From a wellness perspective, I see these cookies as a joyful indulgence, perfect for sharing and celebrating without overdoing it. Balance in all things, right?
Conclusion
So there you have it—New Year’s clock cookies that are as fun to make as they are to eat. They bring a festive flair to any party, impress guests with their charming design, and satisfy sweet cravings with buttery goodness. I love how customizable they are, letting you play with flavors and decorations to match your celebration vibe.
If you try this recipe, don’t hesitate to tweak the colors or add your own creative touches—I’d love to hear about your versions! Drop a comment below sharing your decorating tips or how these cookies went over at your party. If you enjoyed the recipe, please share it with friends who need a festive baking project this season.
Here’s to ringing in the new year with sweet moments and delicious memories. Happy baking and happy celebrations!
FAQs
Can I make the cookie dough ahead of time?
Yes! The dough can be refrigerated for up to 3 days or frozen for up to 1 month. Just thaw in the fridge before rolling and cutting.
What if I don’t have a clock-shaped cookie cutter?
No worries! Use a simple round cutter and pipe the clock face and hands with icing to create the design.
How do I store decorated cookies without ruining the icing?
Store in a single layer in an airtight container at room temperature. Avoid stacking until icing is completely dry to prevent smudging.
Can I use butter substitutes for a dairy-free version?
Absolutely. Use plant-based butter or coconut oil, but keep in mind this may slightly change the texture and flavor.
What is the best way to get sharp, clean lines when piping the clock hands?
Use a small piping tip and steady your hand by resting your elbow on the table. Practice on parchment paper first, and pipe slowly for precision.
Pin This Recipe!

Irresistible New Years Clock Cookies Easy Festive Recipe for Parties

These New Year’s clock cookies feature a buttery, melt-in-your-mouth texture with a hint of vanilla, decorated with royal icing and edible glitter for a festive touch. Perfect for parties and celebrations, they combine fun design with delicious flavor.
- Prep Time: 15 minutes
- Cook Time: 12 minutes
- Total Time: 45 minutes
- Yield: 24 servings 1x
- Category: Dessert
- Cuisine: American
Ingredients
- 1 cup (227 g) unsalted butter, softened
- 1 cup (200 g) granulated sugar
- 1 large egg, room temperature
- 1 teaspoon pure vanilla extract
- 1/4 teaspoon almond extract
- 3 cups (375 g) all-purpose flour
- 1 teaspoon baking powder
- 1/2 teaspoon salt
- Royal icing ingredients: 3 cups (360 g) powdered sugar, 2 tablespoons meringue powder, 5-6 tablespoons water
- Food coloring: black or dark brown gel (for clock hands and numbers), optional gold or silver edible glitter
Instructions
- In a large bowl, cream together 1 cup softened unsalted butter and 1 cup granulated sugar until light and fluffy, about 3-4 minutes using an electric mixer on medium speed.
- Beat in 1 large egg, 1 teaspoon pure vanilla extract, and 1/4 teaspoon almond extract until fully combined.
- In a separate bowl, whisk together 3 cups all-purpose flour, 1 teaspoon baking powder, and 1/2 teaspoon salt. Gradually add this to the wet mixture, mixing on low speed until dough just comes together. Avoid overmixing.
- Wrap the dough in plastic wrap and refrigerate for at least 1 hour.
- Preheat oven to 350°F (175°C) and line baking sheets with parchment paper or silicone mats.
- On a lightly floured surface, roll dough to about 1/4 inch (6 mm) thickness. Use a clock-shaped cookie cutter or a round cutter to cut out cookies. Transfer to baking sheets, spacing about 2 inches (5 cm) apart.
- Bake for 10-12 minutes, or until edges are just beginning to turn golden. Let cool on baking sheets for 5 minutes, then transfer to wire racks to cool completely.
- Prepare royal icing by combining 3 cups powdered sugar, 2 tablespoons meringue powder, and 5-6 tablespoons water in a small bowl. Mix until smooth, then divide into portions for coloring if desired.
- Use piping bags fitted with fine tips to outline the clock face with white icing. Once dry, pipe numbers and clock hands with black or dark brown icing. Add edible glitter or sprinkles for festive shimmer. Allow icing to set for several hours or overnight before serving.
Notes
Chill dough for at least 1 hour to prevent spreading and maintain shape. Use thickness guide rings on rolling pin for even dough thickness. Let royal icing dry fully to avoid smudging. Dough can be refrigerated up to 3 days or frozen for 1 month. For gluten-free version, substitute all-purpose flour with a 1:1 gluten-free baking blend and chill dough longer. For dairy-free, use plant-based butter or coconut oil. Practice piping on parchment paper for clean lines.
Nutrition
- Serving Size: 1 cookie
- Calories: 120
- Sugar: 10
- Fat: 5
- Carbohydrates: 18
- Protein: 1
Keywords: New Year's cookies, clock cookies, festive cookies, holiday baking, royal icing cookies, party cookies, vanilla cookies, almond extract cookies



