
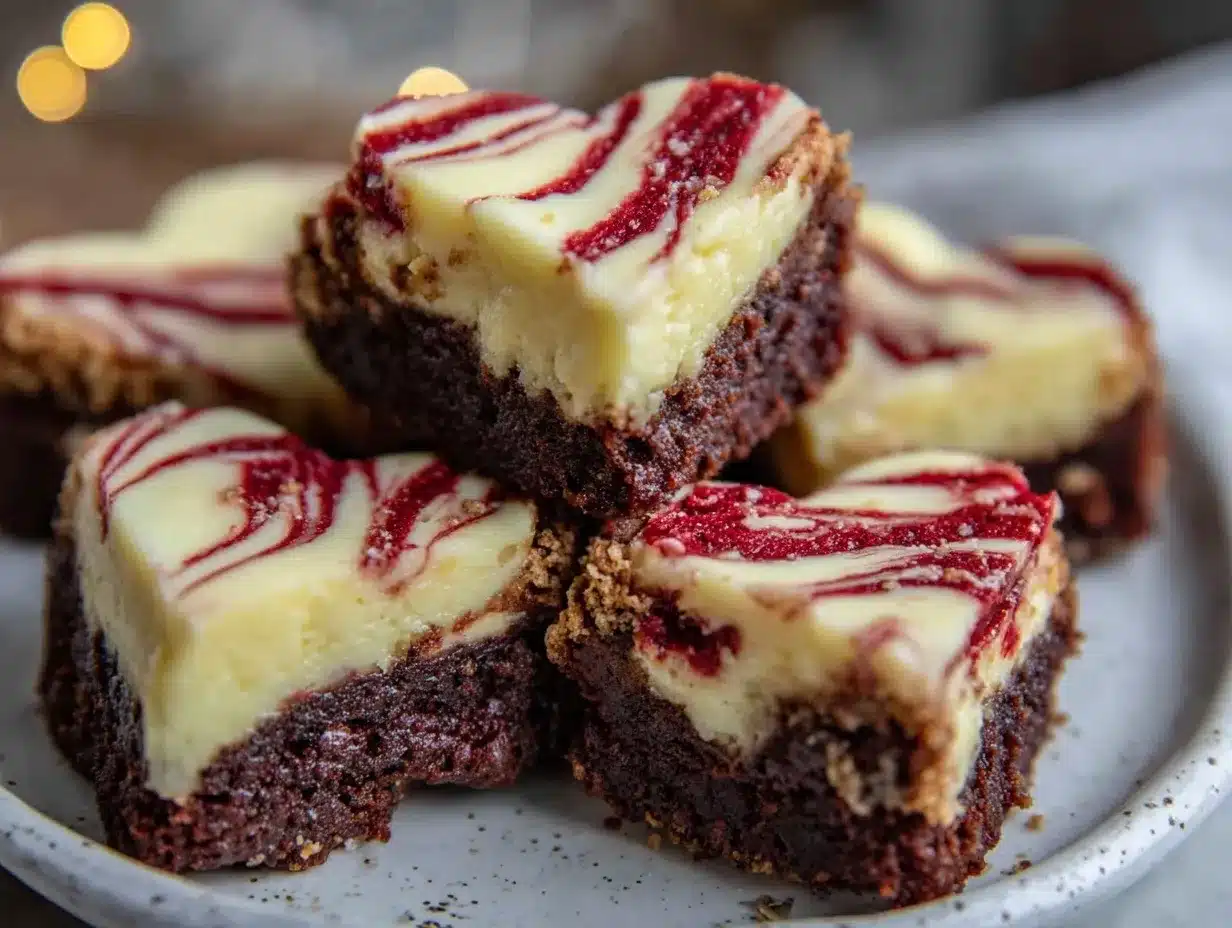
The smell of rich cocoa mingling with the subtle tang of cream cheese always gets me right in the feels. Honestly, the very first time I made these Valentine’s Red Velvet Cheesecake Brownie Hearts, I was aiming for something that screamed romance but didn’t take all day in the kitchen. What I ended up with was pure magic—a dessert that’s as lovely to look at as it is to devour. If you’re like me, chasing that perfect balance between a fudgy brownie and a creamy cheesecake, this recipe will quickly become your go-to for Valentine’s Day or anytime you want to impress without stress.
I stumbled upon the idea while experimenting with my favorite red velvet brownie recipe and thought, why not swirl in some cheesecake to make it extra special? After testing it a handful of times (and maybe sneaking a few bites too many), I knew I had something worth sharing. These cheesecake brownie hearts are perfect for anyone who loves a little indulgence but also appreciates the comfort of homemade treats.
Whether you’re baking for your sweetheart, your kids, or just yourself (hey, no judgment here!), these Red Velvet Cheesecake Brownie Hearts blend the velvety texture of brownies with the creamy richness of cheesecake, all wrapped up in a festive, heart-shaped package. Trust me, once you make these, you’ll want to keep them in your dessert rotation year-round.
Why You’ll Love This Recipe
After baking these Red Velvet Cheesecake Brownie Hearts more times than I can count, I’ve realized why they’re such a hit:
- Quick & Easy: You can whip up the batter in about 15 minutes, and they bake in under 30—perfect for last-minute romantic plans.
- Simple Ingredients: No need for fancy or hard-to-find items. Chances are, you have everything in your pantry and fridge already.
- Perfect for Valentine’s Day or Any Occasion: These heart-shaped delights make for a charming brunch treat, a cozy dessert, or a thoughtful gift.
- Crowd-Pleaser: Kids, adults, skeptics—it’s hard not to love the combo of silky cheesecake and chocolatey red velvet.
- Unbelievably Delicious: The texture contrast is spot on—fudgy brownie meets creamy cheesecake swirls with a hint of red velvet’s signature flavor.
What really sets this recipe apart is the way the cheesecake layer is swirled in to create those beautiful, marbled hearts. I’ve found that blending the cream cheese mixture until it’s ultra-smooth makes all the difference—no lumps, just pure lusciousness. Plus, the use of red food coloring (or natural beet powder if you’re feeling adventurous) gives the brownies a vibrant pop that’s seriously Instagram-worthy.
Honestly, these Red Velvet Cheesecake Brownie Hearts make you close your eyes after the first bite and smile. It’s not just dessert; it’s a little love letter on a plate.
What Ingredients You Will Need
This recipe calls for straightforward ingredients that come together to create that dreamy red velvet cheesecake brownie flavor. Most are pantry staples, and substitutions are easy if needed.
- For the Red Velvet Brownie Batter:
- Unsalted butter, 1/2 cup (115g), melted (adds richness and fudginess)
- Granulated sugar, 1 cup (200g)
- Large eggs, 2, at room temperature
- Vanilla extract, 1 teaspoon
- All-purpose flour, 3/4 cup (95g)
- Cocoa powder, 2 tablespoons (use Dutch-processed for best flavor)
- Salt, 1/4 teaspoon
- Red food coloring, 2 tablespoons (gel or liquid; natural beet powder works too!)
- White vinegar, 1/2 teaspoon (helps activate the red velvet flavor)
- Baking soda, 1/4 teaspoon
- For the Cheesecake Swirl:
- Cream cheese, 8 ounces (225g), softened (I prefer Philadelphia for smooth texture)
- Granulated sugar, 1/4 cup (50g)
- Large egg, 1, at room temperature
- Vanilla extract, 1/2 teaspoon
- All-purpose flour, 1 tablespoon (helps stabilize the cheesecake layer)
Pro tip: Using room temperature eggs and cream cheese helps everything blend seamlessly. If you’re gluten-free, swapping all-purpose flour for a 1:1 gluten-free baking flour works great too. For dairy-free, try vegan cream cheese and coconut oil instead of butter.
Equipment Needed
- 8×8-inch (20×20 cm) square baking pan – I like glass pans for even baking, but metal works too.
- Mixing bowls – one large for the brownie batter and one smaller for the cheesecake swirl.
- Electric mixer or hand mixer – makes blending the cheesecake mixture smooth and lump-free.
- Rubber spatula – for folding and scraping the batter from the bowl.
- Measuring cups and spoons – for precise ingredient measurements.
- Toothpick or skewer – to create the heart-shaped swirls.
- Cooling rack – to cool the brownies evenly.
If you don’t have a heart-shaped stencil, no worries! The toothpick swirl technique makes naturally pretty heart shapes as you drag through the batter. For budget-friendly options, silicone spatulas and glass mixing bowls are easy to find and clean.
Preparation Method
- Preheat the oven and prepare the pan: Set your oven to 350°F (175°C). Grease your 8×8-inch pan with butter or non-stick spray and line it with parchment paper, leaving an overhang for easy removal.
- Make the red velvet brownie batter: In a large bowl, whisk together the melted butter and granulated sugar until smooth and glossy, about 2 minutes. Beat in the eggs one at a time, then stir in vanilla extract.
- Mix dry ingredients: In a separate bowl, sift together the flour, cocoa powder, salt, and baking soda. Slowly add the dry mix to the wet mixture, stirring gently until just combined.
- Add the red food coloring and vinegar: Stir in the red food coloring and white vinegar. The batter should be a vibrant red and slightly glossy. Don’t overmix here; just enough to distribute the color.
- Prepare the cheesecake swirl: Using an electric mixer, beat the softened cream cheese until smooth and creamy (no lumps!). Add sugar and beat again. Mix in the egg and vanilla extract, then fold in the tablespoon of flour until just combined.
- Layer the batter: Pour half of the red velvet batter into the prepared pan and spread evenly with a spatula. Dollop half of the cheesecake mixture over the brownie batter in spoonfuls.
- Repeat layering: Pour the remaining brownie batter over the cheesecake dollops, then add the last of the cheesecake mixture on top.
- Create heart swirls: Take a toothpick or skewer and drag it through the batter in a swirling motion to form heart shapes. Start from the center of each dollop and pull outwards gently. This step is fun and gives that signature look.
- Bake: Place the pan in the preheated oven and bake for 25-30 minutes. Check at 25 minutes by inserting a toothpick near the center. It should come out with a few moist crumbs but no raw batter.
- Cool completely: Let the brownies cool in the pan on a wire rack for at least an hour before slicing into hearts. This helps the cheesecake layer set and keeps the brownies from crumbling.
- Slice and serve: Use a sharp knife warmed under hot water for clean cuts. Cut into heart shapes or squares if you’re short on time, and enjoy!
Little tip: If the cheesecake layer starts browning too fast, loosely cover the pan with foil halfway through baking.
Cooking Tips & Techniques
Making the perfect red velvet cheesecake brownie hearts can be a breeze once you know a few tricks. First, always soften your cream cheese and eggs to avoid lumps in the cheesecake swirl. I learned the hard way that cold cream cheese can make the swirl gritty and unappealing.
When mixing the batter, don’t overdo it—overmixing can lead to dense brownies. Just stir until the ingredients come together. Also, the vinegar in the red velvet batter reacts with the baking soda to give that classic tang and lift, so don’t skip it!
For those heart swirls, practice makes perfect. If your first swirl looks more like a squiggle, no worries. It still tastes amazing. Use a light touch with the toothpick and go slow to create well-defined hearts.
Timing is key: check the brownies a bit early to avoid overbaking. They should be fudgy, not dry. Cooling is equally important—warm brownies can fall apart when sliced.
And here’s a personal fail: I once forgot to line my pan and the brownies stuck terribly. Lesson learned—lining with parchment is a must for clean removal and perfect edges!
Variations & Adaptations
Want to switch things up? Here are some ideas to keep this Valentine’s Red Velvet Cheesecake Brownie Hearts recipe fresh and fun:
- Vegan Version: Use dairy-free cream cheese, flax eggs (1 tbsp ground flaxseed + 3 tbsp water per egg), and coconut oil instead of butter. Adjust baking time slightly as vegan brownies can take a bit longer.
- Nutty Twist: Add 1/2 cup chopped pecans or walnuts to the brownie batter for a delightful crunch.
- Berry Infusion: Gently fold in 1/2 cup fresh or frozen raspberries into the cheesecake layer before swirling for a tart surprise.
- Chocolate Lovers: Sprinkle mini chocolate chips on top before baking for extra gooey pockets of chocolate.
- Mini Heart Brownies: After baking, use a small heart-shaped cookie cutter to create bite-sized treats—perfect for parties.
Personally, I love the berry version during spring; it adds a fresh brightness that balances the rich chocolate and cream cheese wonderfully.
Serving & Storage Suggestions
Serve these Red Velvet Cheesecake Brownie Hearts slightly chilled or at room temperature. The cheesecake layer tastes best when it’s cool but not cold, so if you’ve refrigerated them, let them sit out for 10-15 minutes before indulging.
Pair with a cup of coffee, a glass of cold milk, or a light sparkling rosé for a romantic vibe. For an extra special touch, dust with a little powdered sugar or drizzle melted white chocolate on top.
To store, keep the brownies in an airtight container in the refrigerator for up to 4 days. They also freeze well—wrap tightly and freeze for up to 2 months. Thaw overnight in the fridge and warm gently before serving.
Flavors actually deepen after a day, so if you have the patience, let the brownies rest overnight. They develop that perfect fudgy-cheesecake harmony that keeps you reaching for seconds.
Nutritional Information & Benefits
Each serving of these Red Velvet Cheesecake Brownie Hearts packs roughly 280-320 calories, with a good balance of fats, sugars, and protein from the cream cheese and eggs. The cocoa powder adds antioxidants, while the cream cheese provides calcium and vitamin A.
While this dessert is a treat, it’s made with real ingredients—no artificial fillers or preservatives. Using unsalted butter and controlling sugar allows you to tweak sweetness and fat content as you prefer.
For gluten-free eaters, swapping flour for almond or coconut flour is a tasty option that adds fiber and healthy fats. Just remember to adjust baking times accordingly.
Personally, I love how this recipe combines indulgence with a bit of nutritional goodness, making it feel like a celebration that’s not totally off-limits.
Conclusion
These Valentine’s Red Velvet Cheesecake Brownie Hearts are honestly one of my favorite desserts to bake and share. They bring together luscious textures and festive flair without a ton of fuss, making them perfect for both kitchen rookies and seasoned bakers.
Feel free to customize the recipe to suit your taste or dietary needs—the heart shape and luscious layers make it a winner every time. Whether you’re surprising a loved one or treating yourself, these brownies are guaranteed to bring smiles.
Go ahead, give them a try! And please, don’t forget to come back and tell me how yours turned out or what fun twists you added. Sharing dessert stories is the sweetest part of baking, after all.
Happy baking and lots of love!
FAQs About Valentine’s Red Velvet Cheesecake Brownie Hearts
1. Can I make these brownies ahead of time?
Absolutely! They taste even better after resting overnight in the fridge. Just keep them covered to maintain freshness.
2. What if I don’t have red food coloring?
You can use natural beet powder or omit it entirely—the brownies will be more of a classic chocolate cheesecake brownie but still delicious.
3. How do I prevent the cheesecake swirl from cracking?
Make sure the cream cheese is well softened and don’t overbake. Keeping an eye on the oven timing helps prevent cracks.
4. Can I use a different shape pan?
Yes! Just adjust baking time accordingly. A 9×9-inch pan works well, but thinner brownies may need less baking time.
5. Is it okay to use low-fat cream cheese?
Low-fat options can work but might affect the texture and richness of the cheesecake layer slightly. Full-fat cream cheese gives the best results.
Pin This Recipe!
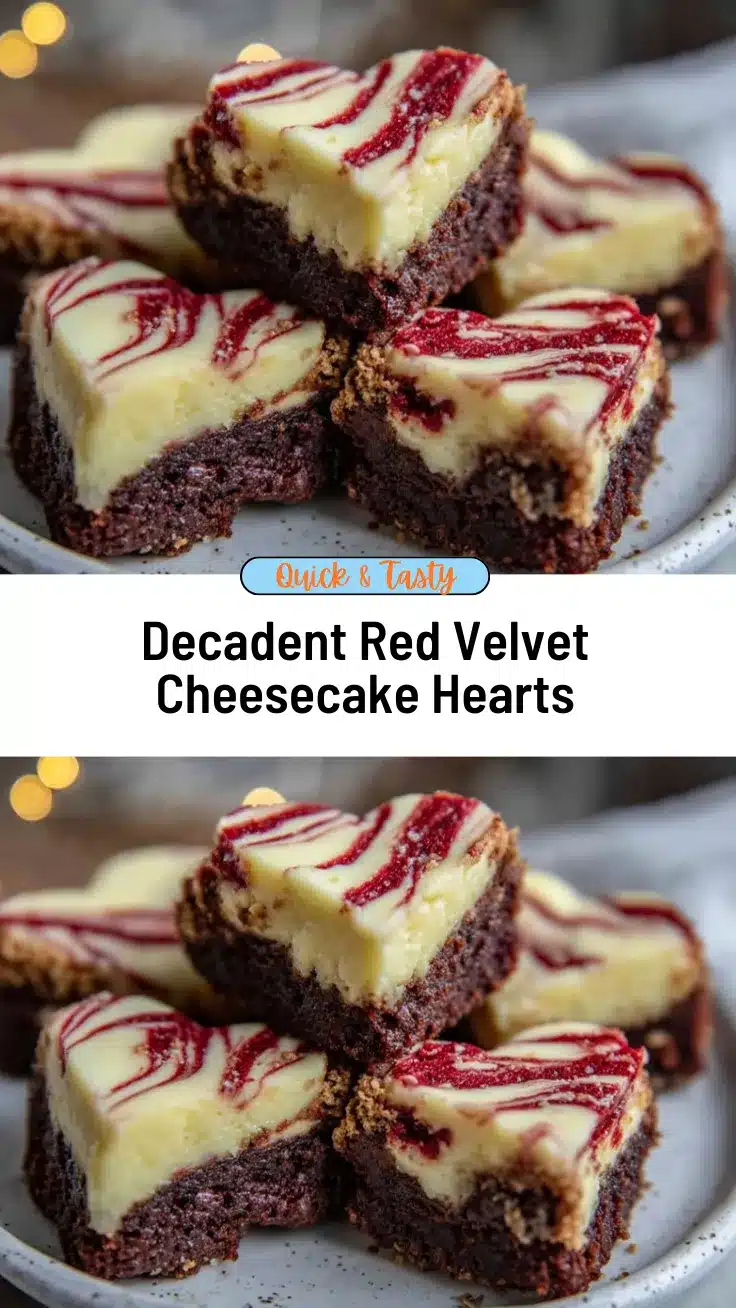
Irresistible Valentine’s Red Velvet Cheesecake Brownie Hearts

A quick and easy dessert combining fudgy red velvet brownies with creamy cheesecake swirls, perfect for Valentine’s Day or any romantic occasion.
- Prep Time: 15 minutes
- Cook Time: 25-30 minutes
- Total Time: 40-45 minutes
- Yield: 16 servings 1x
- Category: Dessert
- Cuisine: American
Ingredients
- 1/2 cup (115g) unsalted butter, melted
- 1 cup (200g) granulated sugar
- 2 large eggs, at room temperature
- 1 teaspoon vanilla extract
- 3/4 cup (95g) all-purpose flour
- 2 tablespoons cocoa powder (Dutch-processed recommended)
- 1/4 teaspoon salt
- 2 tablespoons red food coloring (gel or liquid; natural beet powder optional)
- 1/2 teaspoon white vinegar
- 1/4 teaspoon baking soda
- 8 ounces (225g) cream cheese, softened
- 1/4 cup (50g) granulated sugar
- 1 large egg, at room temperature
- 1/2 teaspoon vanilla extract
- 1 tablespoon all-purpose flour
Instructions
- Preheat oven to 350°F (175°C). Grease an 8×8-inch pan and line with parchment paper, leaving an overhang.
- In a large bowl, whisk melted butter and granulated sugar until smooth and glossy, about 2 minutes. Beat in eggs one at a time, then stir in vanilla extract.
- In a separate bowl, sift together flour, cocoa powder, salt, and baking soda. Gradually add dry ingredients to wet mixture, stirring gently until just combined.
- Stir in red food coloring and white vinegar until batter is vibrant red and glossy. Do not overmix.
- Using an electric mixer, beat softened cream cheese until smooth and creamy. Add sugar and beat again. Mix in egg and vanilla extract, then fold in flour until just combined.
- Pour half of the red velvet batter into the prepared pan and spread evenly. Dollop half of the cheesecake mixture over the brownie batter.
- Pour remaining brownie batter over cheesecake dollops, then add remaining cheesecake mixture on top.
- Use a toothpick or skewer to drag through the batter in swirling motions to create heart shapes.
- Bake for 25-30 minutes. Check at 25 minutes with a toothpick; it should come out with a few moist crumbs but no raw batter.
- Cool brownies completely in the pan on a wire rack for at least one hour before slicing.
- Slice into heart shapes or squares and serve.
Notes
Use room temperature eggs and cream cheese for smooth batter. Do not overmix brownie batter to avoid dense texture. If cheesecake layer browns too fast, cover pan loosely with foil halfway through baking. Let brownies cool completely before slicing for clean cuts. For gluten-free, substitute flour with 1:1 gluten-free baking flour. For dairy-free, use vegan cream cheese and coconut oil instead of butter.
Nutrition
- Serving Size: 1 brownie heart (app
- Calories: 300
- Sugar: 25
- Sodium: 180
- Fat: 18
- Saturated Fat: 10
- Carbohydrates: 35
- Fiber: 1
- Protein: 4
Keywords: red velvet, cheesecake, brownie, Valentine’s Day, dessert, heart-shaped, easy, romantic, chocolate, cream cheese



