Introduction
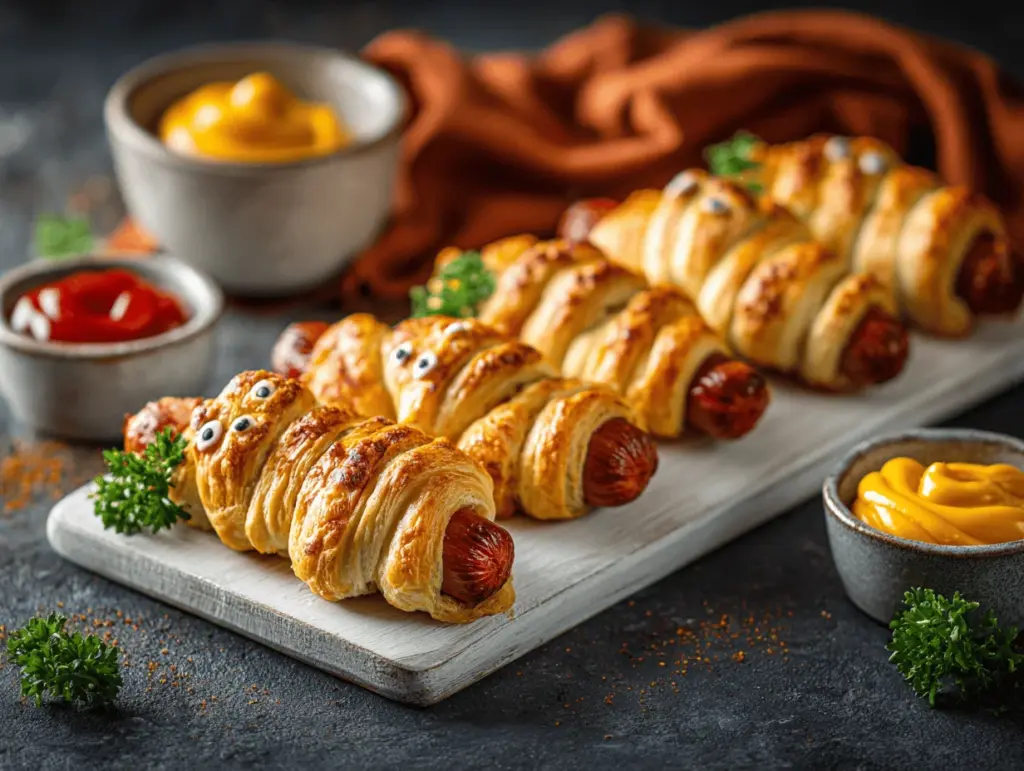
The first time I set a tray of mummy hot dogs on the table, the kids squealed so loud I thought the windows would rattle. There’s just something about these cute, spooky snacks that makes them a hit every single Halloween. You know the scene: flickering jack-o’-lanterns, cobwebs in every corner, and the irresistible smell of buttery pastry wafting from the oven. That’s when you know you’ve nailed the Halloween party snack game.
I stumbled onto this recipe during one of those “what can I make with what’s in the fridge?” moments. It was the day before Halloween, stores were packed, and honestly, I wasn’t about to brave the costume aisle for snack ideas. So, I grabbed some hot dogs and a can of crescent roll dough—and the mummy hot dogs were born! Now, they’re a family tradition. I’ve tested this recipe more times than I can count, and every batch disappears faster than you can say “trick or treat.”
Mummy hot dogs are a lifesaver for busy parents and Halloween hosts. They’re quick, easy, and require zero fancy skills—seriously, anyone can pull them off. Plus, kids love helping make them, especially when it’s time to add the little “eyes.” If you’re looking for a party snack that’s as fun to make as it is to eat, this mummy hot dogs recipe is for you. Whether you’re hosting a crowd or just want a spirited after-school treat, these mini mummies deliver big smiles and even bigger flavor. Trust me, there won’t be a single one left on the plate!
Why You’ll Love This Recipe
- Super Quick & Easy: You can whip up a batch of mummy hot dogs in under 30 minutes—perfect for those chaotic pre-party hours when time is short and excitement is high.
- Simple Ingredients: No need for a long shopping list. Crescent roll dough and your favorite hot dogs are the stars here. Some edible eyes or dots of mustard are all you need for finishing touches.
- Party-Perfect: These mummy hot dogs are made for Halloween parties, classroom celebrations, and even spooky movie nights at home. They’re finger food at its finest—no forks required!
- Kid-Friendly & Interactive: Kids go wild for these. Not only do they love eating them, but they also love helping wrap the “bandages” and placing the eyes. Nothing beats food that doubles as a craft project!
- Crowd-Pleaser: These disappear in minutes, no matter the age group. Adults sneak seconds when they think no one’s looking. There’s just something about that golden, flaky crust paired with a juicy hot dog.
- Adorably Spooky: The finished mummies are almost too cute to eat—almost. They’ll be the star of your Halloween snack table and a total Instagram (or Pinterest) favorite.
What sets my mummy hot dogs recipe apart is the attention to detail and a few chef-tested tweaks. I always pat the hot dogs dry first (no soggy dough here!), and I roll the crescent dough thin for extra crispiness. When you’re pulling these little guys out of the oven, golden and puffed, you know you’ve struck Halloween gold. This snack isn’t just a novelty—it’s genuinely delicious and comforting. It brings people together, sparks laughter, and makes even grown-ups feel like kids again. That, for me, is the real magic of mummy hot dogs.
What Ingredients You Will Need
This mummy hot dogs recipe keeps things straightforward and fuss-free. The magic comes from just a few pantry staples and some creative assembly—no need for complicated steps or expensive ingredients. Here’s what you’ll need:
- Hot Dogs (8 standard size, or 12 mini): Use your favorite brand. Classic beef, turkey, chicken, or plant-based all work. (I’m partial to Applegate or Nathan’s for their snap!)
- Crescent Roll Dough (1 can, 8 oz/226g): The refrigerated kind makes life easy and bakes up beautifully golden. Pillsbury is reliable, but store brands work, too.
- Egg Wash (1 egg, beaten with 1 tsp water): Optional, but it gives your mummies a shiny, bakery-style finish.
- Edible Eyes or Mustard/Ketchup: For the “eyes.” Candy eyeballs from the baking aisle are perfect, but you can also use small dots of mustard, ketchup, or even little pieces of black olive.
- Flour (for dusting): Just a pinch to keep things from sticking while you work with the dough.
If you want to switch things up, here are some handy substitutions and tweaks:
- For Gluten-Free Mummies: Swap in a gluten-free crescent dough (like the one from Schär or Immaculate Baking).
- For Vegan Mummies: Use vegan hot dogs and a dairy-free crescent dough. There are tons of great options these days.
- Mini Mummies: Use cocktail sausages or cut regular hot dogs in half for bite-size snacks. Kids love these!
- Cheesy Mummies: Add a thin slice of cheddar or mozzarella underneath the dough for a melty surprise.
- Spicy Mummies: Brush the hot dogs with a little sriracha or sprinkle with chili powder before wrapping for a grown-up kick.
Everything you need can be found at your neighborhood grocery store, and most of it might already be in your fridge. It’s part of what makes mummy hot dogs such a go-to recipe—no stress, all flavor.
Equipment Needed
- Baking Sheet: A standard half-sheet pan works perfectly. If yours is old and warped (like mine), just line it with parchment paper for even browning.
- Parchment Paper or Silicone Baking Mat: Keeps the mummies from sticking and makes cleanup a breeze.
- Sharp Knife or Pizza Cutter: For slicing the crescent dough into thin strips. I actually prefer a pizza cutter for quick, clean cuts.
- Pastry Brush: To apply the egg wash. If you don’t have one, just use your fingers or a folded paper towel.
- Small Spoon or Toothpick: For placing the “eyes.” A toothpick makes it easy to dab on mustard or ketchup.
- Cooling Rack (optional): Helps the mummies stay crisp as they cool, but you can also transfer them to a plate if you don’t have one.
If you’re working with kids, plastic knives or kid-safe kitchen scissors are great for little helpers. And honestly, you don’t need anything fancy. I’ve made these with a butter knife and a well-loved cookie sheet more times than I can count. Just give everything a quick rinse or wipe-down before you start—flaky dough loves to stick to old crumbs!
Preparation Method
- Preheat the Oven: Set your oven to 375°F (190°C). Line your baking sheet with parchment paper or a silicone mat—this keeps the mummies from sticking and makes cleanup so much easier.
- Prep the Hot Dogs: Remove the hot dogs from their packaging and pat them dry with a paper towel. (This step is key—if they’re wet, the dough gets soggy and won’t crisp up.)
- Prepare the Crescent Dough: Unroll the crescent dough onto a lightly floured surface. Pinch the seams together gently to create a single sheet. Using a sharp knife or pizza cutter, slice the dough into thin strips about 1/4 inch (0.6 cm) wide. Don’t worry if they’re not perfectly even—mummies are supposed to look a little ragged!
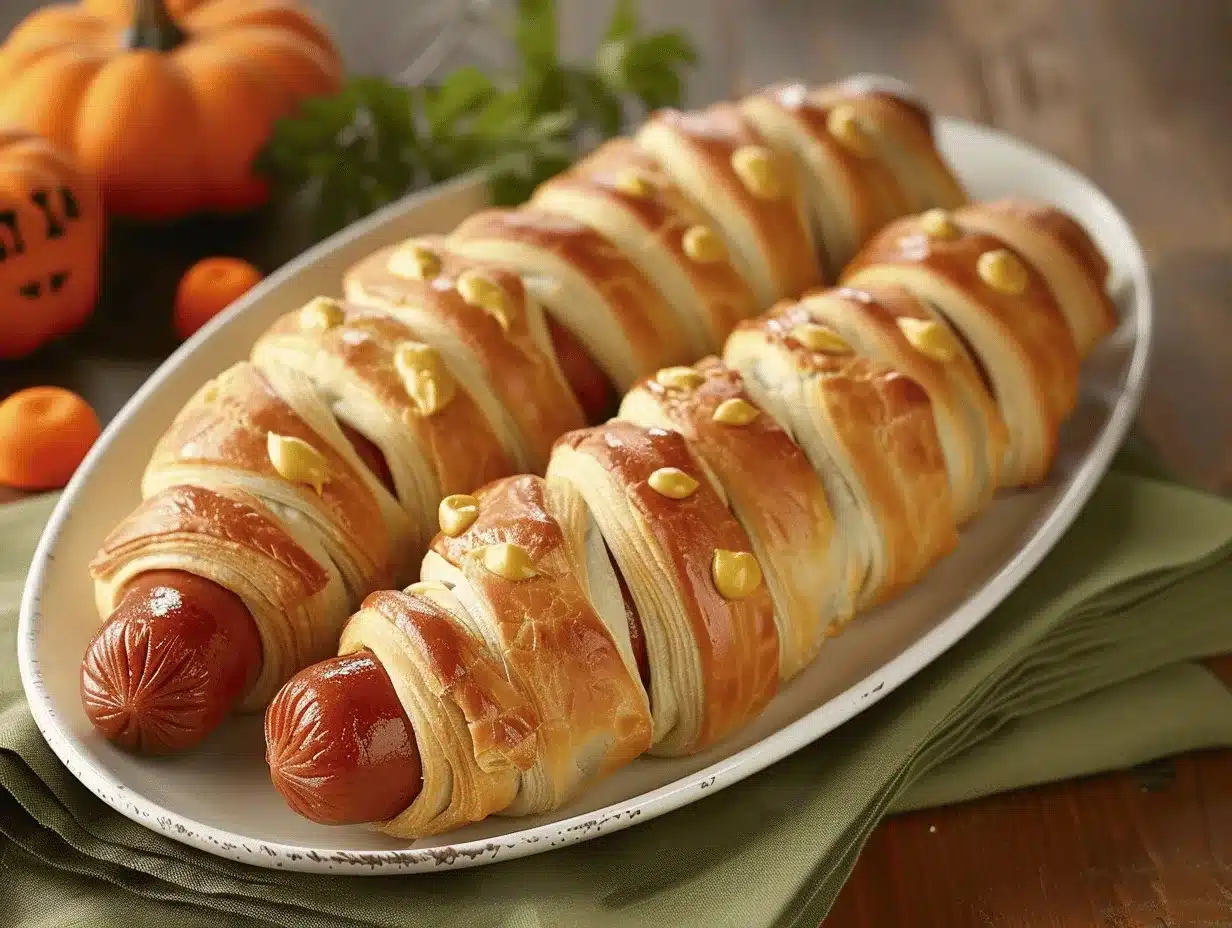
- Wrap the Hot Dogs: Starting at one end of a hot dog, wrap a strip of dough around, leaving a small gap near the top for the “face.” Overlap the strips as you go to create a bandaged look. If the strip runs out, just pinch another on and keep wrapping. Repeat for all hot dogs.
- Arrange on Baking Sheet: Place the wrapped hot dogs onto your prepared baking sheet, spacing them about an inch apart.
- Apply Egg Wash: Brush the dough lightly with the egg wash for extra shine and color. Skip this step if you’re keeping things egg-free.
- Bake: Slide the tray into the oven and bake for 15-18 minutes, or until the dough is puffed and golden brown. (If you’re using mini hot dogs, start checking at 12 minutes.) Your kitchen will start to smell like fresh, buttery bread—always a good sign.
- Add the Eyes: Let the hot dogs cool for 2-3 minutes. Dot on eyes using mustard, ketchup, or stick on edible candy eyes. If using mustard or ketchup, a toothpick helps to make tiny, precise dots.
- Serve: Transfer the mummies to a cooling rack or platter and serve warm. They’re best fresh from the oven, but honestly, no one’s ever complained about a room-temp mummy!
Preparation Notes: If you find the dough is sticking, sprinkle on a little extra flour. If you run out of strips, simply cut a few more from the edges. For extra crispy mummies, roll the dough thinner before cutting. And don’t stress about perfection—the more “authentically” wrapped, the more character your mummies will have!
Cooking Tips & Techniques
- Don’t Overwrap: Less is more when it comes to dough. If you use too much, the mummy hot dogs won’t bake evenly and the “bandages” could turn doughy. Thin strips are your friend.
- Pat Dry for Success: Always dry off the hot dogs before wrapping. Trust me, I skipped this step once and ended up with a tray of gummy-bottomed mummies—not cute.
- Chill the Dough if Needed: Crescent dough can get sticky if your kitchen is warm. If it gets tricky to handle, pop it in the fridge for 10 minutes and it’ll firm right up.
- Use a Pizza Cutter: This is the easiest way to get even strips, but a sharp knife works in a pinch. (My kids love this step—it’s like Play-Doh for grown-ups!)
- Watch the Bake Time: Ovens vary, so check at the 12-minute mark, especially for mini mummies. You want the dough golden and cooked through, not pale or overly brown.
- Batch Baking: If you’re making a big batch, assemble all the mummies first and bake in two trays. Rotate the trays halfway for even color.
- Let Kids Help: Little hands are perfect for wrapping the dough and sticking on eyes. Just expect wonky, adorable results—honestly, the imperfections make these even more festive.
One time, I got distracted and let the mummies go a few minutes too long. They came out super crispy, but the kids still gobbled them up. Moral of the story: mummy hot dogs are forgiving! Just keep an eye (pun intended) on them as they bake, and you’ll be golden.
Variations & Adaptations
- Cheesy Mummies: Lay a thin slice of cheese (cheddar, American, or even pepper jack) under the dough wrap for a gooey surprise. The cheese melts inside, which is always a crowd-pleaser.
- Spooky Veggie Mummies: Use veggie dogs and a vegan crescent dough. Brush the finished mummies with a little olive oil instead of egg wash for shine.
- Mini Mummy Hot Dogs: Make bite-sized versions with cocktail sausages. These are perfect for party platters and little hands.
- Allergen-Friendly: For gluten-free guests, swap in a gluten-free crescent dough. For dairy-free, check labels carefully—Immaculate Baking’s organic dough is a good pick.
- Seasonal Flavors: Sprinkle the dough strips with a little Italian seasoning or poppy seeds before baking for a savory twist. Or, add a hint of smoked paprika for extra color and depth.
Last year, I tried a sweet-and-savory version by adding a thin layer of honey mustard to the hot dogs before wrapping. It was a surprise hit—even the grown-ups went back for seconds! Don’t be afraid to get creative and put your own spin on these Halloween mummies.
Serving & Storage Suggestions
Mummy hot dogs are best served warm, right out of the oven, when the pastry is crisp and the hot dogs are juicy. I like to pile them up on a platter, maybe scatter a few plastic spiders around for effect, and serve them with little bowls of ketchup, mustard, and barbecue sauce for dipping. They pair wonderfully with apple cider, spooky punch, or even a simple veggie tray for balance.
If you have leftovers (rare, but it happens!), store them in an airtight container in the fridge for up to 3 days. To reheat, pop them in a 350°F (175°C) oven for 5-7 minutes until warmed through. The microwave works too, but the dough stays crispier with oven reheating. For longer storage, freeze cooled mummy hot dogs in a single layer, then transfer to a freezer bag. Reheat from frozen in the oven—about 10-12 minutes at 350°F (175°C). Honestly, the flavors hold up, and they’re just as fun the next day!
One tip: if you make them ahead, wait to add the “eyes” until after reheating so they don’t melt or run. It’s a tiny detail, but it keeps those mummies looking their best!
Nutritional Information & Benefits
Each standard mummy hot dog (using regular beef hot dogs and crescent dough) has about 180-210 calories, 9g protein, 11g fat, and 16g carbohydrates. The numbers will vary with your choice of hot dog and dough, of course. Turkey or veggie dogs cut down on fat and calories, while gluten-free or reduced-fat dough options are great for special diets.
This snack is all about fun, but it’s also a good source of protein—especially if you use high-quality or plant-based hot dogs. Watch out for potential allergens: wheat (gluten) in the dough, dairy if using cheese, and possible soy in veggie dogs. For my family, I love how this recipe brings a bit of protein to the sugar-heavy Halloween table. It’s a playful way to balance out all those treats and sneak in a little real food on a night filled with candy!
Conclusion
Mummy hot dogs are more than just a cute party snack—they’re a Halloween tradition in our house. They’re ridiculously easy, endlessly customizable, and always the first thing to vanish from the snack table. Whether you’re hosting a crowd, feeding picky eaters, or just want to make October feel a little more magical, this mummy hot dogs recipe is an absolute must-try.
I hope you’ll put your own twist on these and make them part of your Halloween memories. If you have creative ideas or unique takes, I’d love to hear about them in the comments below! Snap a photo, share on Pinterest, or tag me if you post your mummies on social media. Wishing you a spooky, snack-filled holiday—may your treats be as adorable as they are delicious!
FAQs
How far in advance can I make mummy hot dogs?
You can assemble them up to 4 hours ahead and keep them covered in the fridge. Bake just before serving for the best texture. If you need to fully prep ahead, bake them and reheat in the oven before adding the “eyes.”
Can I use puff pastry instead of crescent dough?
Absolutely! Puff pastry works great and bakes up extra flaky. Just roll it out a bit thinner and follow the same wrapping method.
What’s the best way to make these gluten-free?
Look for gluten-free crescent dough (like Schär or Immaculate Baking) and pair with gluten-free hot dogs. The process is exactly the same—just keep an eye on bake time since some gluten-free doughs brown faster.
Do I need to cook the hot dogs before wrapping?
Nope! Standard hot dogs are already fully cooked, so they’ll heat through in the oven as the dough bakes. If you prefer a slightly crispier hot dog, you can sear them in a skillet for a minute or two first.
Can I freeze baked mummy hot dogs?
Yes, they freeze well! Cool completely, freeze in a single layer, then transfer to a freezer bag. Reheat from frozen in a 350°F (175°C) oven for 10-12 minutes. Add the “eyes” after reheating for best results.
Pin This Recipe!

Mummy Hot Dogs Recipe – Easy Halloween Party Snack Kids Love

These adorable mummy hot dogs are a quick and easy Halloween party snack that kids love to help make and eat. Wrapped in golden crescent dough and finished with spooky ‘eyes,’ they’re a festive, crowd-pleasing treat perfect for any spooky celebration.
- Prep Time: 10 minutes
- Cook Time: 15-18 minutes
- Total Time: 25-28 minutes
- Yield: 8 servings 1x
- Category: Snack
- Cuisine: American
Ingredients
- 8 standard size hot dogs (or 12 mini hot dogs/cocktail sausages)
- 1 can (8 oz/226g) refrigerated crescent roll dough
- 1 egg, beaten with 1 tsp water (for egg wash, optional)
- Edible candy eyes or mustard/ketchup/black olive pieces (for eyes)
- Flour, for dusting
Instructions
- Preheat the oven to 375°F (190°C). Line a baking sheet with parchment paper or a silicone baking mat.
- Remove hot dogs from packaging and pat dry with a paper towel.
- Unroll crescent dough onto a lightly floured surface. Pinch seams together to form a single sheet. Slice dough into thin strips about 1/4 inch wide using a sharp knife or pizza cutter.
- Wrap each hot dog with dough strips, leaving a small gap near the top for the ‘face.’ Overlap strips for a bandaged look. Pinch on extra strips as needed.
- Place wrapped hot dogs on the prepared baking sheet, spacing about 1 inch apart.
- Brush dough lightly with egg wash for shine and color (optional).
- Bake for 15-18 minutes (12-15 minutes for mini hot dogs), until dough is puffed and golden brown.
- Let cool for 2-3 minutes. Add eyes using mustard, ketchup, or candy eyes.
- Serve warm on a platter with dipping sauces as desired.
Notes
For gluten-free or vegan versions, use appropriate hot dogs and dough. Pat hot dogs dry to prevent soggy dough. Roll dough thinner for extra crispiness. Let kids help with wrapping and adding eyes for a fun activity. Serve with ketchup, mustard, or barbecue sauce for dipping. Store leftovers in an airtight container in the fridge for up to 3 days; reheat in the oven for best texture.
Nutrition
- Serving Size: 1 mummy hot dog
- Calories: 180210
- Sugar: 3
- Sodium: 610
- Fat: 11
- Saturated Fat: 4
- Carbohydrates: 16
- Fiber: 1
- Protein: 9
Keywords: mummy hot dogs, Halloween snacks, party food, crescent roll hot dogs, kid friendly, spooky snacks, easy Halloween recipe



