
The snap of cool peppermint and creamy chocolate swirling together in a cookie—honestly, it’s the taste of December in every bite. The first time I made peppermint bark cookies, my kitchen smelled like a candy shop collided with a bakery. You know that rush of nostalgia when you unwrap a peppermint stick? That same feeling buzzes through this recipe. It’s a mashup of crunchy, minty bark and classic buttery cookies, perfect for snacking while you wrap presents (or, let’s be real, binge-watch holiday movies with a mug of cocoa).
I stumbled across the idea for peppermint bark cookies during a holiday cookie swap years ago. A friend brought peppermint bark, another brought chocolate cookies, and my inner mad scientist wondered what would happen if you combined those two. Turns out, they’re a match made for festive parties and cozy nights in. These cookies quickly became my go-to for Christmas gatherings and potlucks—everyone always asks for the recipe, even the folks who “don’t love mint.”
What I love about this recipe is that it’s ridiculously easy but looks like you spent hours. The peppermint bark cookies are crunchy on the edges, gooey in the middle, and loaded with bits of crushed candy canes and rich chocolate. Kids adore them (they’re colorful!), adults sneak seconds, and they’re sturdy enough to pack as edible gifts. Trust me, if you want a holiday treat that’s both beautiful and addictive, peppermint bark cookies are the answer.
As someone who’s baked these at least a dozen times, I promise they’re foolproof. The ingredient list is simple, substitutions are a breeze, and you get a perfect blend of festive flavors in every batch. If you’re searching for a holiday baking win, this peppermint bark cookies recipe ticks all the boxes—taste, texture, and a sprinkle of seasonal magic.
Why You’ll Love This Recipe
- Quick & Easy: These peppermint bark cookies come together in under an hour, including bake time. No complicated steps—just mix, bake, and decorate.
- Simple Ingredients: Most of what you need is probably already in your pantry (think flour, chocolate chips, butter, and peppermint candies).
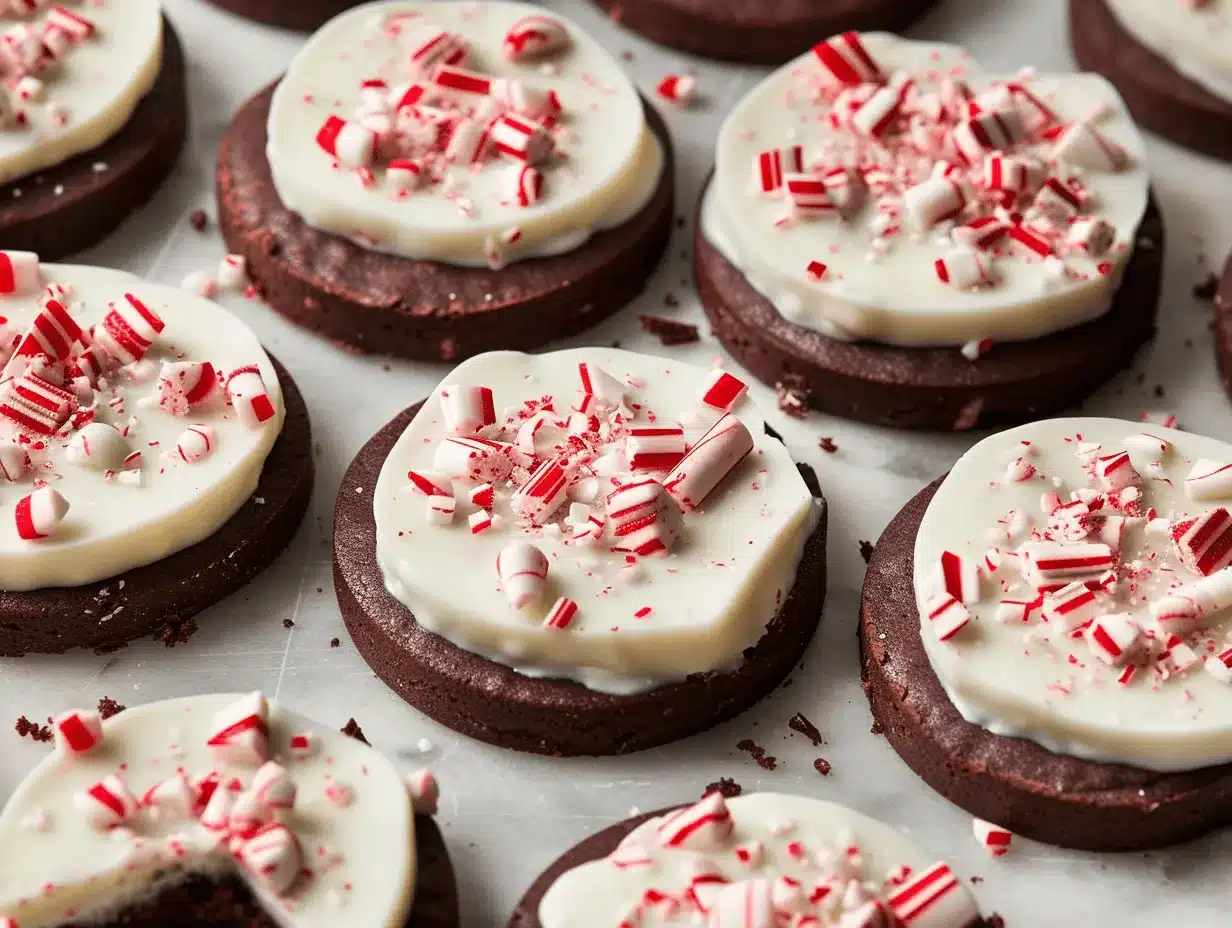
- Perfect for Holidays: Whether it’s a cookie exchange, holiday brunch, or a treat for Santa, these cookies fit right in. They’re festive and eye-catching, with a snowy white chocolate drizzle and pops of red from crushed candy canes.
- Crowd-Pleaser: Kids love the sweet peppermint crunch, and adults dig the rich chocolate base. Even the “not-so-sweet” tooth folks end up reaching for seconds.
- Unbelievably Delicious: The flavor combo—cool peppermint, creamy white and dark chocolate, buttery cookie—hits all the right notes.
What truly sets these peppermint bark cookies apart is the homemade touch. I blend the peppermint candy into the dough for a subtle minty kick, then layer on melted chocolate and more crushed candy canes for that signature bark effect. It’s not just a topping—it’s a triple threat of taste and texture.
I’ve tested dozens of variations, from swapping out the chocolates to tweaking the sugar balance. My favorite trick? Chilling the dough for 30 minutes before baking for a thicker, chewier cookie that holds its shape. Friends have described these as “peppermint bark in cookie form,” and honestly, they’re not wrong. If you’re after a treat that’s equal parts comfort food and holiday showstopper, this recipe is it.
Peppermint bark cookies are more than just dessert—they’re a memory in the making. The first bite is like stepping into a winter wonderland, and the last crumb leaves you wishing you’d made a double batch. They’re easy to personalize, impossible to resist, and guaranteed to become a new holiday tradition.
What Ingredients You Will Need
This recipe uses simple, wholesome ingredients to deliver bold flavor and satisfying texture without the fuss. Most items are pantry staples, and swapping in seasonal or dietary alternatives is super easy.
- For the Cookie Dough:
- 1 cup (226g) unsalted butter, softened (adds richness)
- 1 cup (200g) granulated sugar
- 1/2 cup (100g) brown sugar, packed (for chewiness)
- 2 large eggs, room temperature
- 2 tsp pure vanilla extract
- 2 3/4 cups (345g) all-purpose flour
- 1/2 tsp baking powder
- 1/2 tsp baking soda
- 1/4 tsp fine sea salt (balances sweetness)
- 1/2 cup (90g) mini semi-sweet chocolate chips (I love Ghirardelli)
- 1/2 cup (90g) white chocolate chips
- 1/3 cup (50g) crushed peppermint candies or candy canes (plus more for topping)
- For the Peppermint Bark Topping:
- 3/4 cup (135g) bittersweet or semi-sweet chocolate, chopped or chips
- 3/4 cup (135g) white chocolate, chopped or chips
- 1/4 tsp peppermint extract (optional, for extra minty flavor)
- 2 tbsp crushed candy canes (for garnish)
If you need gluten-free, swap in a 1:1 gluten-free baking blend. For dairy-free, use plant-based butter and chocolate chips. I’ve tried almond flour for a softer, slightly nutty cookie—worked great, just watch the bake time. If you can’t find mini chocolate chips, roughly chop regular ones. The peppermint candies can be swapped with peppermint bark pieces if you have leftovers from another batch!
Ingredient note: Always use fresh baking powder and baking soda—old leaveners can leave the cookies flat. For the best peppermint flavor, look for classic red-and-white candy canes. If you’re making these outside of the holiday season, peppermint candies work just as well. And don’t skip the salt—it really brings out all the flavors.
Pro tip: I like to save a handful of chocolate chips and crushed candy canes to press into the tops of the cookies right before baking. Makes them extra pretty and Instagram-ready!
Equipment Needed
- Mixing Bowls: One large, one medium—for wet and dry ingredients. I use glass bowls for easy cleanup, but plastic works fine.
- Hand Mixer or Stand Mixer: For creaming butter and sugars. If you don’t have an electric mixer, a sturdy wooden spoon does the trick—just prepare for a bit of an arm workout!
- Measuring Cups and Spoons: Precision matters, especially for baking. My set is ancient, but any reliable set is good.
- Baking Sheet: Heavy-duty, rimmed is best. You’ll need at least one, but two makes batch baking quicker.
- Parchment Paper or Silicone Baking Mat: Prevents sticking and makes cleanup a breeze. I love silicone mats for repeated use.
- Wire Cooling Rack: Helps cookies cool evenly and keeps them from getting soggy.
- Small Saucepan or Microwave-Safe Bowl: For melting chocolate. If you don’t have a microwave, the stove works just as well.
- Spatula: For scraping down the bowl and spreading melted chocolate.
- Rolling Pin (optional): For crushing candy canes—otherwise, a sturdy zip-top bag and a heavy mug work great.
Don’t stress about specialty equipment. I’ve baked these cookies on old cookie sheets and used a fork for mixing—honestly, they still turn out. If your baking sheet is warped, just rotate it halfway through baking. Clean your wire rack with warm, soapy water after each batch to prevent sticky residue (learned that the hard way!).
Budget-friendly tip: Dollar store measuring spoons and bowls work just as well as the fancy ones. The only splurge I recommend is a silicone baking mat—it lasts ages and saves tons of parchment paper.
Preparation Method
- Prep Your Ingredients: Preheat oven to 350°F (175°C). Line two baking sheets with parchment paper or silicone mats. Measure all ingredients before starting—trust me, it makes the process smoother.
- Cream the Butter and Sugars: In a large bowl, beat 1 cup (226g) unsalted butter, 1 cup (200g) granulated sugar, and 1/2 cup (100g) brown sugar until light and fluffy—about 2-3 minutes with a mixer. If mixing by hand, it might take 5 minutes and a bit of elbow grease.
- Add Eggs and Vanilla: Beat in 2 large eggs (one at a time) and 2 tsp vanilla extract until well combined. Scrape down the sides of the bowl so everything gets mixed in.
- Combine Dry Ingredients: In a separate bowl, whisk together 2 3/4 cups (345g) flour, 1/2 tsp baking powder, 1/2 tsp baking soda, and 1/4 tsp salt. Gradually add dry mixture to the wet, mixing just until combined. Overmixing can make cookies tough—so stop when the flour disappears.
- Fold in Chocolates and Peppermint: Gently stir in 1/2 cup (90g) semi-sweet chocolate chips, 1/2 cup (90g) white chocolate chips, and 1/3 cup (50g) crushed peppermint candies. Reserve a bit of each for topping.
- Chill the Dough (Optional but Recommended): Cover the bowl and chill for 30 minutes. This helps the cookies hold their shape and makes for a thicker, chewier texture.
- Scoop and Shape: Using a cookie scoop or tablespoon, portion dough into balls (about 1.5 tbsp each). Place 2 inches apart on prepared baking sheets. Press a few extra chips and peppermint bits into the tops for visual appeal.
- Bake: Bake on middle rack for 10-12 minutes, until edges are golden and centers look slightly underdone. They’ll firm up as they cool! Rotate baking sheets halfway for even baking.
- Cool: Let cookies cool on the baking sheet for 5 minutes, then transfer to a wire rack to cool completely. They’ll set up and get that perfect cookie texture.
- Make the Peppermint Bark Topping: Melt 3/4 cup (135g) bittersweet chocolate in a microwave-safe bowl (30-second bursts, stirring between each) or over a double boiler. Repeat with 3/4 cup (135g) white chocolate. Stir in 1/4 tsp peppermint extract if desired.
- Decorate: Drizzle or spread melted chocolates over cooled cookies. Sprinkle with 2 tbsp crushed candy canes while chocolate is still warm—this helps them stick!
- Set and Serve: Let chocolate set at room temperature for 30 minutes, or pop cookies in the fridge for 10 minutes if you’re in a rush.
Troubleshooting tip: If your chocolate seizes, add a teaspoon of coconut oil and stir gently. If cookies spread too much, chill dough longer or check oven temperature (an oven thermometer is your friend!). For extra crunch, use larger pieces of peppermint candies. And don’t worry if the drizzle isn’t perfect—the rustic look is half the charm!
Efficiency hack: Bake one sheet while prepping the next. Clean up as you go, especially sticky peppermint bits. The cookies freeze beautifully—just layer with parchment in a container.
Cooking Tips & Techniques
Baking peppermint bark cookies might seem simple, but there are a few tricks I’ve learned over countless batches that guarantee success every time.
- Chill Your Dough: If you skip this step, cookies can spread too much and lose their chewy texture. A 30-minute chill sets the butter and makes the cookies thicker.
- Use Room Temperature Ingredients: Cold eggs or butter can cause uneven mixing. Take them out 30 minutes before starting—makes a big difference!
- Don’t Overmix: Once you add flour, mix just until it’s incorporated. Overmixing leads to tough cookies (learned that after my first batch turned out like hockey pucks).
- Watch Your Bake Time: Cookies should look slightly underdone in the center when you pull them out. They continue to set as they cool. Overbaking means dry cookies—the ultimate holiday letdown.
- Chocolate Melting Tips: Use short microwave bursts and stir often. If using a saucepan, melt over low heat and stir constantly. Burnt chocolate is a sad thing, trust me.
- Drizzle vs. Dip: For a classic bark effect, drizzle both chocolates in zigzag patterns. If you want a thicker layer, dip half the cookie in chocolate. Either way, sprinkle peppermint immediately so it sticks.
- Multitasking: While cookies bake, crush the candy canes and melt chocolate. It saves time and keeps things moving.
Common mistake: Not rotating the baking sheet halfway. Some ovens have hot spots—rotating ensures even golden edges. Also, don’t skip parchment paper; peppermint can get sticky.
I’ve had my share of fails (once I used expired baking soda—flat, sad cookies). Now I double-check dates and always have extra peppermint candies on hand. Consistency comes from precise measurements and watching for sensory cues: golden edges, soft centers, and the sweet smell of baked sugar and mint. If you want picture-perfect cookies, press extra toppings right as they come out of the oven.
Variations & Adaptations
Peppermint bark cookies are super customizable—here’s how you can make them your own:
- Gluten-Free: Substitute all-purpose flour with a 1:1 gluten-free baking blend. I’ve tried Bob’s Red Mill—texture is nearly identical, just keep an eye on bake time (might need a minute less).
- Dairy-Free: Use vegan butter and dairy-free chocolate chips. The flavor still pops and texture stays chewy.
- Seasonal Swap: Instead of peppermint, use orange zest and dried cranberries for a winter citrus twist. White chocolate drizzle pairs beautifully.
- Chocolate Lovers: Double up the semi-sweet chips and skip the white chocolate for a more intense chocolate cookie. Add extra cocoa powder (2 tbsp) for extra richness.
- Nuts: Fold in 1/2 cup (50g) chopped pecans or walnuts for added crunch. Works especially well with dark chocolate drizzle.
- Mini Cookies: Scoop smaller dough balls for bite-sized treats—bake 2 minutes less.
I once made a batch with matcha powder and white chocolate—kind of a Grinch-inspired look. Not everyone loved the green, but it was a fun experiment! For allergy concerns, skip nuts or use seed-based butters. You can also use gluten-free oat flour for a heartier cookie, though the texture is a bit more crumbly.
If you want to switch things up for New Year’s, use gold sprinkles instead of peppermint for a sparkle effect. Honestly, these cookies are a blank canvas—so don’t be afraid to get creative!
Serving & Storage Suggestions
Serve peppermint bark cookies at room temperature, stacked high on a festive platter. I like to arrange them with fresh mint leaves and a scattering of extra crushed candy canes for a Pinterest-worthy look. They’re perfect alongside mugs of hot chocolate, coffee, or even peppermint tea.
For parties, I sometimes tie cookies in clear cellophane bags with red ribbon—instant homemade gifts. Pair them with chocolate-covered pretzels or a plate of shortbread for a stunning holiday dessert board.
Storage is a breeze: Layer cookies between sheets of parchment in an airtight container. They stay fresh for up to 5 days at room temperature. For longer storage, freeze cookies in a zip-top freezer bag for up to 2 months. To thaw, just set out at room temp for 30 minutes. If the chocolate drizzle softens, a quick fridge chill firms it up.
Reheating tip: Warm cookies in the microwave for 10 seconds if you want a gooey center. The flavors mellow and deepen after a day—so they’re even better the next morning, honestly!
If you make a batch ahead for a party, let them come to room temperature before serving. The peppermint aroma is somehow more intense after they sit overnight. These cookies hold their shape and taste, so they’re ideal for gifting or shipping, too.
Nutritional Information & Benefits
Estimated per cookie (based on a batch of 24):
- Calories: ~170
- Fat: 8g
- Carbs: 24g
- Protein: 2g
- Sugar: 14g
- Fiber: 1g
Peppermint bark cookies are a treat, but they do offer a few perks. Dark chocolate provides antioxidants and a little magnesium. Peppermint can aid digestion—so maybe that’s a holiday bonus? Using real butter instead of margarine keeps the flavor pure and gives a boost of vitamin A.
Gluten-free and dairy-free adaptations are easy, so most dietary needs can be met. Main allergens: wheat, eggs, dairy, and possibly nuts (if you add them). If you’re counting carbs or sugars, mini cookies and sugar substitutes like coconut sugar work well. I love that you can make a batch to fit almost any wellness goal—just tweak as needed!
Conclusion
Peppermint bark cookies aren’t just another holiday dessert—they’re a little slice of festive magic, ready to brighten any gathering (or solo snack session). The recipe is reliable, quick, and loaded with flavor, but it’s also flexible enough for every kitchen and dietary need.
If you’re looking for a new holiday tradition, these cookies are a winner. Customize with your favorite chocolates, swap in gluten-free flour, or add a handful of nuts—make them your own. I keep coming back to this recipe because it’s comforting, fun, and always gets rave reviews.
Let me know if you try these peppermint bark cookies! Drop a comment with your version, tag me on social, or share your best holiday baking memory. Wishing you sweet success and plenty of peppermint joy this season!
Frequently Asked Questions
Can I make peppermint bark cookies ahead of time?
Absolutely! Bake them up to 3 days ahead and store in an airtight container. They actually taste even better after a day or two.
What’s the best way to crush candy canes for the recipe?
Place candy canes in a zip-top bag and use a rolling pin or heavy mug to crush them. Aim for small pieces—too fine and they’ll melt into the dough.
Can I freeze peppermint bark cookies?
Yes, these cookies freeze beautifully. Layer with parchment in a zip-top bag and freeze for up to 2 months. Thaw at room temp before serving.
Do I have to chill the dough?
It’s not mandatory, but chilling helps cookies hold their shape and makes them chewier. If you’re short on time, skip it—they’ll still taste great!
Can I use peppermint extract instead of crushed candy canes?
You can! Add 1/2 tsp peppermint extract to the dough for a stronger mint flavor. Still add some crushed candies for texture and color.
Pin This Recipe!

Peppermint Bark Cookies

Peppermint bark cookies combine the festive flavors of cool peppermint, creamy chocolate, and buttery cookie dough for a holiday treat that’s crunchy on the edges, gooey in the middle, and loaded with crushed candy canes. They’re easy to make, eye-catching, and perfect for parties, gifting, or cozy nights in.
- Prep Time: 20 minutes
- Cook Time: 12 minutes
- Total Time: 1 hour
- Yield: 24 cookies 1x
- Category: Dessert
- Cuisine: American
Ingredients
- 1 cup (226g) unsalted butter, softened
- 1 cup (200g) granulated sugar
- 1/2 cup (100g) brown sugar, packed
- 2 large eggs, room temperature
- 2 tsp pure vanilla extract
- 2 3/4 cups (345g) all-purpose flour
- 1/2 tsp baking powder
- 1/2 tsp baking soda
- 1/4 tsp fine sea salt
- 1/2 cup (90g) mini semi-sweet chocolate chips
- 1/2 cup (90g) white chocolate chips
- 1/3 cup (50g) crushed peppermint candies or candy canes (plus more for topping)
- 3/4 cup (135g) bittersweet or semi-sweet chocolate, chopped or chips
- 3/4 cup (135g) white chocolate, chopped or chips
- 1/4 tsp peppermint extract (optional)
- 2 tbsp crushed candy canes (for garnish)
Instructions
- Preheat oven to 350°F (175°C). Line two baking sheets with parchment paper or silicone mats.
- In a large bowl, beat butter, granulated sugar, and brown sugar until light and fluffy (2-3 minutes with mixer, 5 minutes by hand).
- Beat in eggs one at a time and vanilla extract until well combined. Scrape down the sides of the bowl.
- In a separate bowl, whisk together flour, baking powder, baking soda, and salt.
- Gradually add dry mixture to wet ingredients, mixing just until combined.
- Gently stir in semi-sweet chocolate chips, white chocolate chips, and crushed peppermint candies. Reserve a bit of each for topping.
- Cover the bowl and chill dough for 30 minutes (optional, for thicker cookies).
- Scoop dough into balls (about 1.5 tbsp each) and place 2 inches apart on prepared baking sheets. Press extra chips and peppermint bits into tops.
- Bake for 10-12 minutes, until edges are golden and centers look slightly underdone. Rotate sheets halfway through baking.
- Let cookies cool on baking sheet for 5 minutes, then transfer to wire rack to cool completely.
- Melt bittersweet chocolate in microwave-safe bowl (30-second bursts, stirring between each) or over double boiler. Repeat with white chocolate. Stir in peppermint extract if desired.
- Drizzle or spread melted chocolates over cooled cookies. Sprinkle with crushed candy canes while chocolate is still warm.
- Let chocolate set at room temperature for 30 minutes, or refrigerate cookies for 10 minutes to speed up setting.
Notes
Chilling the dough for 30 minutes yields thicker, chewier cookies. Use room temperature ingredients for best results. Don’t overmix after adding flour. Rotate baking sheets halfway through for even baking. Drizzle or dip cookies in chocolate for different bark effects. Cookies freeze well for up to 2 months. For gluten-free, use a 1:1 baking blend; for dairy-free, use plant-based butter and chocolate chips.
Nutrition
- Serving Size: 1 cookie
- Calories: 170
- Sugar: 14
- Sodium: 60
- Fat: 8
- Saturated Fat: 5
- Carbohydrates: 24
- Fiber: 1
- Protein: 2
Keywords: peppermint bark cookies, holiday cookies, Christmas cookies, chocolate peppermint cookies, festive dessert, edible gifts, easy cookie recipe



