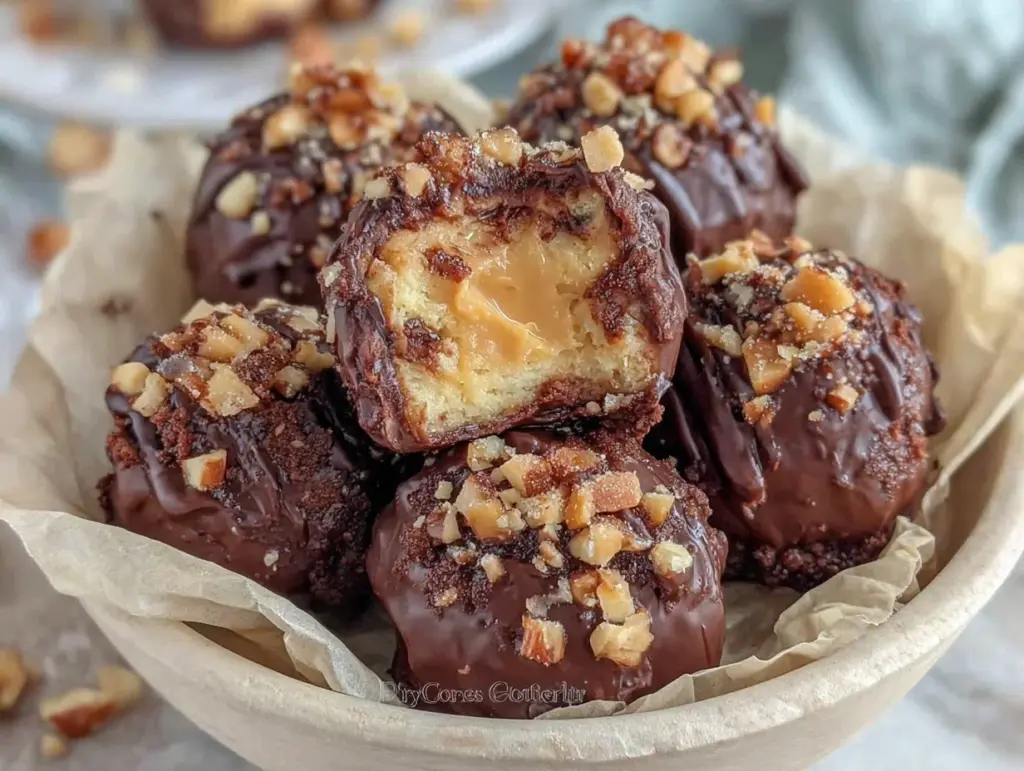
The first time I made these chocolate covered peanut buttercream truffles, I couldn’t believe how easy they were. With just a few simple ingredients and a little patience, I had a tray of decadent, bite-sized treats that looked like they came straight from a fancy chocolatier. The rich, creamy peanut butter filling paired with the smooth, glossy chocolate shell is pure magic. Whether you’re prepping for a party, making edible gifts, or just treating yourself, this recipe is going to be your new favorite indulgence! Trust me—you’ll want to make a double batch.
These truffles are a labor of love (but don’t worry, they’re surprisingly simple!). They’re perfect for satisfying your sweet tooth, impressing guests, or even as a fun weekend project with friends or family. Let me show you how to make these irresistible little bites that will have everyone asking, “Where did you get these amazing truffles?”
Why You’ll Love This Recipe
There’s something about chocolate covered truffles that feels luxurious and special, but the best part of this recipe is how approachable it is! Here’s why I think you’ll fall head over heels for these peanut buttercream truffles:
- Easy to make: While these truffles look impressive, they’re actually very simple to prepare. No fancy techniques or equipment needed!
- Perfect balance of flavors: The creamy peanut butter filling is rich, yet not overly sweet, and pairs beautifully with the slightly bitter chocolate coating.
- Customizable: Add a sprinkle of flaky sea salt, drizzle on white chocolate, or roll them in crushed nuts—the possibilities are endless.
- Ideal for gifting: These truffles make fantastic edible gifts for holidays, birthdays, or any celebration.
- Kid-approved: Kids love helping with the dipping process, and they’ll be just as excited to eat these treats!
Honestly, what makes this recipe stand out is the velvety peanut butter cream filling. It’s smoother and richer than your standard peanut butter cup, and the chocolate shell adds just the right amount of snap. Plus, you can easily adjust the sweetness or use dark chocolate for a more grown-up flavor profile.
What Ingredients You Will Need
This recipe uses basic pantry staples, and you might already have most of them on hand. Here’s what you’ll need for these chocolate covered peanut buttercream truffles:
- Peanut butter: Creamy peanut butter works best here for a smooth filling. I recommend a classic brand like Jif or Skippy.
- Butter: Use unsalted butter at room temperature for a rich, creamy texture.
- Powdered sugar: This sweetens the filling and helps bind it together.
- Vanilla extract: Adds a subtle warmth and depth to the peanut butter mixture.
- Chocolate chips or candy melts: Use good-quality semi-sweet or dark chocolate chips for the coating. Candy melts also work if you want to make them extra glossy.
- Flaky sea salt (optional): A sprinkle of salt on top adds a gourmet touch.
If you need substitutions, almond butter or sunflower seed butter can replace the peanut butter for allergy-friendly options, and dairy-free butter works perfectly for a vegan twist. For the chocolate, you can use milk, white, or even sugar-free varieties depending on your preference.
Equipment Needed
Don’t worry—you won’t need anything fancy to make these truffles. Here’s the list:
- Mixing bowl: To mix the peanut buttercream filling.
- Hand mixer or stand mixer: Makes mixing the filling much easier and ensures everything is well combined.
- Baking sheet: For chilling the truffles before dipping.
- Parchment paper: Keeps the truffles from sticking.
- Microwave-safe bowl: To melt the chocolate easily.
- Fork or dipping tool: For coating the truffles in chocolate.
If you don’t have a hand mixer, you can mix the filling with a sturdy spoon—it just takes a little more elbow grease. And for dipping, a simple fork works perfectly!
Detailed Preparation Method
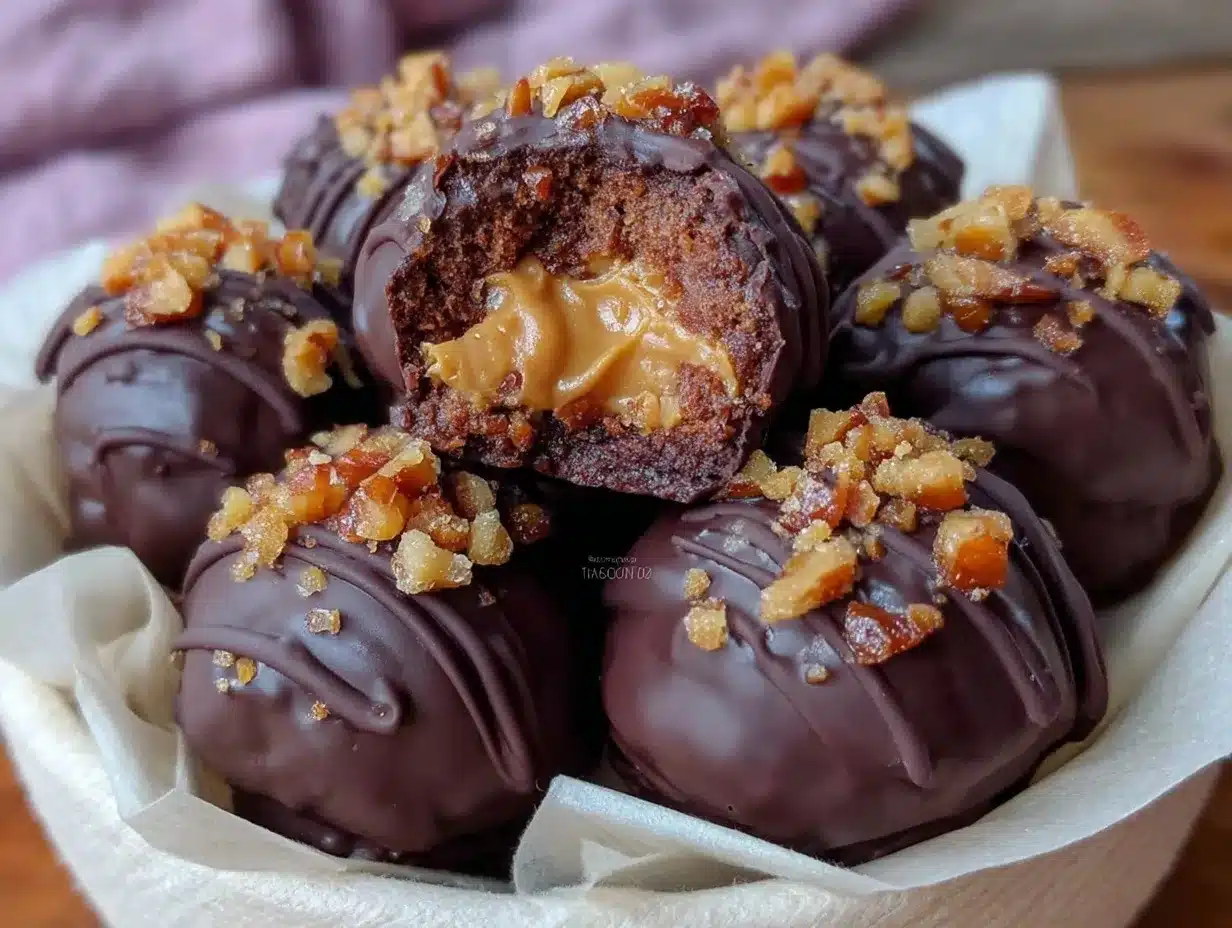
Follow these steps to make your perfect chocolate covered peanut buttercream truffles:
- Prepare the filling: In a mixing bowl, combine 1 cup (240g) creamy peanut butter, 4 tablespoons (57g) unsalted butter, and 1 teaspoon vanilla extract. Beat with a hand mixer or stand mixer until smooth and creamy.
- Sweeten and thicken: Gradually add 2 cups (240g) powdered sugar, 1/2 cup at a time, mixing until the filling forms a thick, moldable dough.
- Shape the truffles: Roll the mixture into small balls, about 1 inch in diameter, and place them on a parchment-lined baking sheet. Chill in the refrigerator for at least 30 minutes to firm up.
- Melt the chocolate: In a microwave-safe bowl, melt 2 cups (340g) semi-sweet chocolate chips or candy melts in 20-second intervals, stirring in between until smooth.
- Dip the truffles: Using a fork, dip each chilled truffle into the melted chocolate, letting the excess drip off. Place back on the parchment paper.
- Decorate: Optionally, sprinkle flaky sea salt or drizzle melted white chocolate over the truffles for added flair.
- Chill again: Let the chocolate set by chilling the truffles in the refrigerator for 20-30 minutes.
Once the truffles are set, they’re ready to enjoy!
Cooking Tips & Techniques
Here are some tips to make sure your truffles turn out perfectly:
- Use room temperature ingredients: Cold peanut butter or butter won’t mix well, so make sure they’re soft.
- Don’t overheat the chocolate: Chocolate can seize up if overheated—melt it gently and stir often.
- Chill the filling: This step is essential for easy dipping and keeps the truffles from falling apart.
- Work quickly while dipping: Melted chocolate can thicken as it cools, so be efficient when coating the truffles.
- Use a fork for dipping: A fork lets the excess chocolate drip off easily, avoiding a messy coating.
If your chocolate starts to harden, simply reheat it in the microwave for 10 seconds. And don’t worry if the coating isn’t perfect—homemade truffles always have charm!
Variations & Adaptations
Here are some fun ways to mix things up:
- Dietary swaps: Use almond butter and dairy-free chocolate for a vegan version.
- Seasonal flavors: Add a dash of cinnamon or pumpkin spice to the filling for fall-inspired truffles.
- Texture twist: Roll the dipped truffles in crushed peanuts, sprinkles, or coconut flakes for extra crunch.
- Low-sugar option: Use sugar-free chocolate and a powdered sweetener like erythritol instead of powdered sugar.
- Different coatings: Try white chocolate, dark chocolate, or even caramel for a unique finish.
I once made a batch using cookie butter instead of peanut butter—it was ridiculously good!
Serving & Storage Suggestions
Here’s how to serve and store your truffles to keep them fresh:
- Serving: Serve the truffles slightly chilled or at room temperature. Arrange them on a pretty platter for parties or wrap them in individual candy wrappers for gifting.
- Storage: Store in an airtight container in the refrigerator for up to 2 weeks.
- Freezing: Freeze the truffles for up to 3 months. Let them thaw in the refrigerator before serving.
- Reheating: If the chocolate gets dull, you can gently warm the truffles for a few seconds to restore their shine.
The flavors deepen over time, making these truffles even more delightful a day or two after making them!
Nutritional Information & Benefits
Here’s a quick snapshot of the nutrition per truffle (approximately):
- Calories: 120
- Protein: 2g
- Fat: 8g
- Carbs: 11g
- Sugar: 9g
Peanut butter adds a dose of healthy fats and protein, while dark chocolate provides antioxidants. Keep in mind, these are a treat, so enjoy them in moderation!
Conclusion
If you’re looking for a crowd-pleasing dessert that’s simple yet indulgent, these chocolate covered peanut buttercream truffles are the answer. They’re fun to make, easy to customize, and utterly delicious. Whether you’re gifting them or keeping them all for yourself, they’re sure to be a hit!
I hope you love this recipe as much as I do. If you try it, I’d love to hear your thoughts in the comments below. Share your own twists or tag me if you post photos—I can’t wait to see your creations!
Happy truffle-making, and remember, there’s no such thing as too much chocolate!
FAQs
Can I use crunchy peanut butter instead of creamy?
Yes, but the filling won’t be as smooth. Crunchy peanut butter will add a bit of texture.
How do I keep the chocolate from cracking?
Make sure the truffles aren’t too cold before dipping. Let them sit out for a few minutes if needed.
Can I make these ahead of time?
Absolutely! These truffles can be made up to 2 weeks in advance if stored properly in the fridge.
What’s the best way to melt chocolate?
The microwave method works great, but you can also use a double boiler for more control.
Can I use white chocolate for the coating?
Yes, white chocolate works beautifully and gives the truffles a different flavor profile.
Pin This Recipe!

Perfect Chocolate Covered Truffles Recipe Easy How-To Guide

Decadent chocolate covered peanut buttercream truffles with a rich, creamy filling and smooth chocolate shell. Perfect for gifting, parties, or a sweet treat.
- Prep Time: 15 minutes
- Cook Time: 30 minutes
- Total Time: 45 minutes
- Yield: 24 truffles 1x
- Category: Dessert
- Cuisine: American
Ingredients
- 1 cup (240g) creamy peanut butter
- 4 tablespoons (57g) unsalted butter, room temperature
- 1 teaspoon vanilla extract
- 2 cups (240g) powdered sugar
- 2 cups (340g) semi-sweet chocolate chips or candy melts
- Flaky sea salt (optional)
Instructions
- In a mixing bowl, combine peanut butter, unsalted butter, and vanilla extract. Beat with a hand mixer or stand mixer until smooth and creamy.
- Gradually add powdered sugar, 1/2 cup at a time, mixing until the filling forms a thick, moldable dough.
- Roll the mixture into small balls, about 1 inch in diameter, and place them on a parchment-lined baking sheet. Chill in the refrigerator for at least 30 minutes to firm up.
- In a microwave-safe bowl, melt semi-sweet chocolate chips or candy melts in 20-second intervals, stirring in between until smooth.
- Using a fork, dip each chilled truffle into the melted chocolate, letting the excess drip off. Place back on the parchment paper.
- Optionally, sprinkle flaky sea salt or drizzle melted white chocolate over the truffles for added flair.
- Let the chocolate set by chilling the truffles in the refrigerator for 20-30 minutes.
Notes
Use room temperature ingredients for smooth mixing. Melt chocolate gently to avoid seizing. Chill the filling before dipping for easier handling.
Nutrition
- Serving Size: 1 truffle
- Calories: 120
- Sugar: 9
- Sodium: 50
- Fat: 8
- Saturated Fat: 3
- Carbohydrates: 11
- Fiber: 1
- Protein: 2
Keywords: chocolate truffles, peanut butter truffles, easy dessert, edible gifts, homemade truffles



