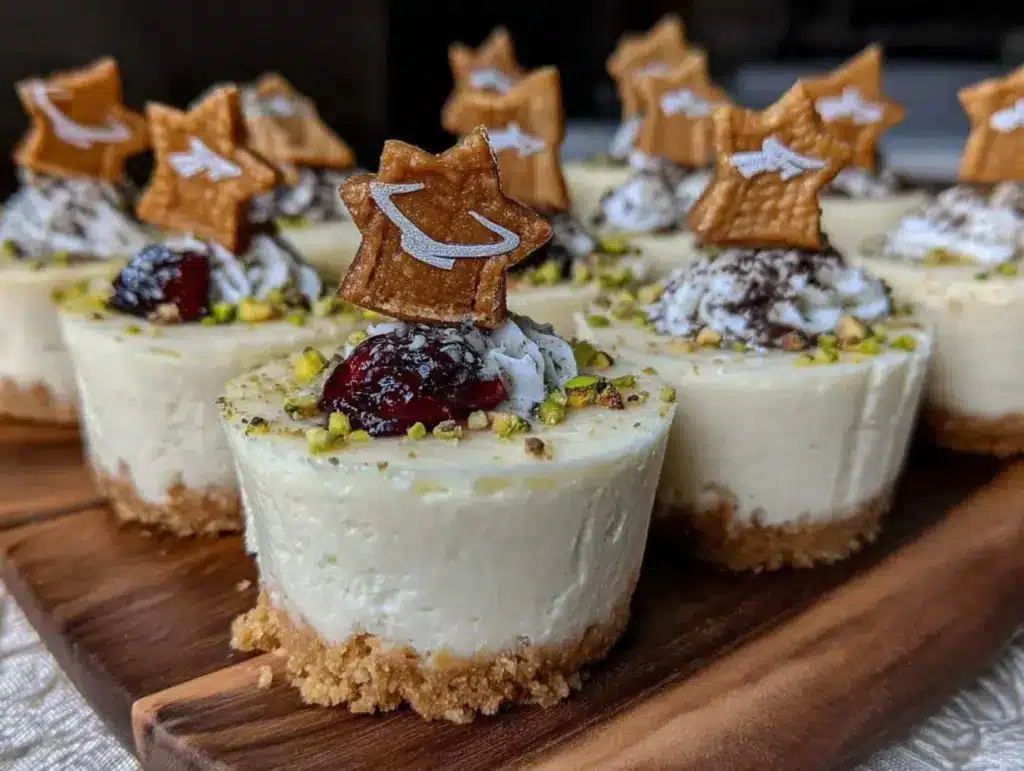
“You really think tiny cheesecakes can steal the show at a graduation party?” That’s what my cousin threw at me over text the week before her daughter’s big day. Honestly, I was skeptical—how could something so small pack enough punch to impress a crowd of dessert lovers? But I was also juggling a hectic schedule, so I figured, why not give it a shot? It started as a bit of a shortcut, a quick dessert idea that wouldn’t take over the kitchen or my time.
Fast forward to the party, and those little cheesecake cups were the unexpected highlight. People were sneaking seconds, asking for the recipe, and admiring the cute, customized graduation toppers I whipped up last minute. The smell of vanilla and cream cheese wafting through the room mixed with the quiet buzz of congratulations created a cozy moment I didn’t see coming. I kept thinking about how something so simple could feel so special and personal all at once.
What stuck with me after that day wasn’t just the recipe itself but the way these mini cheesecakes brought a crowd together without fuss or fancy equipment. It’s the kind of recipe you keep coming back to for celebrations, or honestly, just when you want a little indulgence without the guilt of a giant slice. If you’ve ever found yourself scrambling for a dessert idea that’s easy, adorable, and just a little bit fancy, you might find yourself making these mini cheesecake cups more than once this season.
Why You’ll Love This Recipe
After testing this recipe multiple times (I lost count after the third batch in one week), I can say it’s become my go-to for celebrations and casual treats alike. Here’s why it’s a keeper:
- Quick & Easy: These mini cheesecake cups come together in under 40 minutes, making them perfect for last-minute gatherings or when your schedule is packed.
- Simple Ingredients: No complicated or hard-to-find items here—just basics you probably already have in your pantry and fridge.
- Perfect for Graduation Parties and More: The customizable toppers make these just right for marking milestones, but they’re equally great for birthdays, baby showers, or a sweet weeknight treat.
- Crowd-Pleaser: From kids to adults, these cheesecakes vanish fast. The creamy texture with a crisp crust makes everyone happy.
- Unbelievably Delicious: The balance of tangy cream cheese and sweet crust makes each bite melt in your mouth, honestly.
- Customizable Toppers: This isn’t just any cheesecake cup recipe. Adding personalized graduation toppers turns these into mini masterpieces that catch eyes and hearts alike.
This recipe isn’t your average cheesecake—it’s the kind of dessert that feels carefully crafted but doesn’t demand hours in the kitchen. Plus, pairing it with something savory like the cream cheese stuffed mushrooms with bacon makes for a perfectly balanced party spread.
What Ingredients You Will Need
This recipe uses simple, wholesome ingredients to deliver bold flavor and a satisfying texture without fuss. Most are pantry staples, with easy substitutions if needed:
- For the Crust:
- Graham cracker crumbs (about 1 ½ cups / 150g) – I prefer Honey Maid for that perfect crunch
- Unsalted butter, melted (5 tablespoons / 70g) – adds richness and binds the crust
- Granulated sugar (2 tablespoons / 25g) – balances the buttery flavor
- For the Cheesecake Filling:
- Cream cheese, softened (16 oz / 450g) – room temperature is key for smooth texture
- Granulated sugar (⅔ cup / 135g) – sweetens the filling just right
- Large egg (1) – adds structure
- Pure vanilla extract (1 teaspoon) – enhances flavor
- Sour cream (⅓ cup / 80ml) – keeps it creamy and tangy
- Optional Toppings:
- Fresh berries or fruit slices – for a seasonal twist
- Chocolate shavings or mini chips – if you like a little indulgence
- Custom graduation toppers – made from cardstock or edible wafer paper for a personal touch
For a gluten-free option, swap graham cracker crumbs with almond flour or gluten-free cookie crumbs. If dairy is a concern, try a dairy-free cream cheese and coconut yogurt combo, though texture might vary slightly. When I’m in a rush, I’ve even used store-bought crusts, but homemade always tastes better.
Equipment Needed
- Mini muffin pan (12-cup) – essential for those perfect mini servings
- Mixing bowls – one large for batter, one small for crust mix
- Electric mixer or stand mixer – helps get that ultra-smooth cheesecake filling
- Measuring cups and spoons – accuracy matters here
- Spatula – for folding and scraping batter cleanly
- Food processor (optional) – handy for crushing graham crackers effortlessly
If you don’t have a mini muffin pan, small ramekins work, though baking times might adjust. I’ve used a handheld mixer when short on time, but a stand mixer really makes the filling silkier. For budget-friendly kitchens, crushing crackers by hand with a rolling pin works fine—just keep crumbs fine and even.
Preparation Method
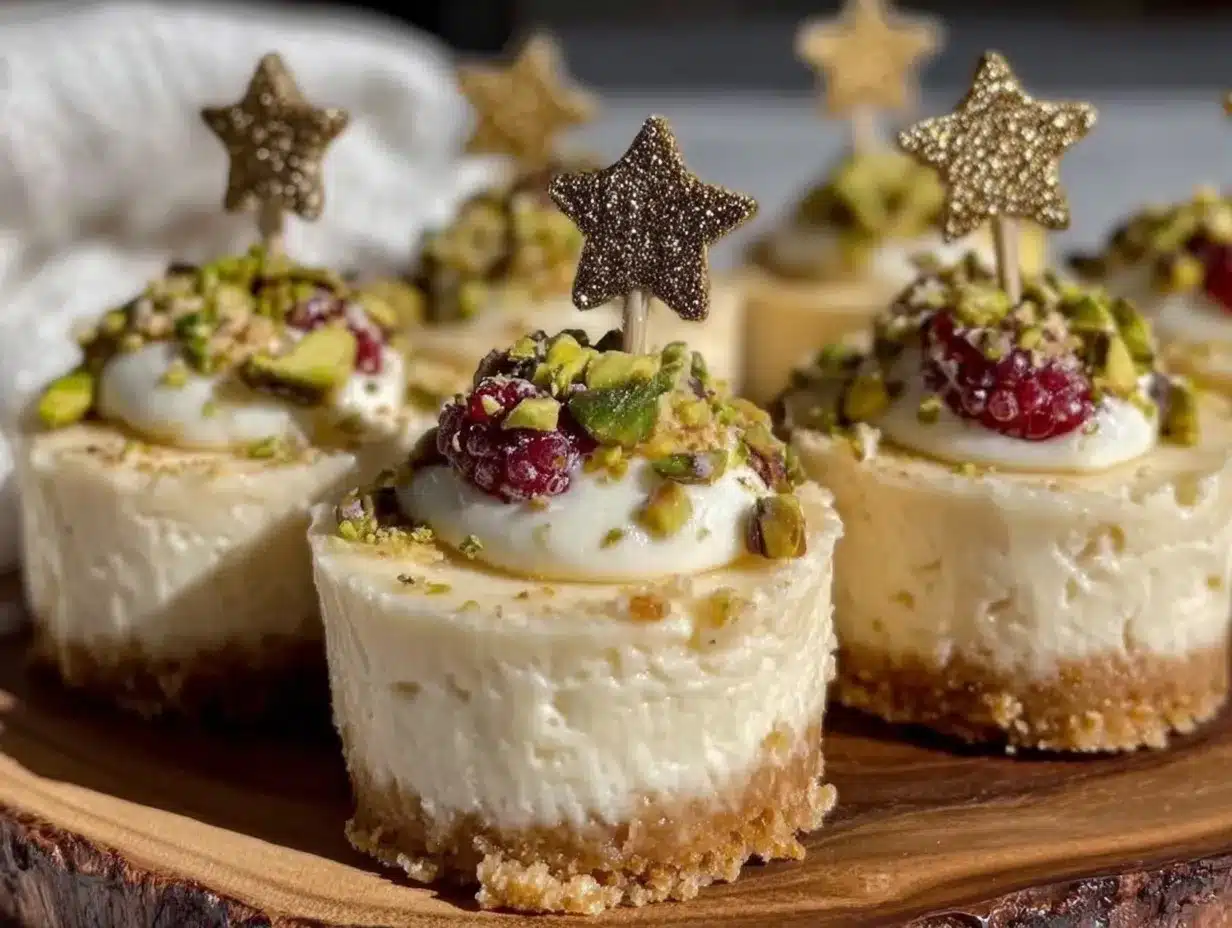
- Preheat your oven to 325°F (160°C). Line your mini muffin pan with paper liners or lightly grease each cup to make removal easier.
- Prepare the crust: In a small bowl, combine 1 ½ cups (150g) graham cracker crumbs, 5 tablespoons (70g) melted unsalted butter, and 2 tablespoons (25g) sugar. Mix until the crumbs are evenly coated and look like wet sand.
- Divide and press crust: Spoon about 1 tablespoon (15g) of the crust mixture into each muffin cup. Use the back of a spoon or your fingers to firmly press the crust into an even layer covering the bottom. This usually takes about 5 minutes. The crust should hold together when pressed but not be too thick.
- Bake the crust: Place the pan in the oven for 7 minutes. This step helps the crust set and adds a slight toasty flavor. Remove and let cool slightly while preparing the filling.
- Make the cheesecake filling: In a large mixing bowl, beat 16 oz (450g) softened cream cheese with ⅔ cup (135g) sugar on medium speed until smooth and creamy—about 2-3 minutes. Scrape the sides often to avoid lumps.
- Add egg and vanilla: Crack in 1 large egg and add 1 teaspoon vanilla extract. Beat until just combined; overmixing can cause cracks later.
- Fold in sour cream: Gently mix in ⅓ cup (80ml) sour cream with a spatula until smooth. This adds moisture and tang.
- Fill the cups: Spoon the filling evenly over the prebaked crusts, filling each about ¾ full. Tap the pan lightly on the counter to release air bubbles.
- Bake the mini cheesecakes: Bake at 325°F (160°C) for 18-22 minutes. The edges should be set, but the center will jiggle slightly when you gently shake the pan.
- Cool and chill: Remove from oven and let cool at room temperature for 30 minutes. Then transfer the pan to the fridge for at least 2 hours, ideally overnight, to fully set.
- Add toppings and toppers: Just before serving, decorate with fresh berries, chocolate shavings, or your personalized graduation toppers. I’ve found that adding toppers last minute keeps them crisp and festive.
Pro tip: If your cheesecakes crack, don’t panic! A quick fix is to cover the top with fruit or whipped cream. Also, avoid overbaking to keep the filling smooth and creamy.
Cooking Tips & Techniques
One thing I learned the hard way is that temperature matters—a lot. Softened cream cheese blends easier and prevents lumps. If it’s too cold, you’ll end up with little chunks that ruin the texture.
Another trick is beating the egg in slowly and stopping as soon as it’s combined. Overmixing introduces air, which can cause cracks during baking. I always scrape the bowl down a couple of times to make sure everything’s uniform.
When pressing the crust, be firm but gentle. Too thin, and it won’t hold; too thick, and it overpowers the filling. I use the bottom of a shot glass to get an even layer every time.
Since these cupcakes are small, oven temperature consistency is key. I recommend using an oven thermometer to avoid overheating or undercooking. Also, chilling overnight isn’t just for patience—it really helps the flavors meld and texture firm up.
Lastly, multitasking is your friend. While the crust bakes, prep your filling and even start on your custom toppers. This way, when the cheesecakes cool, you’re ready to decorate and serve swiftly.
Variations & Adaptations
- Flavor Swaps: Add a swirl of fruit preserves or chocolate ganache before baking for a surprise inside. I once made a raspberry swirl version that vanished in minutes.
- Dairy-Free Option: Use vegan cream cheese and coconut yogurt to mimic the creamy texture, though baking time might slightly vary.
- Crust Alternatives: Swap graham crackers for crushed digestive biscuits or gluten-free cookie crumbs to suit dietary needs.
- Seasonal Toppings: In summer, fresh mango or kiwi slices add a bright contrast. Winter calls for spiced apple compote or candied nuts.
- Baking Method Adjustments: Try baking in a water bath for an ultra-silky texture, though it requires more careful handling and equipment.
A personal favorite twist is mixing in finely chopped toasted pecans into the crust for added crunch and flavor. It pairs beautifully with a sprinkle of sea salt on top to balance the sweetness.
Serving & Storage Suggestions
Serve these mini cheesecakes chilled for the best texture. They look adorable arranged on a platter, especially with colorful graduation toppers poking out. Pair with a light sparkling beverage or a cup of rich coffee to complement the creamy dessert.
Store leftovers in an airtight container in the refrigerator for up to 4 days. For longer storage, freeze them in a single layer on a baking sheet, then transfer to a sealed bag—perfect for prepping ahead of celebrations. When ready, thaw in the fridge overnight.
Reheat gently at room temperature for 15 minutes before serving, or enjoy cold. The flavors deepen and the texture firms up as they chill, so they often taste better the next day.
Nutritional Information & Benefits
Each mini cheesecake cup contains approximately 180-200 calories, with about 10g fat, 20g carbohydrates, and 3-4g protein, depending on toppings. The cream cheese provides calcium and vitamin A, while the graham cracker crust adds fiber.
For those mindful of gluten, this recipe easily adapts to gluten-free crumbs. The use of sour cream adds probiotics, beneficial for digestion. While indulgent, these mini portions help keep treats reasonable without compromising flavor or satisfaction.
Conclusion
Perfect mini cheesecake cups with customizable graduation toppers have become my secret weapon for celebrations that feel special without the stress. They strike a balance between simplicity and wow factor, making every bite memorable. Whether you tweak the toppings, try a new crust, or bake them just as is, these cheesecakes invite creativity and joy.
Honestly, I love how they bring people together—small, sweet moments that celebrate big achievements. If you give this recipe a try, I’d love to hear how you made it your own or see your topper designs. Sharing those little personal touches is what makes cooking so rewarding, don’t you think?
Frequently Asked Questions
Can I make these mini cheesecake cups ahead of time?
Yes! They actually taste better after chilling overnight, which helps the flavors develop and the texture set perfectly.
What’s the best way to remove the cheesecakes from the pan?
Use paper liners or lightly grease the pan. Gently run a butter knife around the edges if needed and carefully lift them out with a small spatula or your fingers.
Can I use flavored cream cheese for different tastes?
Absolutely! Flavored cream cheeses like strawberry or honey can add a fun twist. Just adjust sugar accordingly to prevent them from getting too sweet.
How do I make custom graduation toppers?
Simple cardstock cutouts on toothpicks work great, or use edible wafer paper for a fun, food-safe option. Personalize with names, years, or school colors!
Is there a vegan version of this recipe?
Yes, by using vegan cream cheese and dairy-free yogurt alternatives, you can make a dairy-free cheesecake. Baking times and texture might slightly differ.
Feeling inspired? These mini cheesecakes would pair wonderfully with a savory bite like bacon-wrapped jalapeño poppers for a party spread that’s both sweet and spicy.
Pin This Recipe!
Perfect Mini Cheesecake Cups Recipe Easy Customizable Graduation Toppers

These mini cheesecake cups are quick, easy, and customizable desserts perfect for graduation parties and other celebrations. They feature a creamy filling with a crisp graham cracker crust and can be topped with fresh fruit, chocolate, or personalized toppers.
- Prep Time: 15 minutes
- Cook Time: 30 minutes
- Total Time: 2 hours 45 minutes
- Yield: 12 mini cheesecakes 1x
- Category: Dessert
- Cuisine: American
Ingredients
- 1 ½ cups (150g) graham cracker crumbs
- 5 tablespoons (70g) unsalted butter, melted
- 2 tablespoons (25g) granulated sugar (for crust)
- 16 oz (450g) cream cheese, softened
- ⅔ cup (135g) granulated sugar (for filling)
- 1 large egg
- 1 teaspoon pure vanilla extract
- ⅓ cup (80ml) sour cream
- Optional toppings: fresh berries or fruit slices, chocolate shavings or mini chips, custom graduation toppers
Instructions
- Preheat your oven to 325°F (160°C). Line your mini muffin pan with paper liners or lightly grease each cup.
- In a small bowl, combine graham cracker crumbs, melted butter, and sugar. Mix until crumbs are evenly coated and look like wet sand.
- Spoon about 1 tablespoon (15g) of the crust mixture into each muffin cup. Press firmly into an even layer covering the bottom.
- Bake the crust for 7 minutes. Remove and let cool slightly.
- In a large bowl, beat softened cream cheese with sugar on medium speed until smooth and creamy, about 2-3 minutes.
- Add the egg and vanilla extract; beat until just combined.
- Gently fold in sour cream until smooth.
- Spoon the filling evenly over the prebaked crusts, filling each about ¾ full. Tap the pan lightly to release air bubbles.
- Bake at 325°F (160°C) for 18-22 minutes until edges are set but center jiggles slightly.
- Cool at room temperature for 30 minutes, then chill in the refrigerator for at least 2 hours or overnight.
- Add toppings and custom graduation toppers just before serving.
Notes
Use softened cream cheese for smooth texture and avoid overmixing the egg to prevent cracks. Press crust firmly but not too thick. Chill overnight for best flavor and texture. For gluten-free, substitute graham crackers with almond flour or gluten-free cookie crumbs. Dairy-free options include vegan cream cheese and coconut yogurt. Custom toppers should be added just before serving to keep them crisp.
Nutrition
- Serving Size: 1 mini cheesecake cu
- Calories: 190
- Sugar: 15
- Sodium: 150
- Fat: 10
- Saturated Fat: 6
- Carbohydrates: 20
- Fiber: 1
- Protein: 4
Keywords: mini cheesecake, graduation dessert, easy cheesecake cups, customizable toppers, party dessert, quick cheesecake



