
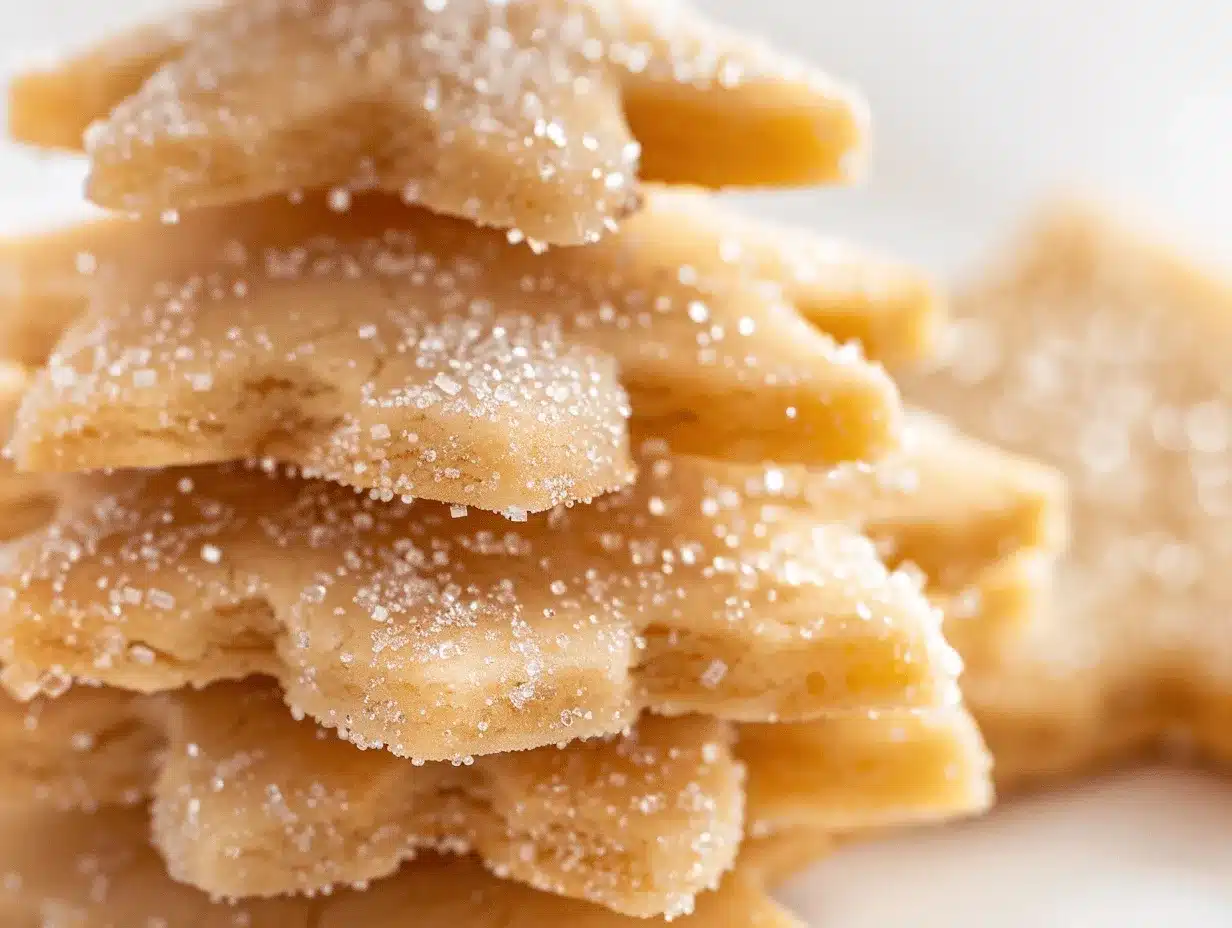
The first bite of a buttery shortbread Christmas tree, fresh out of the oven, always melts away any hint of holiday stress—at least for me. The rich aroma of real butter and vanilla fills the whole kitchen, swirling with a hint of nostalgia (and maybe a sprinkle of powdered sugar on the floor, let’s be honest). I still remember the first time I made these shortbread Christmas trees with my little sister—she insisted on extra green sanding sugar, and the cookies were gone before the neighbors could try them. Through every December since, these festive cookies have become a family tradition, and honestly, they’re the kind of treat that never goes out of style.
It’s not just about tradition, though—these shortbread Christmas trees are impossibly easy to make, require just a handful of pantry staples, and always look as cheerful as they taste. Whether you’re a baking newbie or an old pro, the dough is simple to work with, and decorating is pure joy (kids and grown-ups both get into it). Plus, the texture—oh my—each bite is crisp yet tender, and the buttery flavor is the kind that makes you close your eyes. As a recipe developer who’s tested more holiday cookies than I care to admit, I can say these shortbread Christmas trees have never let me down. When you’re looking for a showstopper for your cookie exchange, a sweet gift for friends, or a festive nibble to pair with hot cocoa, this is the recipe you’ll come back to year after year.
So if you’re searching for the ultimate shortbread Christmas trees recipe—one that’s easy, delicious, and guaranteed to bring out the holiday spirit—you’re in the right place. I’ve tweaked and tested this recipe to perfection, and I’m excited to share all my tips, tricks, and decorating ideas with you. Let’s make this season extra merry, one buttery cookie at a time!
Why You’ll Love This Shortbread Christmas Trees Recipe
If you’ve ever baked holiday cookies and wished for something simple, foolproof, and absolutely delicious, these shortbread Christmas trees are about to become your new favorite. After years of making them for cookie trays, gifting tins, and last-minute dessert emergencies, I can tell you: they never disappoint.
- Quick & Easy: The dough comes together in under 15 minutes, and there’s no complicated chilling or fancy ingredients. Just mix, roll, cut, and bake!
- Simple Ingredients: You probably have everything you need in your kitchen right now—think flour, butter, sugar, and a dash of vanilla.
- Perfect for Holidays: Whether you’re prepping for a Christmas party, a school bake sale, or a cozy night in, these cookies add instant festive flair to any occasion.
- Crowd-Pleaser: Kids love decorating them, adults love eating them, and even picky relatives go for seconds. They’re always the first to disappear from the dessert table.
- Unbelievably Delicious: The classic shortbread texture gets a holiday twist—tender, crumbly, melt-in-your-mouth, with rich buttery goodness and just enough sweetness.
What sets this shortbread Christmas trees recipe apart? For one, I’ve learned (the hard way) that creaming the butter and sugar just right makes all the difference. And rolling out the dough between sheets of parchment means no sticking or tearing. There’s also a secret: a pinch of salt to balance the sweetness, and the perfect cookie cutter for those crisp tree shapes. I’ve tried fancier versions—almond flour, lemon zest, you name it—but honestly, this classic keeps winning for taste and ease.
But it’s more than just flavor—it’s about the memories you’ll make. Baking these shortbread Christmas trees is an experience, from mixing the dough to choosing sprinkles and icing. It’s the kind of recipe you’ll reach for when you want to create holiday magic without any fuss. The cookies taste like a cozy hug, and they look adorable packaged for gifts or stacked on a festive platter. So if you want a treat that checks every holiday box, trust me—this is it.
What Ingredients You Will Need
This shortbread Christmas trees recipe is all about simplicity—each ingredient plays a starring role in flavor and texture. You won’t need anything fancy, and most of these are pantry staples. Here’s what you’ll need to get started:
- For the Shortbread Dough:
- Unsalted butter (1 cup / 225g, room temperature): The heart of shortbread—use good-quality butter for best flavor (I like Kerrygold or Plugrá).
- Powdered sugar (3/4 cup / 90g): Creates a tender crumb and smooth texture (granulated sugar works, but the cookies will be crisper).
- Vanilla extract (1 teaspoon): Adds sweet depth—pure vanilla is best, but any will do in a pinch.
- All-purpose flour (2 cups / 250g): The base of the dough—sift if you want an extra-light texture.
- Salt (1/4 teaspoon): Don’t skip this! It brings out all the buttery notes and balances the sweetness.
- For Decorating:
- Green sanding sugar or sprinkles: For the classic “tree” look. You can use colored sugar, nonpareils, or even edible glitter—go wild!
- Royal icing or simple glaze (optional): Mix powdered sugar with a splash of milk and vanilla for easy, drizzle-able icing.
- Mini chocolate chips or silver dragees (optional): Perfect for decorating the “tree” with ornaments.
Ingredient Tips: I’ve had great results with both regular and gluten-free flour blends—just make sure to measure carefully. If you want a dairy-free option, use plant-based butter (like Earth Balance), but the flavor won’t be quite as rich. For extra holiday flair, you can add a touch of almond extract or orange zest to the dough. And if you’re feeling creative, dip the cooled cookies in melted chocolate and sprinkle with crushed peppermint!
These ingredients are flexible—if you’re out of powdered sugar, blend granulated sugar in a food processor. And if you can’t find green sprinkles, dust with plain powdered sugar for a snowy effect. The beauty of shortbread Christmas trees is that you can make them your own, no matter what’s in your pantry.
Equipment Needed
Baking shortbread Christmas trees doesn’t require anything fancy, but having the right tools makes things smoother (and more fun). Here’s what I use every year:
- Mixing bowls: At least one large bowl for the dough—glass or stainless steel both work.
- Hand mixer or stand mixer: Creaming butter and sugar is easier with electric power, but a sturdy wooden spoon does the job in a pinch.
- Rolling pin: For even dough—if you don’t have one, a wine bottle (cleaned thoroughly) works fine.
- Parchment paper: Essential! It keeps the dough from sticking and helps with easy transfer to baking sheets.
- Christmas tree cookie cutter (about 3-inch / 7cm): The star of the show—metal cutters tend to give cleaner edges, but plastic works too.
- Baking sheets: Lined with parchment for best results. I’ve used both rimmed and flat sheets—just avoid overcrowding.
- Wire cooling rack: Cools cookies quickly and evenly. If you don’t have one, a clean tea towel on the counter works.
- Small offset spatula or thin metal spatula: For moving cut-out cookies from counter to baking sheet without stretching them.
If you’re decorating, a small piping bag or zip-top bag with the corner snipped works for icing. And don’t stress if you’re missing something—when I misplaced my rolling pin last year, that wine bottle came to the rescue! Just remember to wash and dry everything well, especially if you’re using specialty cutters (a soft brush gets into all the corners).
Preparation Method
-
Cream the butter and sugar:
In a large bowl, beat 1 cup (225g) unsalted butter with 3/4 cup (90g) powdered sugar using a hand mixer or stand mixer on medium speed for about 2-3 minutes, until light and fluffy. Don’t rush this step—you want the mixture pale and creamy. If you’re using a wooden spoon, it’ll take a bit longer, but it’s totally doable! -
Add the vanilla:
Mix in 1 teaspoon vanilla extract until fully combined. Scrape down the sides of the bowl so everything gets mixed evenly. -
Combine dry ingredients:
In a separate bowl, whisk together 2 cups (250g) all-purpose flour and 1/4 teaspoon salt. Gradually add this to your butter mixture, beating on low speed or stirring until just combined. The dough will look crumbly at first—keep mixing until it starts to come together.
Note: Don’t overmix, or your cookies may end up tough instead of tender. -
Form and chill the dough:
Scoop the dough onto a large sheet of parchment paper. Shape it into a flat disk (about 1 inch thick), wrap, and chill in the fridge for 30-45 minutes. This makes the dough easier to roll and helps the cookies keep their shape.
Troubleshooting: If the dough is still sticky after chilling, dust with a little extra flour. -
Preheat your oven:
Set to 325°F (165°C). Line two baking sheets with parchment paper. -
Roll out the dough:
Place the chilled dough between two sheets of parchment paper. Roll to about 1/4 inch (6mm) thickness. If you like thicker cookies, aim for 1/3 inch (8mm)—just add a minute or two to the bake time.
Tip: Rolling between parchment keeps your dough from sticking and means less flour (no dry, tough cookies!). -
Cut out the Christmas trees:
Dip your cookie cutter into flour, then press firmly into the dough. Transfer the trees to your prepared baking sheets with a thin spatula, spacing about 1 inch (2.5cm) apart. Gather and reroll scraps as needed.
Personal tip: If the dough softens and gets sticky, pop it back in the fridge for 10 minutes. -
Decorate before baking (optional):
Sprinkle with green sanding sugar or add mini chocolate chips as “ornaments.” If using icing, decorate after baking and cooling. -
Bake:
Bake for 13-16 minutes, until the edges are just barely golden (watch closely—shortbread can go from perfect to overbaked quickly). For softer cookies, pull them at the 13-minute mark; for a crisper bite, let them go a bit longer.
Sensory cue: The cookies should look matte on top and feel slightly firm at the edges. -
Cool and finish:
Let cookies cool on the baking sheet for 5 minutes, then transfer to a wire rack. If decorating with icing, wait until completely cool, then drizzle or pipe on your designs.
Efficiency tip: While one batch bakes, roll and cut your next tray. If your kitchen is warm, keep the dough in the fridge between rounds. And don’t forget to taste-test a “broken” one—baker’s privilege!
Cooking Tips & Techniques for Perfect Shortbread Christmas Trees
I’ve learned a lot (sometimes the hard way) about making shortbread Christmas trees that look and taste bakery-worthy. Here are my tried-and-true tips:
- Use room-temperature butter: Cold butter won’t cream properly, and melted butter will make the dough too soft. If you’re in a hurry, cut butter into cubes and let it sit out for 20 minutes.
- Don’t overwork the dough: Mix just until the flour disappears. Overmixing can lead to tough cookies—shortbread should be tender and crumbly.
- Chill the dough: Skipping this step means your trees might spread and lose their shape. A quick chill helps the cookies hold sharp edges and bake evenly.
- Keep everything cool: If your kitchen is warm (hello, December baking!), work in batches and keep extra dough in the fridge.
- Watch the bake time: The difference between perfect and overbaked is just a minute or two. Set a timer and check early—edges should be pale golden, not brown.
- Use parchment paper: Not only does this prevent sticking, but it also makes cleanup a breeze. I’ve tried silicone mats, but parchment gives the best texture and color.
- Get creative with decorations: If icing isn’t your thing, a dusting of powdered sugar or a drizzle of melted chocolate adds instant charm.
- Personal fail: One year I tried to bake two trays at once on different oven racks—ended up with unevenly browned cookies. Stick to one tray in the center of the oven for best results.
And here’s my favorite multitasking trick: while the cookies bake, prep your decorating supplies (sprinkles, icing, etc.) so you’re ready to go as soon as they’re cool. For consistent results every time, measure flour using the spoon-and-level method, and always use real butter—margarine just isn’t the same!
Variations & Adaptations
Shortbread Christmas trees are endlessly customizable—here’s how you can make them your own:
- Gluten-Free: Swap the all-purpose flour for a 1:1 gluten-free baking blend (like King Arthur or Cup4Cup). I’ve done this for friends with celiac, and no one could tell the difference!
- Dairy-Free: Use a good-quality plant-based butter. The texture stays similar, but you might lose a bit of that classic buttery flavor.
- Flavor Twists: Mix in 1/2 teaspoon almond extract or orange zest for a bright, festive note. You can even add a pinch of cinnamon or nutmeg to the dough for a subtle spice.
- Chocolate-Dipped: Once baked and cooled, dip half the tree in melted dark or white chocolate. Sprinkle with crushed peppermint or chopped pistachios for extra flair.
- Jam-Filled: Cut a smaller star or circle from the center of half the trees, bake, then sandwich with raspberry jam for a Linzer-style treat.
- Vegan Version: Use dairy-free butter and a splash of plant milk if the dough is dry. Skip the royal icing (use a simple water-based glaze instead).
I’ve personally tried the almond extract version—just 1/2 teaspoon gives a lovely holiday flavor. And for a fun twist, use food coloring to tint the dough green (kids love this). Whatever your dietary needs or creative inspiration, shortbread Christmas trees can flex to fit.
Serving & Storage Suggestions
For the best shortbread Christmas trees experience, serve them at room temperature—this lets the buttery flavor shine. Arrange on a festive platter with extra sprinkles or a dusting of powdered sugar for that “snowy” effect. They also look adorable tucked into cellophane bags with a holiday ribbon for easy gifting.
Pair these cookies with hot chocolate, spiced cider, or even a glass of bubbly for an extra special treat. I like to serve them alongside other holiday favorites—think gingerbread men, peppermint bark, or classic sugar cookies—for a crowd-pleasing cookie tray.
To store, keep shortbread Christmas trees in an airtight container at room temperature for up to 1 week. For longer storage, freeze baked cookies (undecorated) in a zip-top bag for up to 2 months. Thaw at room temp, then decorate as desired. If you’re stacking them, place layers of parchment or wax paper in between to prevent sticking or smudged decorations. And honestly, the flavor deepens after a day or two, so don’t be afraid to bake ahead!
Nutritional Information & Benefits
Each shortbread Christmas tree (about 3-inch/7cm) contains approximately:
- 120 calories
- 7g fat
- 14g carbohydrates
- 1g protein
- 6g sugar
Key Benefits: The simple ingredient list keeps these cookies free from artificial flavors or preservatives. Using real butter means you get healthy fats and a satisfying richness in every bite. For those needing gluten-free or dairy-free options, swaps are easy—just check your flour blend and butter choice. Allergen note: Contains wheat and dairy (if using traditional ingredients). As a home baker who loves a little indulgence balanced with real ingredients, I find these cookies hit the spot: a small, satisfying treat that celebrates the season without going overboard.
Conclusion
There’s just something magical about baking a batch of shortbread Christmas trees—the buttery aroma, the fun of decorating, and the simple joy of sharing them with loved ones. This recipe, with its tried-and-true method and versatile options, is perfect whether you’re a holiday baking rookie or a seasoned pro. I love how these cookies bring everyone together, from little kids rolling dough to friends swapping decorating ideas.
Don’t be afraid to play around with flavors, shapes, or toppings—make these trees uniquely yours! Every year, I find a new way to dress them up, but the classic version always steals the show. If you give this recipe a try, let me know how it goes—share your photos, your tweaks, or even your “oops” moments in the comments. Trust me, you’ll want to make these shortbread Christmas trees part of your holiday tradition. Happy baking, and may your season be sweet and buttery!
Frequently Asked Questions
How do I keep my shortbread Christmas trees from spreading in the oven?
Make sure to chill the dough before cutting and baking the cookies. If your kitchen is warm, pop the cut-out trees in the fridge for 10-15 minutes before baking. This helps them hold their shape beautifully.
Can I make the dough ahead of time?
Absolutely! You can prepare the dough, wrap it tightly, and refrigerate for up to 2 days. You can also freeze the dough for up to 2 months—just let it thaw in the fridge before rolling and cutting.
What’s the best way to decorate shortbread Christmas trees?
You can use colored sanding sugar before baking, or let the cookies cool and drizzle with royal icing, melted chocolate, or a simple powdered sugar glaze. Sprinkles, nonpareils, and mini chocolate chips make great ornaments!
Can I use salted butter instead of unsalted?
Yes, just omit the added salt in the recipe. The flavor will still be delicious, but I prefer unsalted so I can control the saltiness.
How do I store decorated cookies without ruining the icing?
Let the icing or glaze dry completely before stacking, and use parchment or wax paper between layers. Store in an airtight container at room temperature for up to a week, or freeze undecorated cookies for longer storage.
Pin This Recipe!
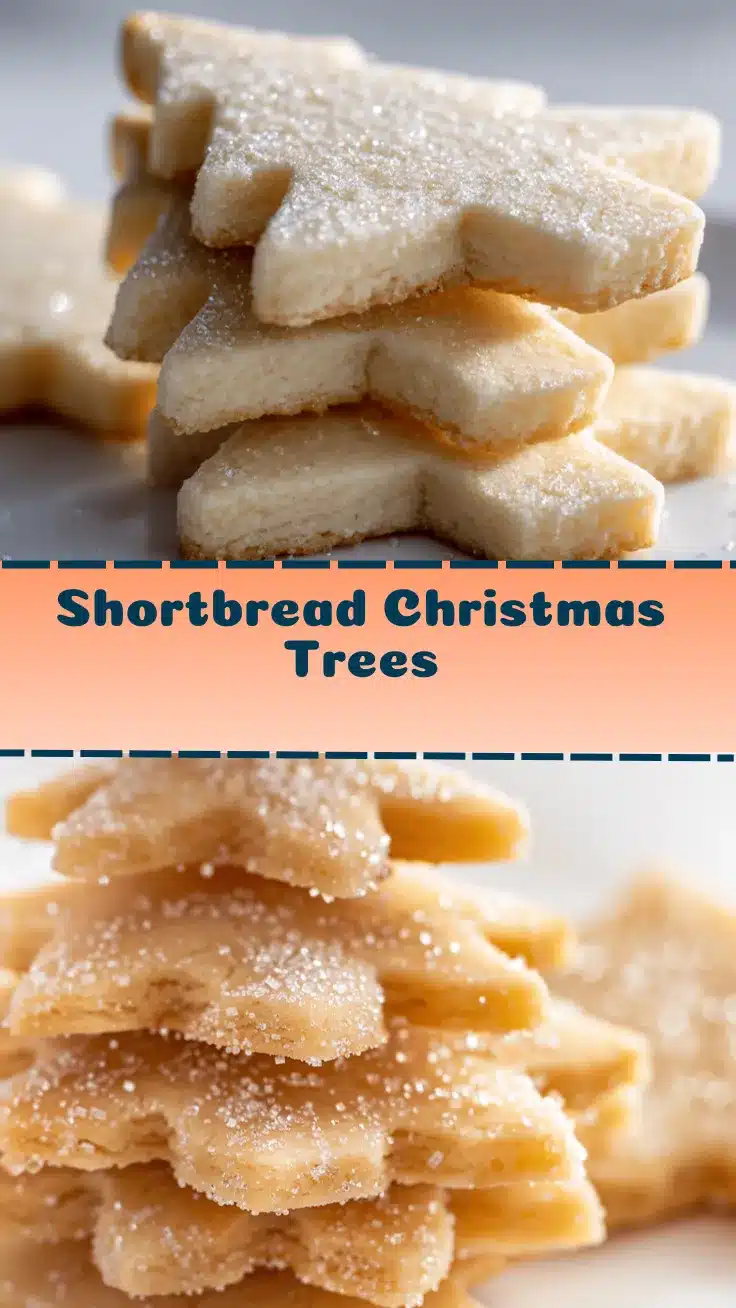
Shortbread Christmas Trees

These buttery, tender shortbread Christmas tree cookies are a festive holiday treat that’s easy to make and fun to decorate. Perfect for cookie exchanges, gifting, or enjoying with a cup of hot cocoa, they feature classic shortbread flavor and a melt-in-your-mouth texture.
- Prep Time: 15 minutes
- Cook Time: 13-16 minutes
- Total Time: 1 hour
- Yield: 24 cookies 1x
- Category: Dessert
- Cuisine: American
Ingredients
- 1 cup unsalted butter (225g), room temperature
- 3/4 cup powdered sugar (90g)
- 1 teaspoon vanilla extract
- 2 cups all-purpose flour (250g)
- 1/4 teaspoon salt
- Green sanding sugar or sprinkles, for decorating
- Royal icing or simple glaze (optional)
- Mini chocolate chips or silver dragees (optional)
Instructions
- In a large bowl, beat unsalted butter and powdered sugar with a hand mixer or stand mixer on medium speed for 2-3 minutes, until light and fluffy.
- Mix in vanilla extract until fully combined, scraping down the sides of the bowl.
- In a separate bowl, whisk together all-purpose flour and salt. Gradually add to the butter mixture, mixing on low speed or stirring until just combined. Do not overmix.
- Scoop dough onto a large sheet of parchment paper, shape into a flat disk (about 1 inch thick), wrap, and chill in the fridge for 30-45 minutes.
- Preheat oven to 325°F (165°C). Line two baking sheets with parchment paper.
- Roll out chilled dough between two sheets of parchment paper to about 1/4 inch thickness.
- Dip a Christmas tree cookie cutter into flour, then cut out tree shapes. Transfer to prepared baking sheets with a thin spatula, spacing about 1 inch apart. Gather and reroll scraps as needed.
- Sprinkle with green sanding sugar or add mini chocolate chips as ornaments if desired. If using icing, decorate after baking and cooling.
- Bake for 13-16 minutes, until edges are just barely golden. For softer cookies, bake 13 minutes; for crisper cookies, bake longer.
- Cool cookies on the baking sheet for 5 minutes, then transfer to a wire rack. If decorating with icing, wait until completely cool before drizzling or piping designs.
Notes
For best results, use room-temperature butter and avoid overmixing the dough. Chilling the dough helps cookies keep their shape. Decorate with sanding sugar before baking or use icing after cooling. Store in an airtight container for up to 1 week, or freeze undecorated cookies for up to 2 months. Gluten-free and dairy-free adaptations are possible using appropriate flour blends and plant-based butter.
Nutrition
- Serving Size: 1 cookie (about 3-inch/7cm)
- Calories: 120
- Sugar: 6
- Sodium: 40
- Fat: 7
- Saturated Fat: 4
- Carbohydrates: 14
- Protein: 1
Keywords: shortbread, Christmas cookies, holiday baking, festive cookies, butter cookies, easy cookies, tree cookies, decorated cookies



