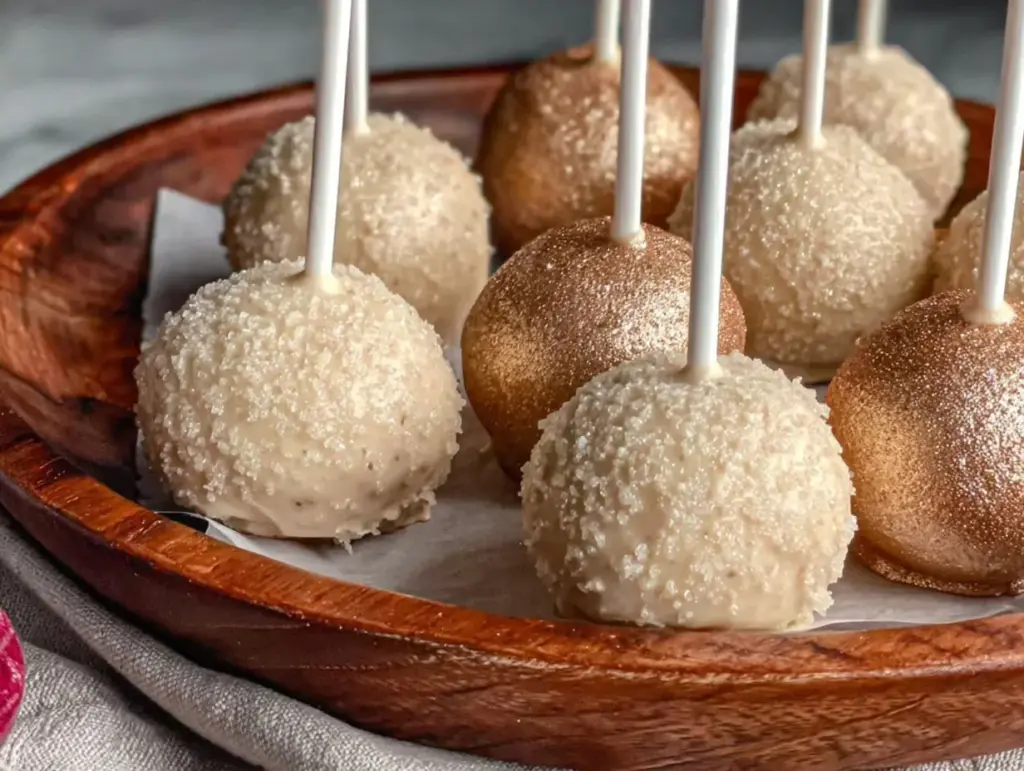
The shimmer of metallic cake pops catching the light is honestly something else. I first made these stunning ball drop cake pops with metallic shine a couple of holiday seasons ago when I wanted to impress guests without spending hours in the kitchen. The moment I dipped those little cake balls into glossy, shimmering coatings and saw them transform into sparkling treats, I knew I had a winner. These pops aren’t just eye candy—they’re a playful twist on classic cake pops that add a bit of magic to any celebration.
Creating these metallic shine cake pops at home feels like crafting tiny edible jewels. Plus, they’re perfect for birthdays, New Year’s parties, or just when you want to bring a little wow-factor to dessert. Trust me, after trying this recipe multiple times, I can say it’s both fun and surprisingly straightforward. If you’re looking for a crowd-pleaser that’s as delightful to look at as it is to eat, these stunning ball drop cake pops will become your go-to.
What I love most about this recipe is how it combines simple ingredients with a dazzling finish. Whether you’re a seasoned baker or just dipping your toes into cake pop making, these metallic shine pops offer a chance to impress without stress. So grab your favorite cake crumbs and your best metallic luster dust—we’re going to make some magic happen!
Why You’ll Love This Recipe
- Quick & Easy: This recipe comes together in about an hour, perfect when you want an impressive dessert without an all-day commitment.
- Simple Ingredients: Most of what you need is probably already in your pantry or fridge, making it super convenient.
- Perfect for Any Occasion: Whether it’s a birthday bash, baby shower, or a festive holiday gathering, these cake pops steal the show.
- Crowd-Pleaser: Kids and adults alike can’t get enough of these bite-sized bites that sparkle with metallic shine.
- Unbelievably Delicious: Moist cake with creamy frosting forms the base, while the metallic coating adds a stunning visual and slight crunch.
- Unique Technique: The secret ball drop method for assembling the pops gives them a flawless round shape that’s both professional and fun.
- Creative Twist: Using edible metallic luster dust brings a high-end patisserie look to homemade cake pops—no fancy equipment needed.
- It’s that kind of recipe that makes you pause and smile after the first bite—comfort food with a shiny, glamorous twist.
What Ingredients You Will Need
This recipe uses straightforward ingredients that work together to create a moist, flavorful cake pop with a dazzling metallic finish. Most are pantry staples, and substitutions are easy if needed.
- Cake Base:
- 1 box of cake mix (any flavor you fancy; I love vanilla or chocolate for this one)
- Ingredients called for on the cake mix box (usually eggs, oil, and water)
- Frosting:
- 1 cup (240 ml) store-bought or homemade buttercream frosting (cream cheese frosting works great too)
- Coating & Decoration:
- 12 oz (340 g) white candy melts or colored candy melts (use high-quality brands like Wilton or Merckens for smooth finish)
- Metallic edible luster dust (silver, gold, rose gold—your choice!)
- Vegetable shortening (a small amount to thin the candy melts if needed)
- Food-safe brushes or cotton swabs for applying luster dust
- Assembly:
- Wooden or plastic cake pop sticks (6-inch length recommended)
- Styrofoam block or cake pop stand for drying
Pro Tip: For the best texture, pick a cake mix that’s moist but firm enough to hold shape when mixed with frosting. If you want a gluten-free version, swap in a gluten-free cake mix and check that your candy melts are gluten-free too.
Equipment Needed
- Mixing Bowls: At least one large bowl for mixing the cake crumbs and frosting.
- Baking Pan: To bake the cake; an 8×8 inch (20×20 cm) square pan or 9×13 inch (23×33 cm) rectangular pan works well.
- Stand Mixer or Hand Mixer: Helpful for making smooth frosting and mixing cake crumbs efficiently.
- Baking Sheet & Parchment Paper: For cooling cake and rolling cake balls.
- Microwave-Safe Bowl or Double Boiler: To melt candy melts smoothly without scorching.
- Styrofoam Block or Cake Pop Stand: Essential for drying the cake pops upright.
- Food-Safe Brushes: For applying metallic luster dust; a small, soft paintbrush does the trick.
If you don’t have a cake pop stand, a sturdy piece of Styrofoam or even a clean block of floral foam will do the job. I’ve also used a colander inverted on the counter as an impromptu drying rack when in a pinch. Keeping your candy melts at the right temperature is key, so a thermometer can help but isn’t necessary if you watch carefully.
Detailed Preparation Method

- Bake the Cake: Preheat your oven to 350°F (175°C). Prepare your cake mix according to the package instructions, using your preferred flavor. Pour the batter into a greased 8×8 inch (20×20 cm) pan and bake for 25-30 minutes or until a toothpick comes out clean. Let the cake cool completely on a wire rack (about 1 hour).
- Crumble the Cake: Once cooled, crumble the cake into fine crumbs using your hands or a mixer. You want it as fine as possible for smooth cake pops.
- Mix with Frosting: Add 1 cup (240 ml) of frosting to the cake crumbs. Stir gently until the mixture holds together when pressed but isn’t too sticky or wet. If it’s too crumbly, add a bit more frosting; if too wet, add a few more crumbs.
- Form Cake Balls: Scoop about 1.5 tablespoons (20 g) of the mixture and roll it into a smooth ball using your hands. Place each ball on a parchment-lined baking sheet. Repeat until all mixture is used (about 20-24 balls). Chill the balls in the fridge for at least 30 minutes to firm up.
- Prepare Candy Melts: Melt 12 oz (340 g) of candy melts in a microwave-safe bowl in 30-second bursts, stirring each time until completely smooth. If too thick, add a teaspoon of vegetable shortening and stir to thin.
- Insert Sticks: Dip one end of a cake pop stick into the melted candy, then insert it halfway into a chilled cake ball. This helps the stick stay in place. Repeat with all balls.
- Coat Cake Pops: Dip each cake pop into the melted candy, fully coating the ball. Gently tap off excess coating and stand the pop upright in your Styrofoam block or cake pop stand to dry.
- Apply Metallic Shine: Once the coating is mostly set but still slightly tacky (about 5-10 minutes), use a food-safe brush to dust on edible metallic luster dust. For an intense shine, you can mix a small amount of luster dust with a few drops of clear alcohol (like vodka) and paint on the pops. Let dry completely.
- Final Touches: After drying, check for any spots to touch up with more candy melts or luster dust. Store cake pops in an airtight container at room temperature or in the fridge if your kitchen is warm.
Tip: If your cake balls crack during dipping, chill them longer next time or add a little more frosting to the mixture. The metallic shine looks best when applied gently—too much brushing can dull the effect.
Cooking Tips & Techniques
Making stunning ball drop cake pops with metallic shine can feel tricky, but a few tricks I learned make all the difference. First, chilling your cake balls well before dipping is key. I’ve had my fair share of messy dips when pops were too warm and crumbly—chilling firms them up and helps the coating stick evenly.
When melting candy melts, patience is your best friend. Short bursts in the microwave with stirring prevent scorching and clumpy coating. If you overheat, the candy can become grainy or thick—so keep it smooth and silky by adding vegetable shortening if needed. I like a silky texture that coats the cake balls with ease.
Applying the metallic luster dust right after dipping (when the coating is slightly tacky) helps it stick without smudging. Using a soft food-safe brush, apply gently in light layers for the most realistic shine. Mixing the dust with a tiny amount of clear alcohol gives a paint-like effect that dries with a true metallic gleam—just don’t overdo it!
One common mistake is pushing the stick too deep into the cake ball, which can cause cracking. A halfway insertion works best. Also, keep your hands dry and cool when rolling cake balls to prevent melting or stickiness. Finally, stand your pops upright to dry to avoid flat spots and maintain their perfect sphere shape.
Variations & Adaptations
- Flavor Variations: Swap the cake mix for fun flavors like red velvet, lemon, or carrot cake. Each gives a unique twist, and the metallic shine pairs beautifully with vibrant colors.
- Dietary Adaptations: Use gluten-free cake mix for those with sensitivities. For dairy-free, try coconut or vegan buttercream and dairy-free candy melts.
- Colorful Metallics: Instead of classic gold or silver, experiment with rose gold, blue, or even holographic luster dust to match your party theme or personal style.
- Alternative Coatings: For a textured look, sprinkle edible glitter or colored sugar over the wet candy coating before adding metallic dust.
- Personal Favorite: I once made these with a salted caramel cake base and brushed on a coppery metallic dust—it was a total crowd-pleaser and felt super luxe without fuss.
Serving & Storage Suggestions
Serve these stunning ball drop cake pops at room temperature to enjoy the perfect balance of moist cake and crisp coating. Display them in a decorative stand or a festive container filled with colorful beads or shredded paper for a charming presentation. Pair them with sparkling cider or a light, fruity punch for celebrations.
Store cake pops in an airtight container at room temperature for up to 3 days. If your kitchen is warm, refrigeration is best but let them come back to room temp before serving to avoid condensation on the metallic finish. You can freeze them wrapped tightly in plastic wrap and placed in a freezer bag for up to a month—just thaw in the fridge overnight.
Over time, the metallic shine may mellow slightly, but the flavor remains delightful. If you want to refresh the sparkle before serving, a quick brush with a little extra luster dust makes them pop again.
Nutritional Information & Benefits
These cake pops are a treat, so here’s a rough estimate per pop (based on 24 pops): 150-180 calories, 6-8 g fat, 25-30 g carbohydrates, and 1-2 g protein. The buttercream and candy melts add sweetness and richness, so enjoying one or two is the way to go.
Using quality ingredients like real butter in frosting and premium cake mix makes a difference in taste and texture. Opting for natural luster dusts without artificial dyes can be a bonus if you’re mindful of additives.
While not a health food, these pops bring joy and celebration to the table—something I consider just as important! They’re perfect for those who want an indulgent dessert that looks as good as it tastes.
Conclusion
Stunning ball drop cake pops with metallic shine are a fun, creative way to wow your guests with minimal fuss. This recipe strikes a perfect balance between simple ingredients and dazzling presentation. Honestly, nothing beats the thrill of biting into a moist cake pop that’s glistening like a little work of art.
Feel free to tweak the flavors, colors, and metallic hues to fit your vibe. I love how customizable and forgiving this recipe is—you can make it your own every time. If you give it a try, I’d love to hear which colors and flavors you chose!
Go ahead, make these shiny pops your next party hit and share the sparkle with friends and family. Don’t forget to leave a comment below sharing your experience or any cool twists you put on the recipe. Happy popping!
FAQs
What’s the best way to prevent cake pops from cracking?
Make sure to chill your cake balls thoroughly before dipping, and don’t push the stick in too far—only halfway. Also, add enough frosting to bind crumbs without making them too wet.
Can I use homemade cake instead of box mix?
Absolutely! Just make sure your homemade cake is moist but firm enough to crumble well and hold shape when mixed with frosting.
How do I get that metallic shine without food coloring?
Use edible metallic luster dust applied with a soft brush, or mix it with a little clear alcohol to paint on. No food coloring needed for that gleam!
Can I prepare cake pops ahead of time?
Yes, you can make cake balls and freeze them before dipping. Once coated, store cake pops airtight in the fridge for a few days or freeze for longer storage.
What if I don’t have a cake pop stand?
No worries! Use a block of Styrofoam, floral foam, or even invert a colander to hold your pops upright while drying.
Pin This Recipe!

Stunning Ball Drop Cake Pops Recipe Easy Homemade Metallic Shine Pops

These stunning ball drop cake pops feature a moist cake base coated with a glossy metallic finish, perfect for celebrations and easy to make at home with simple ingredients.
- Prep Time: 20 minutes
- Cook Time: 30 minutes
- Total Time: 1 hour 50 minutes
- Yield: 20-24 cake pops 1x
- Category: Dessert
- Cuisine: American
Ingredients
- 1 box of cake mix (any flavor, e.g., vanilla or chocolate)
- Ingredients called for on the cake mix box (usually eggs, oil, and water)
- 1 cup (240 ml) store-bought or homemade buttercream frosting (cream cheese frosting works too)
- 12 oz (340 g) white or colored candy melts (high-quality brands like Wilton or Merckens recommended)
- Metallic edible luster dust (silver, gold, rose gold, or other colors)
- Vegetable shortening (small amount to thin candy melts if needed)
- Food-safe brushes or cotton swabs for applying luster dust
- Wooden or plastic cake pop sticks (6-inch length recommended)
- Styrofoam block or cake pop stand for drying
Instructions
- Preheat oven to 350°F (175°C). Prepare cake mix according to package instructions. Pour batter into greased 8×8 inch pan and bake for 25-30 minutes or until toothpick comes out clean. Cool completely on wire rack (about 1 hour).
- Crumble cooled cake into fine crumbs using hands or mixer.
- Add 1 cup frosting to cake crumbs and stir gently until mixture holds together but is not too sticky or wet. Adjust frosting or crumbs as needed.
- Scoop about 1.5 tablespoons (20 g) of mixture and roll into smooth balls. Place on parchment-lined baking sheet. Repeat for 20-24 balls. Chill in fridge at least 30 minutes.
- Melt 12 oz candy melts in microwave-safe bowl in 30-second bursts, stirring until smooth. Thin with vegetable shortening if too thick.
- Dip one end of cake pop stick into melted candy, then insert halfway into chilled cake ball. Repeat for all balls.
- Dip each cake pop into melted candy to coat fully. Tap off excess and stand upright in Styrofoam block or cake pop stand to dry.
- When coating is mostly set but still tacky (5-10 minutes), use food-safe brush to dust edible metallic luster dust on pops. For intense shine, mix luster dust with a few drops of clear alcohol (e.g., vodka) and paint on. Let dry completely.
- Touch up any spots with more candy melts or luster dust if needed. Store cake pops in airtight container at room temperature or refrigerate if warm.
Notes
Chill cake balls thoroughly before dipping to prevent cracking. Use short bursts when melting candy melts to avoid scorching. Apply metallic luster dust gently with a soft brush for best shine. Insert sticks halfway to avoid cracking. Store cake pops in airtight container; can freeze wrapped for up to one month.
Nutrition
- Serving Size: 1 cake pop
- Calories: 150180
- Sugar: 2025
- Sodium: 100150
- Fat: 68
- Saturated Fat: 34
- Carbohydrates: 2530
- Fiber: 1
- Protein: 12
Keywords: cake pops, metallic cake pops, ball drop cake pops, shiny cake pops, party dessert, easy cake pops, homemade cake pops, festive dessert



