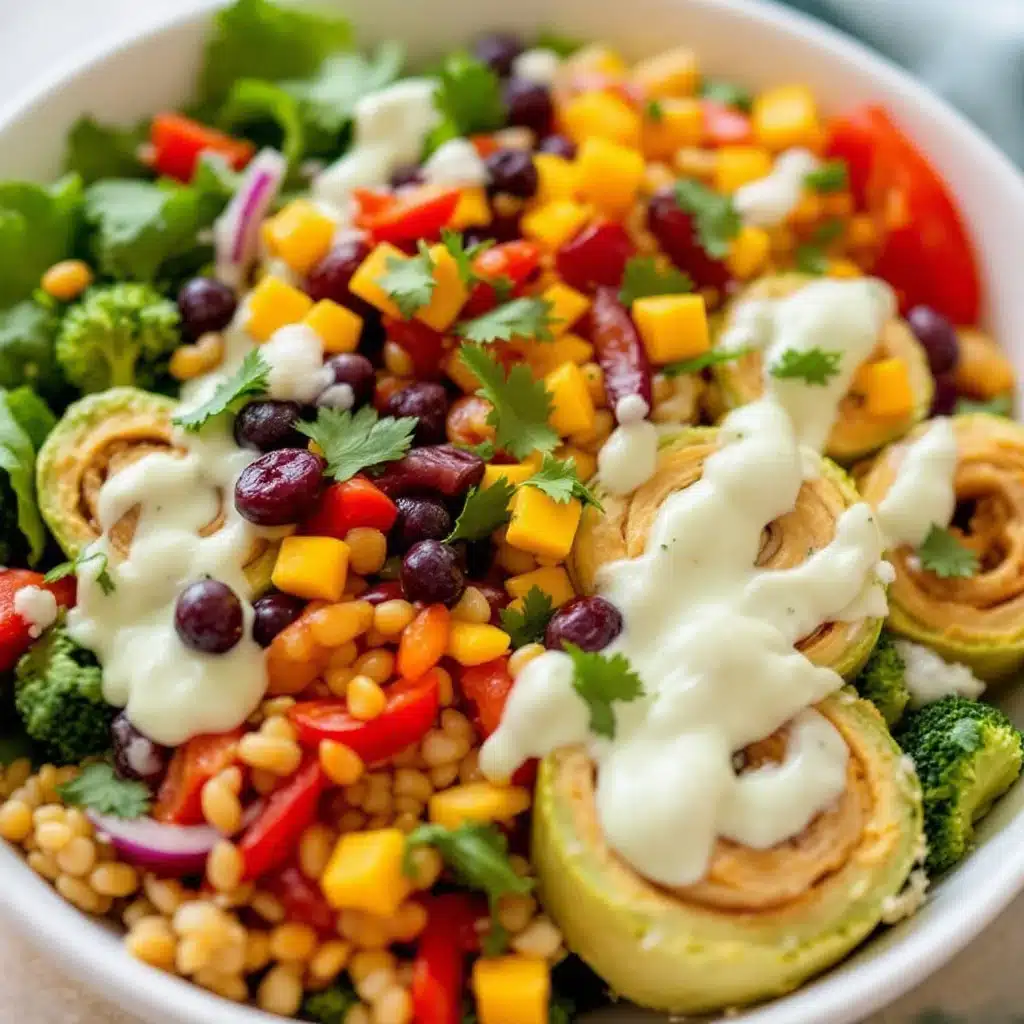
The perfect swirl of creamy sunbutter and bright strawberry jelly pressed between two soft layers of bread — and that’s the whole point. I made these for my nephew’s preschool class, honestly, I was just trying to avoid another lunchbox meltdown. Three days in a row he came home with his sandwich untouched, and I was starting to take it personally. That’s when I remembered the pinwheel trick from a summer picnic years ago.
You know how kids are — they’ll eat anything that looks like a cinnamon roll, even if it’s secretly good for them. These nut-free sunbutter and jelly pinwheels are basically a magic trick disguised as lunch. No crusts to negotiate, no suspicious green stuff hiding inside, just sweet and salty spirals that look like they came from a bakery. My nephew called them “snail sandwiches” and ate four in one sitting (I’m not exaggerating).
Here’s the thing about preschool snacks — they need to travel well, stay fresh, and not cause any allergy panic. Sunbutter is my go-to because it’s completely nut-free but still gives you that rich, toasty flavor kids actually like. The jelly seeps into the bread just enough to keep everything moist without making it soggy. And the rolling? That’s where the fun happens. You don’t need any special tools or fancy ingredients — just a rolling pin, a sharp knife, and maybe a little patience if you’re rolling with a three-year-old “helper.”
I’ve made these for playdates, birthday parties, and even a few grown-up lunches when I wanted something nostalgic but quick. They’re the kind of recipe that makes you feel like you’ve got it together, even when you’re running on three hours of sleep and cold coffee. So if you’ve got a picky eater, a nut-free classroom, or just a craving for something simple and satisfying, these pinwheels are about to become your new best friend.
Why You’ll Love This Recipe
I’ve tested this recipe more times than I’d like to admit — mostly because my nephew kept eating the test batches before I could photograph them. But honestly, that’s the best kind of feedback, right? These pinwheels have been preschool-approved, playdate-tested, and even survived a trip in a backpack on a warm spring day without turning into a sticky mess.
- Completely Nut-Free : Sunbutter is naturally free from peanuts and tree nuts, making it safe for most school and daycare environments. Always check labels, but this is one of the safest options out there.
- Ready in 10 Minutes : No baking, no cooking, no waiting. Just spread, roll, slice, and serve. Perfect for those mornings when you’ve forgotten it’s your turn to bring snack (we’ve all been there).
- Simple Ingredients : You probably already have everything in your kitchen right now. Bread, sunbutter, jelly — that’s it. No special trips to the store required.
- Perfect for Little Hands : The spiral shape is easy for small fingers to hold, and the bite-sized pieces mean less mess. Plus, kids love the fun shape — it’s like a sandwich and a toy rolled into one.
- Customizable for Any Diet : Use gluten-free bread, sugar-free jelly, or add a sprinkle of cinnamon for extra flavor. This recipe bends to whatever your family needs.
What makes these different from every other sandwich idea out there? It’s the texture, honestly. The bread flattens and compresses just enough to hold everything together, but the sunbutter keeps it soft and tender. The jelly adds these little bursts of sweetness in every bite — it’s not just spread on top, it’s swirled through the whole thing. My sister-in-law, who’s a preschool teacher, told me these are the only snack that comes back with zero leftovers in her classroom. That’s a win in my book.
These pinwheels are comfort food reimagined for real life — faster, safer, and somehow even more satisfying than the original sandwich. They’re the kind of thing you make for your kids and then end up eating three yourself while standing at the kitchen counter. No judgment here.
What Ingredients You Will Need
This recipe uses simple, wholesome ingredients that come together to create something surprisingly special. You don’t need anything fancy — just a few pantry staples that you probably already have on hand.
- Soft white bread (8 slices) — Look for fresh, soft bread that’s easy to roll without cracking. I prefer a standard sandwich loaf, but brioche or whole wheat work great too. Day-old bread actually works better here because it’s slightly drier and holds its shape when rolled.
- Sunbutter (½ cup) — The star of the show. Sunbutter is made from roasted sunflower seeds and has a rich, nutty flavor that kids love. I recommend the creamy version for best spreading. My personal favorite is the SunButter brand — it’s consistently smooth and doesn’t separate as much as some store brands.
- Strawberry jelly or jam (¼ cup) — Any flavor works, but strawberry is classic. Look for a thick jam rather than a runny jelly — it stays in place better when you roll the bread. If you’re feeling fancy, try raspberry, grape, or even apricot preserves.
- Optional: Cinnamon (¼ teaspoon) — A tiny sprinkle adds warmth and makes these taste almost like a breakfast pastry. My nephew calls them “snail rolls” when I add cinnamon.
- Optional: Cream cheese (2 tablespoons, softened) — For a richer version, spread a thin layer of cream cheese under the sunbutter. It adds a tangy contrast that adults especially love.
Ingredient Selection Tips: When choosing sunbutter, look for brands that don’t have added sugar or palm oil if you’re trying to keep things cleaner. Some sunbutters can turn green when baked, but since we’re not cooking these, that’s not an issue here. For the bread, avoid super thin sliced bread — it tends to tear when you roll it. A standard medium slice is perfect.
Substitution Guidance: If someone in your family has a gluten sensitivity, use gluten-free bread — just make sure it’s a soft variety, not the dense, crumbly kind. For a lower-sugar option, use no-sugar-added jelly or mashed berries. You can also swap the sunbutter for WowButter (soy-based) or pumpkin seed butter if you need another nut-free alternative.
Equipment Needed
You don’t need much for this recipe — that’s part of the beauty. Here’s what you’ll need to have on hand:
- Rolling pin — A standard rolling pin works perfectly. If you don’t have one, a clean wine bottle or even a smooth water bottle will do the trick. I’ve used a mason jar in a pinch and it worked fine.
- Sharp knife — A serrated bread knife works best for clean slices without squishing the pinwheels. A chef’s knife works too, just be gentle.
- Cutting board — Any flat surface will work. I prefer a wooden board because it doesn’t slide around as much.
- Butter knife or offset spatula — For spreading the sunbutter evenly. An offset spatula gives you more control, but a regular butter knife is totally fine.
- Parchment paper or wax paper — Not strictly necessary, but it makes rolling and storing much easier. The bread doesn’t stick to it, and you can use it to wrap the finished pinwheels.
- Plastic wrap or reusable beeswax wrap — For wrapping the rolled bread before slicing. This helps the pinwheels hold their shape.
Budget-Friendly Options: If you’re just starting out in the kitchen, don’t buy anything special. A butter knife, a plate, and your hands are really all you need. I’ve made these in a hotel room with a coffee mug as a rolling pin — they turned out great.
Preparation Method
Let me walk you through this step by step. I’ve made these so many times I could do it in my sleep, but I’ll share all the little tricks I’ve learned along the way.
- Prepare your bread slices (2 minutes) — Lay out 8 slices of bread on a clean work surface. Using a rolling pin, gently flatten each slice until it’s about ¼ inch thick. Don’t press too hard or the bread will tear — just roll evenly from the center outward. The bread should be thin but still intact. If you’re using fresh bread, this step is crucial because it makes the bread pliable enough to roll without cracking.
- Spread the sunbutter (3 minutes) — Using a butter knife or offset spatula, spread about 1 tablespoon of sunbutter evenly over each slice of flattened bread. Go all the way to the edges — this helps the pinwheels stick together when you roll them. If the sunbutter is thick and hard to spread, microwave it for 10 seconds to loosen it up. Trust me, this makes a huge difference.
- Add the jelly (2 minutes) — Spoon about ½ tablespoon of jelly onto the center of each sunbutter-covered slice. Spread it gently, leaving a ½-inch border around the edges. This prevents the jelly from squishing out when you roll. If your jelly is really runny, use a little less — you can always add more next time.
- Roll the bread (3 minutes) — Starting at one edge, tightly roll each slice of bread into a log shape. Apply gentle, even pressure as you roll — think of it like rolling a sleeping bag. The seam should be on the bottom when you’re done. If the bread cracks a little, just press it together — the sunbutter will act like glue.
- Wrap and chill (30 minutes minimum) — Wrap each rolled log tightly in plastic wrap or parchment paper. Place them in the refrigerator for at least 30 minutes. This step is non-negotiable — the chilling helps the pinwheels hold their shape when you slice them. If you’re in a hurry, pop them in the freezer for 10 minutes instead.
- Slice the pinwheels (3 minutes) — Unwrap the chilled logs and place them on a cutting board. Using a sharp serrated knife, slice each log into 4-6 pinwheels, about ½ inch thick. Use a gentle sawing motion rather than pressing straight down — this gives you clean edges without squishing the shape. Wipe the knife clean between cuts if it gets sticky.
- Serve or store (1 minute) — Arrange the pinwheels on a plate and serve immediately, or store them in an airtight container in the refrigerator for up to 3 days. They’re delicious cold, at room temperature, or even slightly warm.
Sensory Cues: When you’re rolling the bread, you should feel it compress slightly under your fingers — like a firm sponge. The sunbutter should feel smooth and creamy, not gritty or dry. When you slice the chilled logs, the knife should glide through cleanly, revealing a perfect spiral of golden bread, brown sunbutter, and bright red jelly. The edges should be clean, not ragged or squished.
Troubleshooting Tips: If your bread tears while rolling, don’t panic — just press it back together and keep going. The sunbutter will seal it. If the jelly oozes out the sides, you’re using too much — next time, use a little less and leave a bigger border. If the pinwheels come out misshapen, they were probably too warm when you sliced them — pop them back in the fridge for 10 minutes and try again.
Cooking Tips & Techniques
I’ve learned a few things the hard way so you don’t have to. Here are my best tips for perfect pinwheels every time.
The Bread Matters More Than You Think — I once used really fresh, fluffy bread and it was a disaster. The bread was too soft and tore apart when I tried to roll it. Day-old bread is actually ideal — it’s still soft but has enough structure to hold up to rolling. If you only have fresh bread, leave it out on the counter for an hour to dry out slightly, or toast it very lightly (like, 30 seconds in the toaster) before rolling.
Don’t Skip the Chilling Step — I know, I know, you’re hungry and the kids are crying and you just want to be done. But trust me on this one. Chilling the rolled logs firms up the sunbutter and jelly, which makes slicing infinitely easier. Without chilling, you’ll end up with flat, squished pinwheels that look more like sad pancakes than cheerful spirals. I learned this lesson when I tried to rush through the process for a playdate — the resulting pinwheels were edible but definitely not Instagram-worthy.
The Knife Trick — Use a serrated knife and a gentle sawing motion. A straight-edged knife will squish the bread and smear the filling. If you don’t have a serrated knife, try using dental floss — wrap a piece around the log, cross the ends, and pull. It gives you the cleanest cut possible, no joke.
Keep It Tight — When you’re rolling the bread, keep it as tight as you can without tearing the bread. A loose roll means loose pinwheels that fall apart. Think of it like rolling a burrito — you want everything snug and secure. If the roll starts to loosen, tuck the edge under as you go.
Variations & Adaptations
One of the best things about this recipe is how flexible it is. Here are some of my favorite variations:
Breakfast Pinwheels — Swap the jelly for a thin layer of cream cheese and a sprinkle of cinnamon sugar. Roll, chill, and slice for a morning treat that feels indulgent but comes together in minutes. My kids go crazy for these on weekends.
Savory Sunbutter Pinwheels — Yes, really! Skip the jelly and add a thin layer of honey, a sprinkle of granola, and a few raisins. It’s like a grown-up version of ants on a log, but in pinwheel form. I’ve also tried it with a drizzle of maple syrup — absolutely delicious.
Gluten-Free Version — Use your favorite soft gluten-free bread. Canyon Bakehouse and Udi’s both make good options. Just be extra gentle when rolling — gluten-free bread can be more fragile. You might need to press the seams together more firmly.
Holiday Pinwheels — For Christmas, use red and green jelly (strawberry and mint, maybe). For Halloween, use orange marmalade. For Valentine’s Day, use raspberry jam and cut the pinwheels into heart shapes with a small cookie cutter. The possibilities are endless, and kids love the seasonal twist.
Low-Sugar Option — Use no-sugar-added sunbutter and sugar-free jelly. You can also mash fresh berries with a little honey and use that instead of jelly. It’s a little more work, but the fresh fruit flavor is incredible.
Serving & Storage Suggestions
These pinwheels are best served cold or at room temperature. I like to arrange them on a plate in a circular pattern, with the swirl facing up so everyone can see the pretty spiral. For preschool parties, I sometimes stick a cute food pick in each one — it makes them feel like a special treat.
What to Serve With Them: These pair beautifully with fresh fruit like apple slices, grapes, or berries. For a more complete snack, add some cheese cubes or yogurt tubes. If you’re serving them at a party, arrange them on a platter with other finger foods like bacon wrapped jalapeño poppers for the grown-ups and these pinwheels for the kids.
Storage Instructions: Store leftover pinwheels in an airtight container in the refrigerator for up to 3 days. Place a paper towel at the bottom of the container to absorb any excess moisture — this keeps the bread from getting soggy. If you’re packing them for lunch, wrap them individually in parchment paper or beeswax wrap to keep them fresh.
Freezer Instructions: You can freeze the rolled logs (before slicing) for up to 3 months. Wrap each log tightly in plastic wrap, then place them in a freezer bag. When you’re ready to serve, thaw the logs in the refrigerator overnight, then slice and serve. This is a lifesaver for busy mornings — just pull out a log, slice it, and you’re done.
Reheating Tips: These are best served cold or at room temperature, but if you want them slightly warm, pop them in the microwave for 10-15 seconds. Don’t overheat them or the bread will get tough. For a fun twist, try warming them in a skillet over medium heat for about 30 seconds per side — the sunbutter gets slightly melty and the bread gets a little toasty.
Flavor Development: These actually taste better after they’ve sat in the fridge for a few hours. The sunbutter and jelly meld together, and the bread softens slightly. They’re perfect for making ahead — I often make a batch the night before a playdate or preschool event.
Nutritional Information & Benefits
Here’s the nutritional breakdown for one pinwheel (based on 4 pinwheels per slice of bread, using standard ingredients):
| Nutrient | Amount Per Pinwheel |
|---|---|
| Calories | 85 |
| Total Fat | 4g |
| Saturated Fat | 0.5g |
| Carbohydrates | 10g |
| Sugar | 4g |
| Protein | 2g |
| Fiber | 1g |
| Sodium | 95mg |
Sunbutter is a great source of vitamin E, magnesium, and healthy fats — all important for growing bodies and brains. It’s also naturally nut-free, which makes it a safe choice for classrooms with allergy restrictions. The whole wheat bread option adds fiber, and the jelly provides a little burst of fruit (even if it’s processed).
Dietary Considerations: This recipe is naturally nut-free, egg-free, and dairy-free (if you skip the cream cheese option). For a vegan version, use plant-based bread and skip the cream cheese. For a gluten-free version, use certified gluten-free bread. Always check labels on sunbutter — most brands are processed in nut-free facilities, but it’s worth verifying.
Allergen Information: Sunflower seeds are not a common allergen, but they can cause reactions in some people, especially those with ragweed allergies. If you’re serving these at a school event, check with parents first. Most preschools are familiar with sunbutter as a nut-free alternative.
Conclusion
These easy nut-free sunbutter and jelly pinwheels are the kind of recipe that makes you wonder why you ever bothered with regular sandwiches. They’re faster, cuter, and somehow more satisfying — plus they’re completely safe for nut-free environments. Whether you’re packing lunch for a picky preschooler, bringing a snack to a playdate, or just craving something simple and nostalgic, these pinwheels deliver every time.
I love how forgiving this recipe is. You can use whatever bread you have, whatever jelly is in the fridge, and they still turn out great. They’re the perfect canvas for creativity — add cinnamon, swap the jelly for honey, or go savory with cream cheese and herbs. The possibilities are endless, and that’s what makes this recipe a keeper.
If you’re looking for more lunchbox-friendly ideas, try these spooky zombie brain rice krispie treats for a fun Halloween twist, or these soft frosted sugar cookies for a sweet treat that’s perfect for beginners. For something savory, these loaded bacon cheeseburger soup is a hearty meal the whole family will love.
I’d love to hear how these turn out for you! Drop a comment below and let me know what variations you tried — did you add cinnamon? Use a different jelly? Make them for a classroom party? Your ideas might inspire someone else. And if you loved this recipe, share it with a friend who’s always looking for nut-free snack ideas. Happy rolling!
Frequently Asked Questions
Can I make these pinwheels ahead of time?
Absolutely! You can make the rolled logs up to 3 days in advance and keep them wrapped in the refrigerator. Slice them just before serving for the freshest look. You can also freeze the logs for up to 3 months — just thaw overnight in the fridge before slicing.
What if I don’t have sunbutter?
No problem! You can use WowButter (soy-based), pumpkin seed butter, or even tahini (sesame seed paste) for a different flavor. Just make sure whatever you use is nut-free if you’re serving these in a nut-free environment. Almond butter or peanut butter work great for home use, but they’re not safe for school.
Why did my pinwheels fall apart?
This usually happens for one of three reasons: the bread was too fresh and tore during rolling, the roll wasn’t tight enough, or you skipped the chilling step. Make sure to flatten the bread well, roll it tightly, and chill for at least 30 minutes before slicing. If they still fall apart, try using a little more sunbutter — it acts as glue.
Can I use whole wheat bread?
Yes! Whole wheat bread works great, though it can be a little more prone to cracking. Make sure to flatten it thoroughly with a rolling pin before spreading the sunbutter. If the bread cracks, just press it back together — the sunbutter will seal it. White whole wheat bread is a good middle ground if you want the nutrition without the texture issues.
How do I keep the jelly from oozing out?
Use a thick jam or preserves instead of a runny jelly, and spread it in the center of the bread, leaving a ½-inch border around the edges. Don’t overfill — about ½ tablespoon per slice is plenty. If your jelly is particularly thin, try refrigerating it for 10 minutes before spreading to thicken it up.
Pin This Recipe!
Easy Nut-Free Sunbutter & Jelly Pinwheels for Preschool Kids

These nut-free sunbutter and jelly pinwheels are a fun, kid-friendly snack that’s ready in 10 minutes. Perfect for preschool lunches, playdates, and nut-free classrooms, they’re made with simple ingredients and are completely safe for allergy-conscious environments.
- Prep Time: 10 minutes
- Cook Time: 0 minutes
- Total Time: 40 minutes (includes 30 minutes chilling)
- Yield: 4 servings (32-48 pinwheels) 1x
- Category: Snack
- Cuisine: American
Ingredients
- 8 slices soft white bread
- ½ cup sunbutter (creamy)
- ¼ cup strawberry jelly or jam
- ¼ teaspoon cinnamon (optional)
- 2 tablespoons cream cheese, softened (optional)
Instructions
- Lay out 8 slices of bread on a clean work surface. Using a rolling pin, gently flatten each slice until it’s about ¼ inch thick.
- Using a butter knife or offset spatula, spread about 1 tablespoon of sunbutter evenly over each slice of flattened bread, going all the way to the edges.
- Spoon about ½ tablespoon of jelly onto the center of each sunbutter-covered slice. Spread it gently, leaving a ½-inch border around the edges.
- Starting at one edge, tightly roll each slice of bread into a log shape. Place the seam on the bottom.
- Wrap each rolled log tightly in plastic wrap or parchment paper. Refrigerate for at least 30 minutes (or freeze for 10 minutes if in a hurry).
- Unwrap the chilled logs and place them on a cutting board. Using a sharp serrated knife, slice each log into 4-6 pinwheels, about ½ inch thick, using a gentle sawing motion.
- Arrange the pinwheels on a plate and serve immediately, or store in an airtight container in the refrigerator for up to 3 days.
Notes
Day-old bread works best for rolling. Chilling the rolled logs is essential for clean slices. For a gluten-free version, use soft gluten-free bread. For a lower-sugar option, use no-sugar-added jelly or mashed berries.
Nutrition
- Serving Size: 1 pinwheel
- Calories: 85
- Sugar: 4
- Sodium: 95
- Fat: 4
- Saturated Fat: 0.5
- Carbohydrates: 10
- Fiber: 1
- Protein: 2
Keywords: nut-free, sunbutter, jelly, pinwheels, preschool snack, kid-friendly, easy, no-bake



