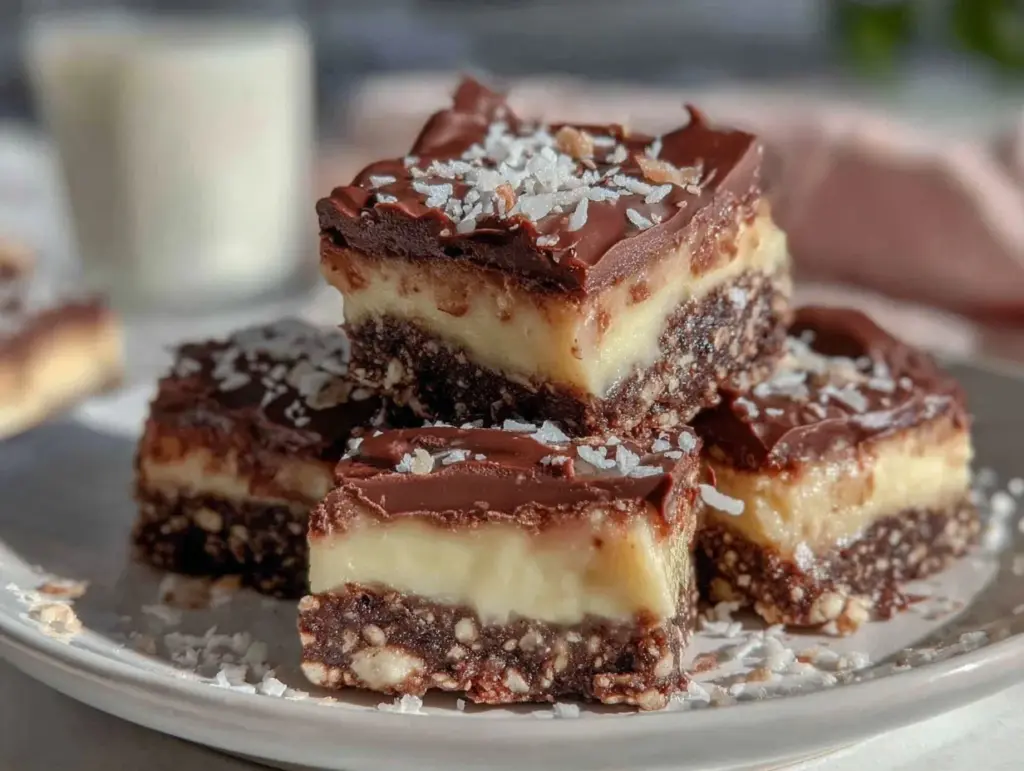
There’s something magical about biting into a decadent Nanaimo bar during the holidays. The combination of a rich chocolate layer, creamy custard filling, and crumbly base feels like a warm hug wrapped in sweetness. I remember the first time I tried Nanaimo bars at a holiday party—it was love at first bite! This classic Canadian treat has become a staple in my home every holiday season, and I’m so excited to share my perfected recipe with you.
These bars are more than just dessert; they’re a tradition. They’re the kind of treat that gets passed around the table with happy smiles and requests for seconds. Whether you’re a seasoned baker or someone just dipping their toes into holiday baking, this Nanaimo bars recipe is foolproof and bound to impress. So grab your apron, and let’s make something truly unforgettable together!
Why You’ll Love This Recipe
- Easy to Make: This recipe doesn’t require baking, making it perfect if you’re short on time or oven space during the holidays.
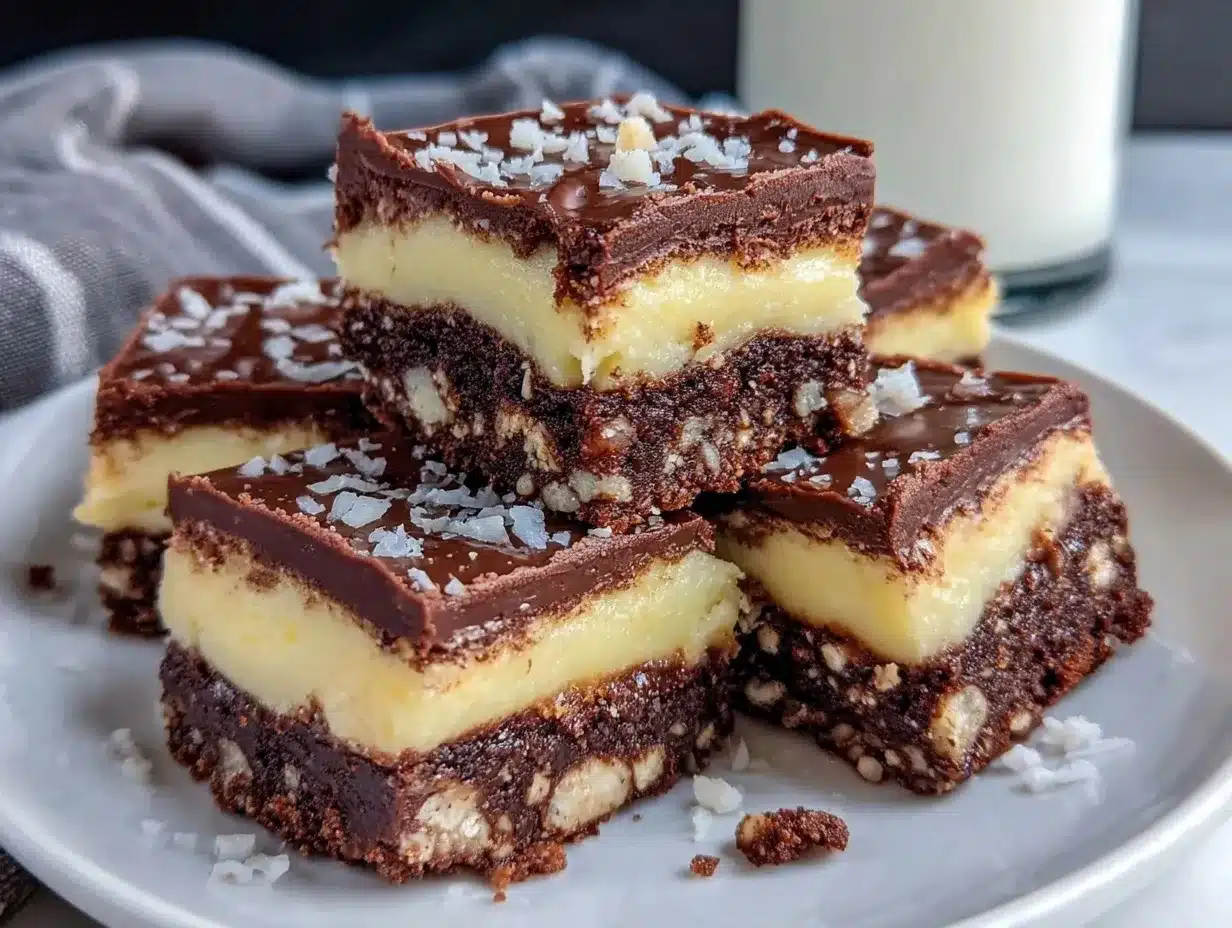
- Layered Perfection: The combination of chocolate, custard, and a nutty base creates a satisfying texture and flavor experience.
- Crowd-Pleaser: Nanaimo bars are universally loved—kids and adults alike rave about them.
- Great for Gifting: These bars make fantastic homemade holiday gifts. Wrap them up in festive packaging, and watch the smiles roll in!
- Customizable: You can easily tweak the recipe to suit dietary preferences or play around with fun flavors.
What sets this recipe apart is its simplicity and unbeatable flavor. The base is rich and chewy, the custard is velvety and sweet, and the chocolate topping ties it all together. It’s the perfect treat to serve at holiday gatherings or enjoy with a cozy cup of coffee by the fire. Trust me, once you make these, they’ll become a holiday tradition in your home too!
What Ingredients You Will Need
This recipe uses simple and accessible ingredients to create three distinct layers that come together in perfect harmony.
For the Base:
- 1/2 cup unsalted butter, melted
- 1/4 cup granulated sugar
- 1/3 cup unsweetened cocoa powder
- 1 large egg, beaten
- 1 1/4 cups graham cracker crumbs
- 1/2 cup shredded coconut
- 1/4 cup chopped walnuts (optional, adds a nice crunch)
For the Custard Filling:
- 1/2 cup unsalted butter, softened
- 2 cups powdered sugar
- 2 tbsp vanilla custard powder
- 2-3 tbsp heavy cream (adjust for desired consistency)
For the Chocolate Topping:
- 1/2 cup semi-sweet chocolate chips
- 2 tbsp unsalted butter
Feel free to swap out the walnuts for pecans or omit them altogether if you’re catering to nut allergies. The custard powder is key for that signature flavor, but you can substitute with vanilla pudding mix if needed.
Equipment Needed
You don’t need fancy gadgets or tools for this recipe—here’s what you’ll need:
- Mixing bowls: For combining your layers.
- Whisk: Helps to blend the custard filling smoothly.
- Spatula: Perfect for spreading the layers evenly.
- 9×9-inch baking pan: The ideal size for this recipe.
- Parchment paper: Makes removing the bars from the pan a breeze.
- Double boiler or microwave-safe bowl: For melting the chocolate topping.
If you don’t have parchment paper, aluminum foil works in a pinch—just grease it lightly to prevent sticking. And if you don’t own a double boiler, you can use a heatproof bowl over a pot of simmering water.
Detailed Preparation Method
- Line a 9×9-inch pan with parchment paper, leaving some overhang for easy removal later.
- Prepare the Base: In a mixing bowl, combine the melted butter, sugar, and cocoa powder. Stir until smooth. Gradually add the beaten egg, mixing quickly to prevent it from cooking. Fold in the graham cracker crumbs, shredded coconut, and walnuts. Press the mixture evenly into the lined pan. Refrigerate for 20-30 minutes to firm up.
- Make the Custard Filling: Cream together the softened butter, powdered sugar, and custard powder until light and fluffy. Add the heavy cream, one tablespoon at a time, until the mixture reaches a spreadable consistency. Smooth the filling over the chilled base, ensuring even coverage. Place the pan back in the fridge for another 20 minutes.
- Prepare the Chocolate Topping: Melt the chocolate chips and butter together in a double boiler or microwave (heat in 15-second intervals, stirring in between). Stir until smooth and glossy. Let it cool slightly before pouring over the custard layer.
- Smooth the chocolate layer with a spatula, ensuring it covers the custard evenly. Chill the bars in the fridge for at least 2 hours or until fully set.
- Once set, remove the bars from the pan using the parchment paper. Cut into squares or rectangles using a sharp knife. Wipe the knife clean between cuts for neat edges.
And voilà—you’ve got yourself a tray of irresistible Nanaimo bars! If the chocolate cracks while cutting, let the bars sit at room temperature for a few minutes before slicing.
Cooking Tips & Techniques
- Don’t Overheat the Chocolate: Melt it gently to avoid burning. If using a microwave, stir frequently to keep it smooth.
- Use Room-Temperature Ingredients: Let the butter for the custard soften to room temperature for easier mixing and a creamy texture.
- Chill Between Layers: Allow each layer to set properly in the fridge before adding the next. This ensures clean layers and prevents them from mixing.
- Cut with Precision: Use a sharp knife and clean it with a warm, damp cloth between cuts for picture-perfect slices.
- Experiment with Toppings: Sprinkle crushed nuts or festive sprinkles on the chocolate layer before it sets for a holiday-inspired touch.
These tips come from many years of holiday baking (and a few moments of chocolate disasters). Trust me, follow these tricks, and your Nanaimo bars will be flawless every time!
Variations & Adaptations
- Gluten-Free Option: Substitute graham cracker crumbs with gluten-free cookie crumbs for a celiac-friendly treat.
- Nut-Free Version: Skip the walnuts entirely, and use extra graham cracker crumbs to make up the difference.
- Mint Chocolate Twist: Add a few drops of peppermint extract to the custard filling and sprinkle crushed candy canes on top of the chocolate layer.
- Dark Chocolate Lovers: Swap semi-sweet chocolate chips for dark chocolate for a richer, less sweet topping.
- Seasonal Touch: Mix a pinch of cinnamon or nutmeg into the base for a warm holiday spice profile.
I’ve tried the mint chocolate variation for a holiday party, and it was a huge hit! Feel free to get creative and make these bars your own.
Serving & Storage Suggestions
Serve these Nanaimo bars chilled or at room temperature for the best texture. They’re perfect on a dessert platter, paired with a cup of coffee or hot cocoa. For a festive vibe, arrange them on a holiday-themed tray with sprigs of fresh rosemary or cranberries for decoration.
Store leftovers in an airtight container in the refrigerator for up to a week. If you’re planning ahead, you can freeze the bars for up to 3 months. Place parchment paper between layers to prevent sticking, and thaw in the fridge overnight before serving. They taste just as amazing after a day or two as they do fresh!
Nutritional Information & Benefits
Here’s an approximate breakdown for a serving (based on 16 bars):
- Calories: 280
- Fat: 18g
- Carbohydrates: 25g
- Protein: 3g
The rich chocolate and buttery base make these bars indulgent, but the walnuts and coconut add a touch of healthy fats and fiber. These bars are a treat, so enjoy them in moderation as part of your holiday celebrations!
Conclusion
If you’re looking for a holiday dessert that’s easy to make, bursting with flavor, and absolutely stunning to serve, these Nanaimo bars are the answer. I love that they’re simple yet sophisticated, and they’ve become a beloved tradition in my family. Every bite feels like a celebration, and I hope they bring just as much joy to your table.
Try the recipe, customize it to your liking, and share your creations in the comments below! I’d love to hear how you make this recipe your own. Happy holidays and happy baking!
FAQs
Can I make Nanaimo bars ahead of time?
Yes! Nanaimo bars are perfect for making ahead. Prepare them up to three days in advance and store them in the refrigerator until ready to serve.
What can I use instead of custard powder?
If you don’t have custard powder, vanilla pudding mix works as a substitute. It’ll still give the filling a creamy texture and sweet vanilla flavor.
How do I prevent the chocolate layer from cracking when cutting?
Let the bars sit at room temperature for a few minutes before slicing. Use a sharp knife and clean it between cuts for smooth edges.
Can I freeze Nanaimo bars?
Absolutely! Freeze them in an airtight container with parchment paper between layers to prevent sticking. Thaw in the fridge before serving.
Are Nanaimo bars gluten-free?
Traditional Nanaimo bars are not gluten-free due to the graham cracker crumbs. However, you can use gluten-free cookie crumbs as a substitute to make them suitable for a gluten-free diet.
Pin This Recipe!

Irresistible Nanaimo Bars Recipe Perfect for Holiday Baking

A classic Canadian treat featuring a rich chocolate layer, creamy custard filling, and crumbly base, perfect for holiday gatherings.
- Prep Time: 30 minutes
- Cook Time: 2 hours
- Total Time: 2 hours 30 minutes
- Yield: 16 servings 1x
- Category: Dessert
- Cuisine: Canadian
Ingredients
- 1/2 cup unsalted butter, melted
- 1/4 cup granulated sugar
- 1/3 cup unsweetened cocoa powder
- 1 large egg, beaten
- 1 1/4 cups graham cracker crumbs
- 1/2 cup shredded coconut
- 1/4 cup chopped walnuts (optional)
- 1/2 cup unsalted butter, softened
- 2 cups powdered sugar
- 2 tbsp vanilla custard powder
- 2–3 tbsp heavy cream
- 1/2 cup semi-sweet chocolate chips
- 2 tbsp unsalted butter
Instructions
- Line a 9×9-inch pan with parchment paper, leaving some overhang for easy removal later.
- Prepare the Base: In a mixing bowl, combine the melted butter, sugar, and cocoa powder. Stir until smooth. Gradually add the beaten egg, mixing quickly to prevent it from cooking. Fold in the graham cracker crumbs, shredded coconut, and walnuts. Press the mixture evenly into the lined pan. Refrigerate for 20-30 minutes to firm up.
- Make the Custard Filling: Cream together the softened butter, powdered sugar, and custard powder until light and fluffy. Add the heavy cream, one tablespoon at a time, until the mixture reaches a spreadable consistency. Smooth the filling over the chilled base, ensuring even coverage. Place the pan back in the fridge for another 20 minutes.
- Prepare the Chocolate Topping: Melt the chocolate chips and butter together in a double boiler or microwave (heat in 15-second intervals, stirring in between). Stir until smooth and glossy. Let it cool slightly before pouring over the custard layer.
- Smooth the chocolate layer with a spatula, ensuring it covers the custard evenly. Chill the bars in the fridge for at least 2 hours or until fully set.
- Once set, remove the bars from the pan using the parchment paper. Cut into squares or rectangles using a sharp knife. Wipe the knife clean between cuts for neat edges.
Notes
[‘Don’t overheat the chocolate to avoid burning.’, ‘Let the butter for the custard soften to room temperature for easier mixing and a creamy texture.’, ‘Allow each layer to set properly in the fridge before adding the next.’, ‘Use a sharp knife and clean it with a warm, damp cloth between cuts for picture-perfect slices.’, ‘Sprinkle crushed nuts or festive sprinkles on the chocolate layer before it sets for a holiday-inspired touch.’]
Nutrition
- Serving Size: 1 bar
- Calories: 280
- Fat: 18
- Carbohydrates: 25
- Protein: 3
Keywords: Nanaimo bars, holiday dessert, no-bake recipe, Canadian treat, chocolate dessert



