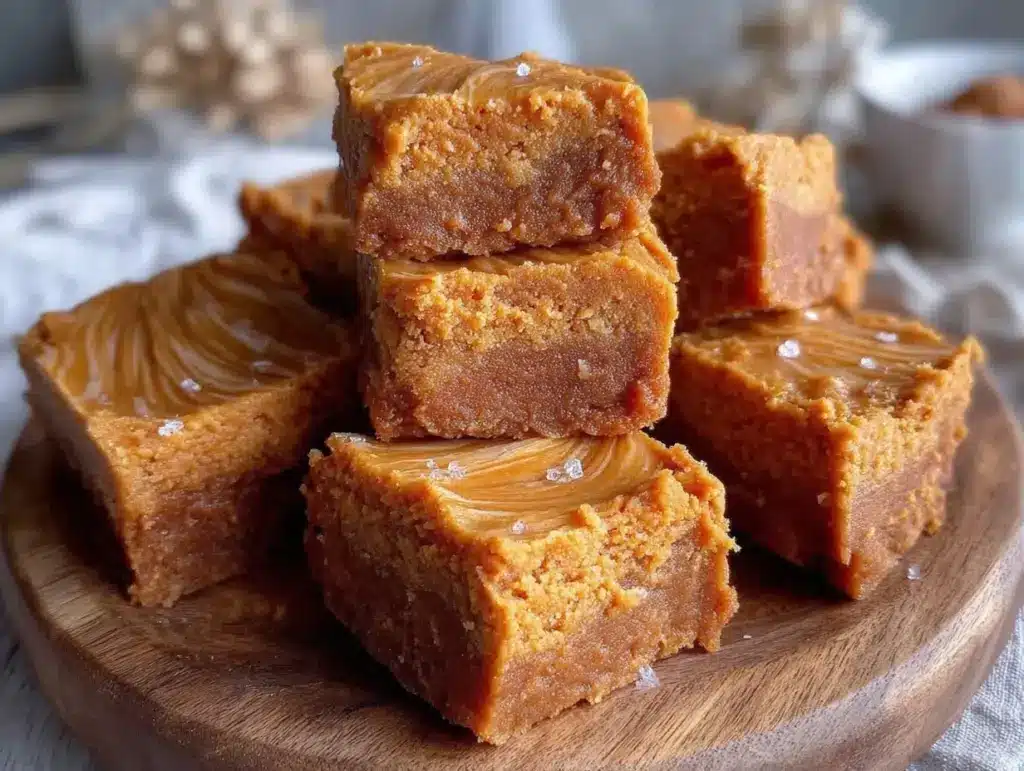
The rich, creamy texture of old fashioned peanut butter fudge melting on my tongue always takes me back to lazy afternoons at grandma’s kitchen. Honestly, there’s something magical about that perfect blend of sweetness and nutty flavor that never gets old. I first stumbled upon this recipe when I was craving a simple, no-fuss treat that reminded me of childhood comforts but still felt special enough to share with friends.
Old fashioned peanut butter fudge is more than just candy — it’s a nostalgic hug wrapped in a square. Over the years, I’ve tweaked this recipe countless times to get that melt-in-your-mouth consistency without the hassle of complicated ingredients or long cooking times. Whether you’re a peanut butter fanatic or just someone who appreciates classic sweets, this fudge hits the spot every time.
What I love most about this recipe is how it captures that vintage charm while being surprisingly easy to make at home. If you’re looking for a homemade treat that’s perfect for gift-giving, potlucks, or just sneaking a bite when nobody’s watching, this old fashioned peanut butter fudge is your new best friend. Plus, it requires only a handful of pantry staples — no need for fancy gadgets or rare ingredients.
After testing this recipe over and over (and sharing it with my toughest critics), I can confidently say it’s a keeper. So, let’s get to it and make some fudge that’ll have you coming back for seconds — or thirds!
Why You’ll Love This Recipe
After making old fashioned peanut butter fudge countless times, I can tell you why it stands out from the sea of other fudge recipes out there. Here’s what makes it so darn good:
- Quick & Easy: You can whip this up in just about 20 minutes, which is perfect for those sudden sweet cravings or last-minute gatherings.
- Simple Ingredients: No need to hunt down specialty items. Peanut butter, sugar, butter, and a few basics — that’s all you need.
- Perfect for Gifting: This fudge slices cleanly and packages beautifully, making it a thoughtful homemade gift for holidays or birthdays.
- Crowd-Pleaser: Kids and adults alike can’t resist this classic flavor combo. It’s that timeless treat everyone remembers fondly.
- Unbelievably Delicious: The creamy, buttery texture paired with the rich peanut butter flavor creates a melt-away experience that’s pure nostalgia.
This recipe isn’t just another peanut butter fudge — it’s the one I reach for when I want that perfect balance between sweet and nutty without any fuss. The trick? Gently melting the ingredients together to get a silky-smooth finish and letting it set just right for that classic fudge bite. Trust me, once you try this, you’ll see why it’s become a staple in my kitchen.
What Ingredients You Will Need
This old fashioned peanut butter fudge recipe relies on a handful of pantry staples that come together to create that perfect texture and flavor. Here’s what you’ll need:
- Granulated Sugar (2 cups, about 400g) — The sweetness backbone; I prefer regular white sugar for that classic fudge taste.
- Evaporated Milk (3/4 cup, 180ml) — Adds creaminess without making the fudge too runny.
- Unsalted Butter (1/2 cup, 115g) — Softened; brings richness and helps the fudge set beautifully.
- Creamy Peanut Butter (1 cup, 250g) — I usually use a natural brand with no added sugar for a pure peanut flavor, but you can go for classic creamy if you like it sweeter.
- Vanilla Extract (1 teaspoon) — Just a splash to round out the flavors.
- Salt (a pinch) — Enhances the peanut butter’s nuttiness and balances the sweetness.
If you want to experiment, you could swap in natural peanut butter or even try almond butter for a twist. Just keep in mind that natural types can sometimes make the fudge a bit softer. For those watching gluten, this recipe is naturally gluten-free, which is a nice bonus.
Equipment Needed
- Medium-sized heavy-bottom saucepan: Perfect for melting sugar and butter evenly without scorching.
- Wooden spoon or heatproof spatula: For stirring the fudge mixture smoothly.
- 9×9-inch square baking pan: I line mine with parchment paper for easy removal.
- Measuring cups and spoons: To keep the ingredient ratios spot-on.
- Candy thermometer (optional): If you want to be precise, but I’ve had great results without one.
If you don’t have a square pan, a loaf pan works well too — just adjust the thickness accordingly. Also, if you’re on a budget, a simple non-stick pan and a silicone spatula do the trick just fine. Keeping your tools clean and dry helps the fudge set better, so I always give everything a quick wipe before getting started.
Detailed Preparation Method
- Prepare your pan: Line a 9×9-inch (23×23 cm) baking pan with parchment paper, letting a bit hang over the sides for easy fudge removal. Set aside.
- Combine sugar and evaporated milk: In your heavy-bottom saucepan, add 2 cups (400g) granulated sugar and 3/4 cup (180ml) evaporated milk. Stir gently to combine before placing on medium heat.
- Bring to a boil: Cook the mixture over medium heat, stirring constantly to prevent burning. Once it reaches a steady boil, keep stirring and boil for about 4-5 minutes. (If you have a candy thermometer, aim for 234°F to 240°F / 112°C to 115°C.) Be patient — this step is key to the fudge’s texture.
- Remove from heat and add butter and peanut butter: Quickly stir in 1/2 cup (115g) softened unsalted butter and 1 cup (250g) creamy peanut butter. Stir vigorously until fully melted and smooth. This is when the magic happens — the mixture will thicken and become glossy.
- Finish with vanilla and salt: Add 1 teaspoon vanilla extract and a pinch of salt. Give it one last good stir, then pour the fudge into your prepared pan, smoothing the top with a spatula.
- Let it set: Allow the fudge to cool at room temperature for at least 2 hours, or until firm. For quicker setting, pop it in the fridge after about 30 minutes.
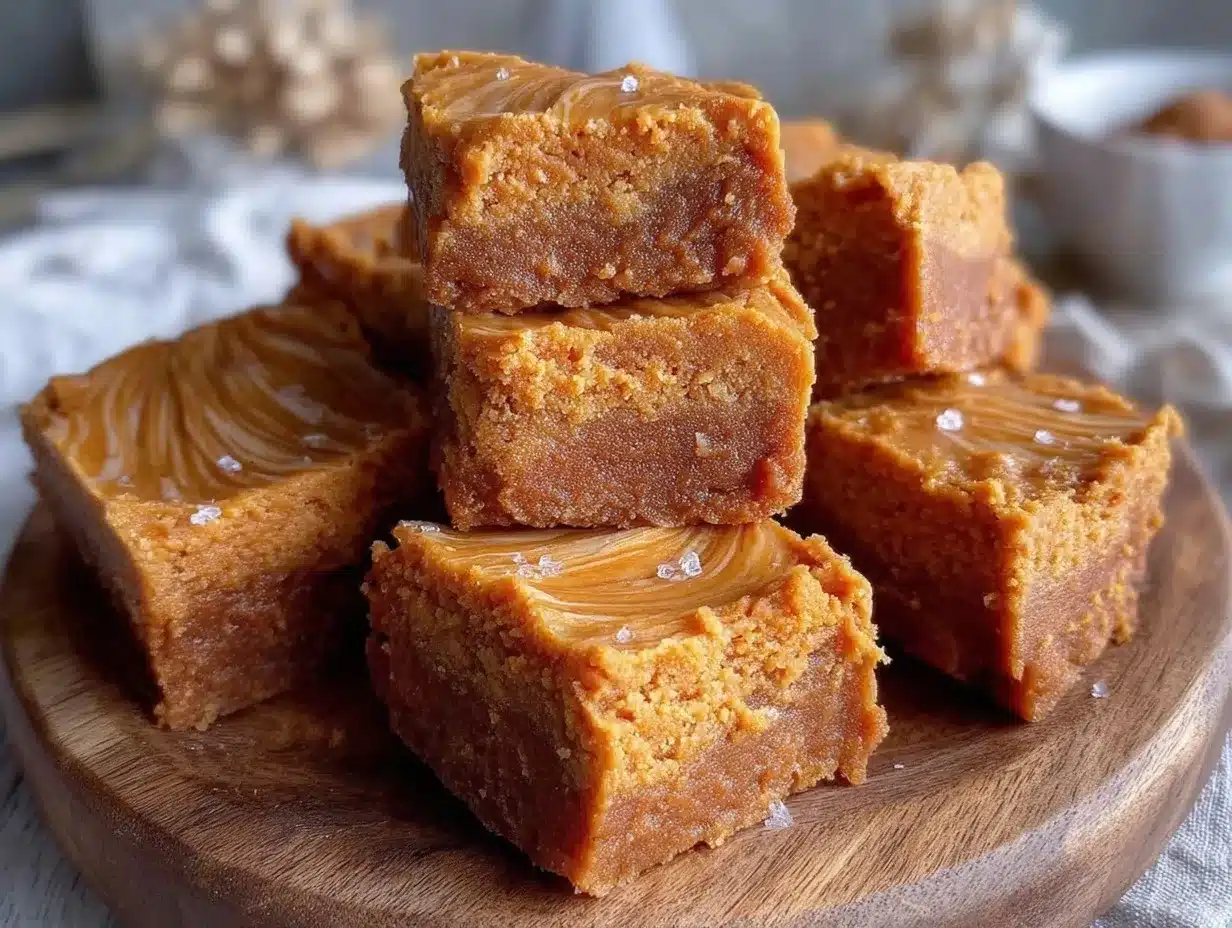
- Slice and serve: Use the parchment paper edges to lift the fudge out of the pan. Cut into 1-inch (2.5 cm) squares and enjoy!
Pro tip: Stir gently but persistently during boiling to avoid grainy sugar crystals. Also, don’t rush the cooling — letting the fudge set fully means that perfect melt-in-your-mouth bite.
Cooking Tips & Techniques
From my experience, the biggest trick with old fashioned peanut butter fudge is controlling the sugar’s temperature and texture. Here are some tips I’ve learned the hard way:
- Use a heavy-bottomed pan: It distributes heat evenly and helps prevent hot spots that can burn the sugar.
- Constant stirring: Keeps the sugar from settling and burning. It’s tempting to walk away, but trust me, don’t.
- Watch your boil time: Too short and the fudge won’t set; too long and it gets hard as a rock. Aim for that soft ball stage (234-240°F / 112-115°C).
- Butter at room temperature: Cold butter will seize up the mixture, making it lumpy.
- Don’t skip the parchment paper: It makes cleanup easier and helps you lift the fudge out without breaking.
- Room temperature cooling: Let it cool undisturbed for best results. Refrigeration can speed up setting but sometimes dulls the flavor a bit.
I once rushed the cooling step and ended up with fudge that crumbled — lesson learned! Taking that extra time is worth it every time.
Variations & Adaptations
While the classic old fashioned peanut butter fudge is hard to beat, I’ve tried a few spins that add fun twists:
- Chocolate Peanut Butter Fudge: Swirl in 1/2 cup (90g) melted semi-sweet chocolate after adding the peanut butter for a marbled effect.
- Chunky Peanut Butter Fudge: Stir in 1/4 cup (30g) chopped roasted peanuts for extra crunch and texture.
- Low-Sugar Version: Replace granulated sugar with a sugar substitute suitable for baking, like erythritol, and use natural peanut butter with no added sugar.
- Vegan Adaptation: Use coconut cream instead of evaporated milk, vegan butter, and a plant-based peanut butter. Keep an eye on texture as it may vary slightly.
- Flavored Fudge: Add a teaspoon of cinnamon or a splash of bourbon for a grown-up twist that surprises and delights.
One of my favorite personal tweaks is adding a pinch of sea salt flakes on top right before setting — it cuts through the sweetness perfectly and makes every bite pop.
Serving & Storage Suggestions
Old fashioned peanut butter fudge is best served at room temperature when its texture is creamy and soft. For a nice presentation, cut it into neat squares and arrange on a pretty plate or wrap in wax paper for gifting.
This fudge pairs wonderfully with a hot cup of coffee or a cold glass of milk — honestly, it’s a match made in heaven. For parties, consider serving alongside fresh fruit or simple cookies to balance the richness.
To store, keep the fudge in an airtight container at room temperature for up to one week. If your kitchen is warm, pop it in the fridge to prevent it from getting too soft. Frozen fudge also freezes well — just wrap tightly and thaw in the fridge overnight before serving.
One neat thing I’ve noticed is that the flavor actually deepens if you let the fudge rest for a day or two, so if you can wait, that’s a bonus!
Nutritional Information & Benefits
A typical serving (1 square, about 30g) of this old fashioned peanut butter fudge packs roughly 150-180 calories, mostly from fats and sugars. It’s a sweet treat, so moderation is key.
That said, peanut butter offers protein and healthy fats, making this fudge a slightly more satisfying indulgence than plain sugar candy. The use of evaporated milk adds calcium and some B vitamins as well.
This recipe is naturally gluten-free and can be adapted for dairy-free diets with substitutions. Just watch for potential peanut allergies, as this is obviously peanut-heavy.
From my perspective, enjoying a piece of this fudge every now and then is a lovely way to savor a sweet moment without guilt — just pair it with balanced meals and some fresh fruit during the day.
Conclusion
Old fashioned peanut butter fudge is one of those recipes that’s simple yet packs so much joy in every bite. It’s a classic treat that brings back warm memories while still feeling fresh and homemade. Whether you’re new to fudge-making or a seasoned sweet tooth, this recipe will quickly become your go-to.
Feel free to play around with the ingredients or add your favorite mix-ins — that’s part of the fun! I love how customizable it is and how each batch can feel a little different but always delicious.
Give this old fashioned peanut butter fudge recipe a try and let me know how it turns out! I’m always excited to hear your thoughts, tweaks, or favorite ways to enjoy it. Don’t hesitate to share this with friends who could use a little sweet comfort too. Happy fudge-making!
Frequently Asked Questions
Can I use crunchy peanut butter instead of creamy?
Absolutely! Crunchy peanut butter will add a bit of texture to the fudge, making it more interesting. Just keep in mind the fudge might be a bit less smooth.
Why did my fudge turn out grainy?
Grainy fudge usually means the sugar crystallized during cooking. Make sure to stir constantly and don’t over-boil. Using a candy thermometer helps prevent this issue.
How long does homemade peanut butter fudge last?
Stored in an airtight container, fudge stays fresh at room temperature for about one week. Refrigeration can extend it to two weeks, and it freezes well up to three months.
Can I double the recipe?
Yes, doubling is fine but use a larger pan to keep the fudge thickness consistent. Also, be mindful of cooking times, as larger batches may take a little longer to reach the right temperature.
Is there a way to make this fudge less sweet?
You can reduce the sugar slightly or use natural peanut butter with no added sugar to balance the sweetness. Adding a pinch of salt on top also helps cut through the sugary taste.
Pin This Recipe!

Old Fashioned Peanut Butter Fudge

A rich, creamy, and nostalgic peanut butter fudge recipe that’s quick and easy to make with simple pantry staples. Perfect for gifting, potlucks, or a sweet treat anytime.
- Prep Time: 10 minutes
- Cook Time: 10 minutes
- Total Time: 2 hours 20 minutes
- Yield: 36 servings 1x
- Category: Dessert
- Cuisine: American
Ingredients
- 2 cups granulated sugar (about 400g)
- 3/4 cup evaporated milk (180ml)
- 1/2 cup unsalted butter, softened (115g)
- 1 cup creamy peanut butter (250g)
- 1 teaspoon vanilla extract
- Pinch of salt
Instructions
- Line a 9×9-inch baking pan with parchment paper, letting a bit hang over the sides for easy fudge removal. Set aside.
- In a medium heavy-bottom saucepan, combine 2 cups granulated sugar and 3/4 cup evaporated milk. Stir gently to combine.
- Cook the mixture over medium heat, stirring constantly to prevent burning. Once it reaches a steady boil, continue boiling and stirring for 4-5 minutes until it reaches 234°F to 240°F (112°C to 115°C).
- Remove from heat and quickly stir in 1/2 cup softened unsalted butter and 1 cup creamy peanut butter until fully melted and smooth.
- Add 1 teaspoon vanilla extract and a pinch of salt. Stir well, then pour the fudge into the prepared pan and smooth the top.
- Let the fudge cool at room temperature for at least 2 hours or until firm. For quicker setting, refrigerate after 30 minutes.
- Use the parchment paper edges to lift the fudge out of the pan. Cut into 1-inch squares and serve.
Notes
Stir constantly during boiling to prevent grainy sugar crystals. Use softened butter at room temperature to avoid lumps. Let fudge cool undisturbed for best texture. Refrigeration speeds setting but may dull flavor. Parchment paper helps with easy removal.
Nutrition
- Serving Size: 1 square (about 30g)
- Calories: 165
- Sugar: 16
- Sodium: 80
- Fat: 10
- Saturated Fat: 3
- Carbohydrates: 18
- Fiber: 1
- Protein: 4
Keywords: peanut butter fudge, old fashioned fudge, homemade fudge, easy fudge recipe, classic fudge, peanut butter dessert



